
Official guide: https://docs.yespo.io/reference/ios
Minimum SDK Requirements
- iOS 15.0+
- Xcode 15.0+
- Swift 5.7+
Add plugin and configure preferences
In config.xml add (or verify):
<!-- Required: Reteno iOS SDK supports iOS 15.0+ -->
<preference name="deployment-target" value="15.0" />

<!-- Reteno SDK access key (required) -->
<preference name="SDK_ACCESS_KEY" value="YOUR_RETENO_ACCESS_KEY" />
Install plugin:
cordova plugin add cordova-plugin-reteno --variable SDK_ACCESS_KEY=YOUR_KEYIf pod install fails with required a higher minimum deployment target, raise deployment target to 15.0+.
If pod install fails with CocoaPods could not find compatible versions for pod "Reteno", your local spec repo is out of date. Run:
pod install --repo-updatefrom the platforms/ios directory (or pass -- --repo-update to cordova build ios).
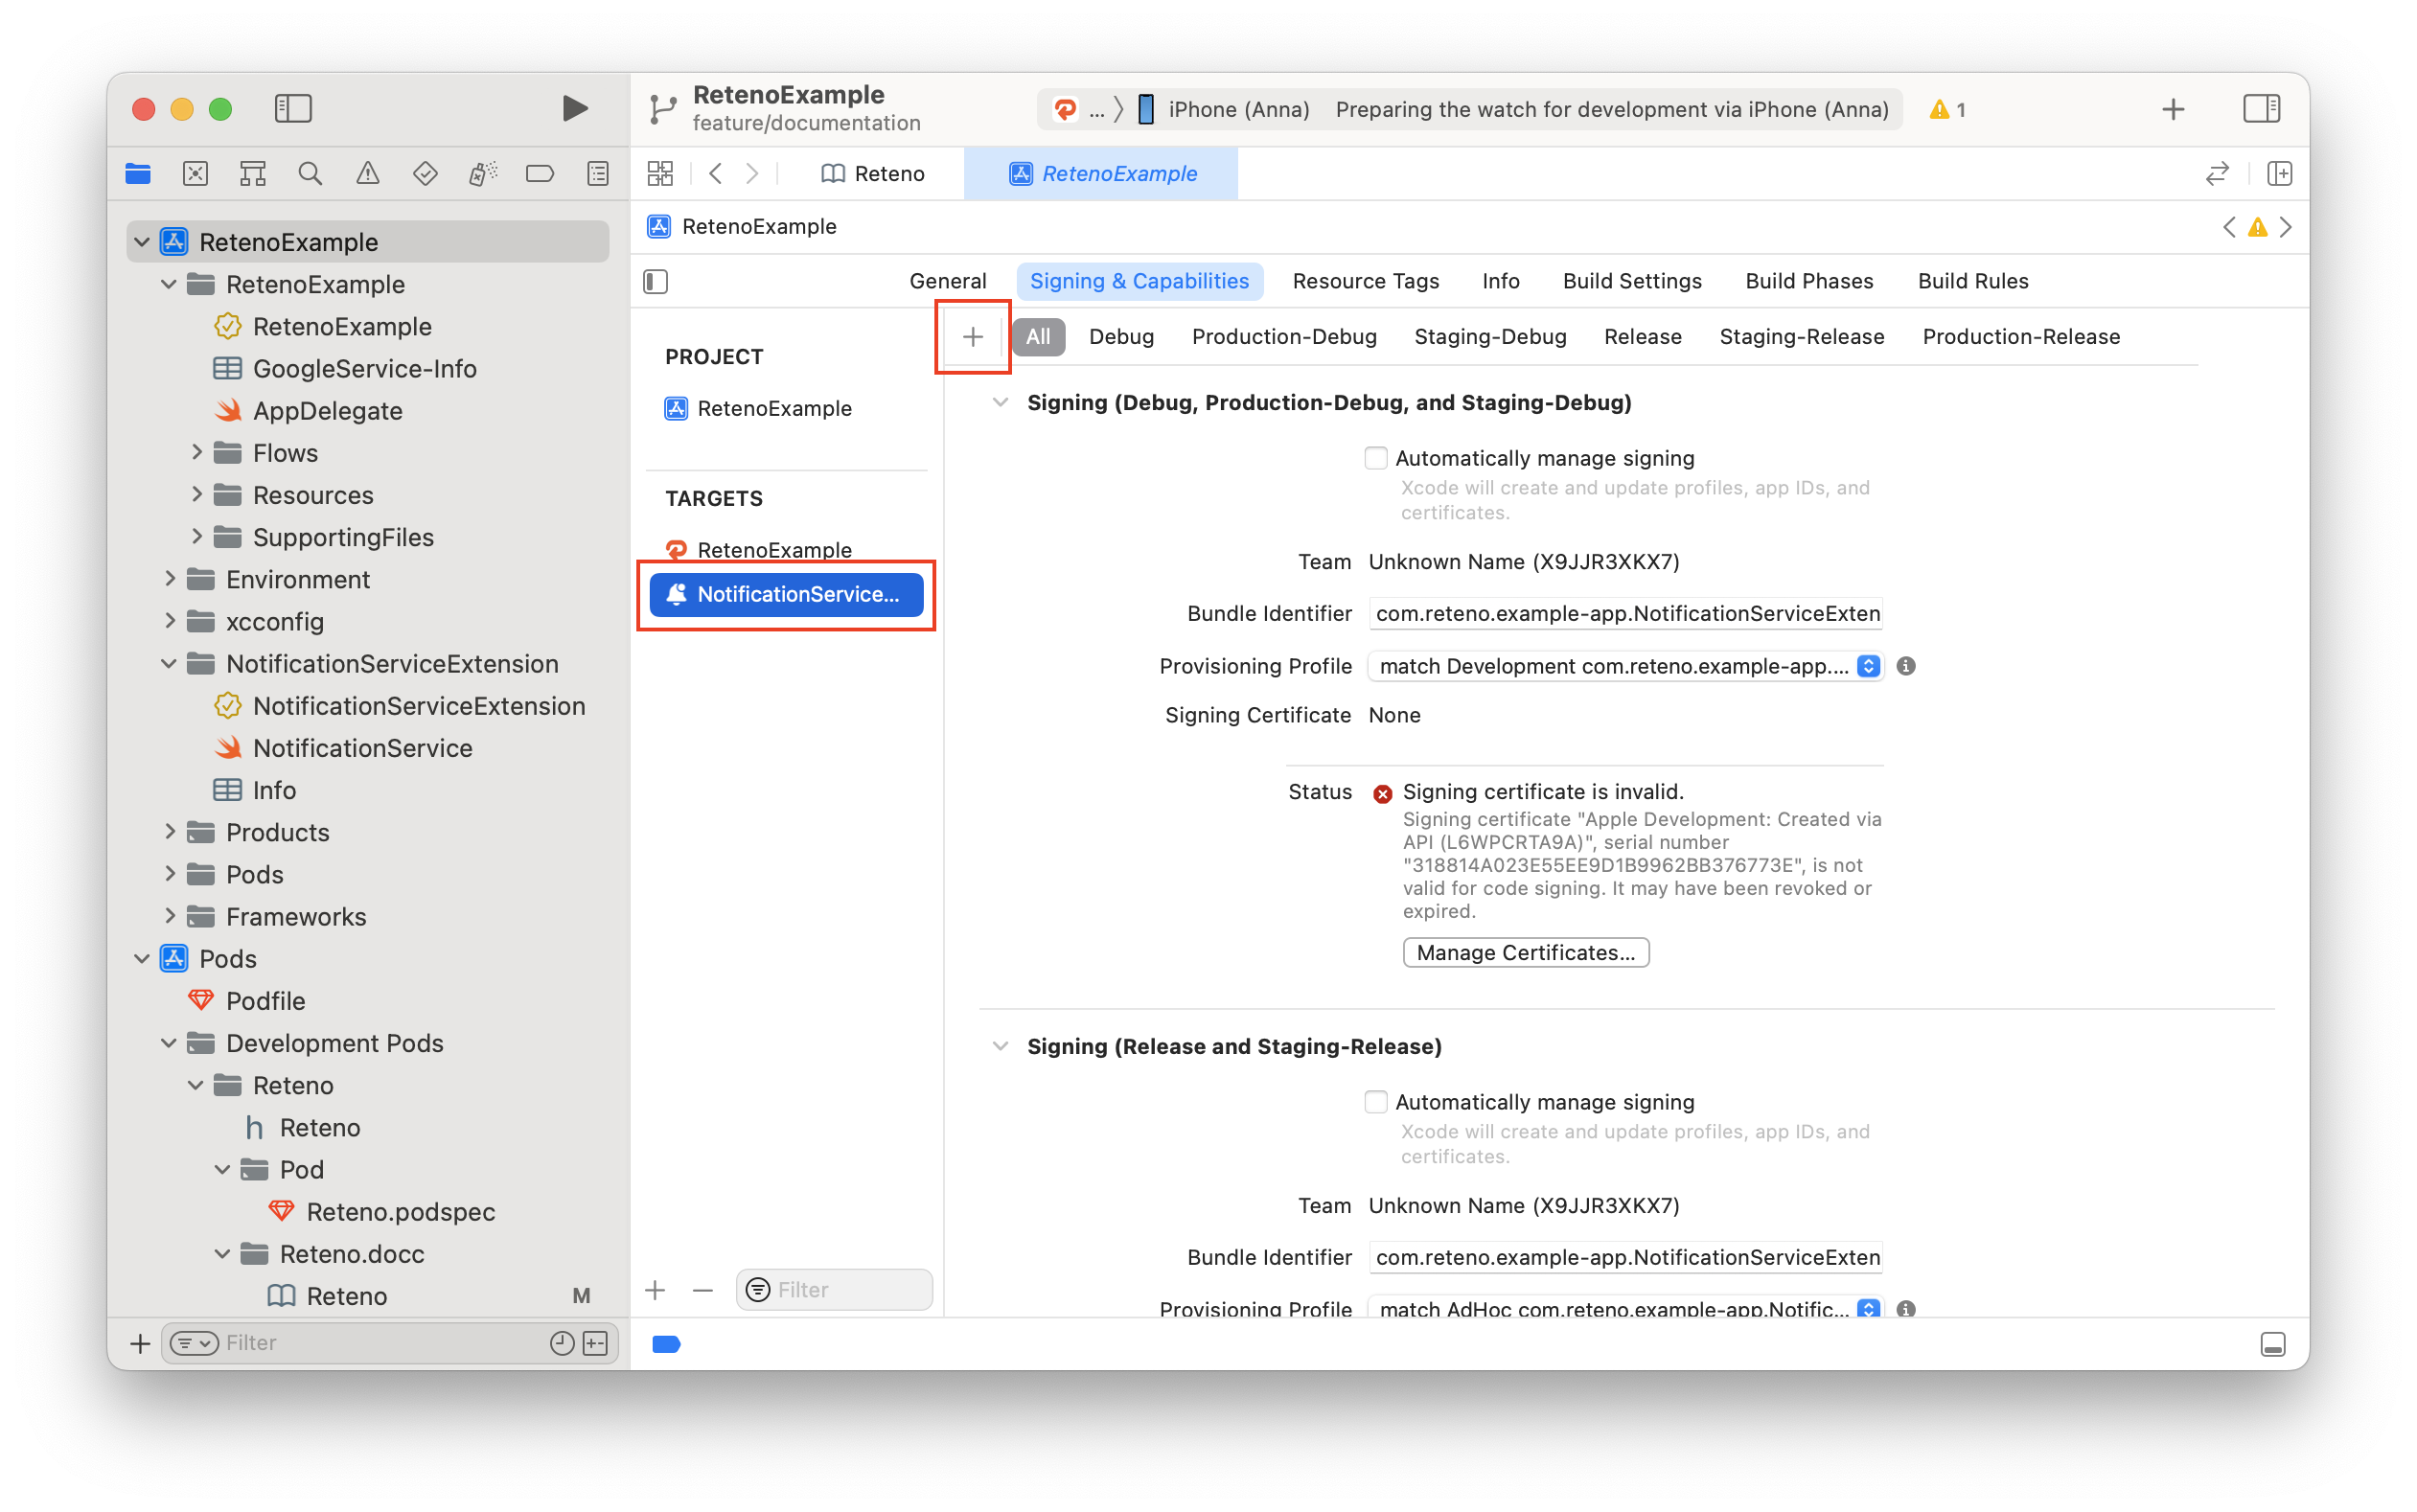
Add Notification Service Extension (NSE)
NSE is required for rich push and correct push payload handling.
- In Xcode select
File > New > Target... - Select
Notification Service Extension.
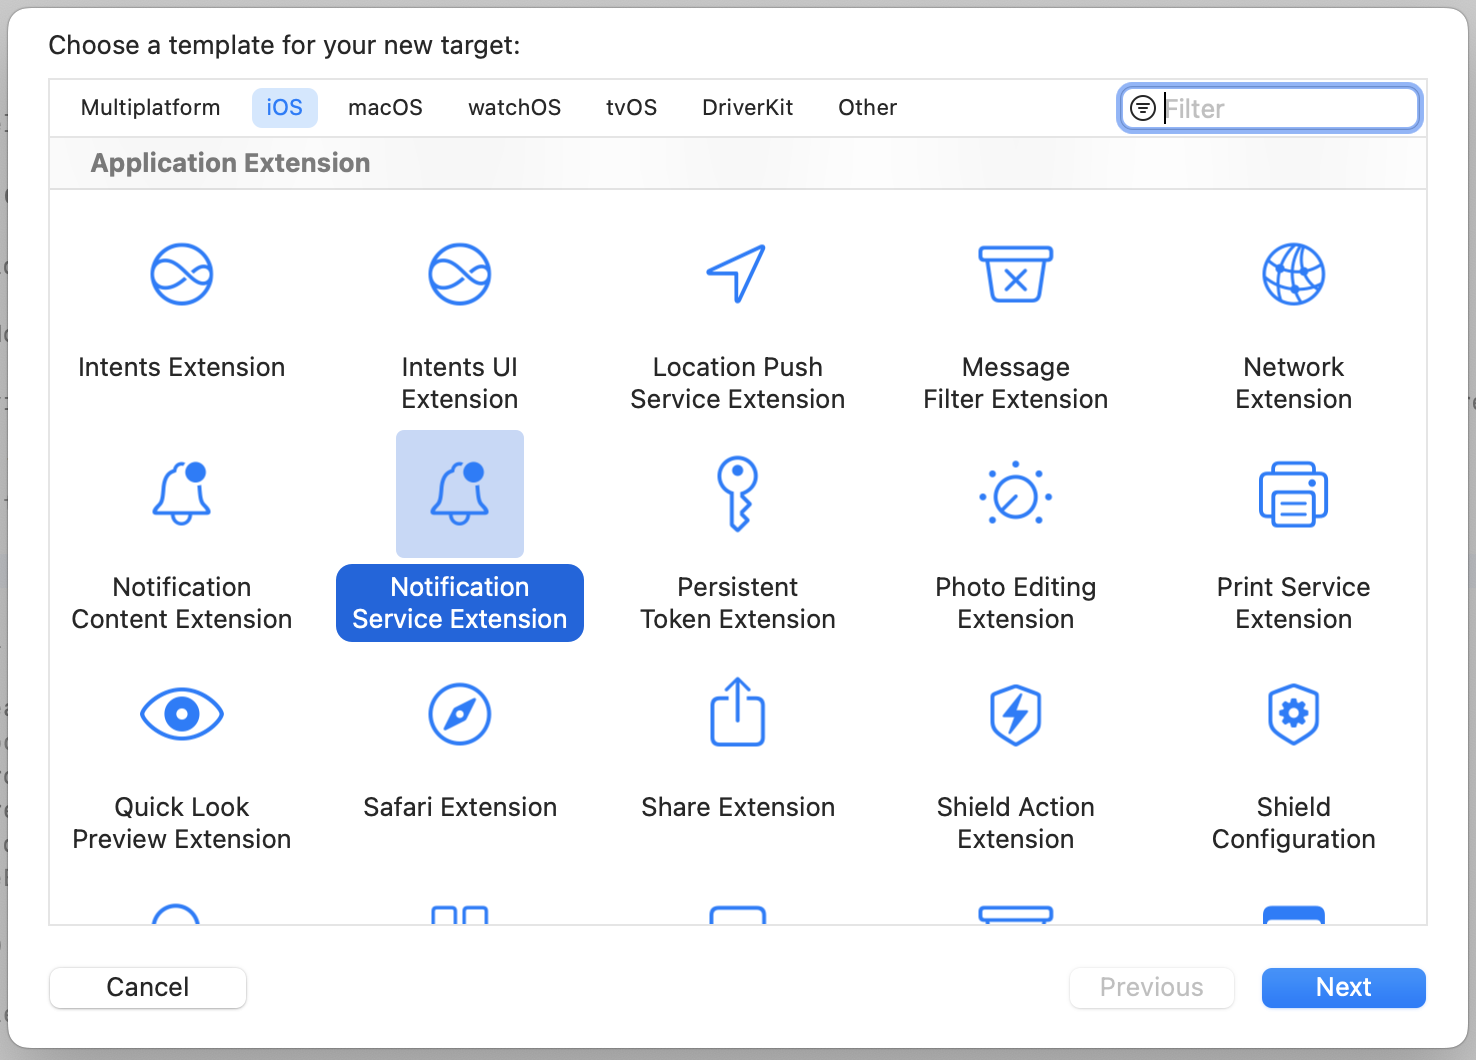
- Use product name
NotificationServiceExtension, pressFinish. - On activate scheme popup, press
Cancel.
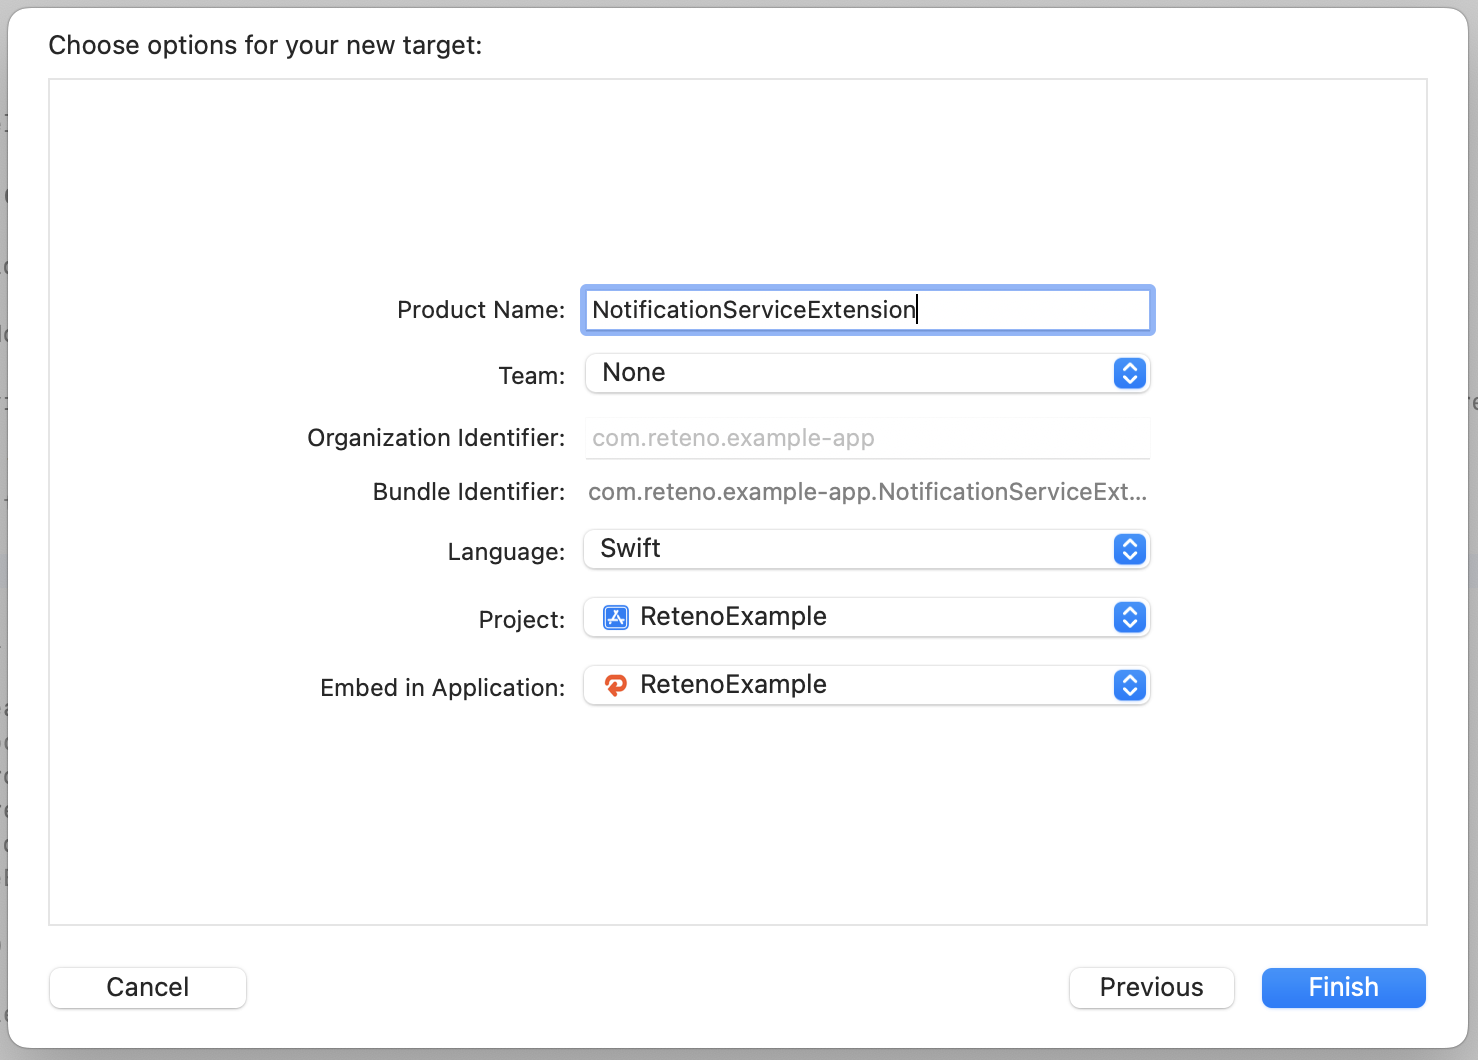
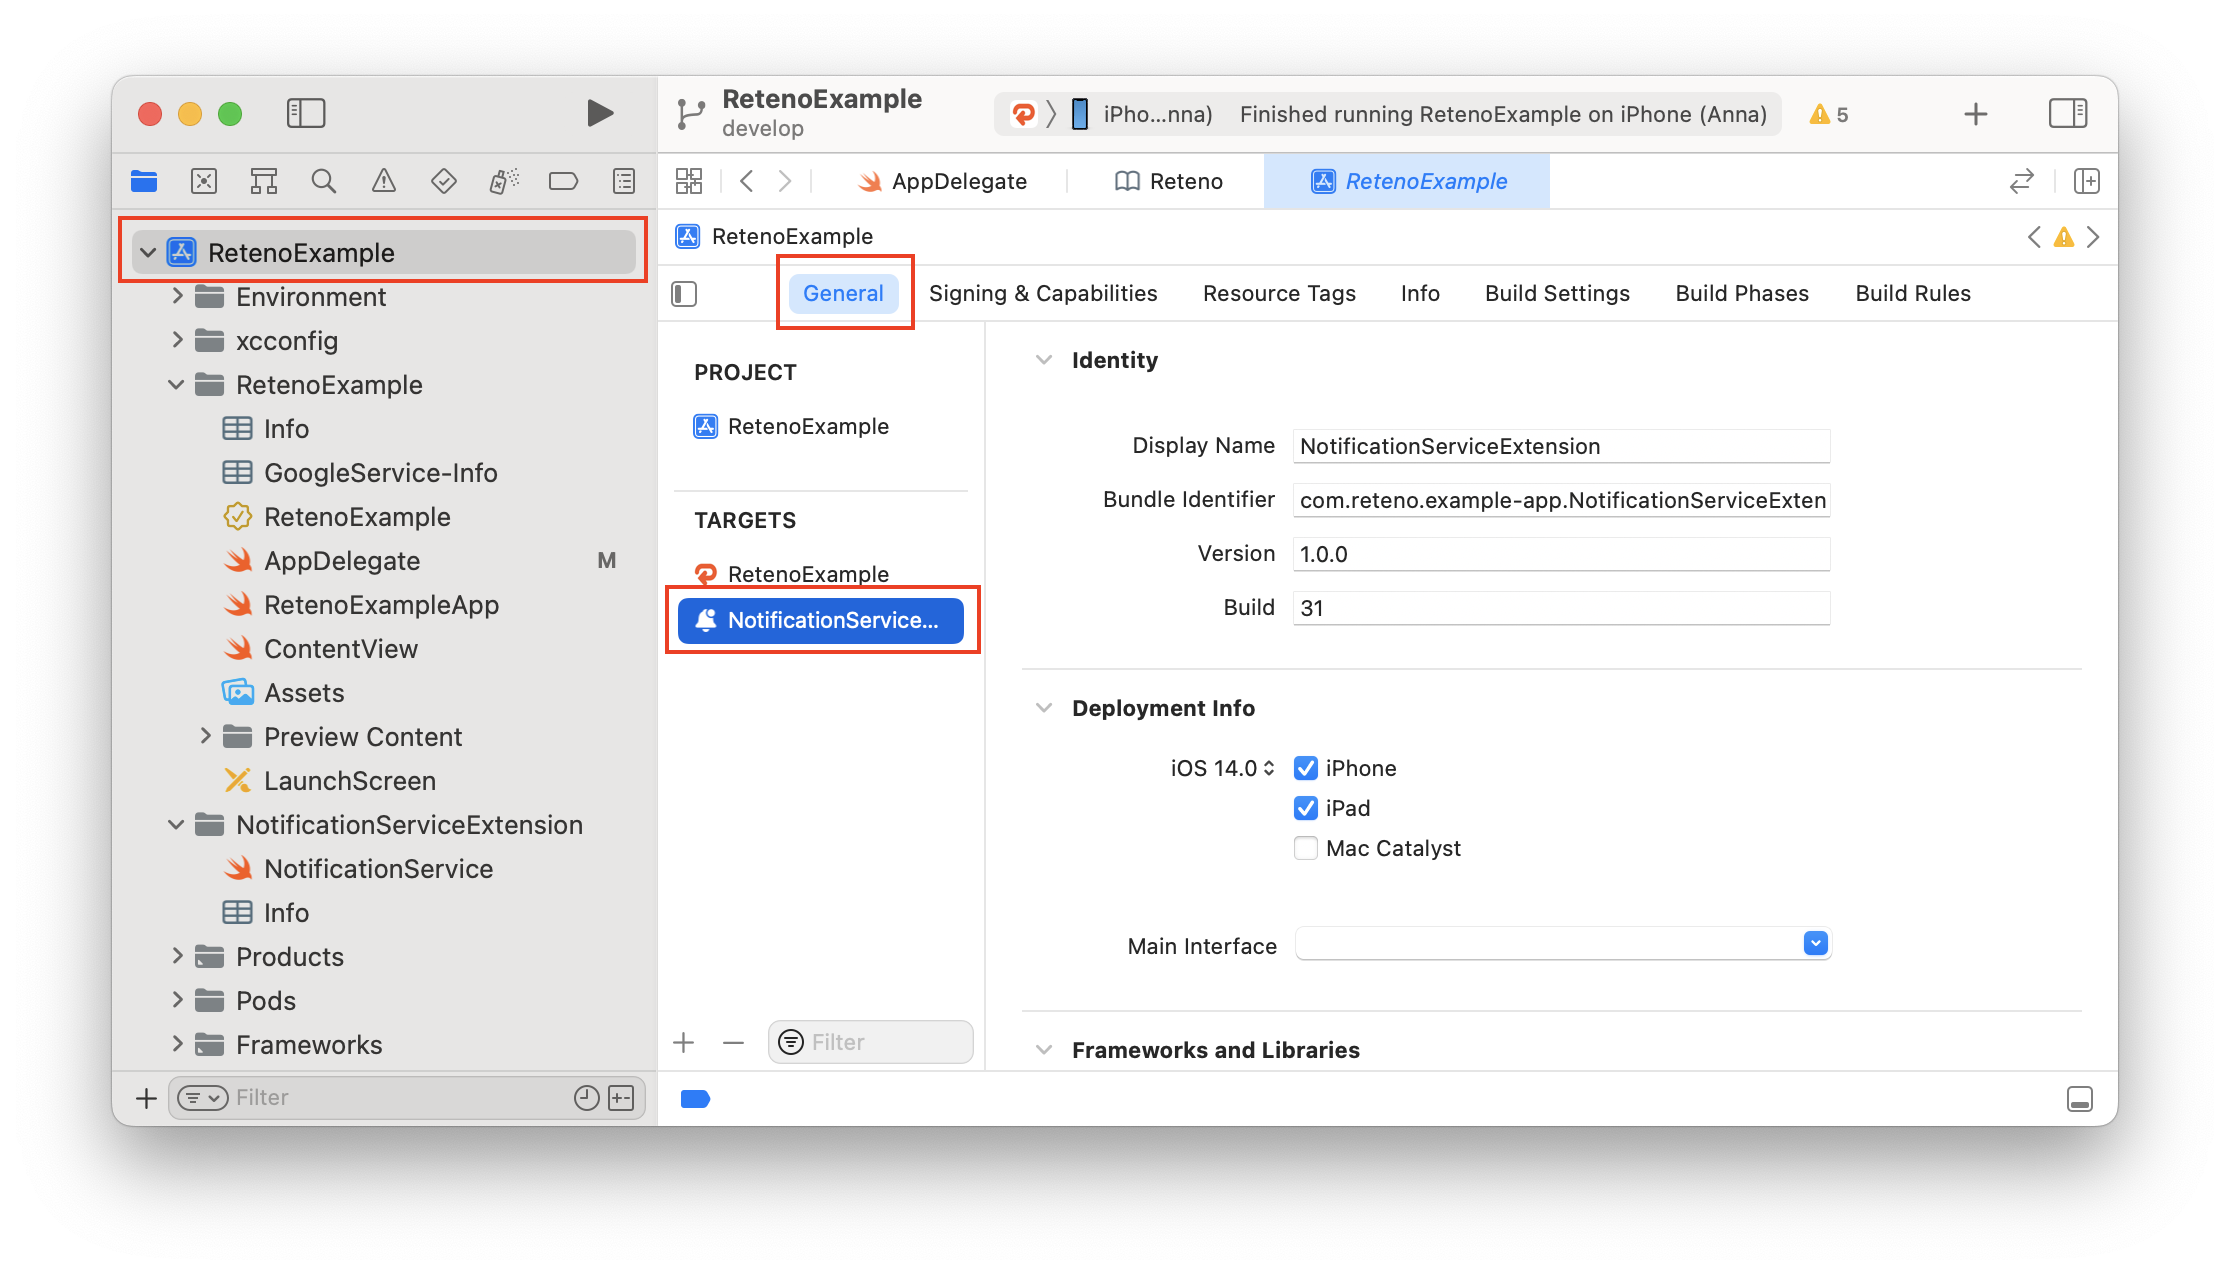
- Check extension deployment target equals main app target.
- Replace
NotificationService.swiftcontents with:
import UserNotifications
import Reteno

class NotificationService: RetenoNotificationServiceExtension {}
Add App Groups
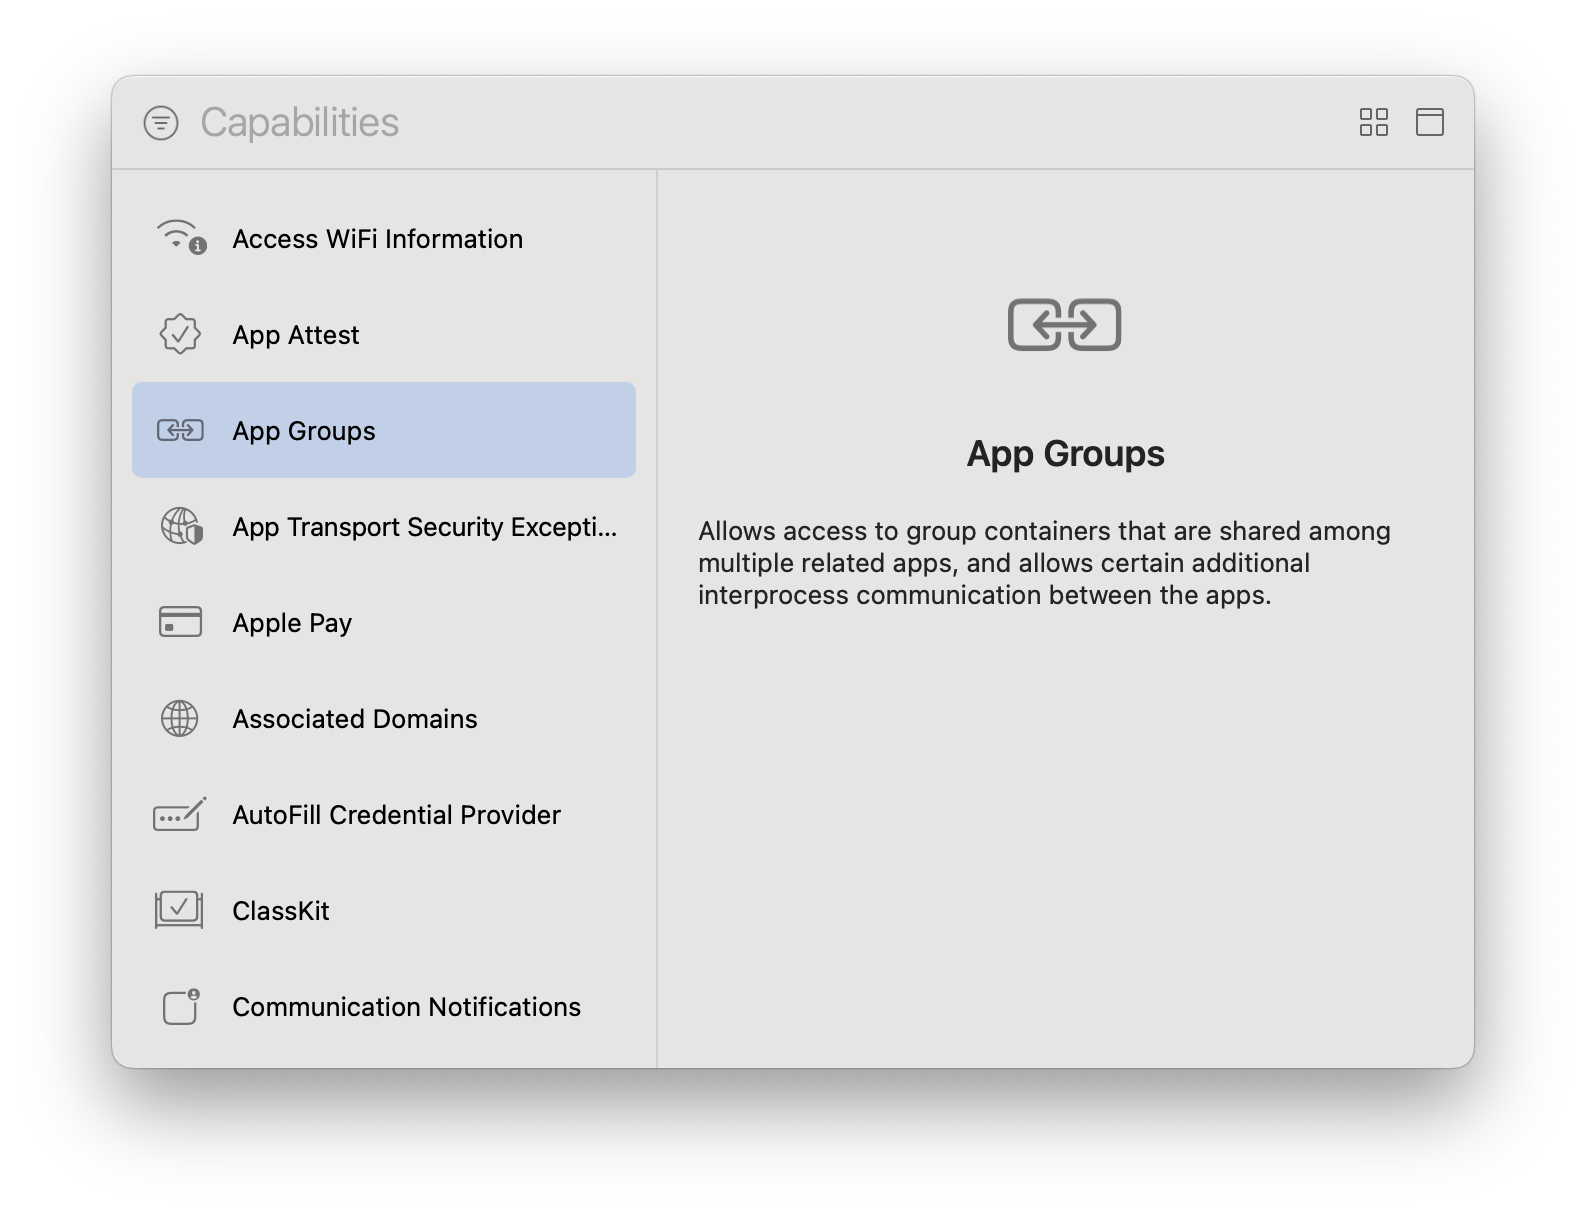
Enable App Groups in both main target and NotificationServiceExtension.
- Main target ->
Signing & Capabilities->+ Capability->App Groups
- Add group in format:
group.{bundle_id}.reteno-local-storage
Example: group.com.example.app.reteno-local-storage
- Repeat in extension target.
Podfile for Extension Targets
Plugin wires Reteno pod into the main iOS target automatically. For extension targets, add pods manually in platforms/ios/Podfile inside the main target block:
target 'App' do
  # ... existing pods ...

  target 'NotificationServiceExtension' do
    inherit! :search_paths
    pod 'Reteno', '2.7.2'
  end

  target 'NotificationContentExtension' do
    inherit! :search_paths
    pod 'Reteno', '2.7.2'
  end
end
Optional: Notification Content Extension (Images Carousel)
The Notification Content Extension is required for rich push notifications with an Images Carousel. It provides the UNNotificationContentExtension entry point that renders a custom carousel UI.
Official guide: https://docs.yespo.io/reference/ios-images-carousel
Create the extension target
In Xcode: File → New → Target → Notification Content Extension. Name it NotificationContentExtension.
Replace extension files
- Delete the generated
MainInterface.storyboard(it is not used withRetenoCarouselNotificationViewController). - Replace the contents of
NotificationViewController.swiftwith:
import Reteno

final class NotificationViewController: RetenoCarouselNotificationViewController {}
Update Info.plist of the NCE
Info.plist of the NCEOpen NotificationContentExtension/Info.plist as source code and replace the NSExtension dict with:
<key>NSExtension</key>
<dict>
    <key>NSExtensionAttributes</key>
    <dict>
        <key>UNNotificationExtensionCategory</key>
        <string>ImageCarousel</string>
        <key>UNNotificationExtensionInitialContentSizeRatio</key>
        <real>0.5</real>
        <key>UNNotificationExtensionUserInteractionEnabled</key>
        <true/>
    </dict>
    <key>NSExtensionPointIdentifier</key>
    <string>com.apple.usernotifications.content-extension</string>
    <key>NSExtensionPrincipalClass</key>
    <string>$(PRODUCT_MODULE_NAME).NotificationViewController</string>
</dict>
Deployment target
Make sure the NCE Deployment Target in Xcode matches the main app target (iOS 15.0+). A mismatch is the most common reason carousel images fail to display.
Embed App Extensions — Copy only when installing
This step must be done manually in Xcode.
In Xcode: Main target → Build Phases → Embed App Extensions. For both NotificationServiceExtension and NotificationContentExtension ensure "Copy only when installing" is unchecked.
If this checkbox is left on, the extensions will not be embedded during Debug builds and carousel images will not appear.
Initialize the SDK in JS
For the full init(...) reference (options, platform matrix, deviceready wrapper) see Initialize the SDK.
Request Notification Permission
await RetenoPlugin.requestNotificationPermission();Provide Device Tokens to the SDK
If another SDK/plugin obtains APNs/FCM token, forward it to Reteno:
await RetenoPlugin.setDeviceToken(token);Using FCM (Firebase Cloud Messaging) on iOS
If your app uses Firebase for push delivery on iOS, follow the steps below to integrate FCM token handling with Reteno.
1. FirebaseMessaging pod
FirebaseMessaging podThe plugin includes FirebaseMessaging pod automatically via plugin.xml. No manual Podfile changes are needed.
Whether Firebase is actually used for token handling depends on the IOS_DEVICE_TOKEN_HANDLING_MODE preference (see step 4 below).
2. Add GoogleService-Info.plist
GoogleService-Info.plistDownload GoogleService-Info.plist from the Firebase Console and add it to your iOS app target in Xcode:
- Open
platforms/ios/<AppName>.xcworkspacein Xcode. - Drag
GoogleService-Info.plistinto the project navigator under the main app target. - Make sure "Copy items if needed" is checked and the file is added to the main app target (not only the extension targets).
If your app calls FirebaseApp.configure() without this file, Firebase will crash at runtime. The plugin avoids auto-configuring Firebase when the file is missing and logs a warning in manual mode.
3. Configure AppDelegate
Nothing to do. Firebase iOS SDK uses method swizzling by default — it automatically intercepts didRegisterForRemoteNotificationsWithDeviceToken and forwards the APNS token to Firebase without any AppDelegate code.
4. IOS_DEVICE_TOKEN_HANDLING_MODE defaults to manual
IOS_DEVICE_TOKEN_HANDLING_MODE defaults to manualIOS_DEVICE_TOKEN_HANDLING_MODE now defaults to manual in the plugin, so no extra config is required for the Firebase flow in most cases.
If you previously overrode it to automatic, switch it back to manual to use FCM token forwarding.
Only set automatic when you intentionally want APNS-only token handling by the native Reteno SDK.
Supported modes:
manual(default)automatic
Any value other than automatic is treated as manual.
The mode is read from iOS preferences during RetenoPlugin.init(). It cannot be changed at runtime from JS after plugin start.
How to change mode:
- Cordova: set in
config.xmlor pass during plugin installation via--variable IOS_DEVICE_TOKEN_HANDLING_MODE=...
Cordova config.xml example:
<preference name="IOS_DEVICE_TOKEN_HANDLING_MODE" value="automatic" />After changing this preference, run cordova prepare ios and rebuild the iOS app.
When IOS_DEVICE_TOKEN_HANDLING_MODE is manual and Firebase is configured (either already configured by the app or auto-configured because GoogleService-Info.plist is present), the plugin automatically:
- Subscribes to Firebase Messaging delegate token updates — every future FCM token rotation is forwarded to Reteno immediately.
- Tries to forward the already-cached FCM token on warm starts.
In-App Status Handler (iOS)
For usage examples and payload mapping, see:
In-Apps Pause (iOS)
For pause/resume examples and pause behaviour options, see:
App lifecycle and screen tracking note
Screen view tracking options:
- Manual (recommended for Cordova) — call
RetenoPlugin.logScreenView(screenName)on each navigation event (for example, by subscribing to your router's navigation events). This works on both iOS and Android and tracks the actual JS screens your users see.
await RetenoPlugin.logScreenView('ScreenName');- Automatic — pass
isAutomaticScreenReportingEnabled: truetoRetenoPlugin.init(...). The native iOS SDK will trackUIViewControllertransitions automatically. Defaults tofalse.
Note on automatic screen tracking in hybrid apps: In Cordova the entire UI runs inside a single WebView, so automatic tracking only captures native controller transitions (e.g.
CDVViewController), not your JS screen navigations. The same applies to Android, where the native SDK'sautoScreenTrackingmonitorsFragmenttransitions. For meaningful screen analytics in a hybrid app, always uselogScreenView()manually.
Custom Notification Behavior (optional)
After initialization you can configure foreground/tap handling from JS:
await RetenoPlugin.setWillPresentNotificationOptions({
  options: ['badge', 'sound', 'banner'],
  emitEvent: true,
});

await RetenoPlugin.setDidReceiveNotificationResponseHandler({
  enabled: true,
  emitEvent: true,
});
If emitEvent: true, plugin emits:
reteno-push-receivedreteno-notification-clicked
Deeplinks in push payloads
Reteno push notifications on iOS can include links. In hybrid Cordova apps, opening the correct in-app route usually requires a separate app-level deeplink solution.
This plugin does not expose full native iOS link-handler customization to JavaScript, so for custom routing use your app deeplink layer, for example:
- Branch.io
- custom URL scheme plugin
- Universal Links / App Links integration
In practice, Reteno delivers the link in push payload, while navigation to the exact app screen should be handled by your deeplink router.
App Lifecycle Events (iOS)
When lifecycle tracking is enabled, iOS can report:
ApplicationInstalledApplicationUpdatedApplicationOpenedApplicationBackgrounded
Related automatic events are also controlled via lifecycleTrackingOptions:
- push subscription events (
pushSubscriptionEnabled) - session events (
sessionStartEventsEnabled/sessionEndEventsEnabled)