
Getting Started With Reteno SDK for Android
- Install reteno_flutter_sdk using flutter pub command:
flutter pub add reteno_pluginThis will add entry in your project's pubspec.yaml (and run flutter pub get):
dependencies:
reteno_plugin: (latest_version_here)- Add mavenCentral repository in your project level
build.gradle:
buildscript {
    repositories {
    mavenCentral()
    }
...
}- Add
retenoandfirebasedependencies in application levelbuild.gradle:
dependencies {
    implementation 'com.reteno:fcm:(latest_version_here)'
    ...
    implementation "com.google.firebase:firebase-messaging:23.1.0"
    implementation "com.google.firebase:firebase-messaging-ktx:23.1.0"
}| Library | Description |
|---|---|
| com.reteno:fcm | FCM enables push notifications through SDK and all core functionality |
| firebase:firebase-messaging | Firebase cloud messaging |
| firebase:firebase-messaging-ktx | Firebase cloud messaging Kotlin extensions |
Setting Up SDK
Follow our setup guide to integrate the Reteno SDK with your app.
Step 1: Enable Androidx in Your gradle.properties file
android.useAndroidX=true
android.enableJetifier=true
Step 2: Add ‘com.reteno:fcm’ and Firebase Dependencies in build.gradle
NoteJava 1.8 compiler is required. In app level
build.gradle:
android {
    compileOptions {
        sourceCompatibility JavaVersion.VERSION_1_8
        targetCompatibility JavaVersion.VERSION_1_8
    }
}
NoteIf you are using
minSdkVersion<26please add desugaring dependency in you app level build.gradle as follows
compileOptions {
    coreLibraryDesugaringEnabled true
    ...
}
...
dependencies {
    coreLibraryDesugaring 'com.android.tools:desugar_jdk_libs:1.2.2'
    ...
}
Step 3: Edit Your MainApplication Class and Provider API Access-Key at SDK Initialization.
Below is sample code you can add to your application class which gets you started with RetenoSDK.
package [com.YOUR_PACKAGE];
import com.reteno.core.Reteno
import com.reteno.core.RetenoApplication
import com.reteno.core.RetenoImpl
import io.flutter.app.FlutterApplication

class CustomApplication : FlutterApplication(), RetenoApplication {
    private lateinit var retenoInstance: Reteno

    override fun onCreate() {
        super.onCreate()
        retenoInstance = RetenoImpl(this, "your_access_key_here")
    }

    override fun getRetenoInstance(): Reteno {
        return retenoInstance
    }
}
Step 3 Alternative: Use Lazy Initialization of Reteno
package [com.YOUR_PACKAGE];
import com.reteno.core.Reteno
import com.reteno.core.RetenoApplication
import com.reteno.core.RetenoImpl
import io.flutter.app.FlutterApplication

class CustomApplication : FlutterApplication(), RetenoApplication {
    private lateinit var retenoInstance: Reteno

    override fun onCreate() {
        super.onCreate()
        retenoInstance = RetenoImpl(this)
    }

    override fun getRetenoInstance(): Reteno {
        return retenoInstance
    }
}
and then in Flutter app, call Reteno.initWith
 await Reteno.initWith(
    accessKey: 'access_key',
    // optional
    isPausedInAppMessages: true,
    // optional
    lifecycleTrackingOptions: LifecycleTrackingOptions(
        appLifecycleEnabled: true,
        pushSubscriptionEnabled: true,
        sessionEventsEnabled: true,
    ),
    // optional if you want to use custom device id
    customDeviceId: () async {
        return await Amplitude.getInstance().getDeviceId();
    },
);
Step 4: Set Up Your Firebase Application for Firebase Cloud Messaging:
-
Download your
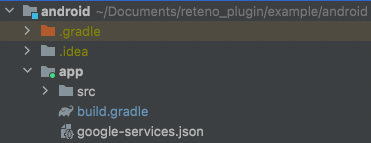
google-services.jsonconfig file (see how here). -
Add the above file to your root
app/folder.
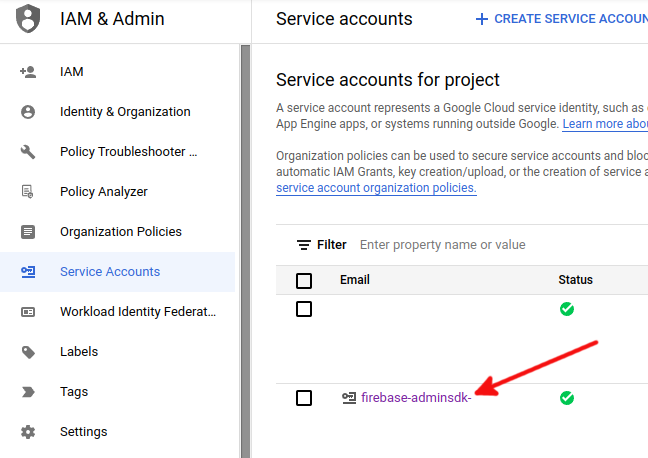
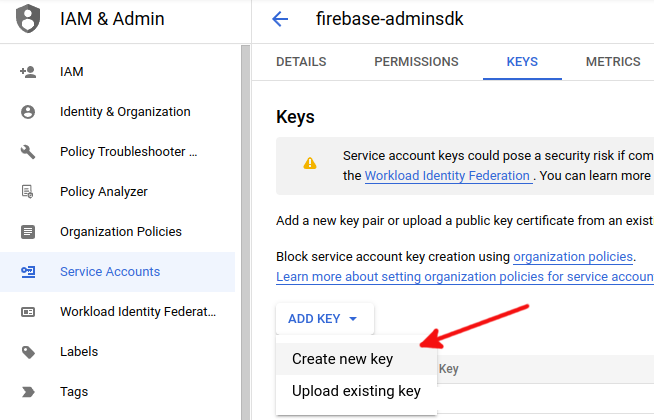
- Copy your FCM Server Key. In the Firebase console, click the gear icon next to Project Overview, then click Project Settings → Cloud Messaging → Manage Service Accounts. Go to Service accounts to download FirebaseAdminSdk account's json key.

- Follow this manual to set up Yespo admin panel with your Firebase key.
Now you are ready to run your app and send a marketing push notification to your application.
Run your app on a physical Android device to make sure it builds correctly.
NoteAndroid Debug Mode enables you to ensure that all events and user properties are logged correctly.