
Custom User Fields
Additional fields contain all the information we know about each contact. You can use it for audience segmentation and marketing automation.
You can create a new list of fields or add new fields to the existing lists. Let's go step by step and create a new Additional info list.
Step 1. Creating a new list
-
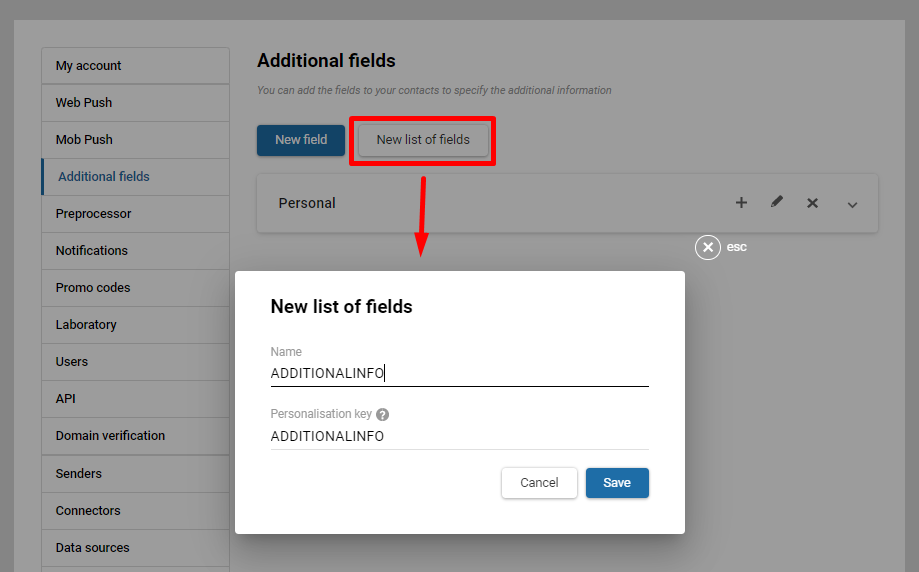
Click the New list of fields button.
-
Type the list name in the Name field.
The personalization key is generated automatically based on the given name. This key is used in your content to refer to this list. We recommend using a descriptive name in capital Latin letters with no spaces or special symbols.
- Click the Save button.
Step 2. Adding fields to the existing list
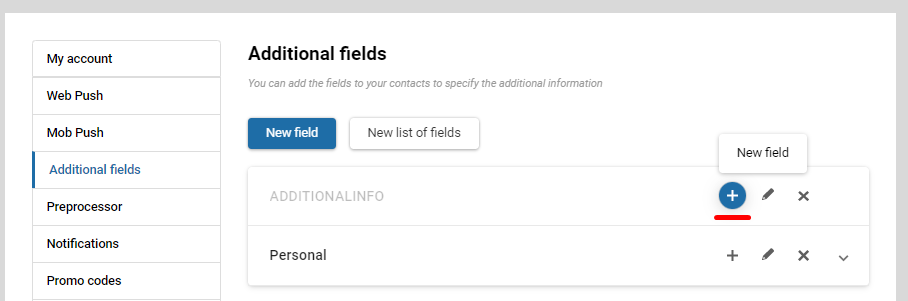
Now you can add any additional field by clicking the plus button.
Specify the name of the field. By default, the field type is saved in the Text box type.
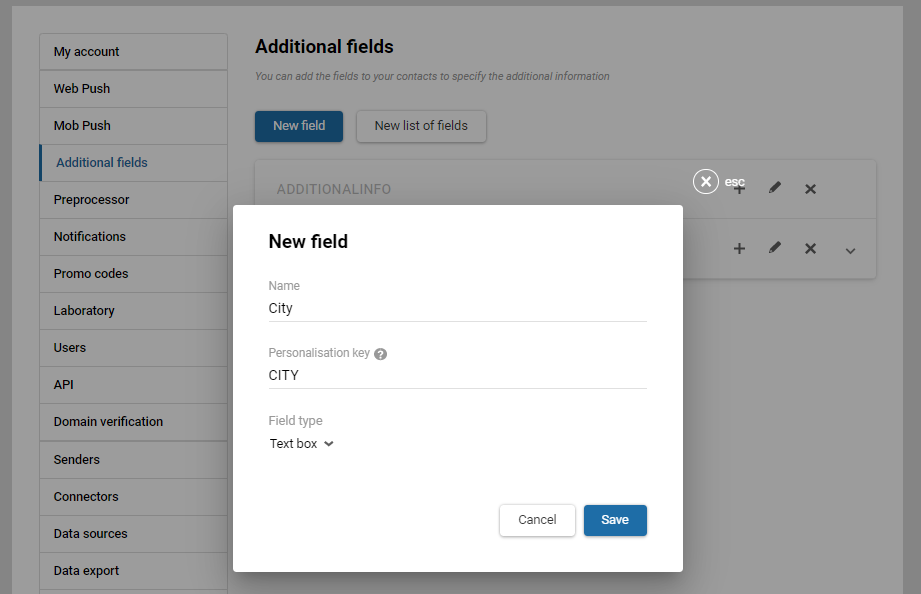
If you need to set another field type, go to step 3.
Step 3. Choosing the field type
Depending on the type of the contact data to be stored, the following field types are available in Yespo:
NoteA field's type can't be changed after creation — for example, you can't switch an existing field from Date with time to Date. You also can't move a field to another list. In both cases, create a new field. Values from the old field aren't transferred to the new one, and deleting the old field deletes its values.
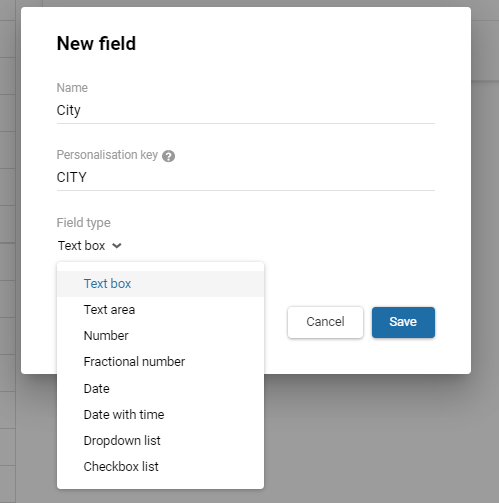
Text box
Used for text characteristics of the contact. The maximum allowed number of characters in the field is one thousand both letters and integer numbers. Special characters (for example, % ^ * | ~ {) are not supported.
Text area
The field can contain up to five thousand characters, both letters and integer numbers. Special characters are not supported.
Number
Can only contain integer values between -2147483647 and 2147483647.
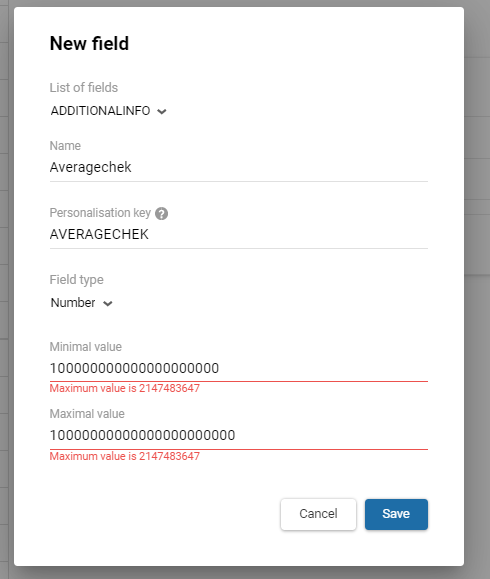
Fractional number
This field can contain integers and fractions.
Date
A field to store the date and time. API values are passed in ISO 8601 format. Date format: YYYY-MM-DD.
A Regular date option is used to determine a creation date, anniversary, etc.
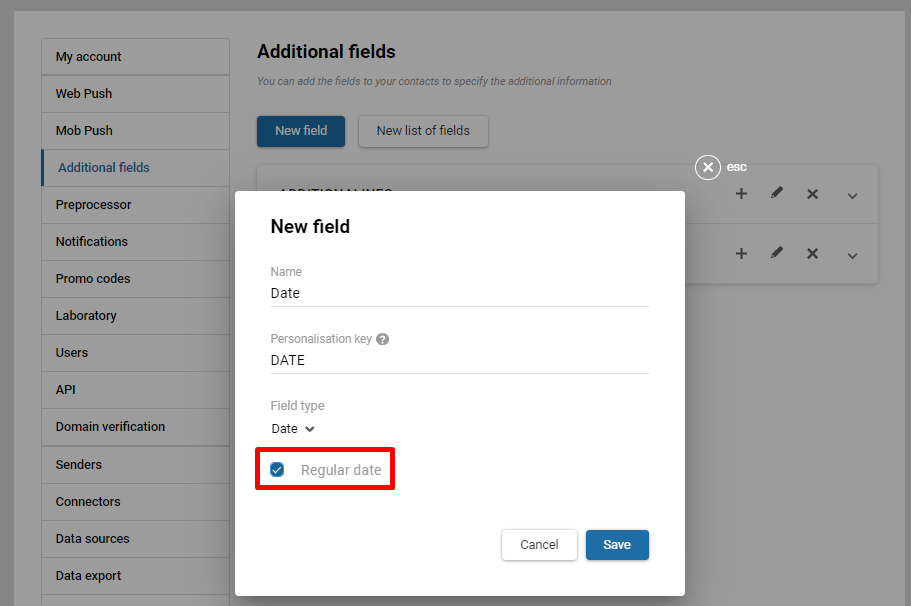
Select the Regular date checkbox to use it for creating dynamic segments:
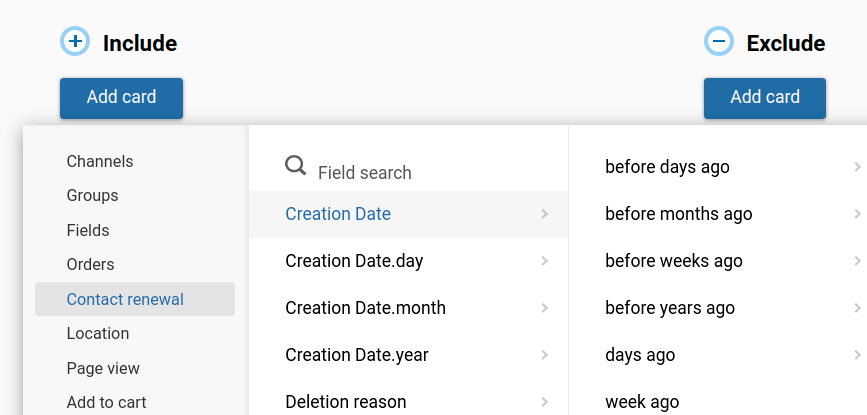
Date with time
The supported format: YYYY-MM-DDTHH:mm
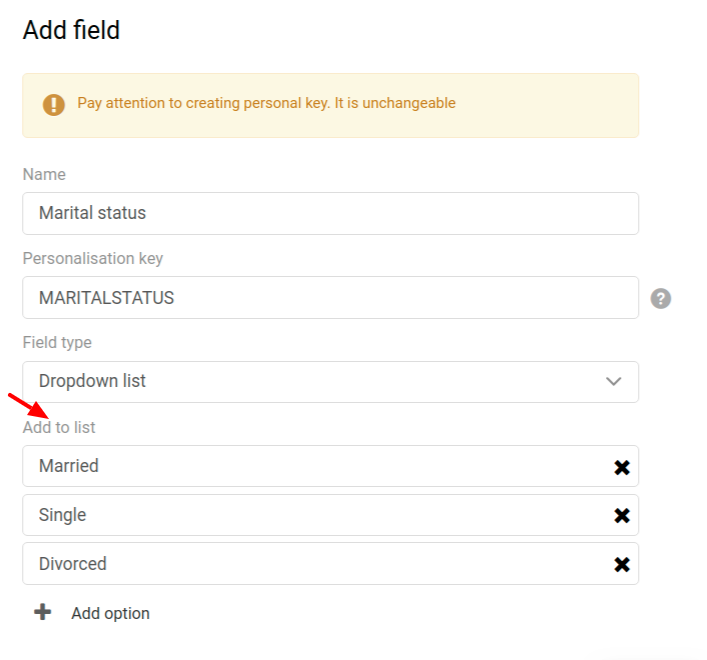
Dropdown list
It contains predefined values, useful for storing the gender, status or language data of a subscriber.
ImportantDo not use the dot character in the field’s name. For example, MARITAL.STATUS.
Checkbox list
This type of field is ideal for characterizing contact's preferences, activity, or professional skills when you need to enter multiple values.
NoteThe set of options for a Checkbox list field is fixed when the field is created — you can't add or remove options afterward. If you need a different set of options, create a new field.
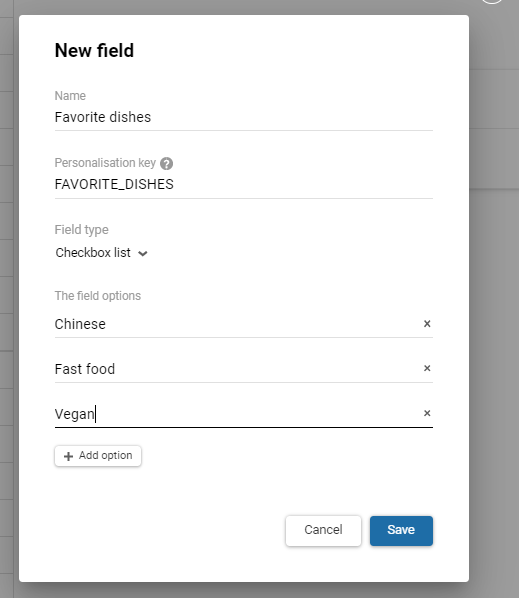
To write or update the Checkbox list field using the Add/update contacts API method, transfer the field ID in the fields array and specify the values separated by commas:
"fields": [{

"id": 87166,

"value": "Chinese "

 }]
Also, don't forget to specify the ID in the customFieldsIDs object — the list of identifiers for additional fields to be updated. Only those additional contact fields whose IDs are specified in this list are updated.
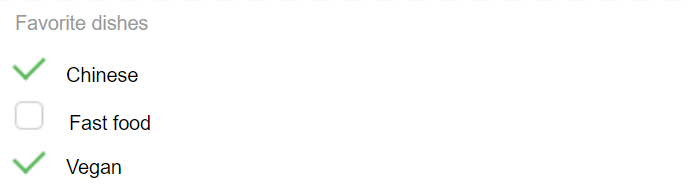
The result of a query for the Favorite dishes field:
Creating lists and adding fields for your segments allows you to make advanced segmentation of your contacts. This allows you to personalize the content and send relevant messages.
ImportantAfter creating an additional field, the system takes some time to synchronize until the field becomes available for using via the API. The procedure may take 1 hour.
NoteThere's no API endpoint for creating additional fields, and no bulk way to create them — each field is created individually. The API below only lets you retrieve the list of existing fields (with Get additional fields) and update a contact's value for one of those fields — pass the field's numeric ID and the new value in the
fieldsarray of the Add/update contacts method, as shown above. Neither call creates a new field. You can create a field two ways: through this UI, or by importing a file with a column for it — unmapped columns are auto-created as new fields during field mapping. File import only supports the Text box, Text area, Number, Fractional number, Date, and Date with time types; Dropdown list and Checkbox list fields still need to be created manually, since their predefined option lists aren't set during import.To replicate the same field set across multiple accounts, use Get additional fields to list the field names, types, and allowed values from one account, then recreate them in each other account — manually, or for the supported types, by importing a small file (for example, one placeholder contact with a column per field) to auto-create them. The field definitions remain even after you delete the contact that created them. Avoid uploading real customer data to another account just to replicate fields — use placeholder data instead.
Custom Fields in Widget Integrations
All integrations available in the widget builder support passing widget data into custom fields on the integration's side. For most integrations, the widget builder can fetch the list of existing custom fields directly from the integration so you can select the target field. For a few integrations, this list can't be fetched — you need to know the target field's key. Some of these integrations still let you create a new custom field directly at the point of subscription, even though the existing list can't be fetched.
| Integration | Fetch existing custom field list | Create new field at subscribe time |
|---|---|---|
| Klaviyo | Not supported | Not supported |
| Omnisend | Not supported | Supported |
| Pipedrive | Not supported | Not supported |
| SalesDrive | Not supported | Supported |
| Shopify | Not supported | Not supported |
| Userlist | Not supported | Supported |
Updated about 1 month ago