
Creating Timer
A Timer displays a countdown in the message until a specific date and time. The end date is the same for all recipients: a countdown from the moment a contact receives or opens the email can't be set up.
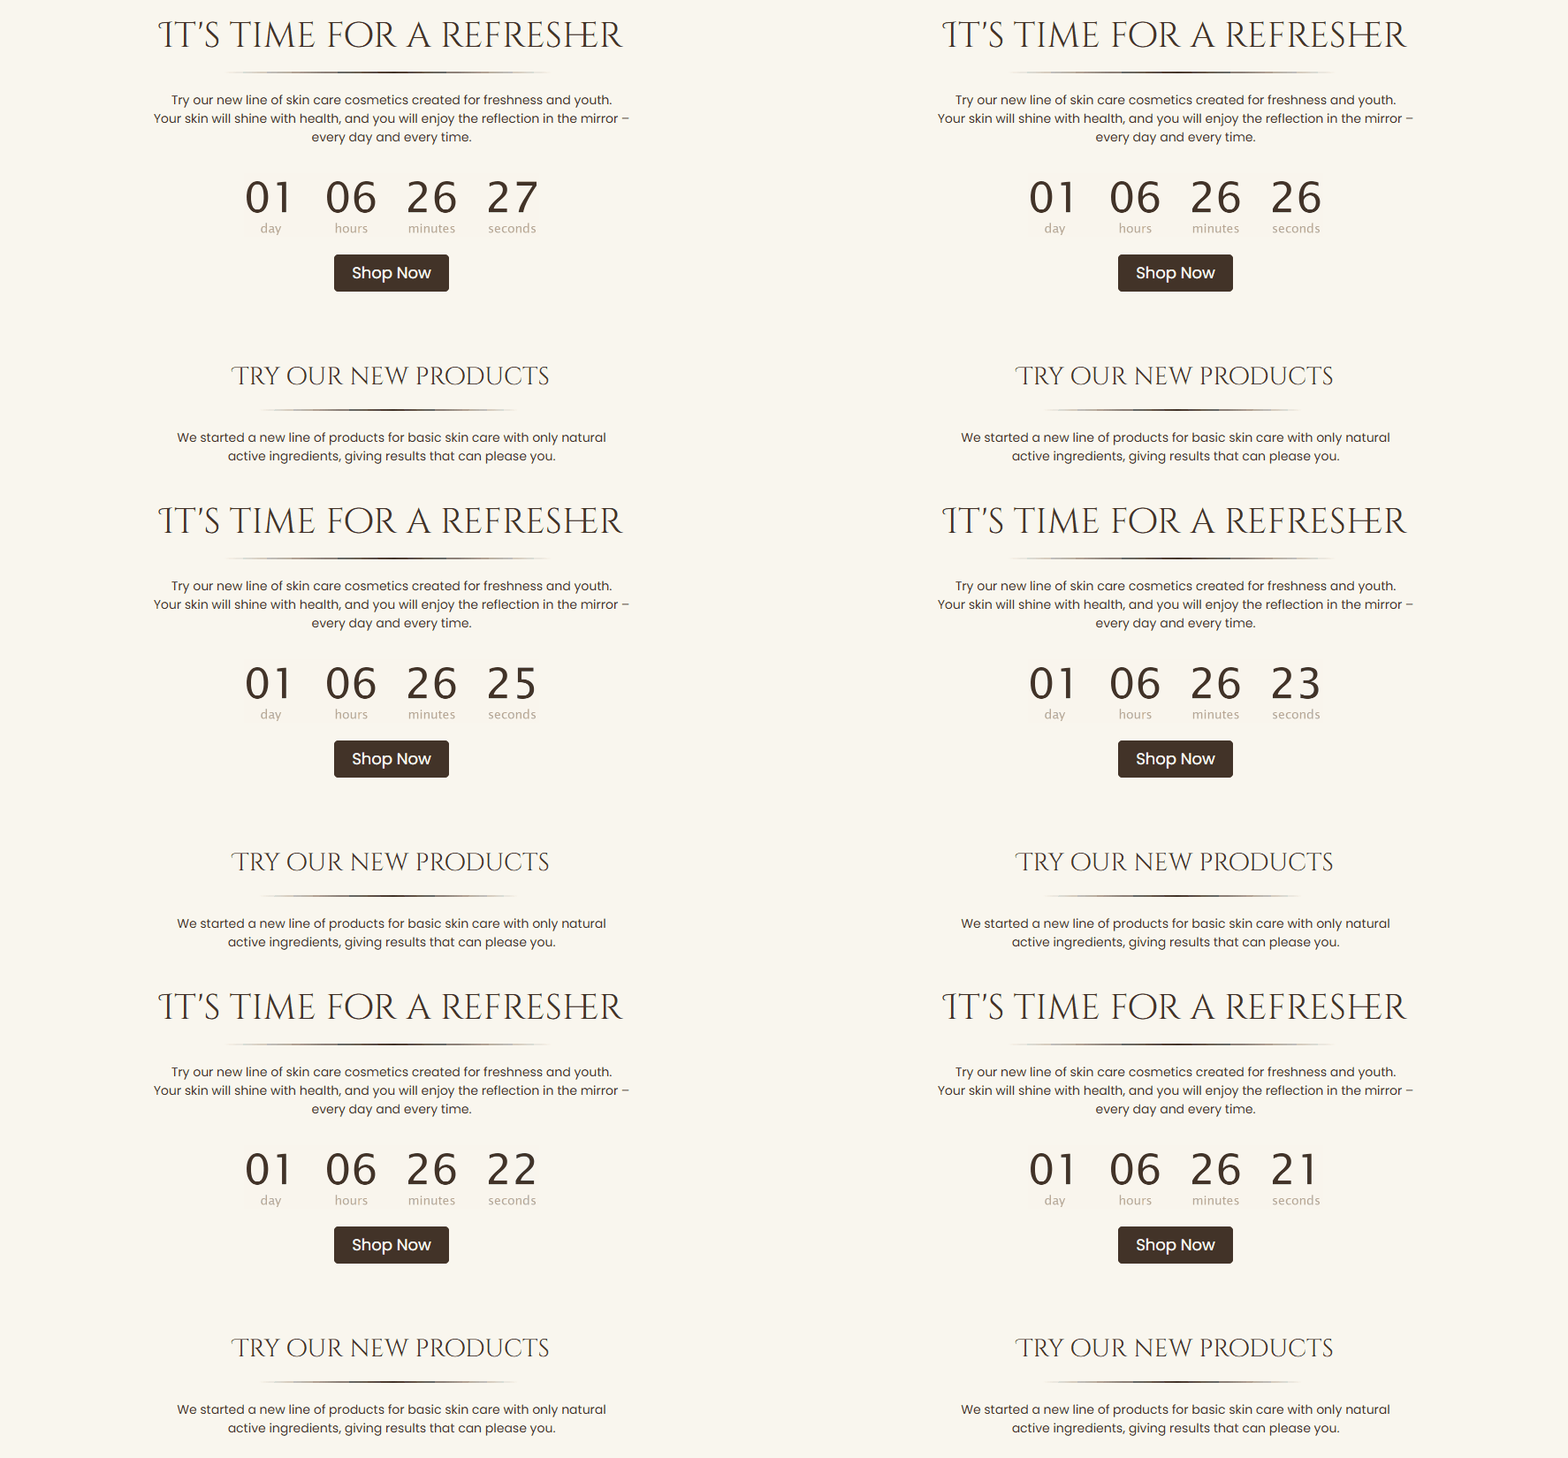
Use it in emails with a fixed deadline, such as:
- promotion end
- event start
- registration closing
Add a Timer to a Message
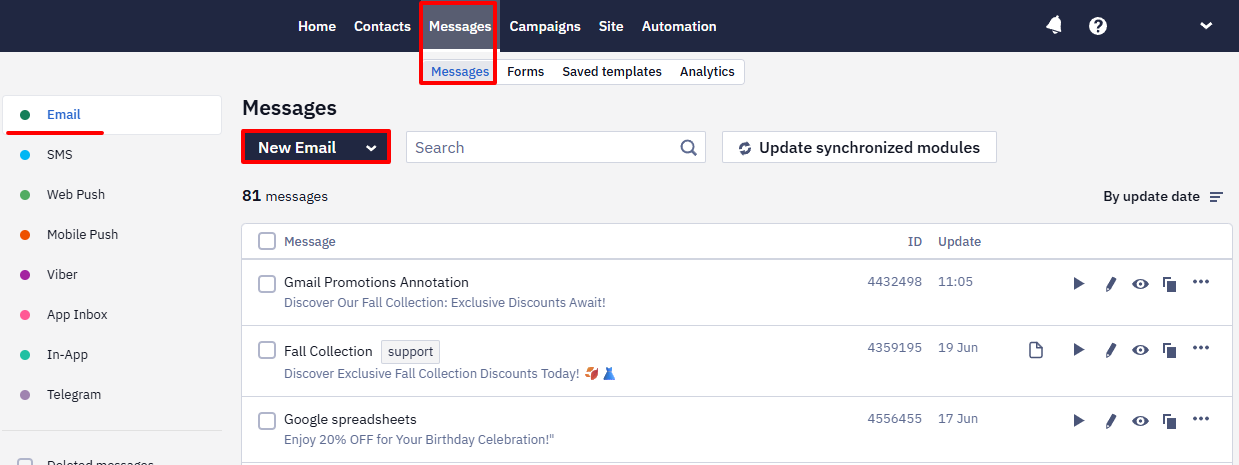
- Create a new message or open an existing one in Messages → Messages.
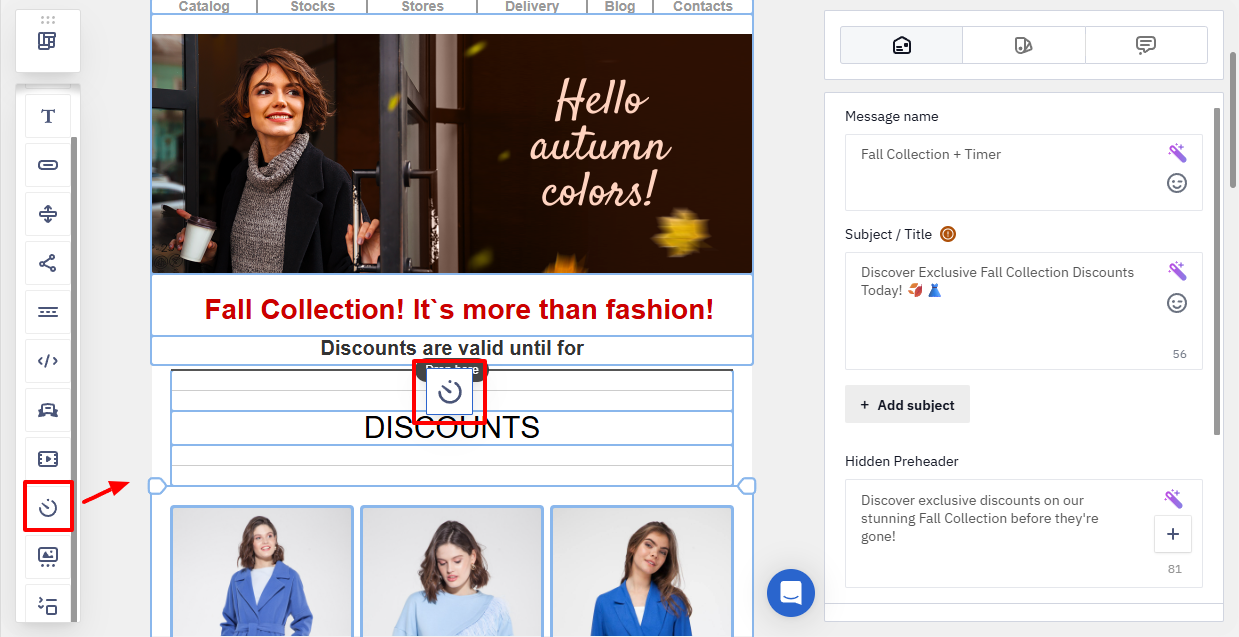
- Drag the Timer block from the side panel into the email.
- Click the timer to open its settings.
Timer Settings
The timer settings include two tabs:
- Settings
- Styles
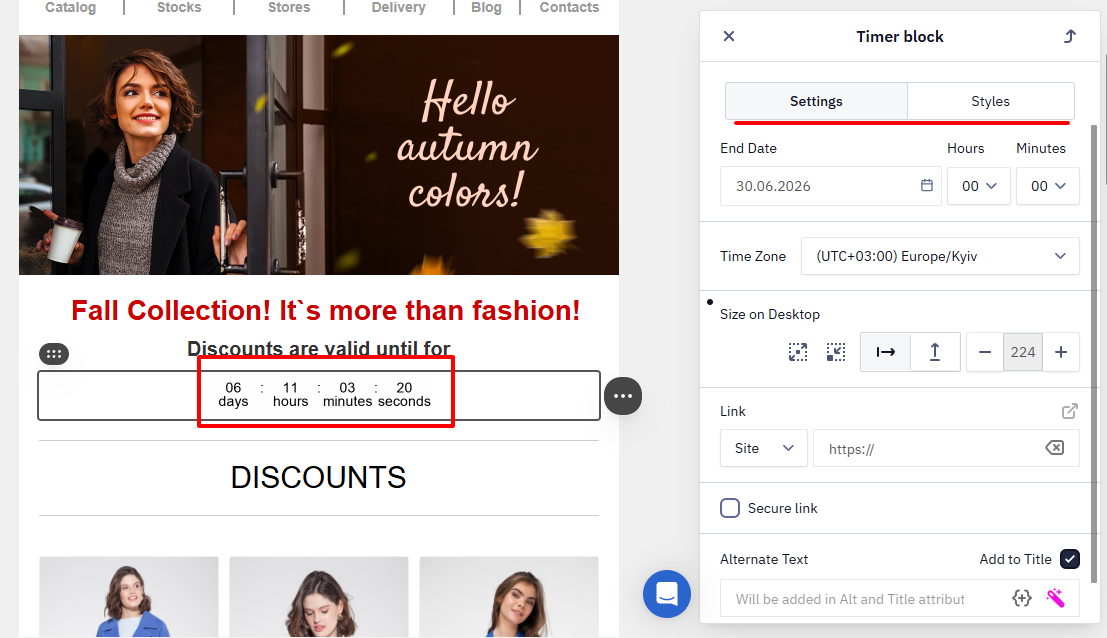
Settings Tab
Use this tab to configure the timer behavior and display.
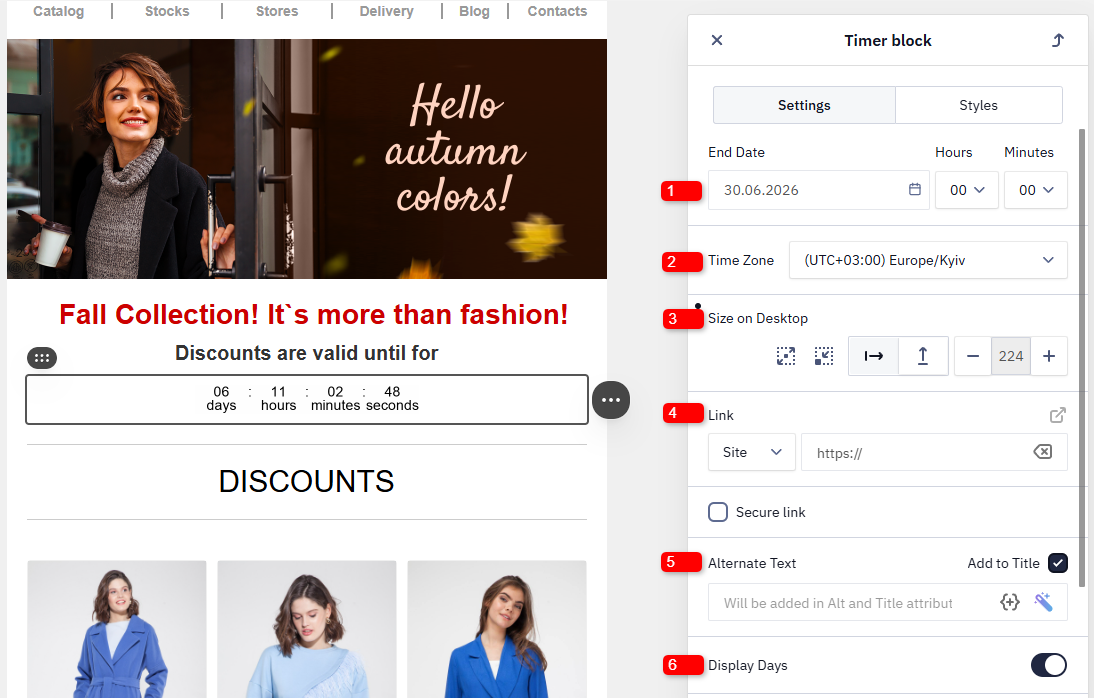
- End date— set the moment when the countdown ends. The timer stops after this date.
- Time zone — select the time zone used for the countdown.
- Size — set the width and height of the timer in pixels.
- Link — add the URL that opens when a recipient clicks the timer.
- Alternate text — display text if the timer image fails to load.
- Display days — display or hide the day counter. If you disable this option, the timer shows the countdown in
HH:MM:SSformat.
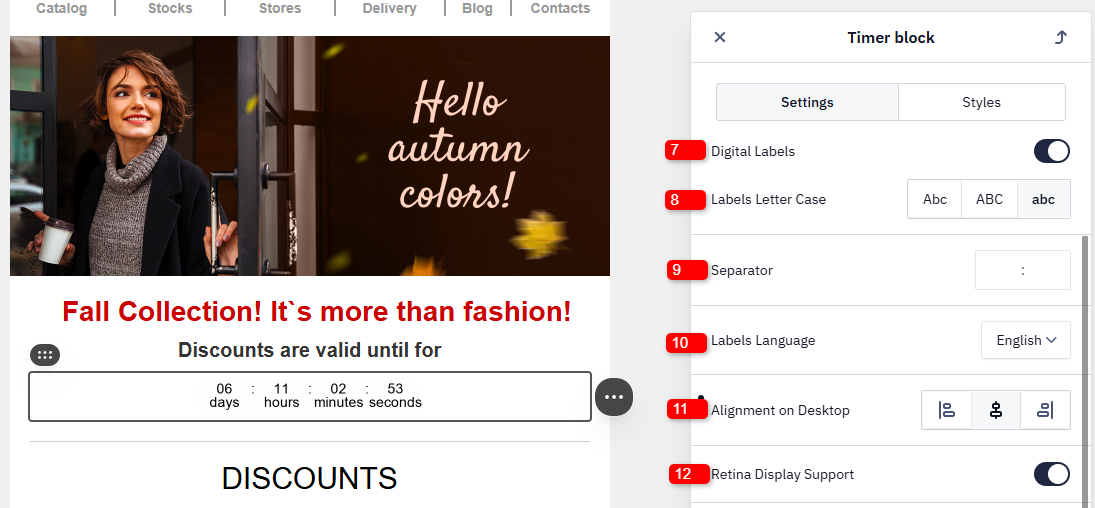
- Digital Labels — add text labels below the time values.
- Labels Letter Case — define the label format: Abc / ABC / abc.
- Separator — choose the symbol between time values (a colon appears by default).
- Labels language — select the language used for the timer labels.
- Alignment — position the timer in the email: left, center, or right.
- Retina Display Support — increase timer clarity on high-density screens (LCD and OLED displays on Apple devices).
NoteEnabling the Retina Display Support option may increase email loading ti
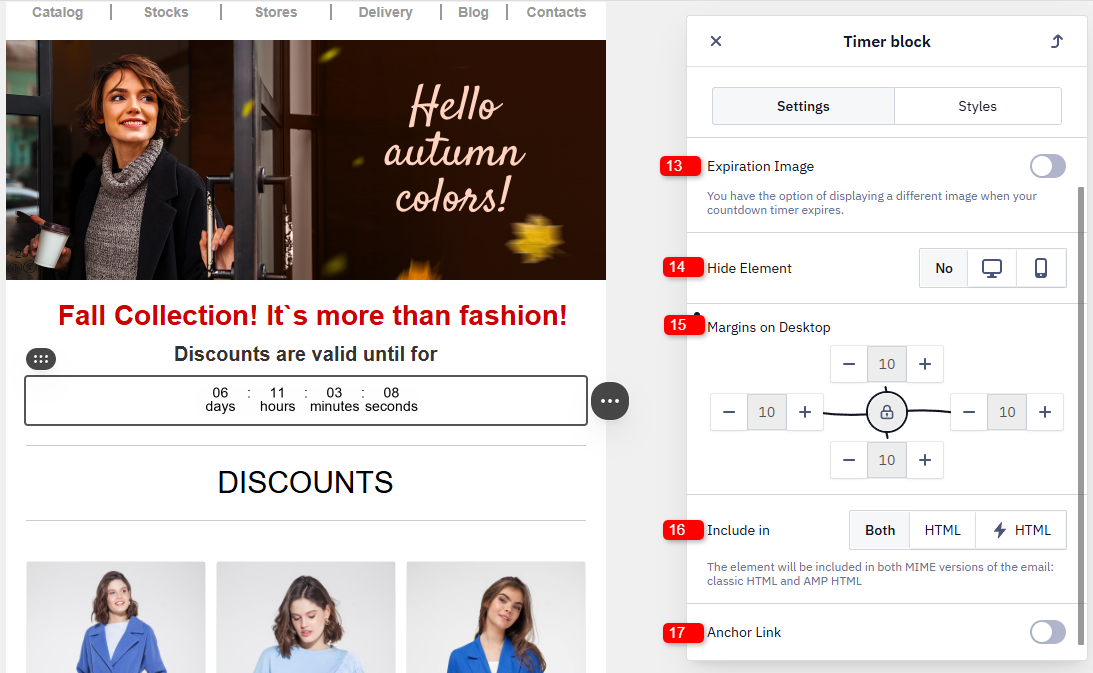
- Expiration Image — display an image if the recipient opens the message after the countdown ends.
- Hide element — hide the timer in the desktop or mobile version.
- Margins — set the outer spacing between the timer block and other email elements.
- Include In — control where the block appears:
- HTML version
- AMP version
- both versions
- Anchor link — jump to a specific section of the same email.
ImportantSome email clients do not support anchor links, including Gmail (iOS), Apple Mail (iOS), Outlook.com (Web), Outlook (Android), Outlook (macOS).
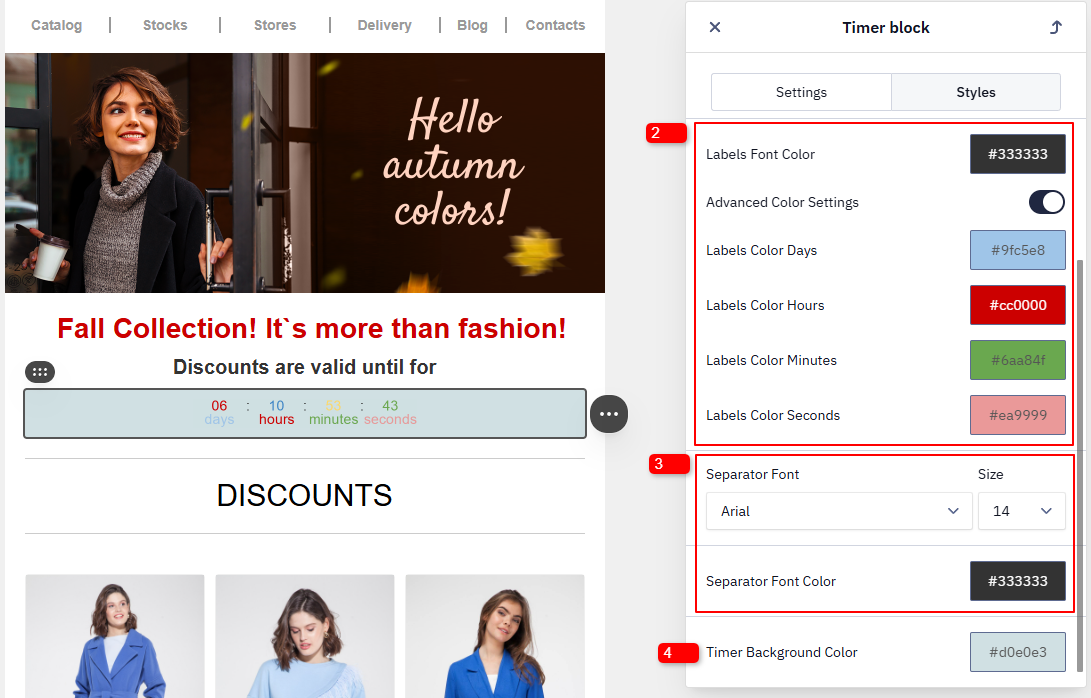
Styles Tab
Use this tab to configure the visual appearance of the timer.
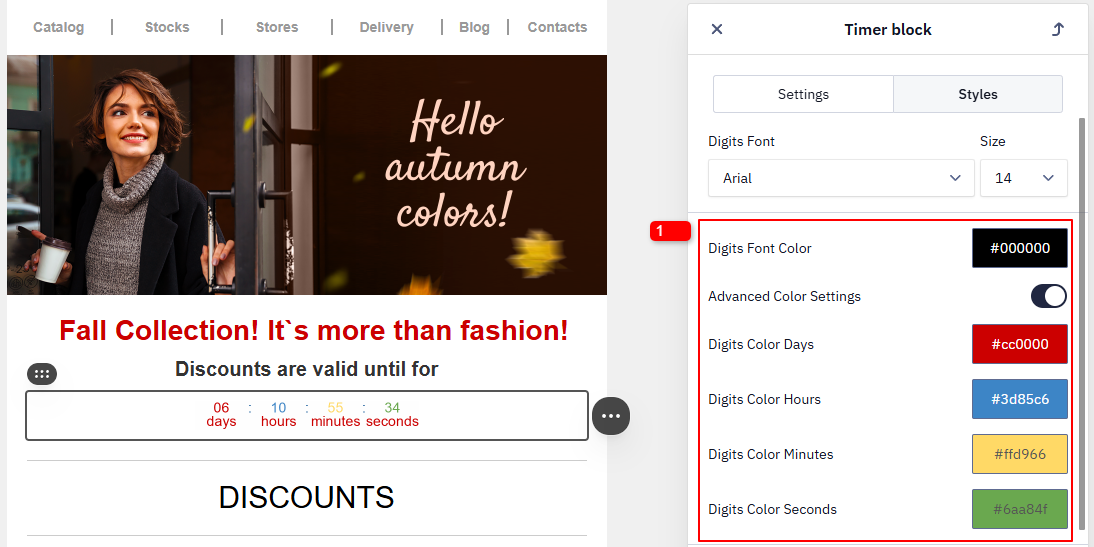
- Digits:
- font family and size
- font color
- advanced color settings (disabled by default)
- Labels:
- font family and size
- font color
- advanced color settings (disabled by default)
- Separator:
- font family and size
- color
- Timer Background Color
Updated about 1 month ago
Did this page help you?