
Import External Data from Google Sheets
External data sources are used for recommendations in emails and for contact base segmentation.
NoteYou can connect more than one Google Sheets data source to the same account — there's no limit on the number of connections. Set each one up separately by repeating the steps below with a different spreadsheet link and a unique data source name.
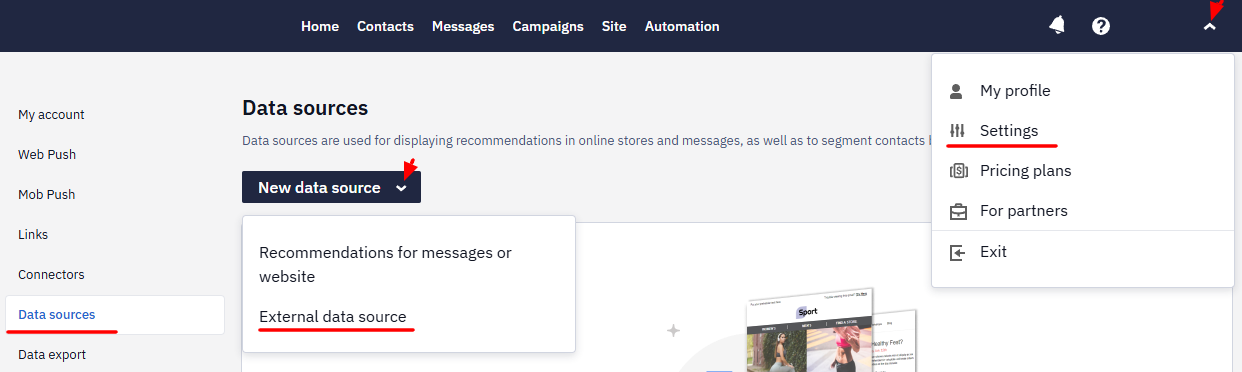
- Go to your personal profile → Settings → Data Sources, click New data source and select External data sources.
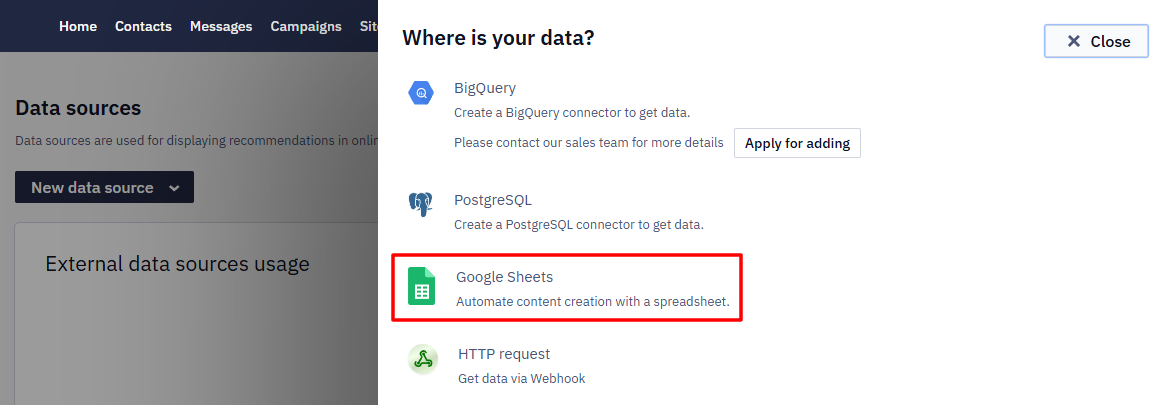
- Select Google Sheets.
- Enter a name and description and insert the link to the corresponding Google Spreadsheet.
Important
- The name may contain only Latin letters (A–Z, a–z), digits (0–9), and the underscore
_.- The name cannot start with a digit.
- The use of spaces or special characters is not allowed.
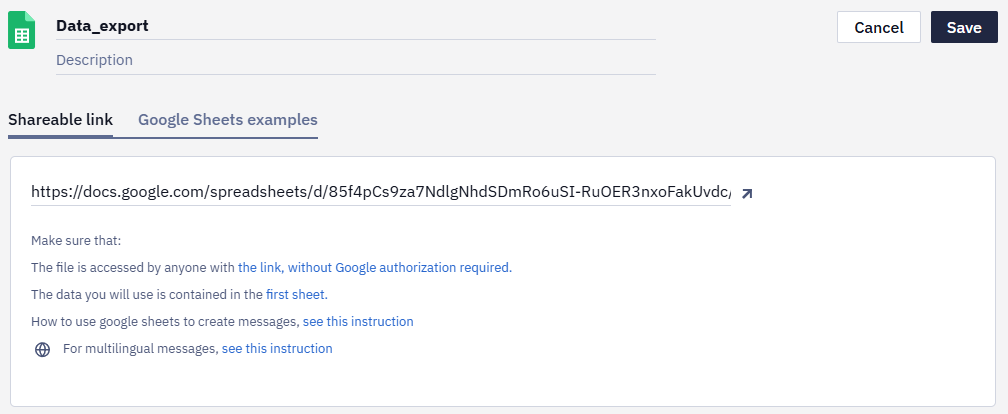
Make sure that:
- The file is accessed by anyone with the link, without Google authorization required.

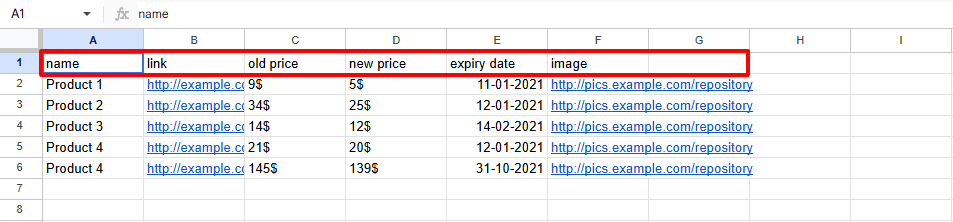
- The first line of the sheet contains headers in Latin.
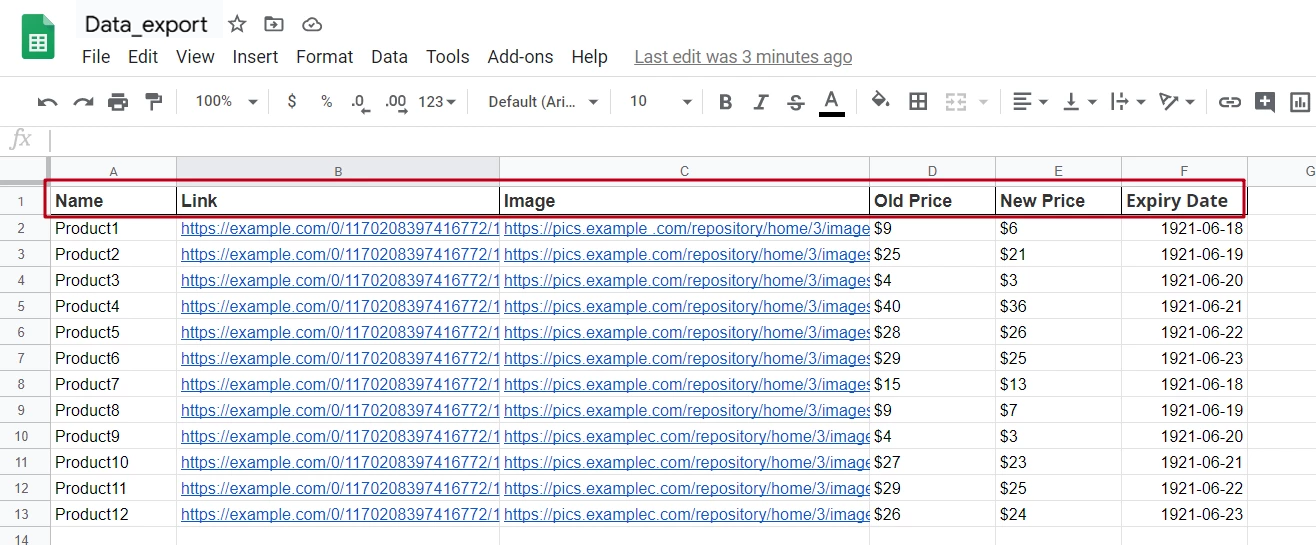
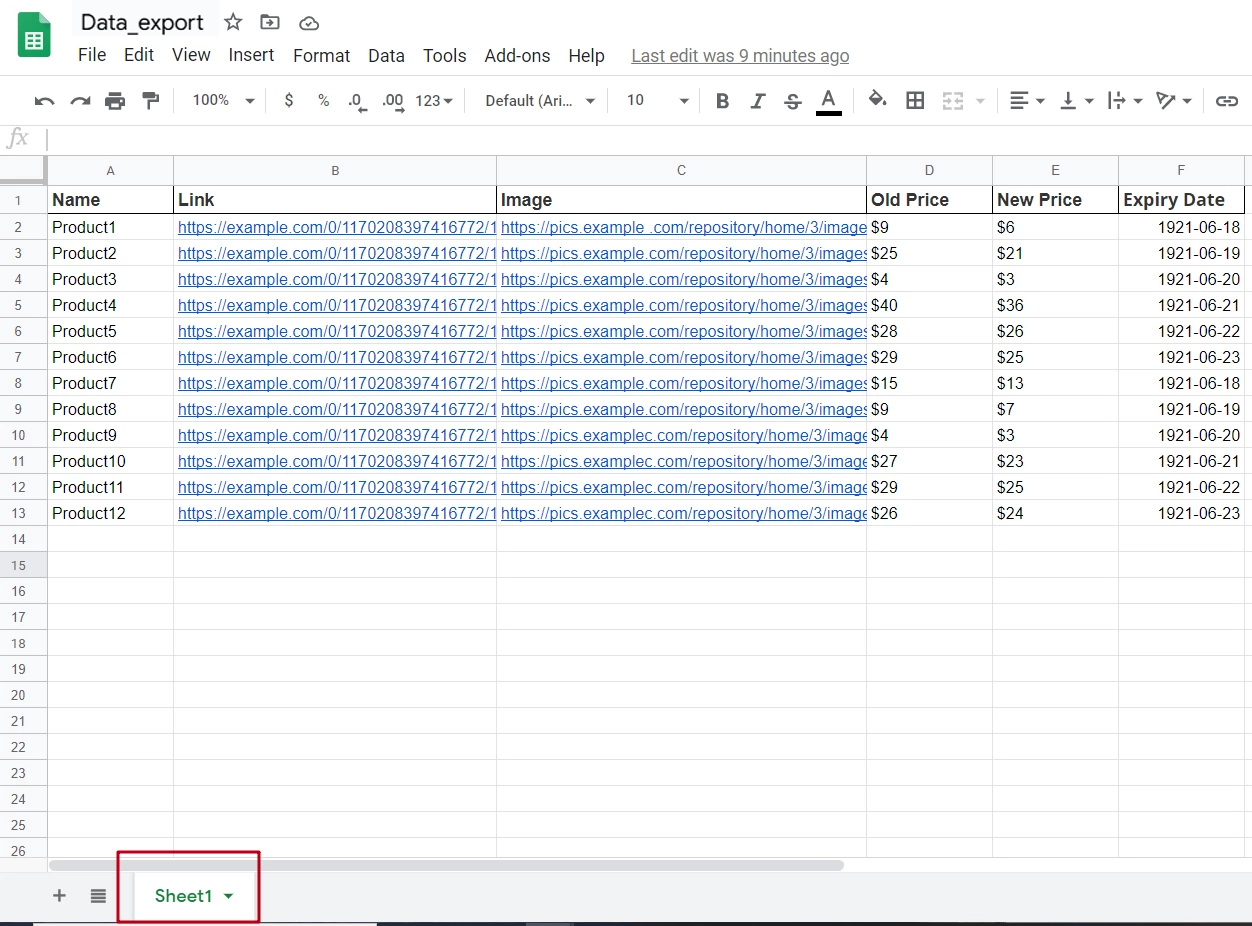
- The data you will use is contained in the first sheet.
- For multilingual messages, name the file sheets with the corresponding language codes according to ISO 639-1 (e.g., en) or
RFC 5646for dialects (e.g.,es-MX).
NoteMultilingualism in messages is not supported for all dialects, if you did not find the one you need, please contact our support at [email protected].
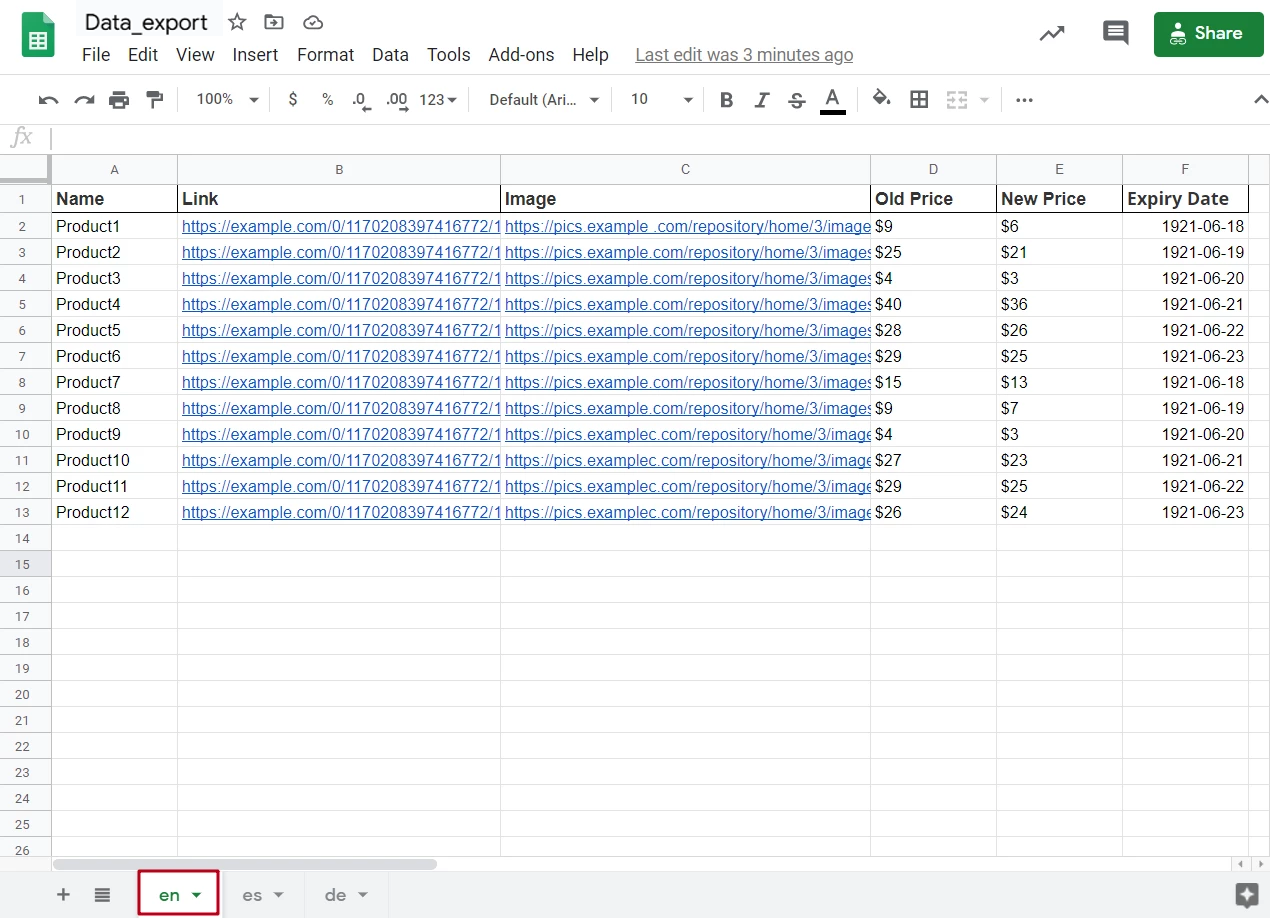
Specify the default language for the message this data source will be used in. If the default language is not specified, the content in the language of the first sheet will be used in the message.
- Click Refresh data. Data from the spreadsheet will be available for preview. By default, only the first 10 lines are previewed.
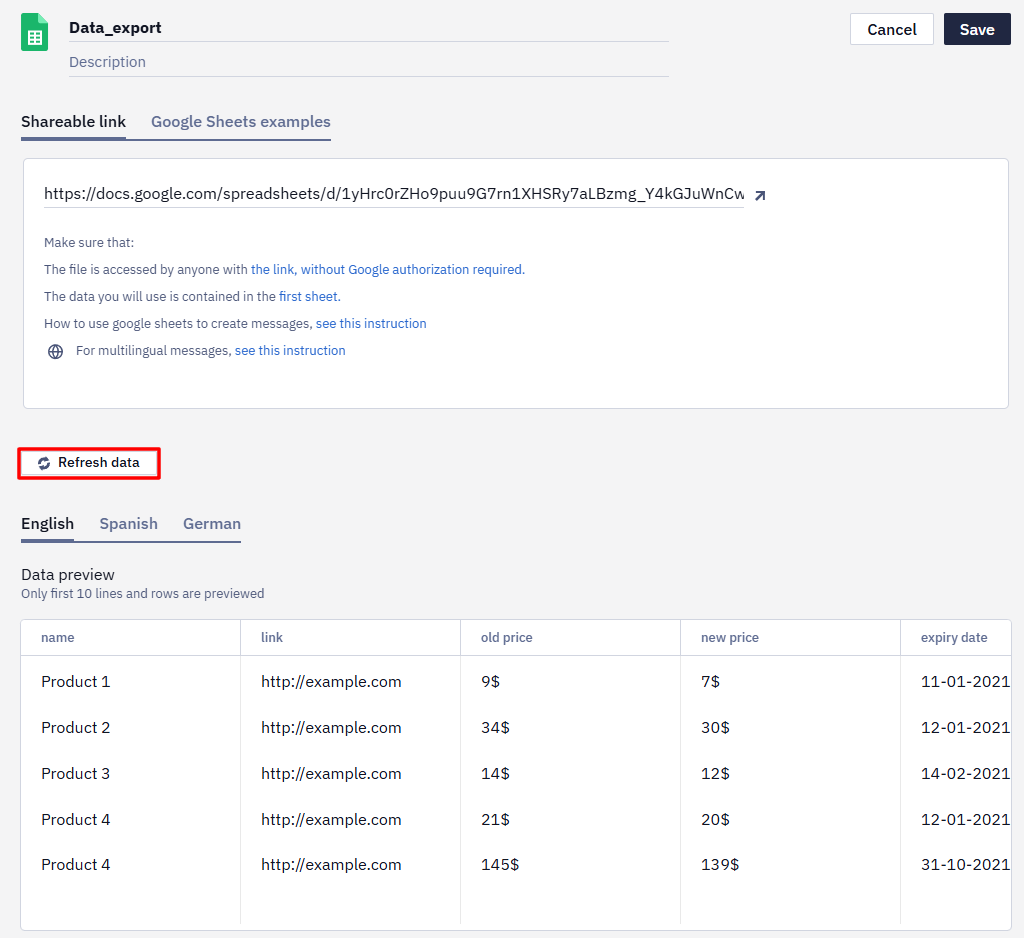
- Click Advanced settings to specify the number of recommended items that will be displayed in the email. The message will not be sent if the quantity of products in the feed doesn’t match the specified range.
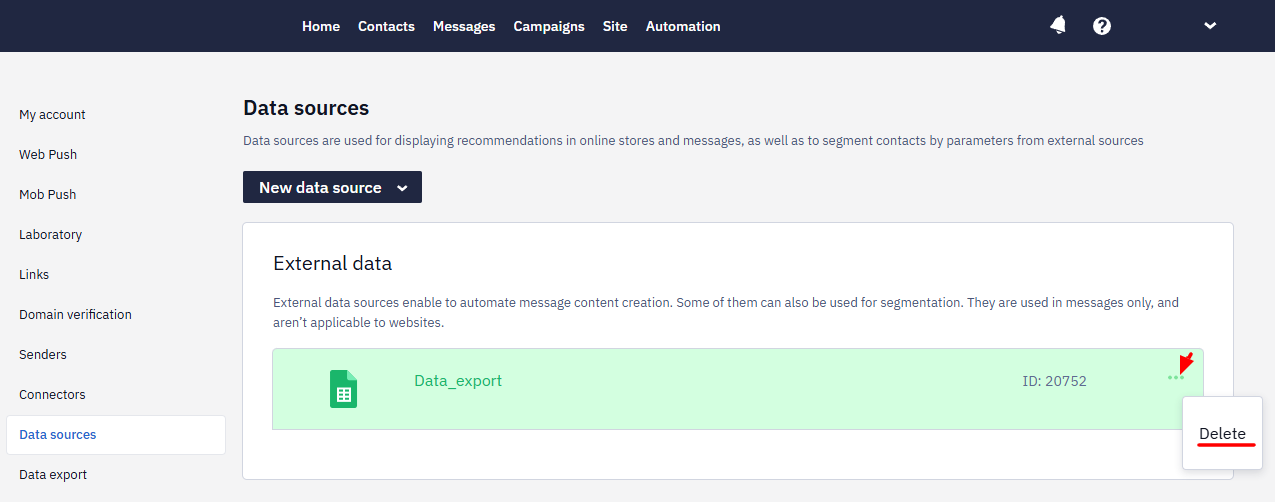
- Click Save. The created data source will be available in the general list. To remove it, click three dots on the right → Delete.
If you need to edit the data (for example, in case of a typo or no longer valid prices), make necessary edits to the Google Spreadsheet, and click Refresh data in the corresponding data source. Changes will be applied immediately.
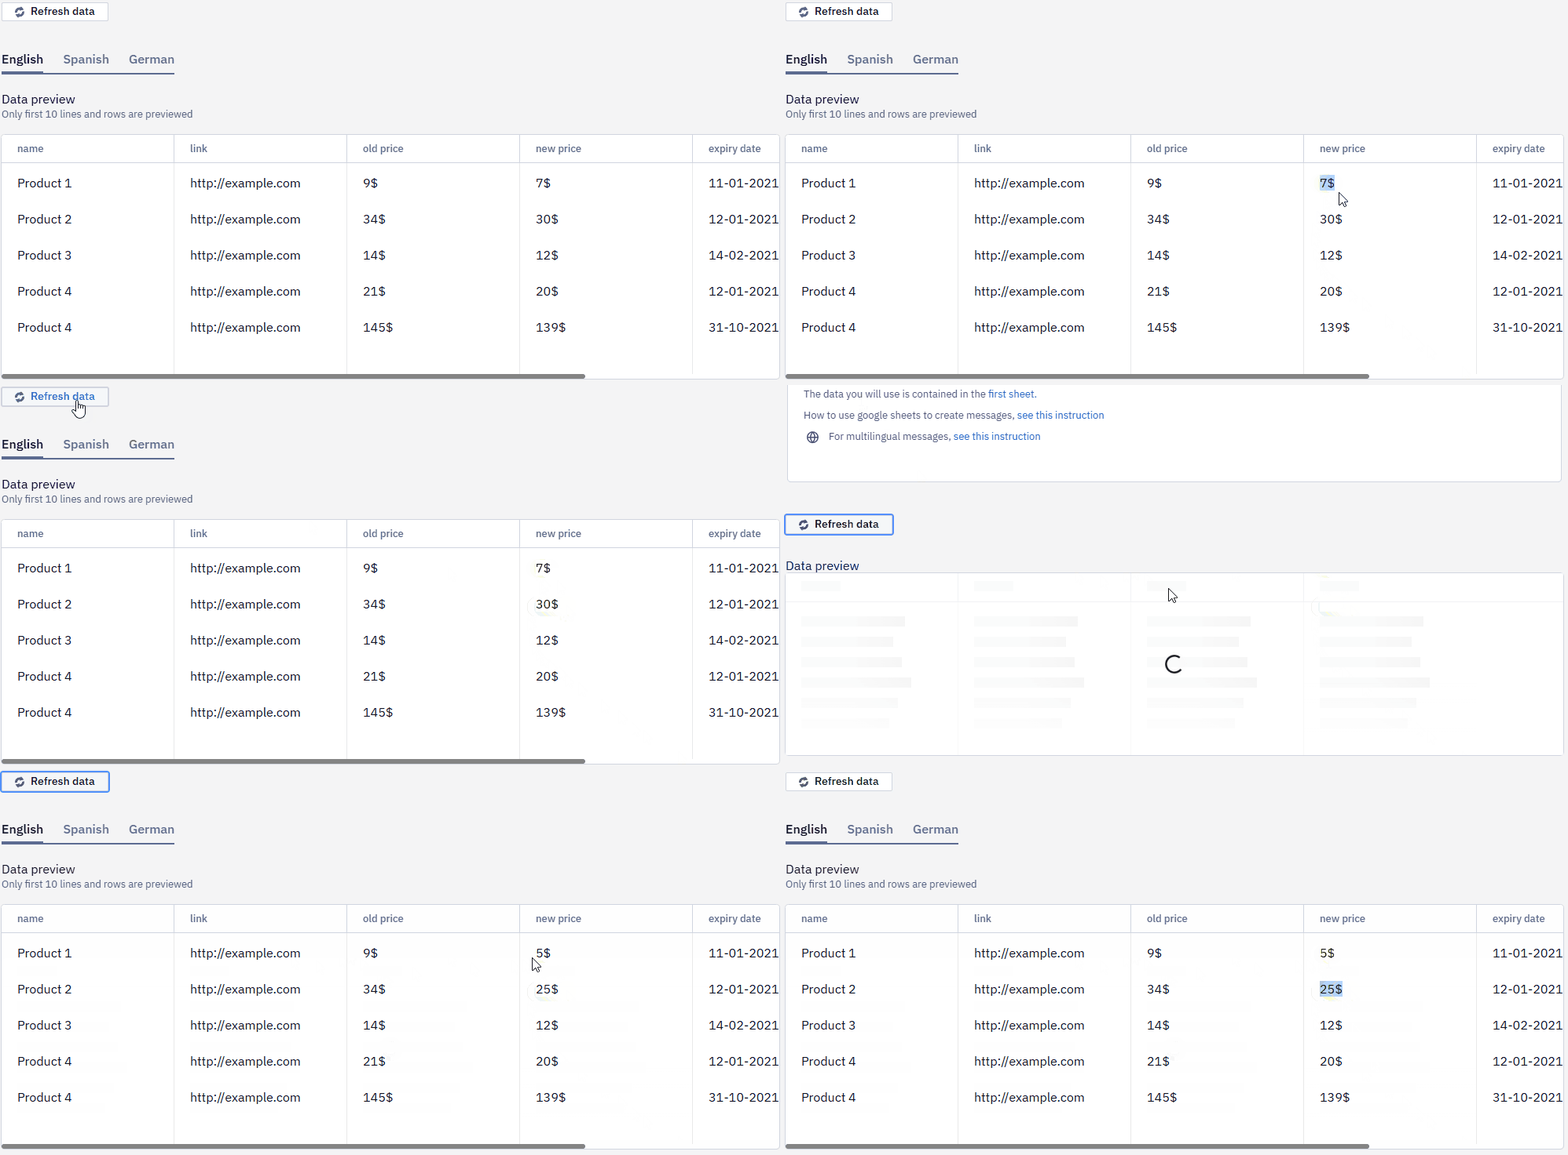
How to Add Data from Google Spreadsheet to an Email
The data is added to the email via Velocity.
- In Messages → Messages, select an email with configured dynamic modules or create a new one.
- Click the stripe with product cards, click Code editor and insert the code with the corresponding data source as shown below.
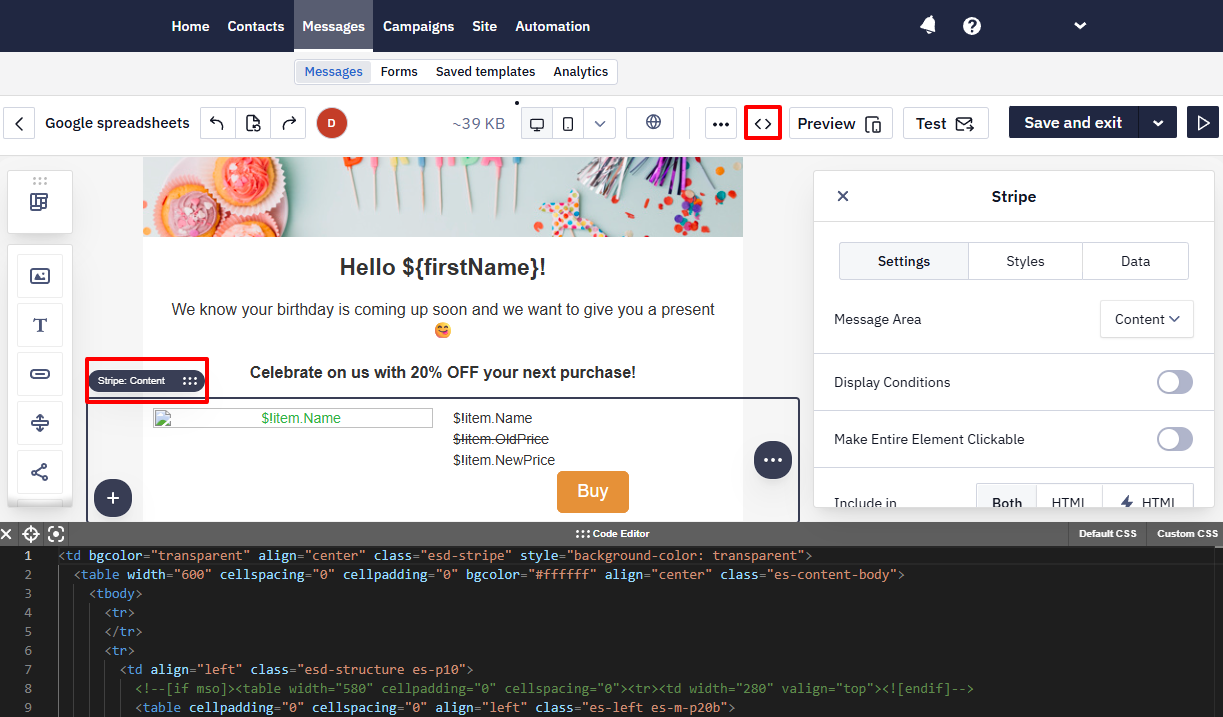
- In the stripe that will be used to products, add the following prefix before each variable.
<!--#foreach($item in $Products)-->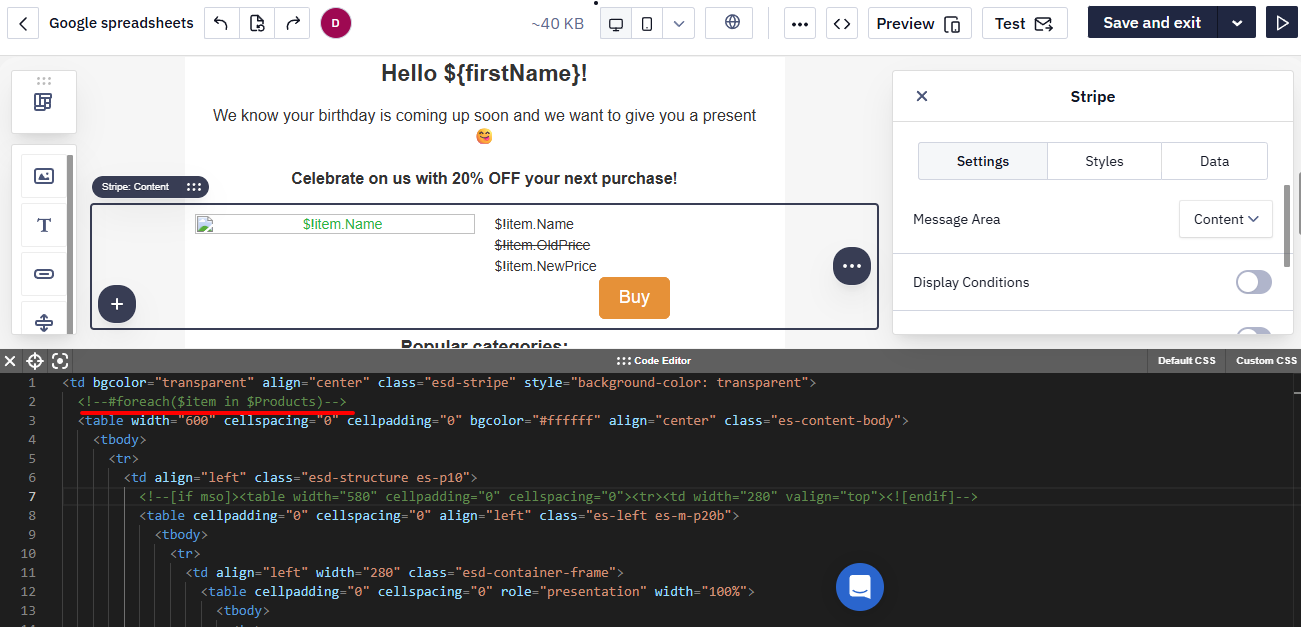
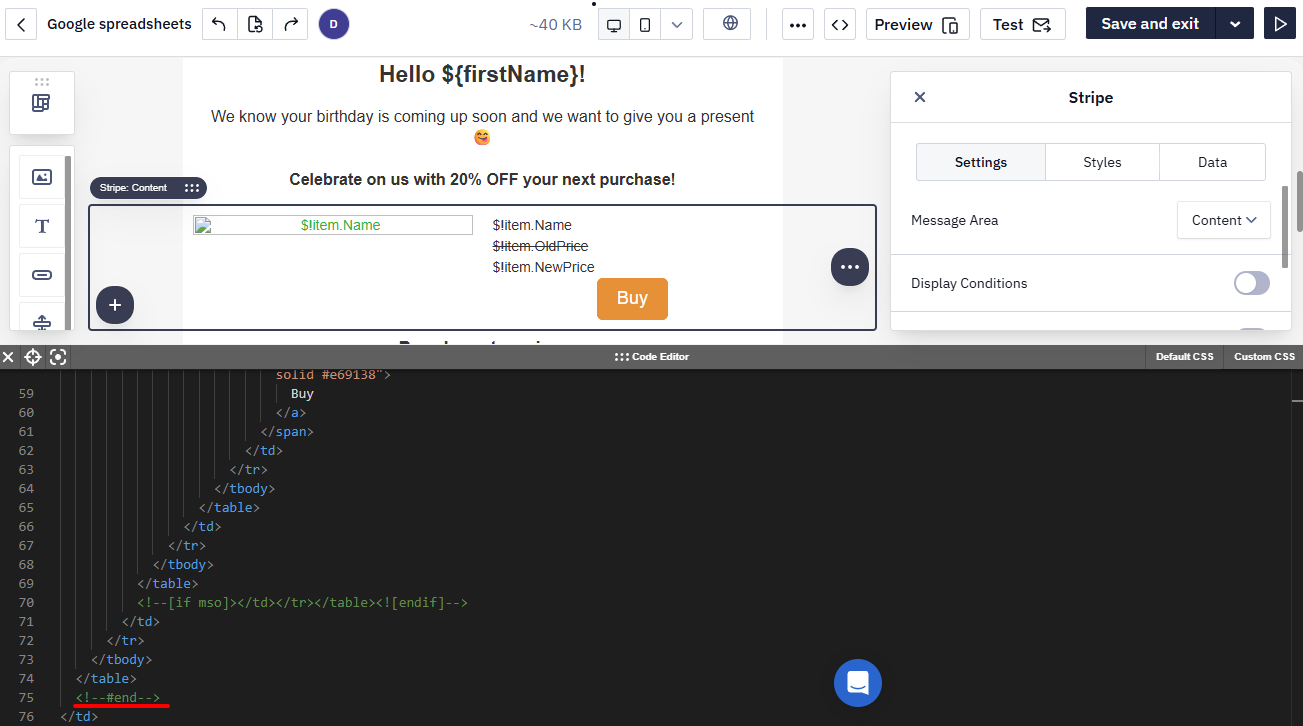
- Make sure the stripe with dynamic content ends with the code
<!--#end-->
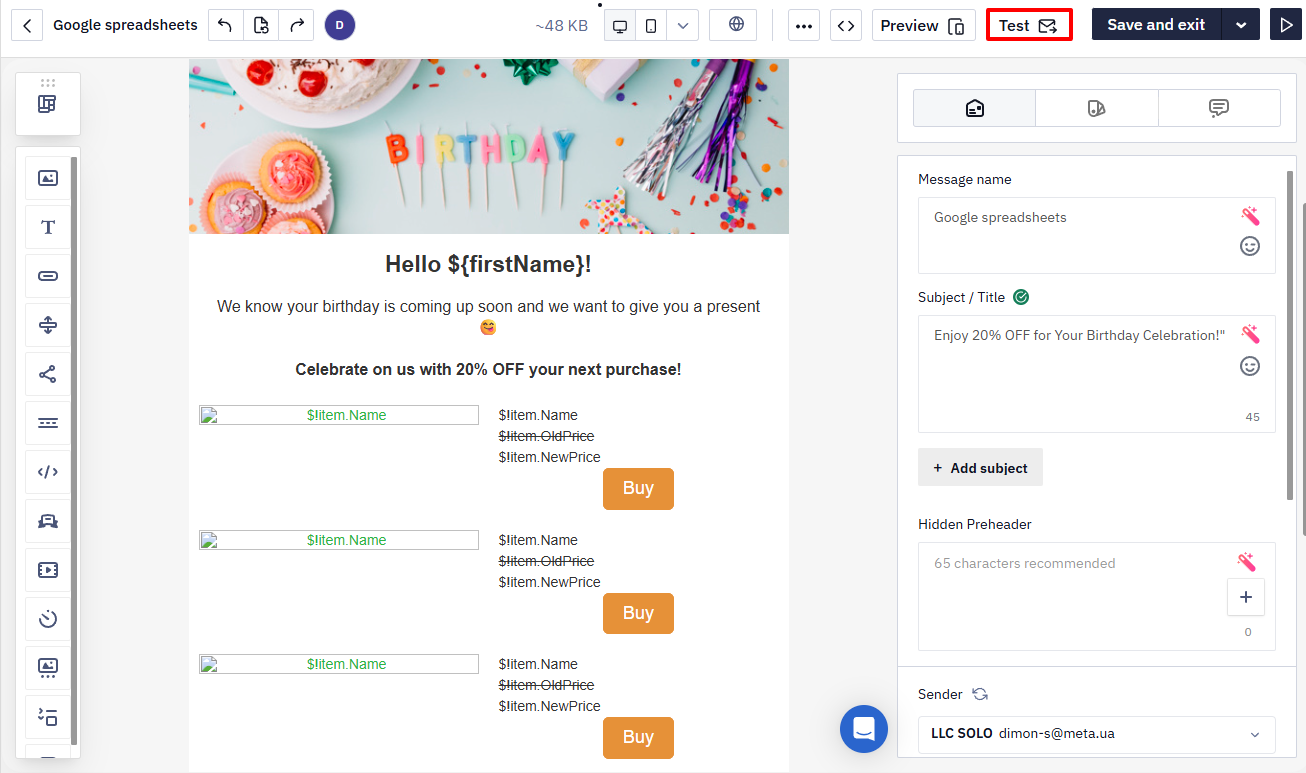
- Specify product parameters from the spreadsheet (name, link, image and prices here) and add their variables to each product card:
$!item.Name$!item.Link$!item.Image$!item.OldPrice$!item.NewPrice
- To test whether the product data is inserted correctly, send a test email
If you’ve set everything right, the data from the website will be added at the moment of the launch, and the email would look as follows:
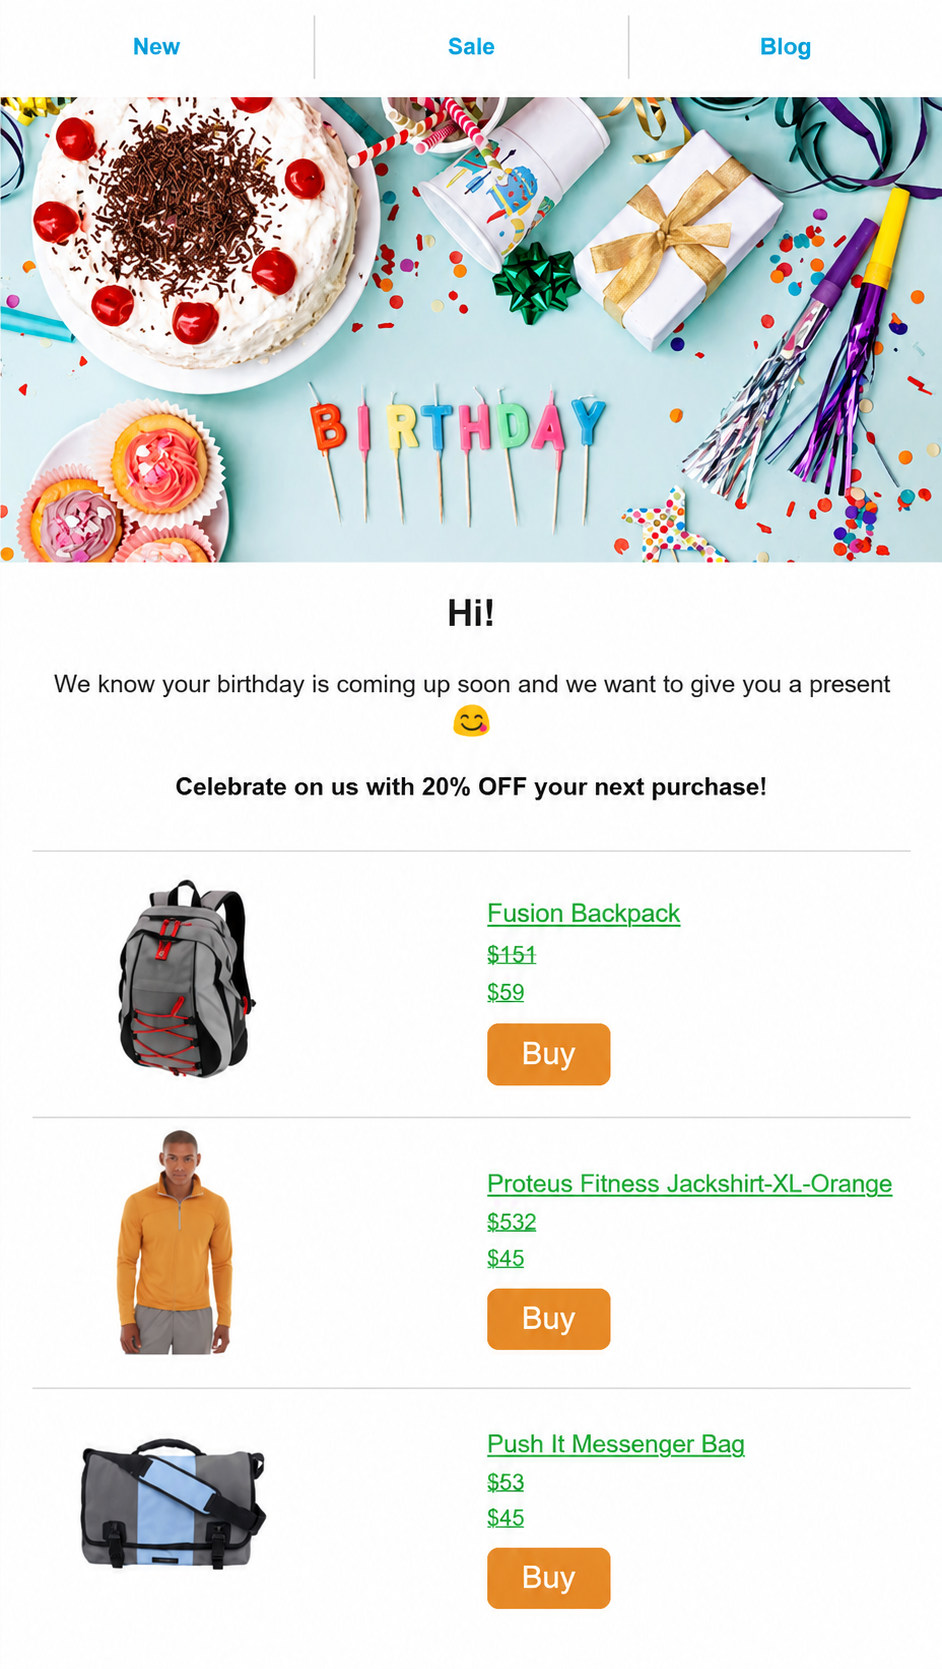
You can change the data in the spreadsheet and refresh the data source, and the updates will be applied immediately. They will be available for new campaigns; products in already sent campaigns will not change.
Updated 3 months ago