
Replacing Double Opt-In System Workflow
System workflows and events make usage of the platform more convenient. For example, Yespo widgets have a subscription confirmation workflow attached by default. When creating a form, it is enough to activate the switcher so that all new contacts who fill out the form on the site receive an email with a link to confirm the subscription.
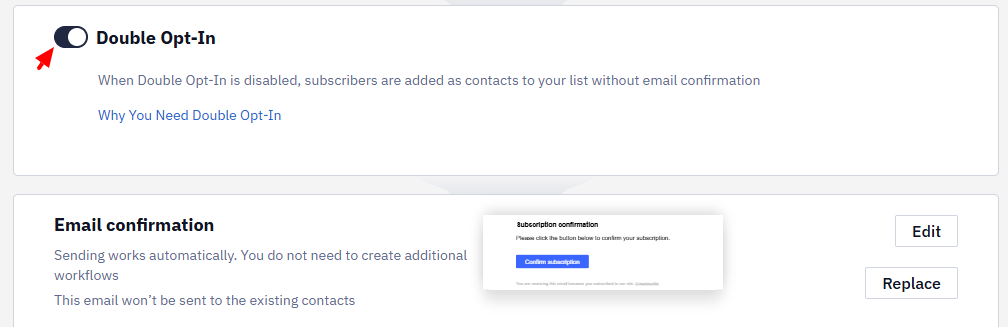
The built-in system workflow sends one confirmation email, specified in the widget settings, no more than once every 72 hours. This system workflow doesn't appear in the account's workflow list.
NoteThe "You are already subscribed" status is determined by the contact's actual status: the check uses the email address and also the contact identifier stored in the browser's
localStorage. Because of this, a repeated subscription from the same browser (even with a different email address) may not send another confirmation email.
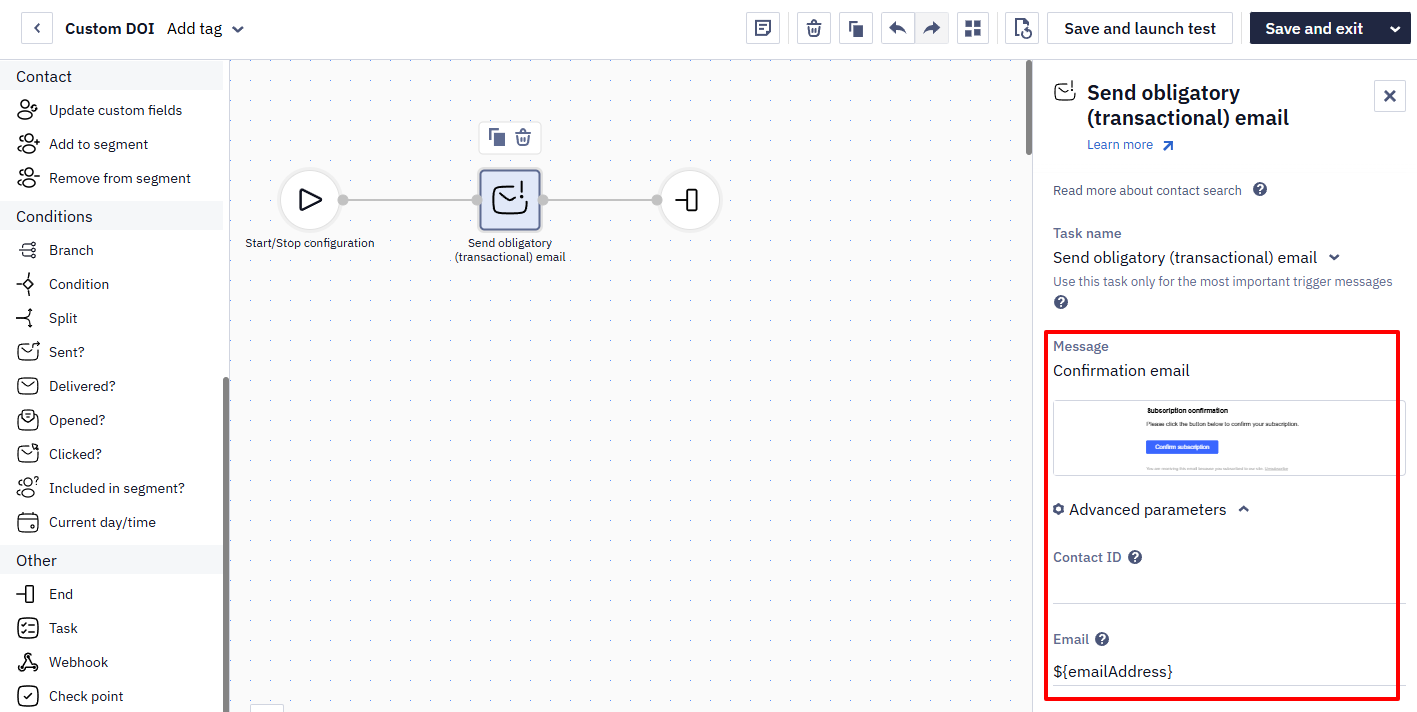
In some cases, you may need to change the system workflow: for example, send one or more messages asking to confirm the subscription to those who did not do this in the first email.
System workflow replacement algorithm:
- Setting up the subscription confirmation link in the email.
- Creating a workflow.
- Configuring trigger.
NoteIf you replace the system workflow, the new mailing scheme will be applied to all widgets in the account, while the emails can still be unique for each form.
Setting Up a Confirmation Link in an Email
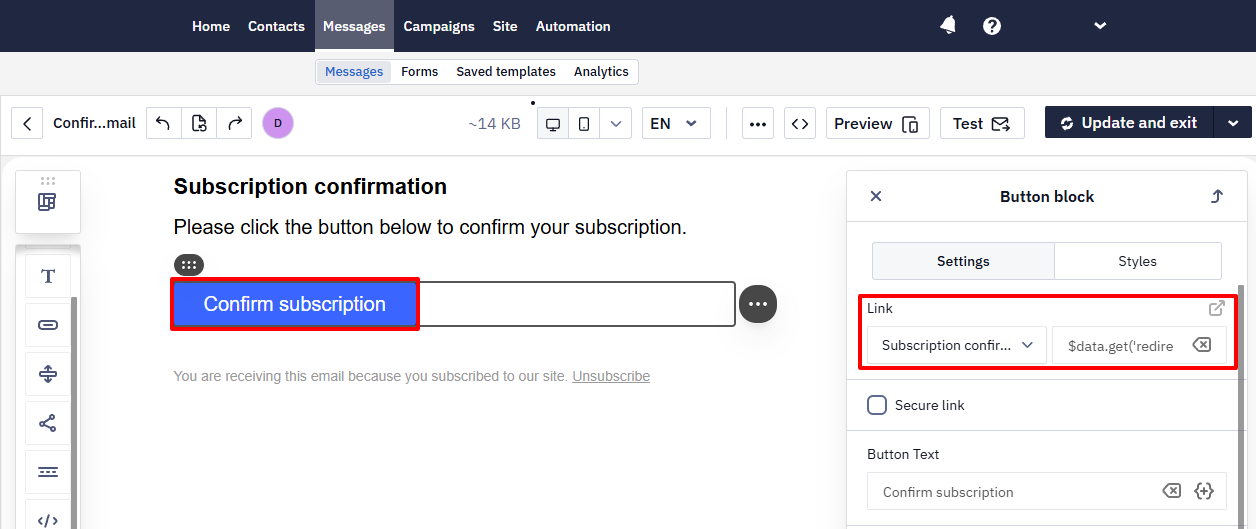
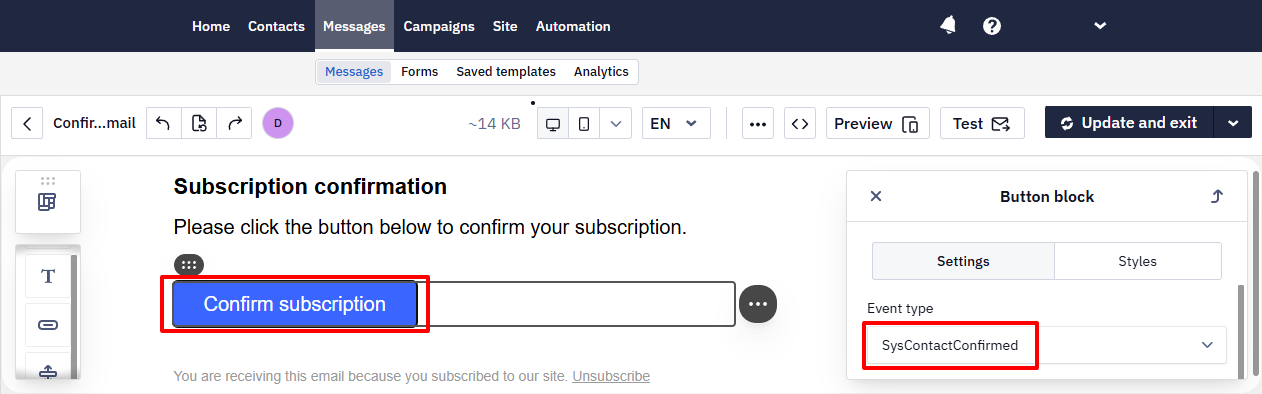
The button with the confirmation link in the email for widgets should have the following settings:
Link:
- Type: Subscription confirmation,
- Link:
$data.get('redirectUrl')
Event type: SysContactConfirmed
Creating Workflow
Create a new workflow. It will be triggered by the SysContactConfirmationRequest system event, which is sent to Yespo when a user submits data from a widget on the site.
For example, if you want to remind about subscription confirmation three times with an interval of an hour, the workflow will be as follows:
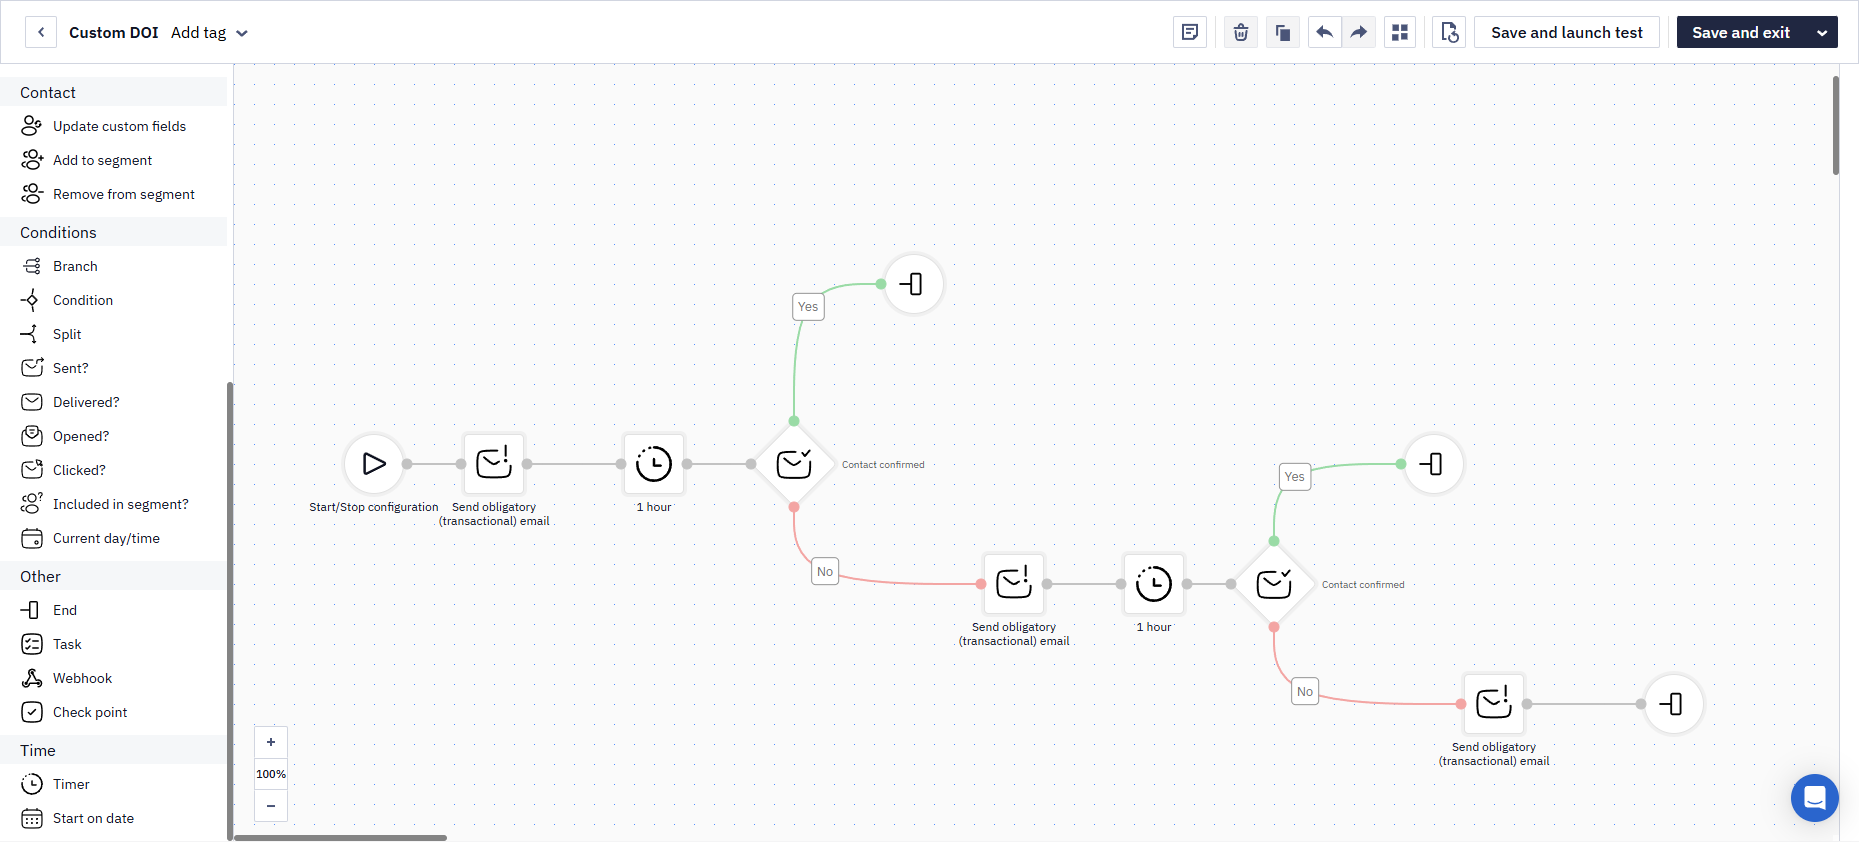
Workflow blocks:
- Start.
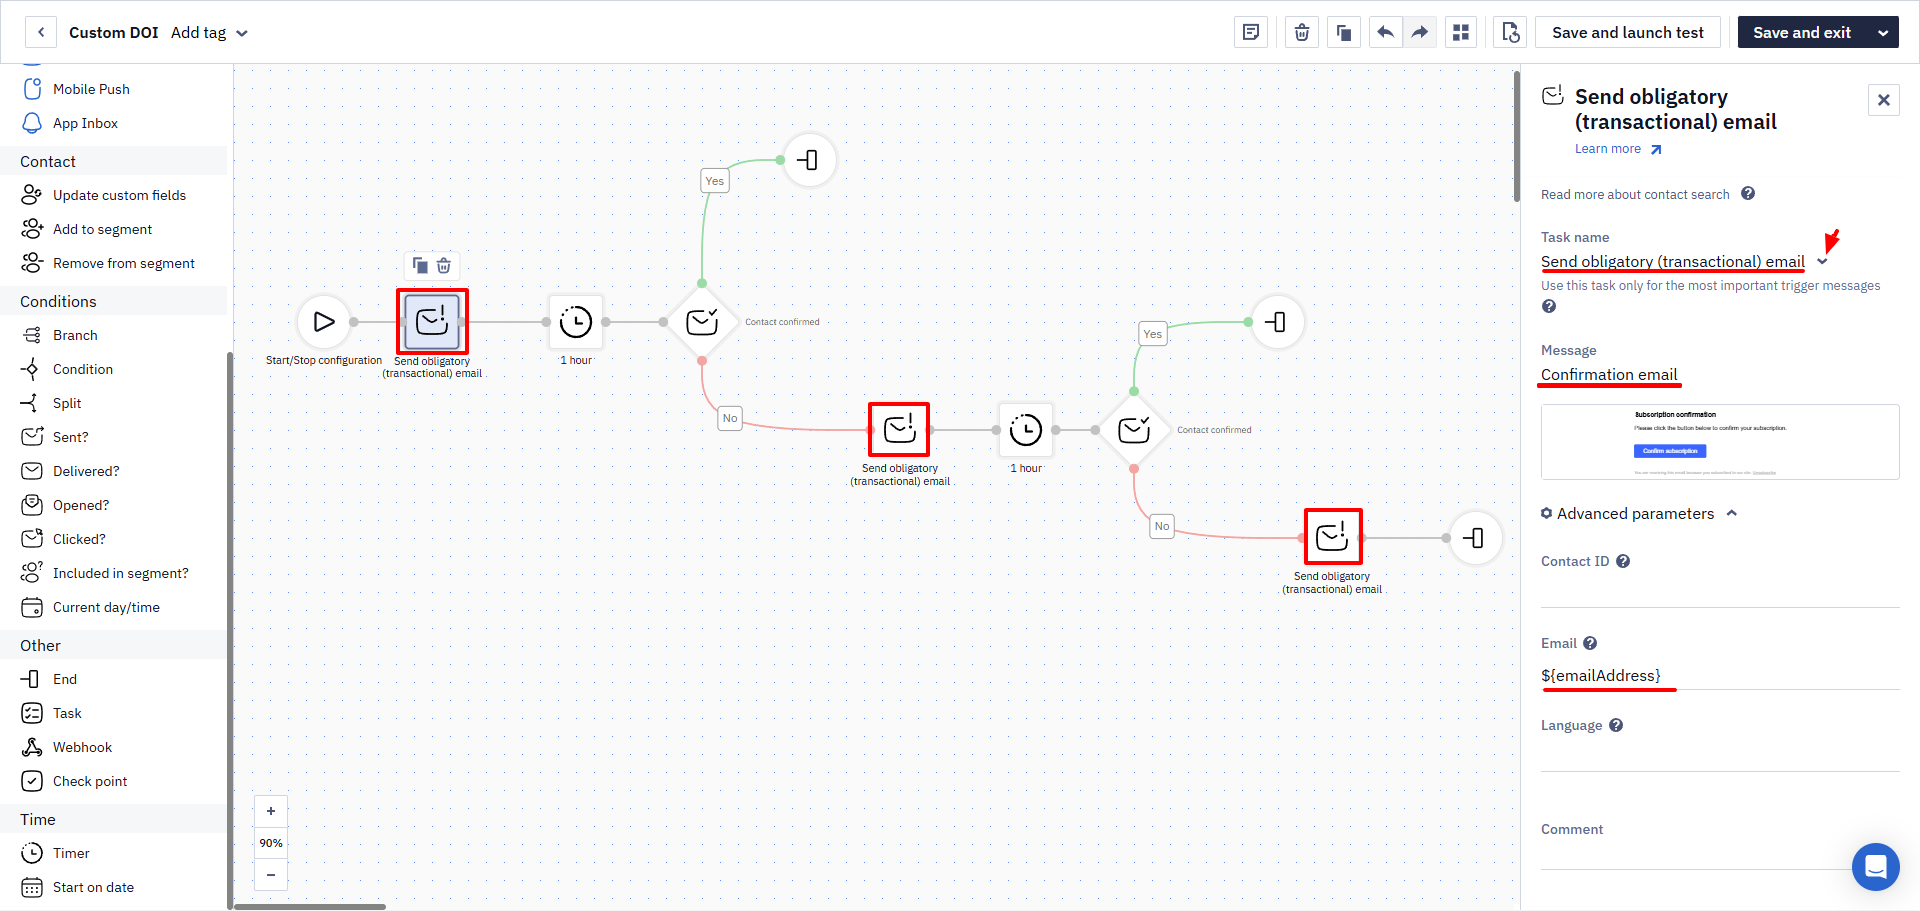
- The Send obligatory (transactional) Email block with the following settings:
- Contact’s email: specify the
${email}variable — the system will substitute from the event the email of the user who filled out the form. - Message: specify the
${messageId}variable — the system will substitute from the event the message specified in the settings of the widget that the user filled out.
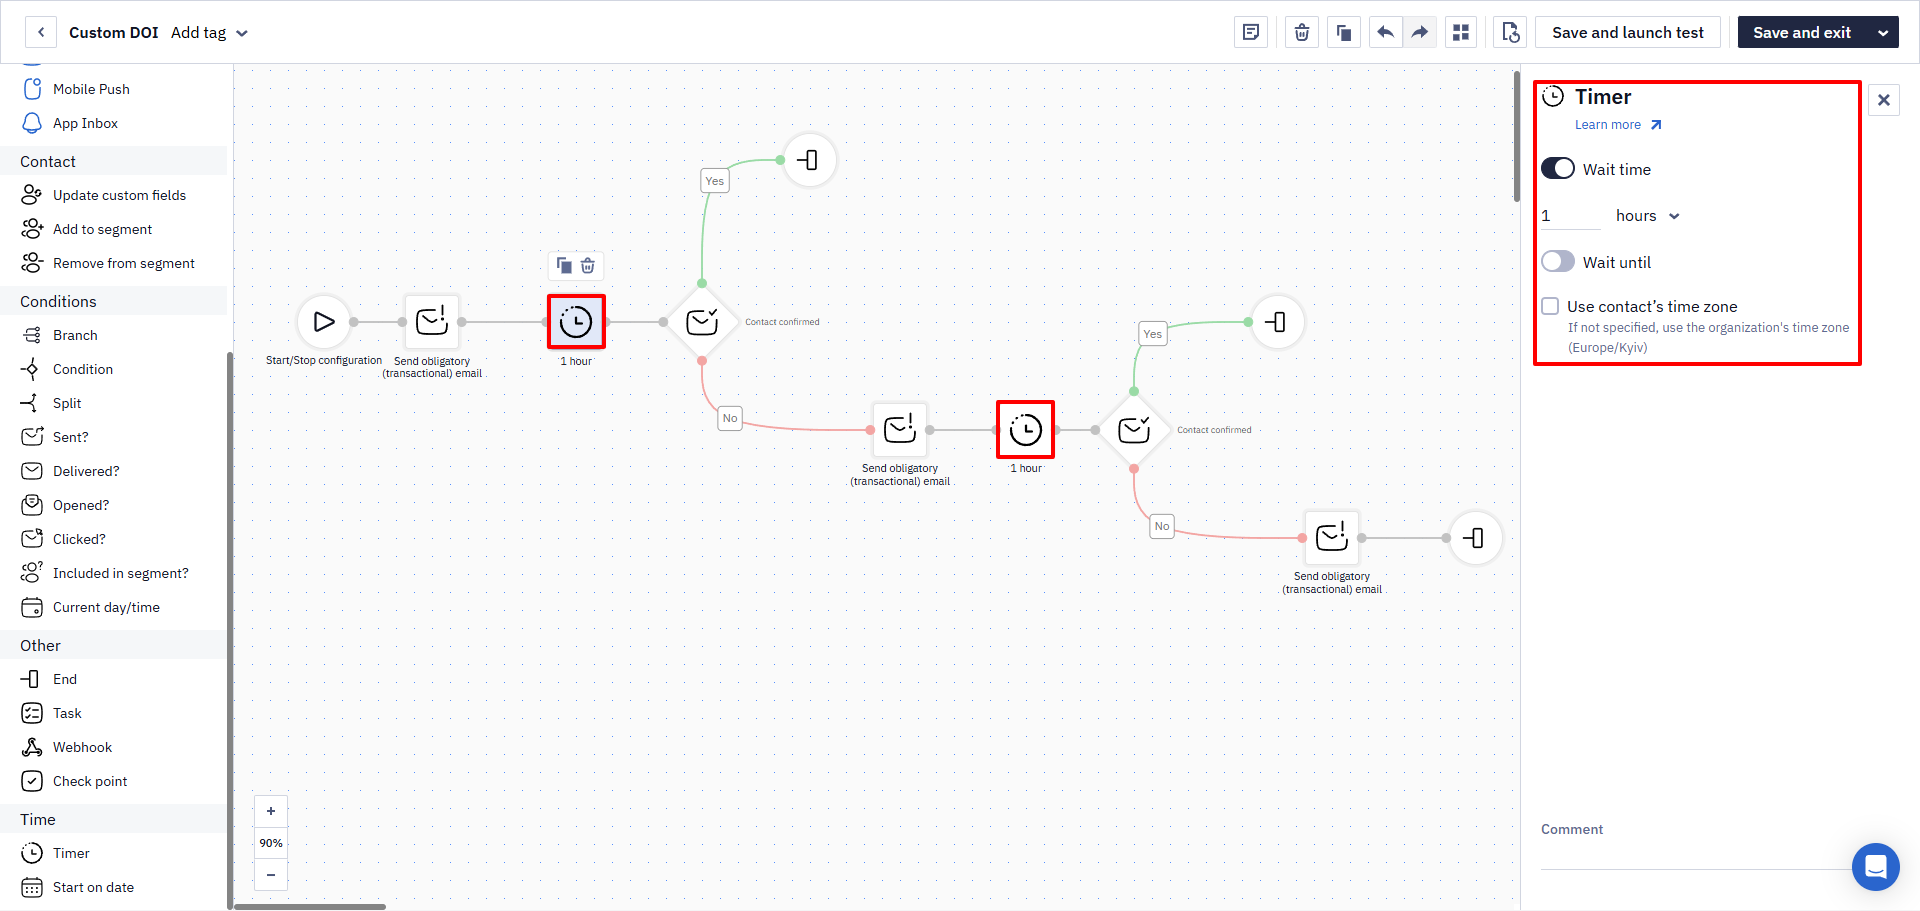
- Timer: specify the time to elapse between subscription checks.
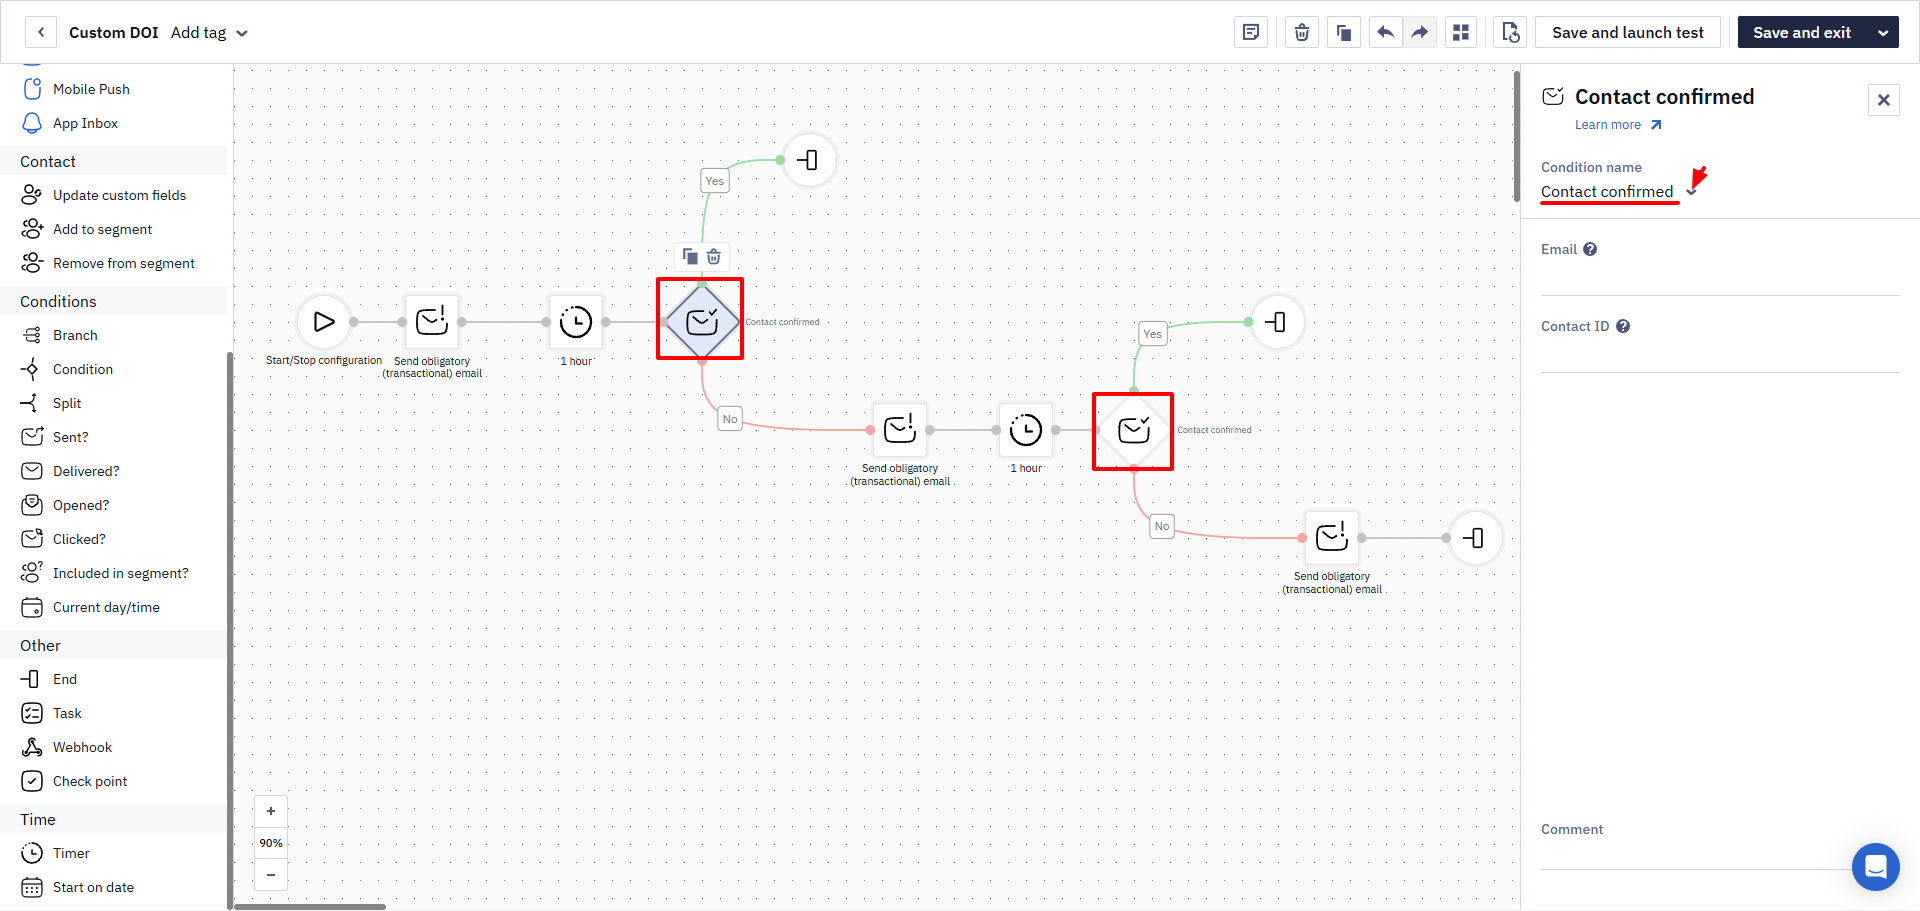
- The Contact confirmed condition checks if the user has confirmed their email: if yes, the workflow ends; if not, sends the message again.
- End.
NoteAn email sent with the Send obligatory (transactional) Email block also reaches contacts with the Unsubscribed status. This is the expected double opt-in behavior: a contact who unsubscribed earlier and then submits the form again receives the confirmation email and can confirm the subscription anew.
After making the settings in the workflow blocks, save it and go to the launch settings.
Configuring Trigger
- Click Trigger configuration in the list of workflows.
- Activate the Start configuration switcher.
- In the Start configuration, select:
- Event-based;
SysContactConfirmationRequestevent;- arbitrary conditions for processing unique events.
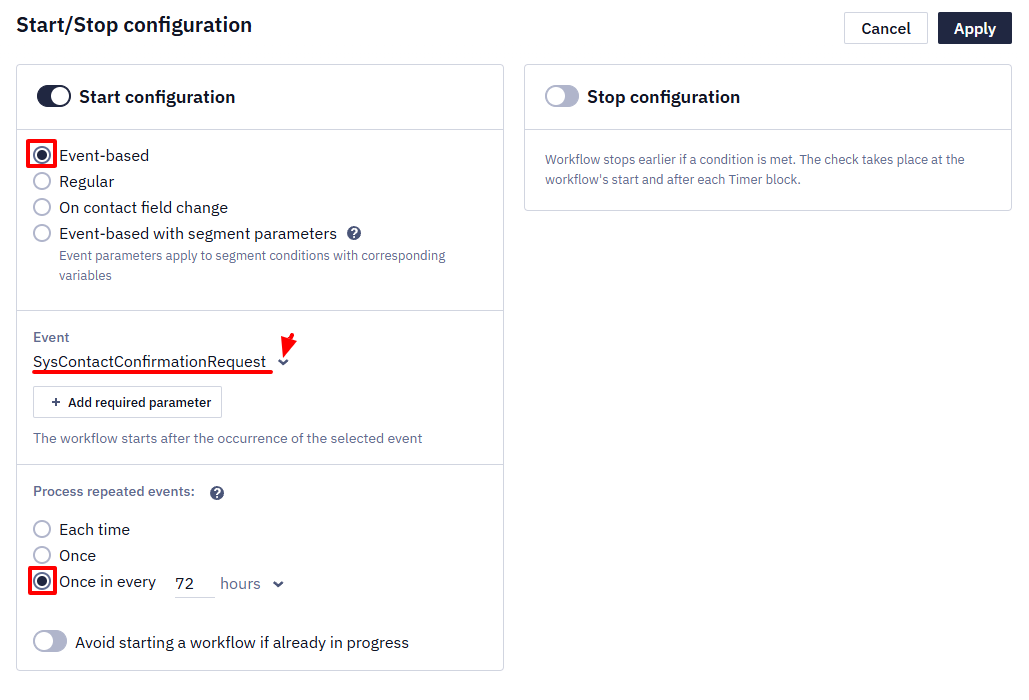
- Click Apply.
Once you activate the workflow, the system will apply it to all widgets in your account.
A repeated subscription within 72 hours doesn't start the workflowSystem workflows process one unique event per contact once every 72 hours. If a contact confirms a subscription again within that window — for example while testing — the workflow doesn't run a second time, so no welcome message goes out. Space test subscriptions further apart, or use a different address for each run.
Updated about 1 month ago