
Email Domain Authentication in Cloudflare
Learn how to protect your emails from scammers and spammers.
We offer three options for domain authentication – Full, Full+ and Subdomain – for each of the below DNS (Domain Name System).
NoteIn each record below, Name uses your own domain or subdomain (the exact value depends on which authentication option you're setting up), while Target/Content/Mail server use a fixed value that's the same for every account:
dkim.esputnik.com,spf2.esputnik.com, ortrap.esputnik.com.
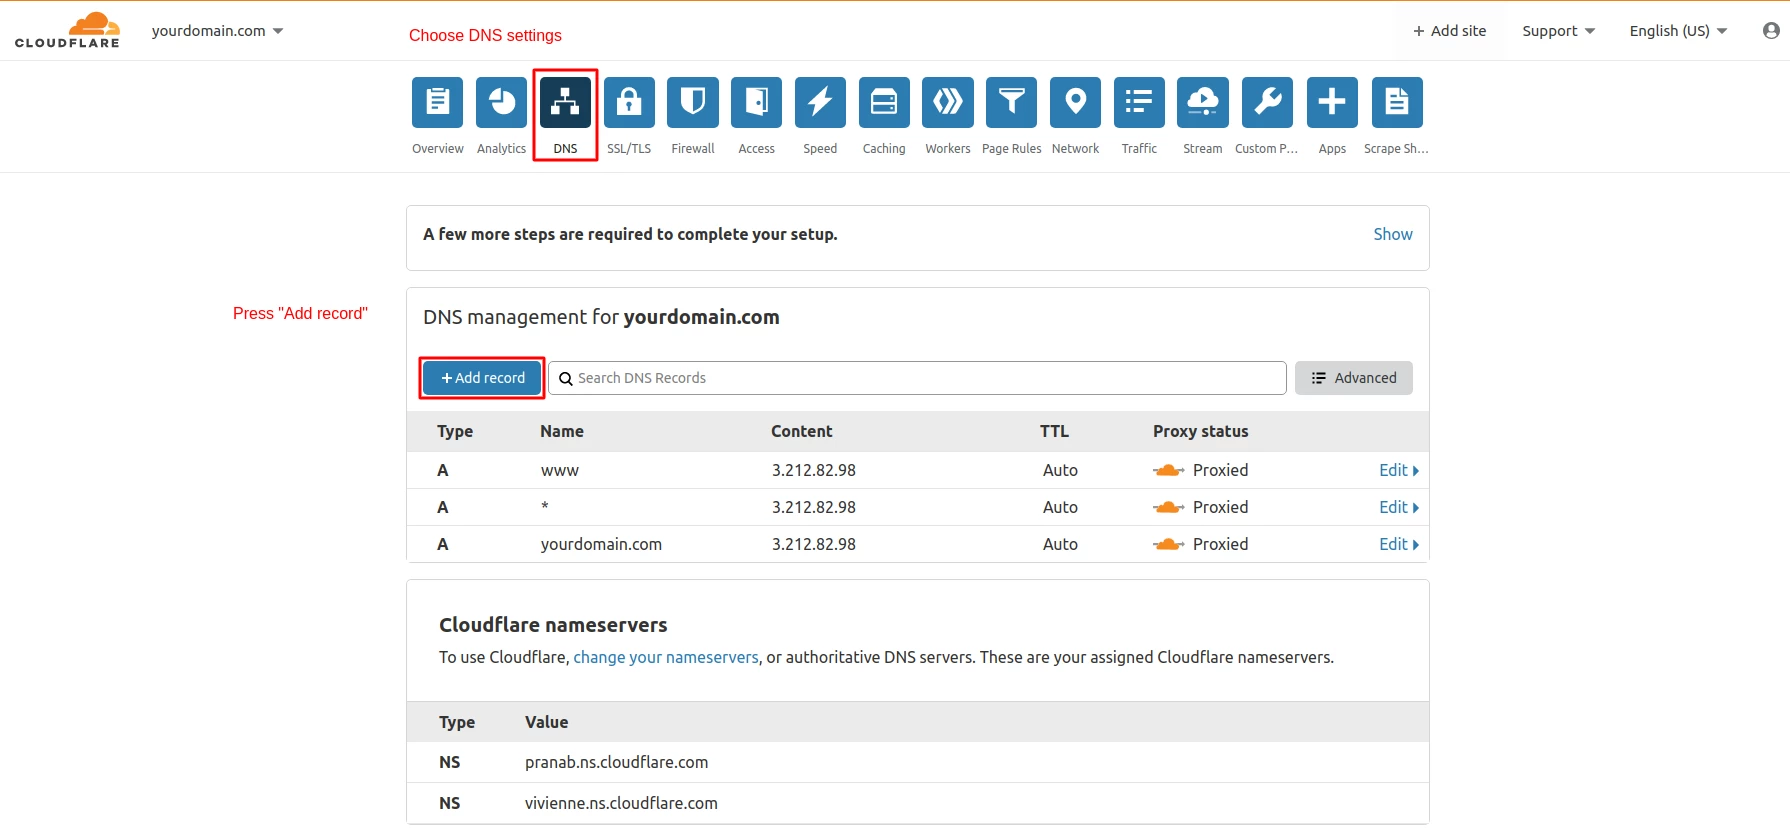
Log in to your Cloudflare account, go to the DNS app and click Add record.
Full
To verify your domain within the Full option, add the following records:
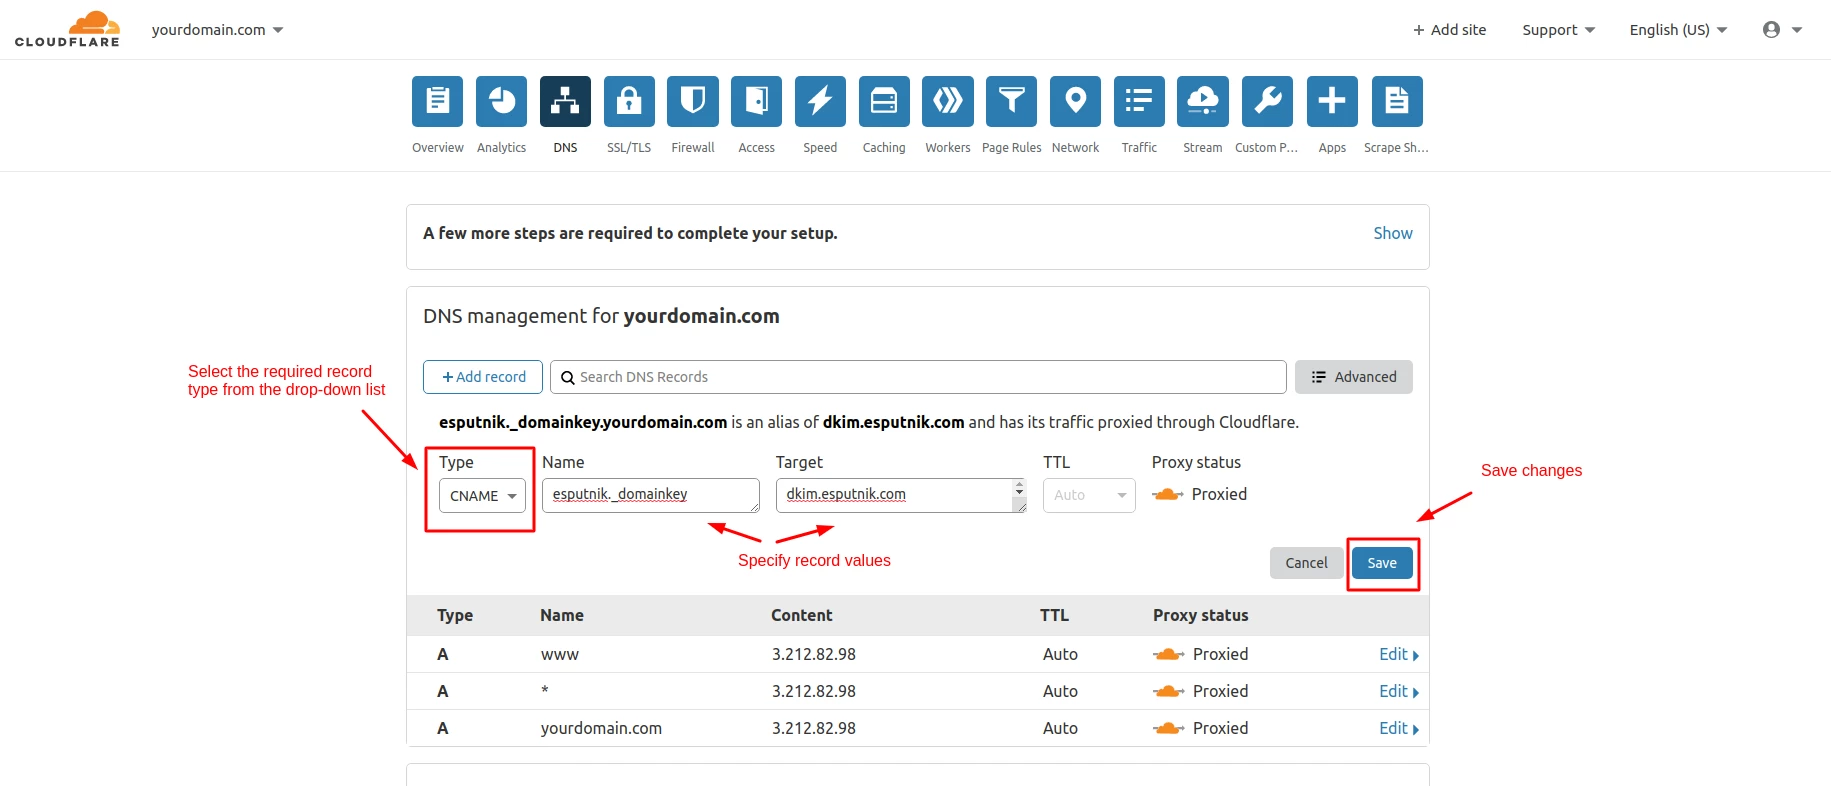
CNAME
- In Type, select CNAME.
- In Name, enter esputnik._domainkey
- In Target, enter dkim.esputnik.com.
- Click Save.
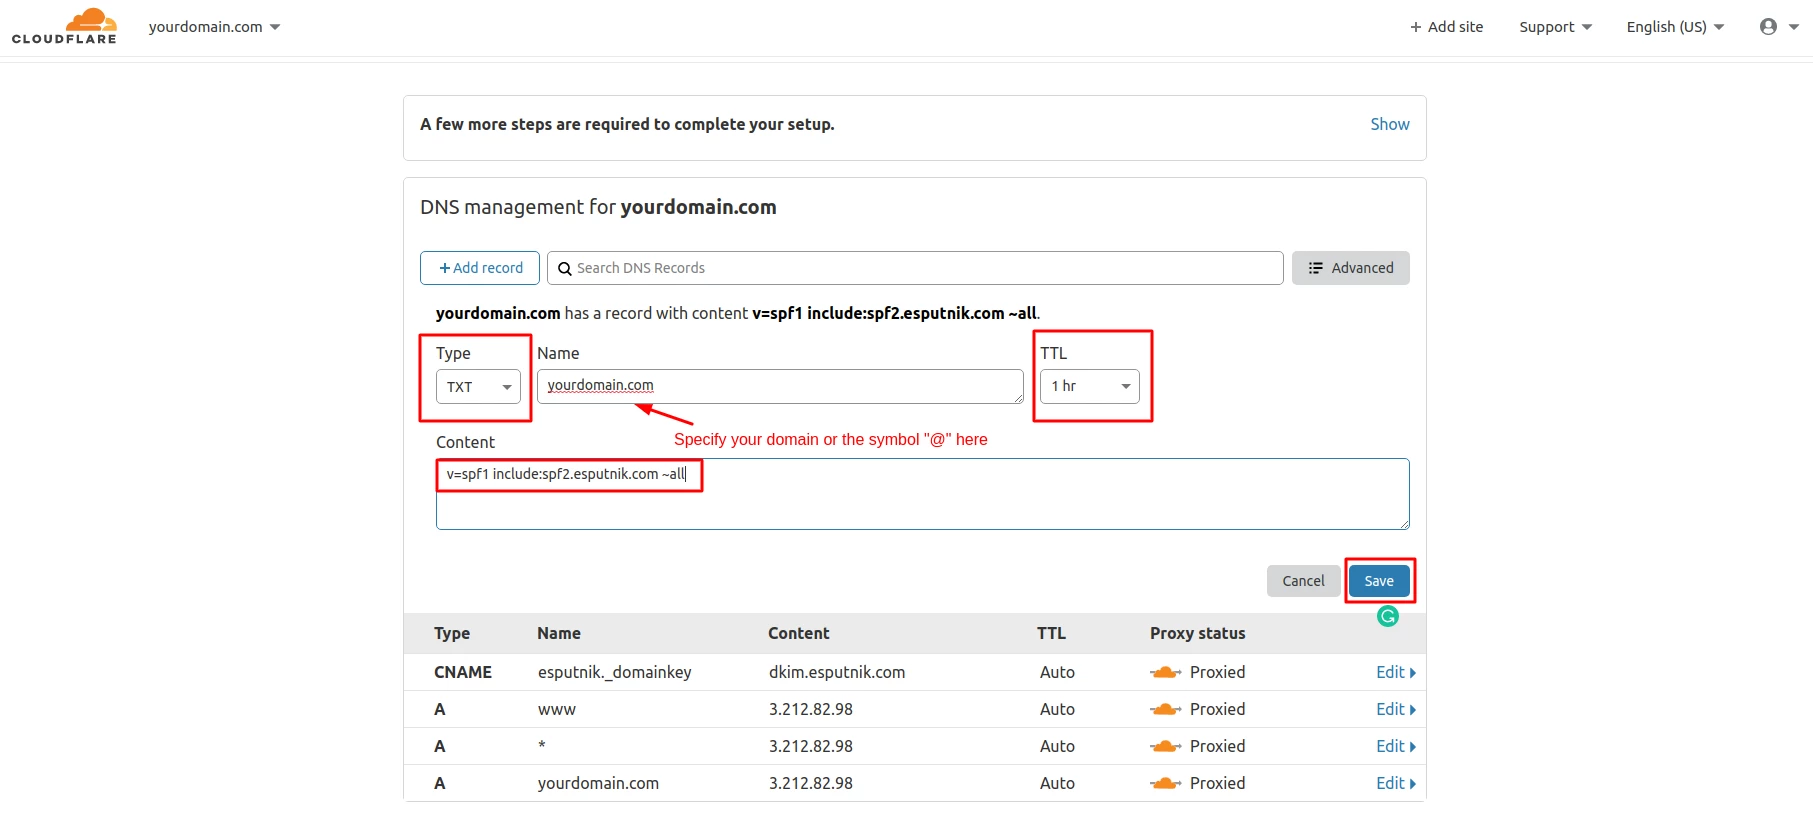
TXT
- In Type, select TXT.
- In Name, enter your domain name.
- In TTL, select 1 hour.
- In Content, enter v=spf1 include:spf2.esputnik.com ~all
- Click Save.
Full+
To verify your domain within the Full+ option, add the following records:
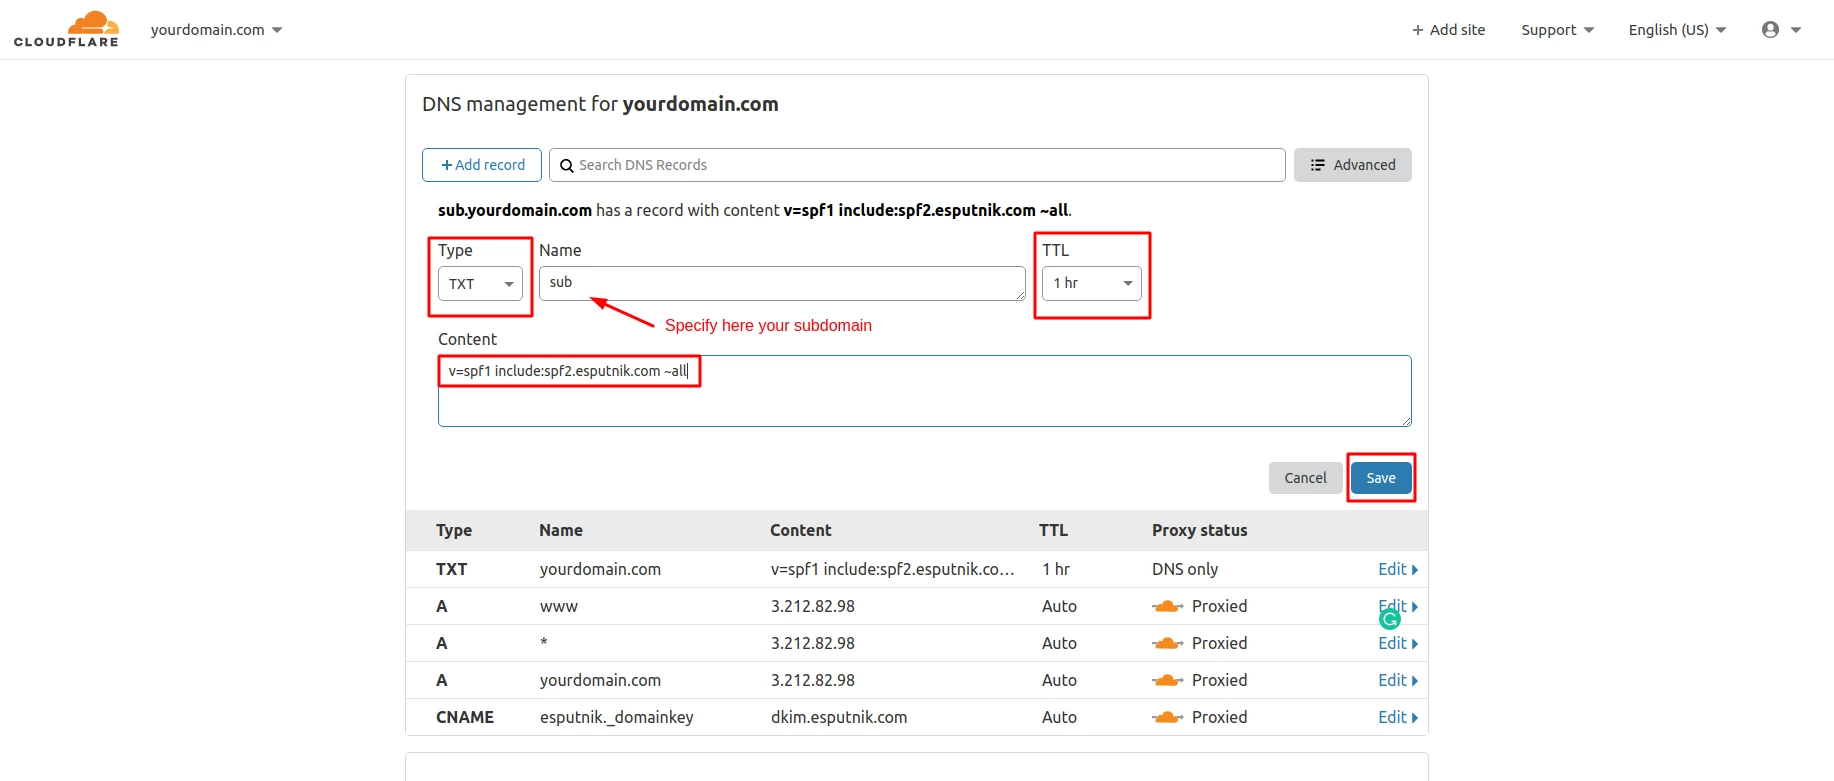
TXT
- In Type, select TXT.
- In Name, enter your subdomain name.
- In TTL, select 1 hour.
- In Content, enter v=spf1 include:spf2.esputnik.com ~all
- Click Save.
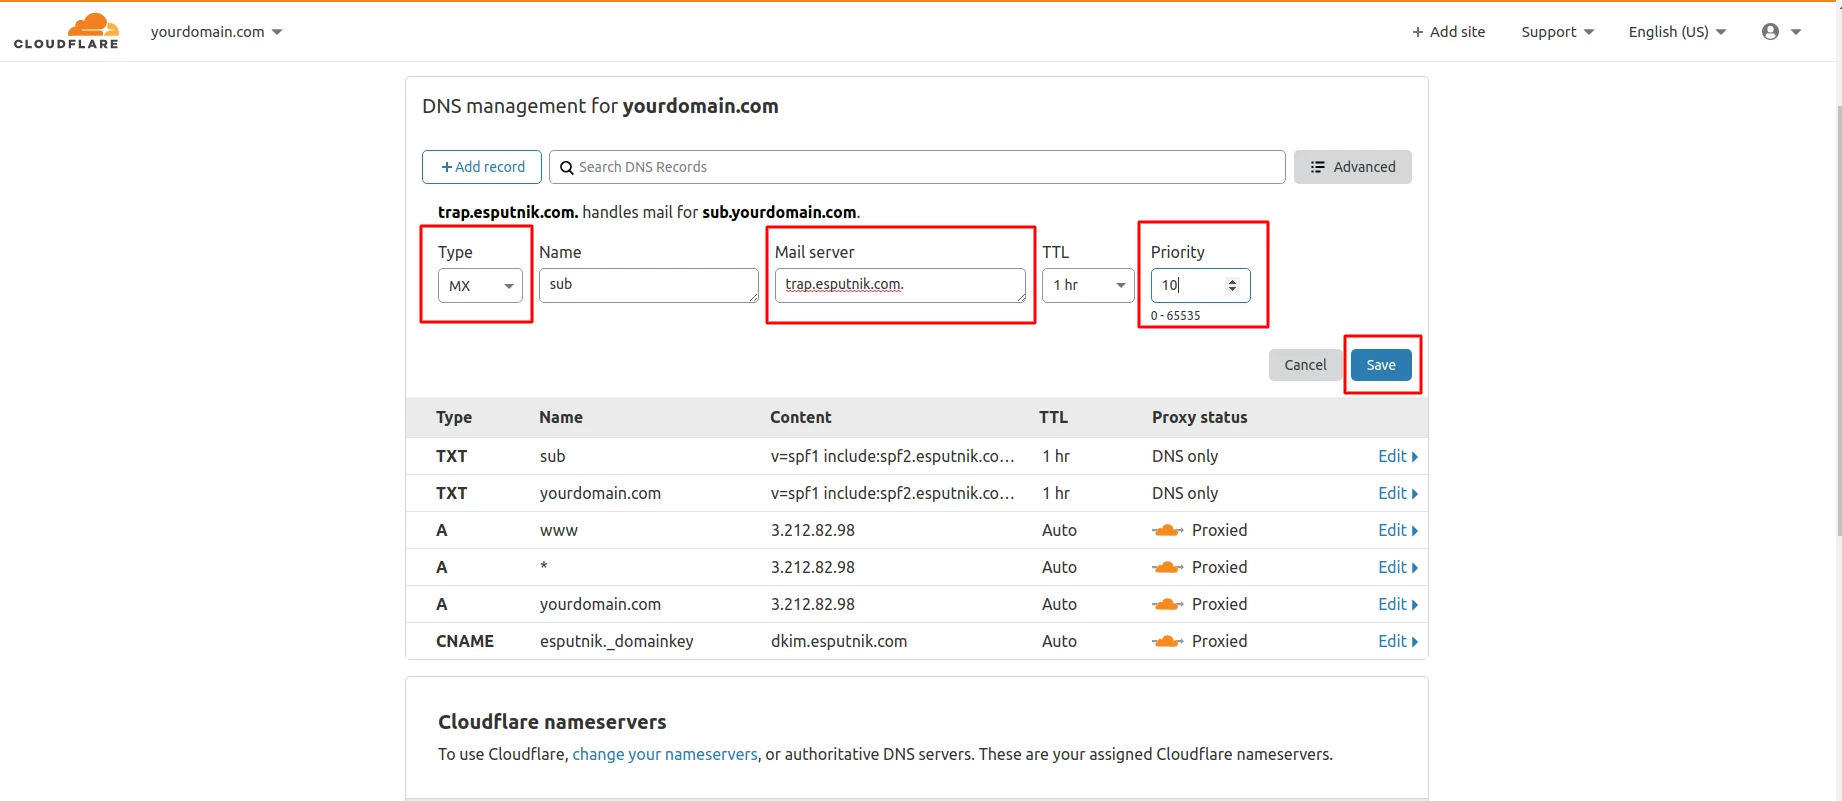
MX
- In Type, select MX.
- In Name, enter your subdomain name.
- In Mail server, enter trap.esputnik.com.
- In TTL, select 1 hour.
- In Priority, select 10.
- Click Save.
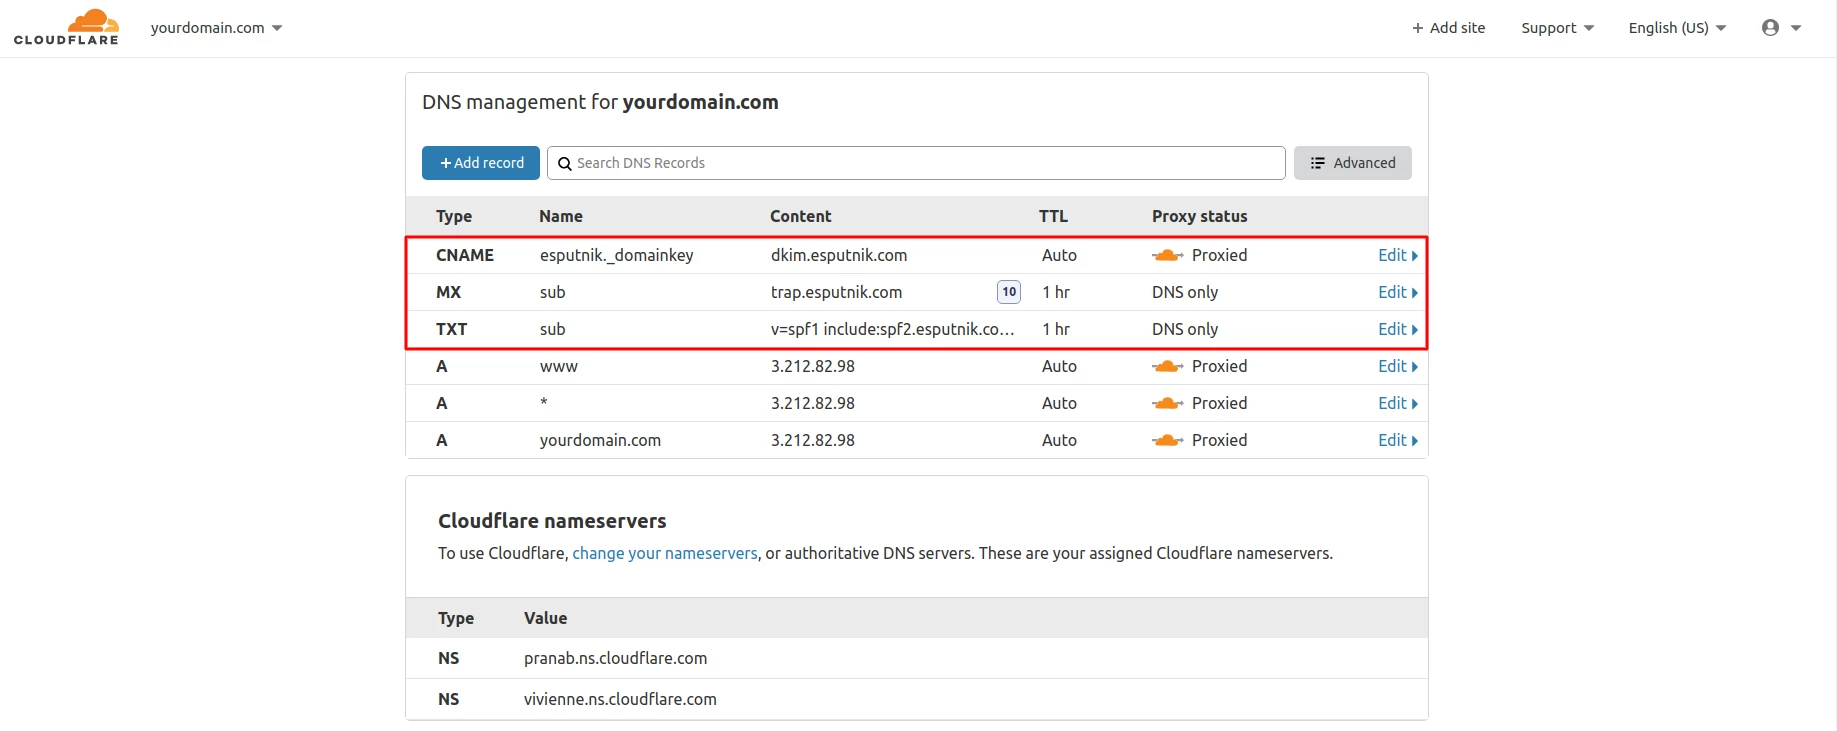
The ready record would look as follows:

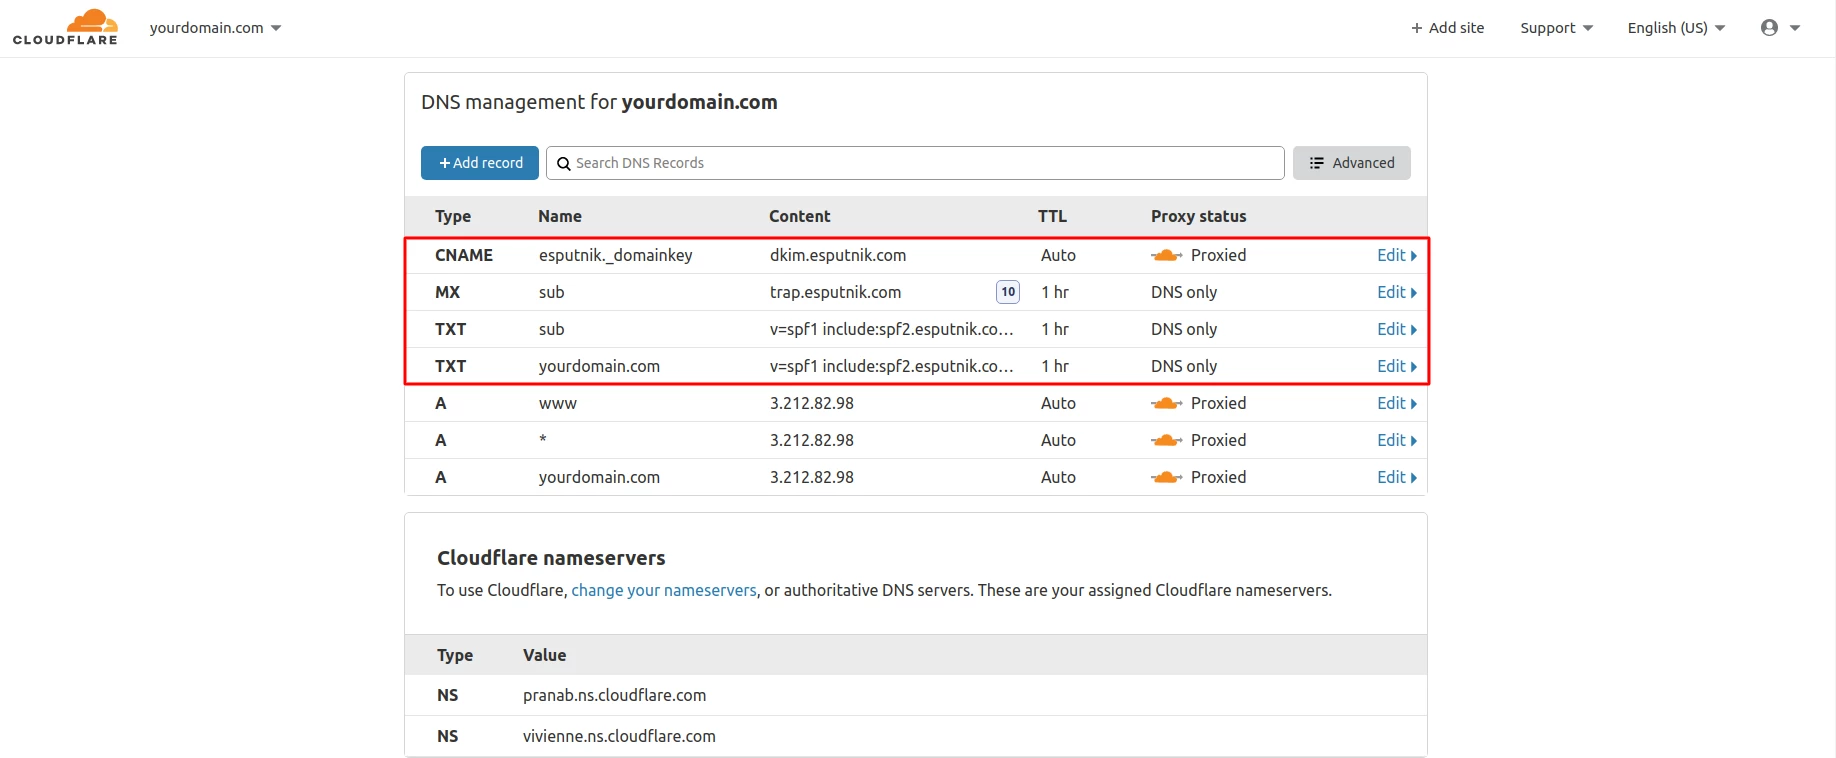
Subdomain
The ready record within the Subdomain option would look as follows:
Updated about 3 hours ago