
Setting Up Geotargeting
Yespo lets you target users based on their location. The location is defined from their IP address.
Send personalized information to people from different regions. Bet on quality rather than on quantity.
Use our dynamic segments for geotargeted campaigns.
How Geo-tracking Works In Yespo
Yespo receives contact location data when
- A contact clicks a link in any marketing email message
- Web push message is delivered
- A contact uses a mobile application
- Our script sends the following widget-related events:
- View
- Click
- Subscribe
- Submit (for request forms)
- The contact is identified from the webcontact web tracking event; data about the language can be obtained from the headers of this event if the Language field is empty in the card of such a contact.
Each time one of the above actions is performed, the contact's location data is updated (except the web tracking event, which does not update, but only records the relevant data if it is not in the contact card).
An event you send yourself — an order, for example — doesn't update the contact's location, even when it carries a country or a city among its parameters: those values stay in the event. To work with them, use segmentation by events; to store your own geographic data for a contact, use the Address fields.
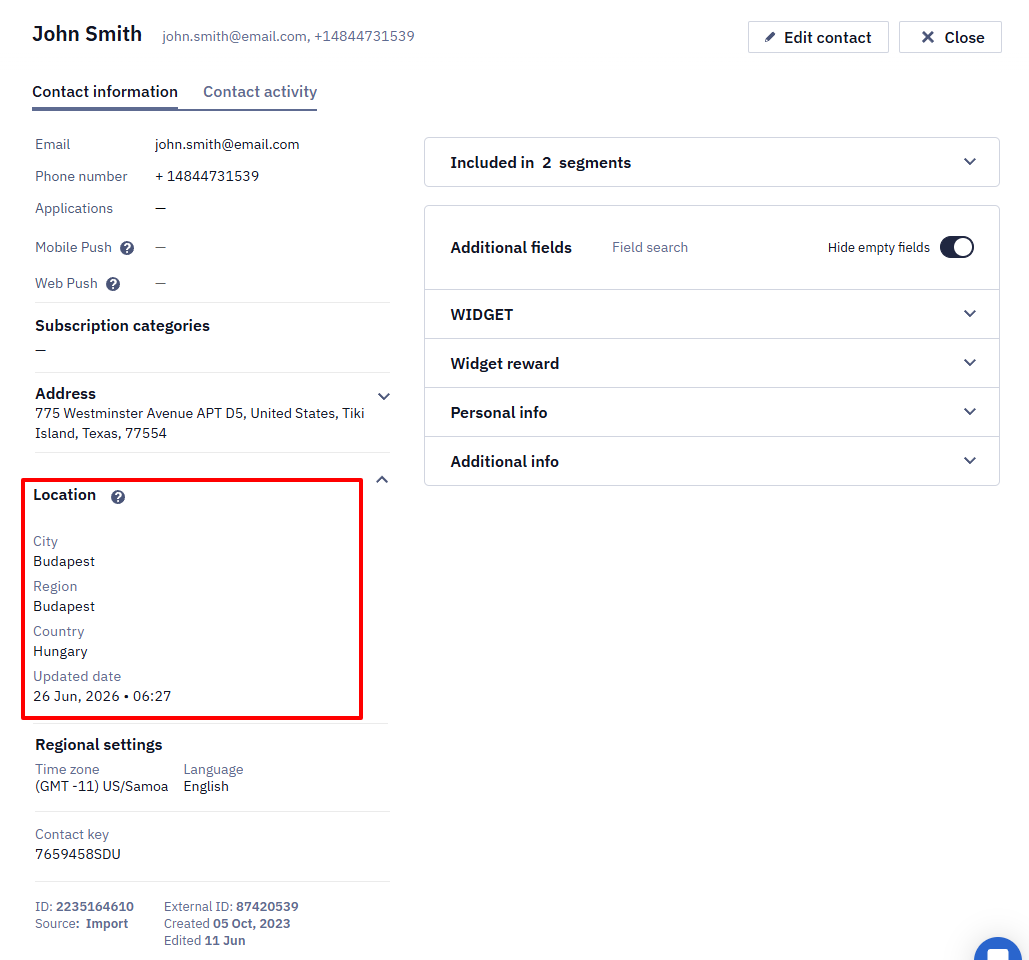
Also, you can import location user data to our system. The principle of its updating will be the same.
NoteLocation data can't be updated through the API, and it is not returned by the Get contact resource. The contact's time zone and language are available through the API — see Tracking User Time Zone and Language.
Reacting to a Visit to a Physical Location
Geo-tracking records where a contact was at the moment of one of the actions above. It is not continuous tracking of the device, and there is no geofencing in the platform. To send a push when someone comes near a store, the app has to watch the area itself — with CoreLocation region monitoring on iOS, the Geofencing API on Android, or a third-party library — and send an event when the device enters it; a workflow then reacts to that event. Two limits come from the mobile platforms: the app must hold the user's location permission, and iOS monitors at most 20 regions per app at a time.
Creating Dynamic Segment for Geotargeting
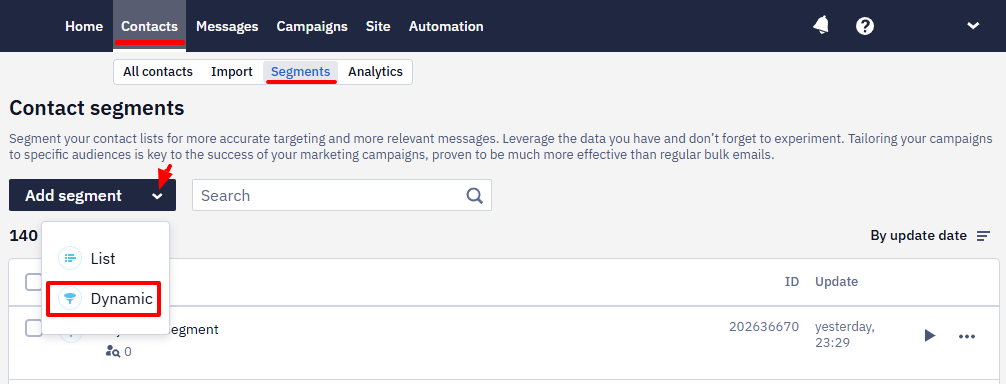
- Go to Contacts → Segments → Add Segment → Dynamic.
- Fill in the general properties:
- Segment name: it will be displayed in the general segments list.
- Segment purpose: for example, for regular promo campaigns, etc.
- Tags: they'll help find and filter the segments in the general list.
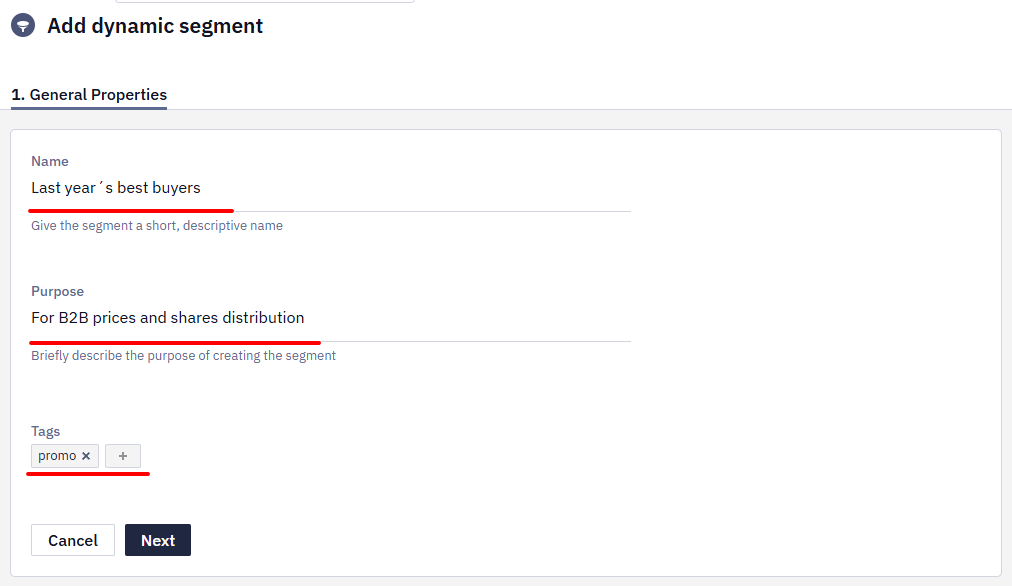
- Click Next.
NoteFor geotargeting, carefully select conditions from the Location section. In the segment, field names are shown with a clarification in parentheses, for example, City (Location) or City (Address).
Fields marked as Address belong to the contact's postal address, which is passed through import or API, and are not geolocation data determined by IP.
City (Location) is determined by the IP address, so for suburbs and small towns it often shows the nearest large city. When you need segmentation by the exact city, pass it to the Address fields through import or the API and build the condition on City (Address).
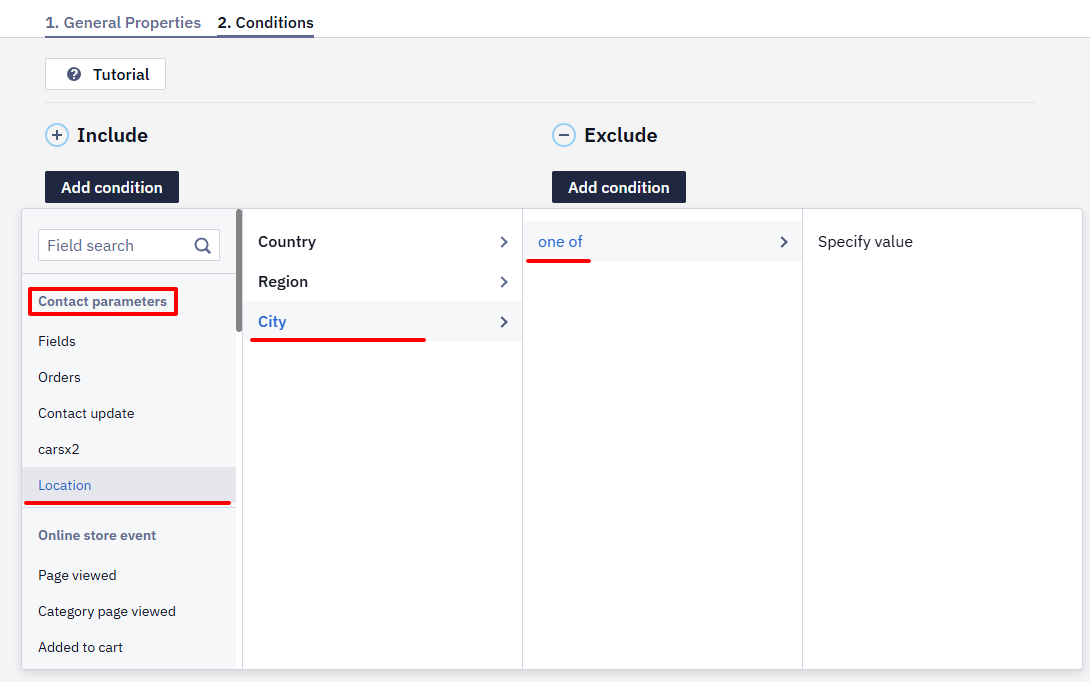
- Click Add condition and create Include card.
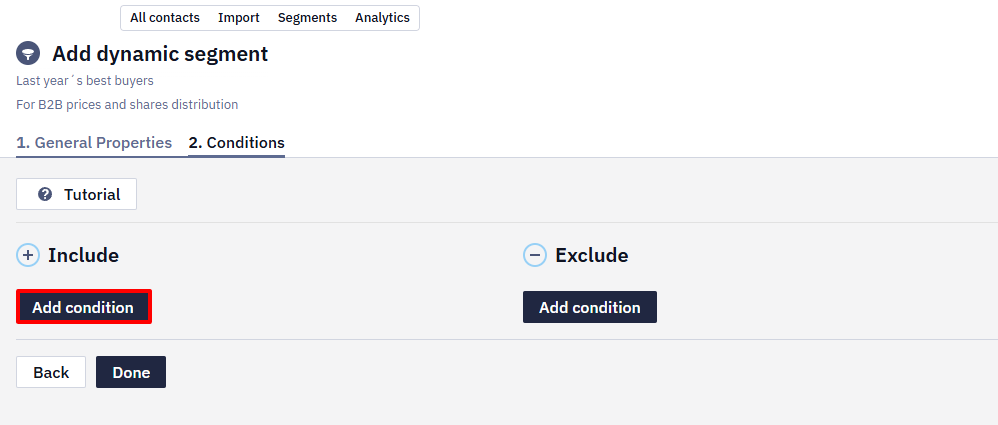
In the left sidebar, go to Location → Country/Region/City → one of → Specify value.
After you select a condition, the segment shows which data the field belongs to, for example, City (Location).
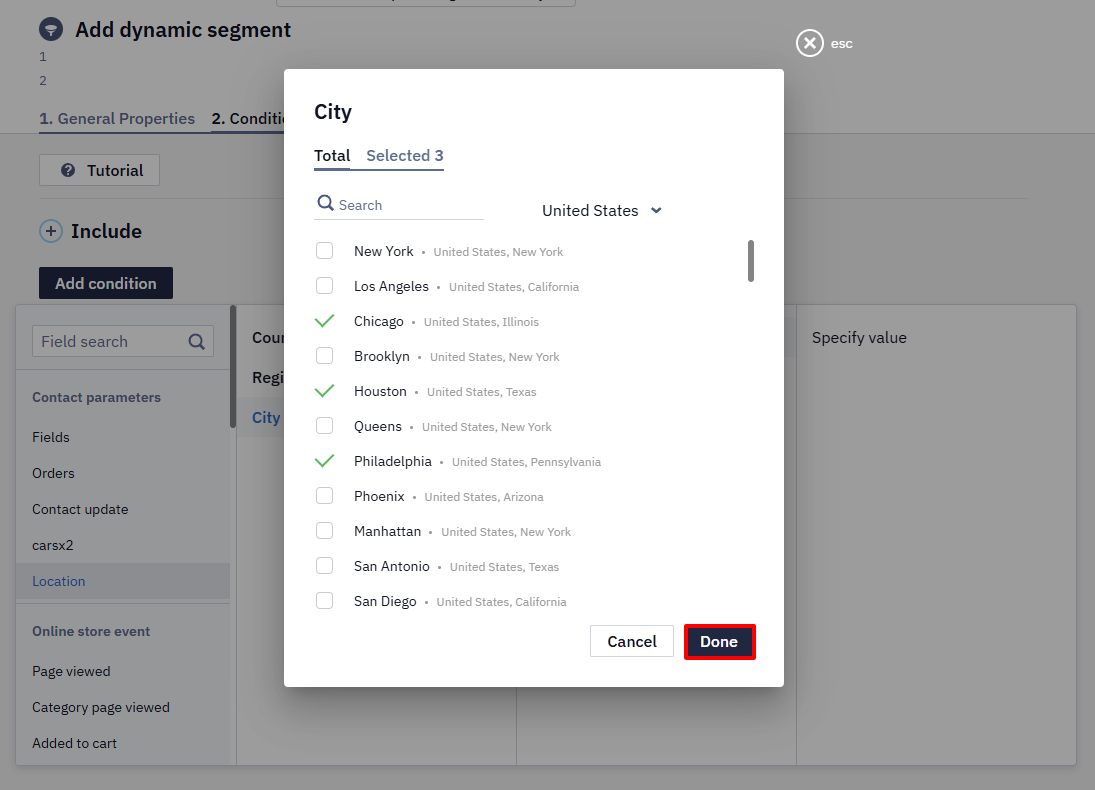
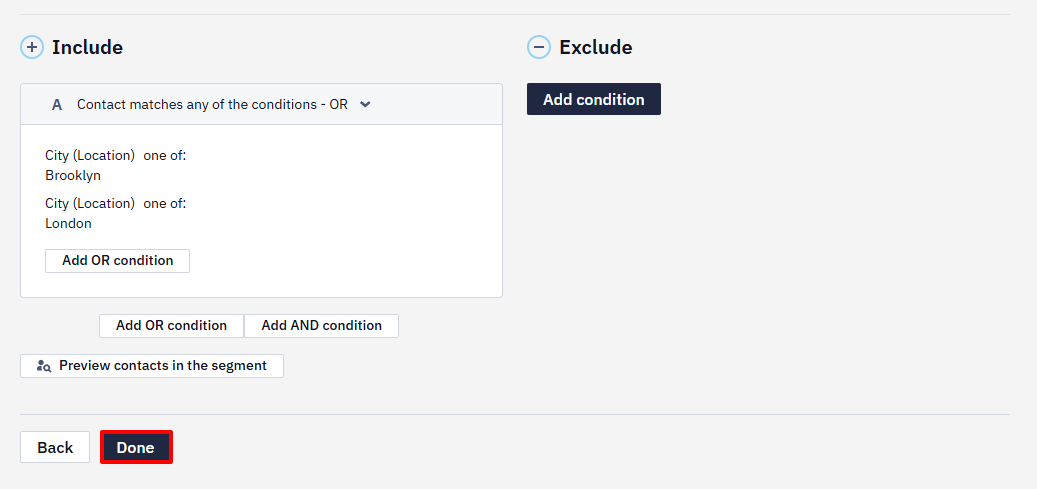
Select the values you want to apply to the targeted segment. Click Done to save settings.
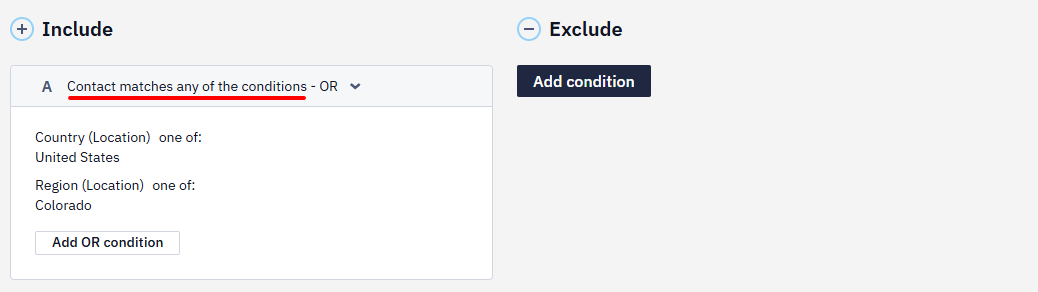
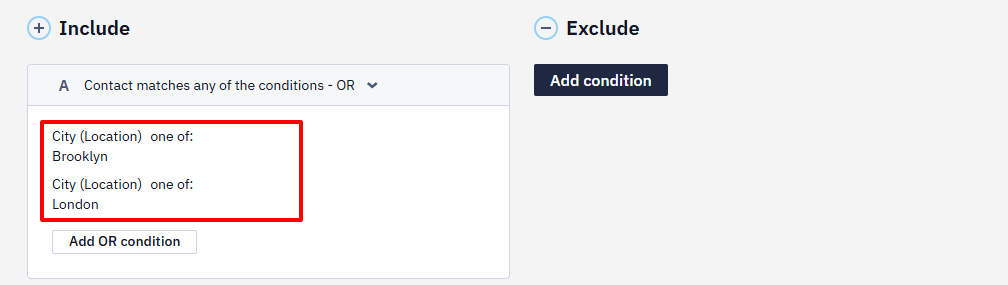
To select a regional center and the whole region, choose the condition Contact matches any of the conditions.
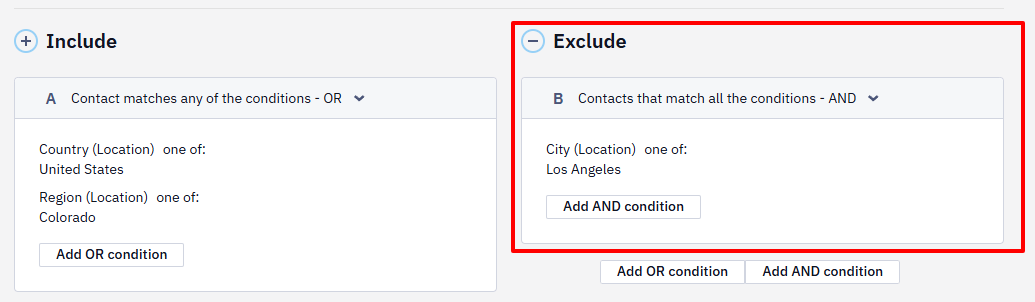
If you need to exclude a city from the region, click Add condition and create a corresponding Exclude card:
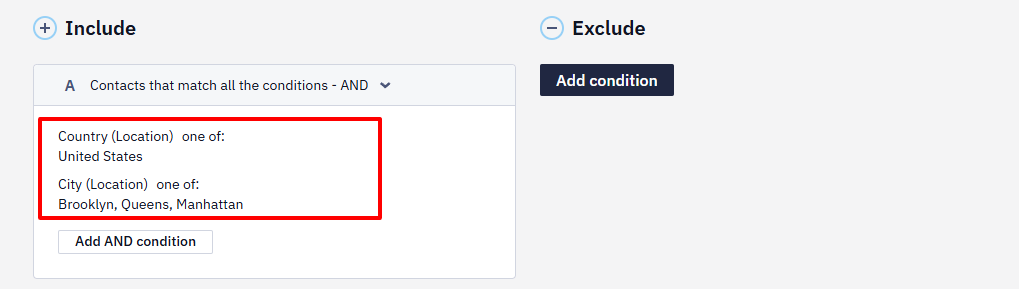
You may set geotargeting within one country:
Or within the selected regions/cities in different countries:
- Click Done.
Updated 5 days ago