
Double Opt-In
Learn how to configure double opt-in for a third-party form via API
Double opt-in (DOI) sends an additional email to a user after they submit a subscription form. It helps verify the email address and confirm that the contact wants to receive future communications. A subscriber becomes confirmed only after clicking a link or button in this email.
Learn more about why Double Opt-In is used and how it works >
In Yespo, you can configure subscription forms in three ways:
- Built-in forms (widgets) — created directly in your account.
To use a custom workflow and confirmation emails, follow the instructions to replace the default Double Opt-In workflow.
- Wix forms — use them for websites built on the Wix platform. They require additional setup. Learn more in the guide >
- Third-party forms integrated via API — use them for custom or self-built forms on your website.
Next, configure Double opt-in for a third-party form integrated via API.
A confirmed subscription is required for bulk campaignsUntil a contact confirms the subscription, you can only send them transactional messages. A consent checkbox on your own form does not replace confirmation: an address collected that way still has to go through double opt-in before it can be included in a bulk campaign.
Setting Up a Subscription Form
You can integrate subscription form via API method Subscribe contact. When a contact fills out the form, the following events are sent to your account:
subscribeFromApi(when a contact fills out a form for the first time);subscribeUpdateFromApi(when filling again).
After setting up data transferring, create an email and two workflows. The first workflow sends subscription confirmation email, the second makes a contact active.
Setting Up Confirmation Email
Create an email that the subscriber will receive after filling out the form.
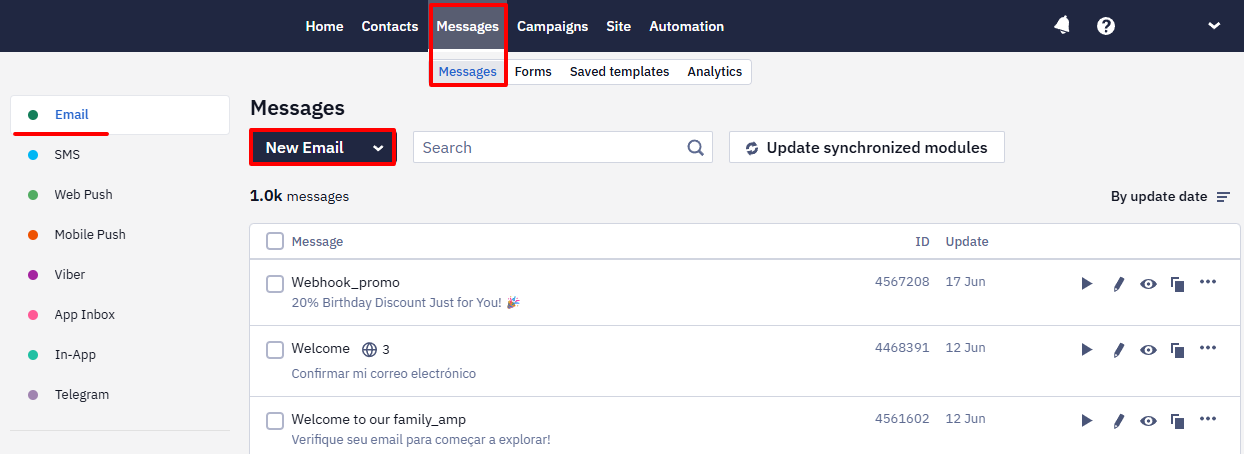
- Go to Messages → Messages → Email and click New Email.
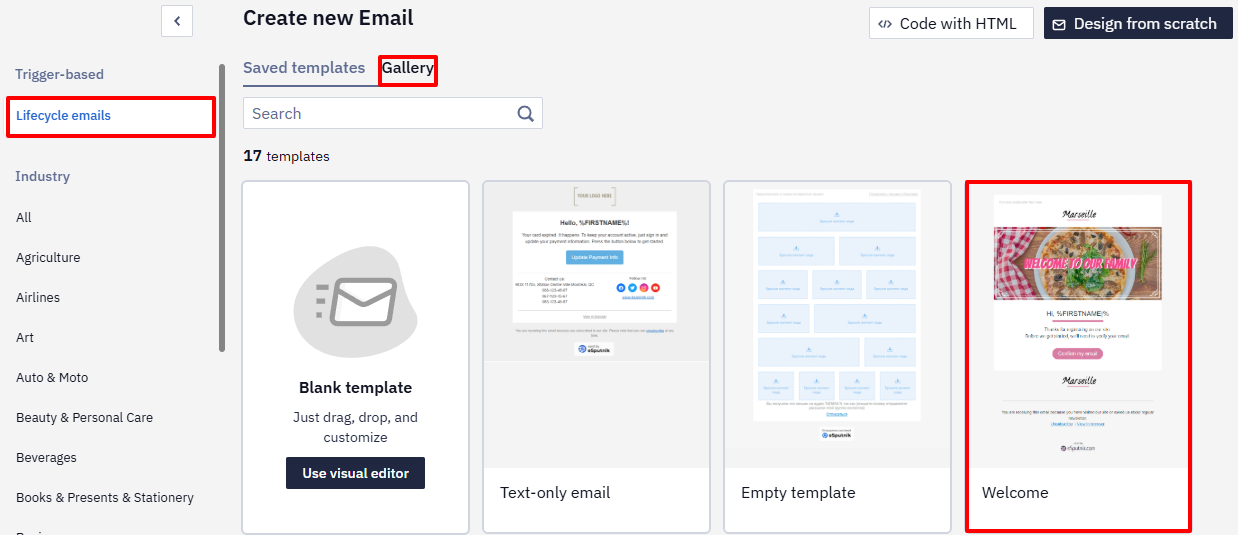
- Open the Gallery tab and select the Welcome email from the Lifecycle emails templates.
Email confirmation block with default text and button looks like this:
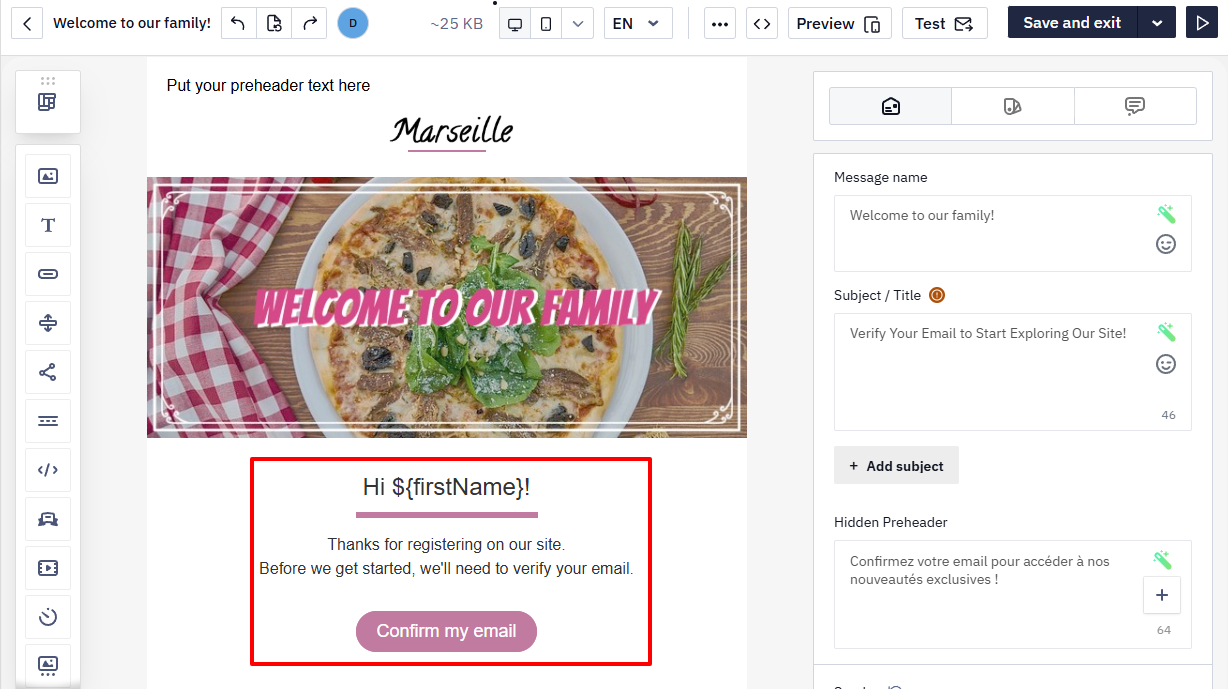
- Design the email in your brand style and enter the required text.
- Link the event to the button or to the link in the email to launch the required workflow.
Select a block with a button in the email. In the left panel, in the corresponding field, select the pre-prepared event Confirmed subscription:
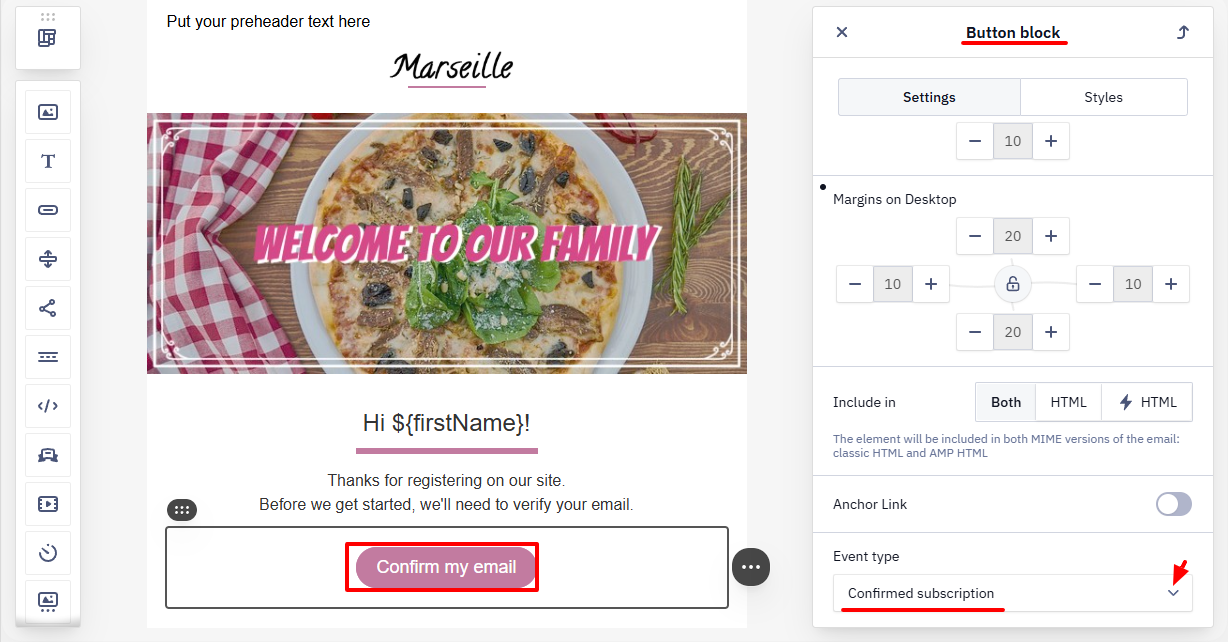
In the left settings panel, you can specify a link to the subscription confirmation page.
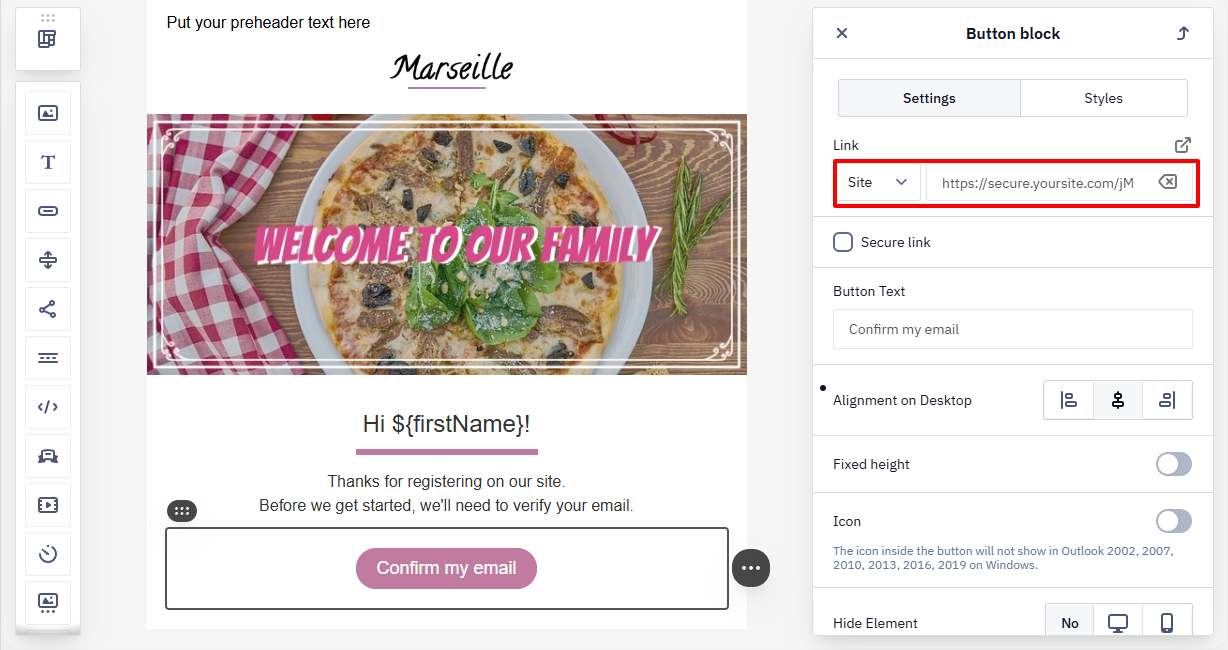
NoteThe Link can point to any page you host, including a custom confirmation page in your own design. The Confirmed subscription event fires when the button is clicked, regardless of the destination URL — the linked page itself doesn't need to call any API to confirm the subscription.
Setting Up the Workflows
To send the confirmation email and change the contact status to active, you need to create two workflows.
Workflow for Sending Confirmation Email
Filling out the form can launch 2 types of events.
subscribeFromApi— creating a new contact.subscribeUpdateFromApi— Contact update (re-filling the form).
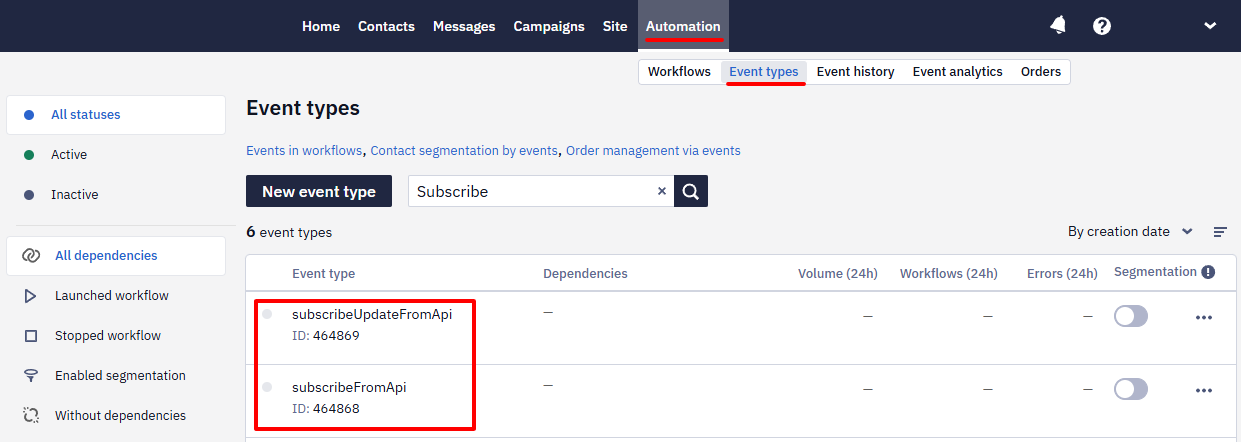
To create a workflow:
- Go to Automation → Workflows and click New workflow.
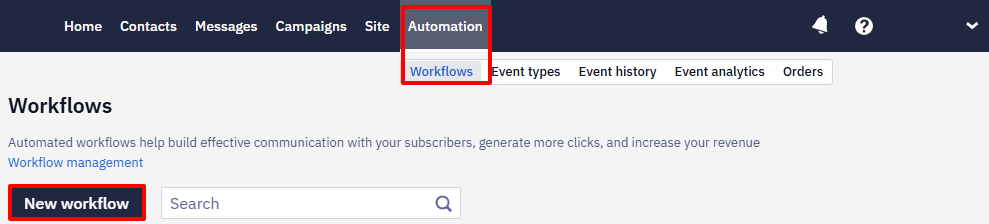
- Enter the workflow name and add the Start, Send obligatory (transactional) Email, and End blocks.
- In the Send obligatory (transactional) Email block parameters, select the required email: Confirmation email.
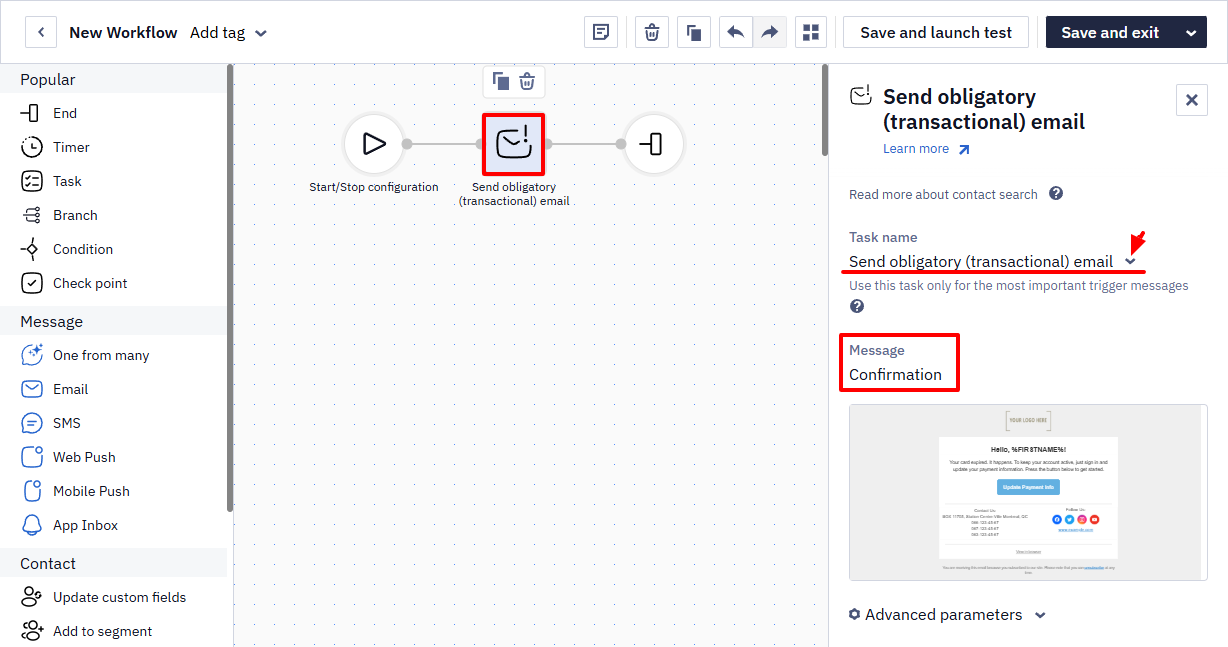
- Click Save and exit.
Workflow to Confirm a Contact
This workflow launches after clicking the button in the confirmation email and makes a contact available for further campaigns.
To create the workflow:
- Go to Automation → Workflows and click New workflow.
- Enter the workflow name and add the Start, Confirm contact, and End blocks. The Confirm contact block requires no additional configuration.
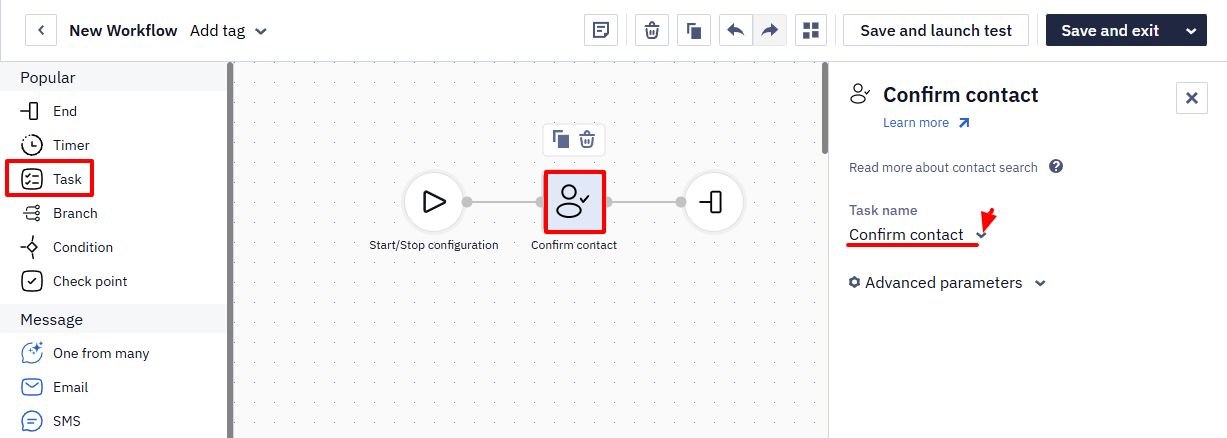
- Click Save and exit.
Welcome Emails Chain After Confirm Contact Block
To send a welcome series, you need to supplement your Confirm contact workflow.
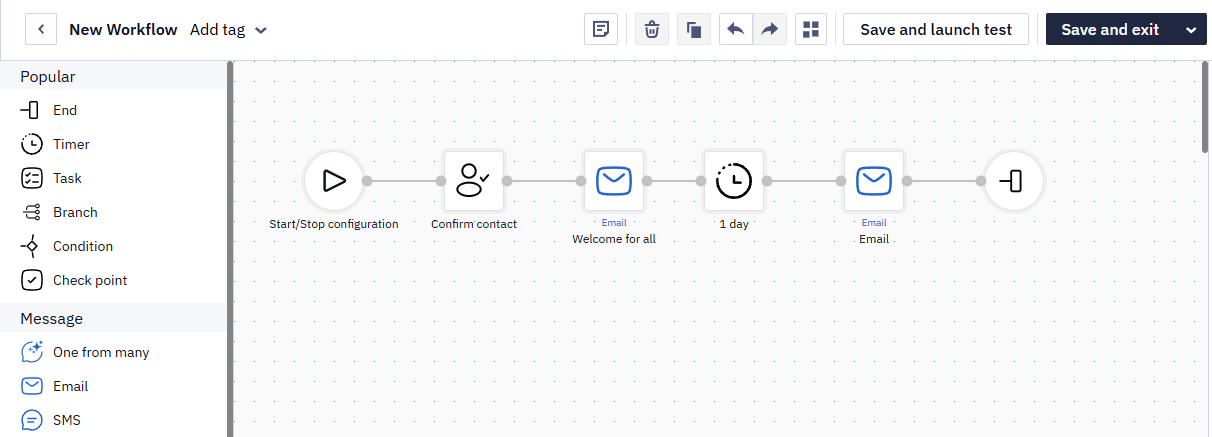
Launching Workflow Conditions
- Go to Start/stop configuration of created workflows.
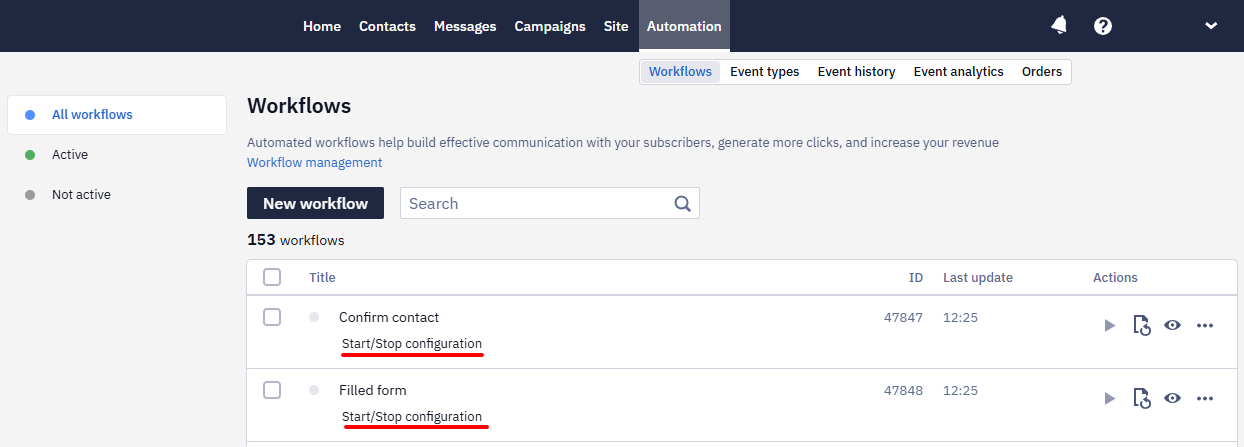
- Select the following events:
subscribeFromApi: Filled form workflowConfirm contact: Confirm contact workflow.
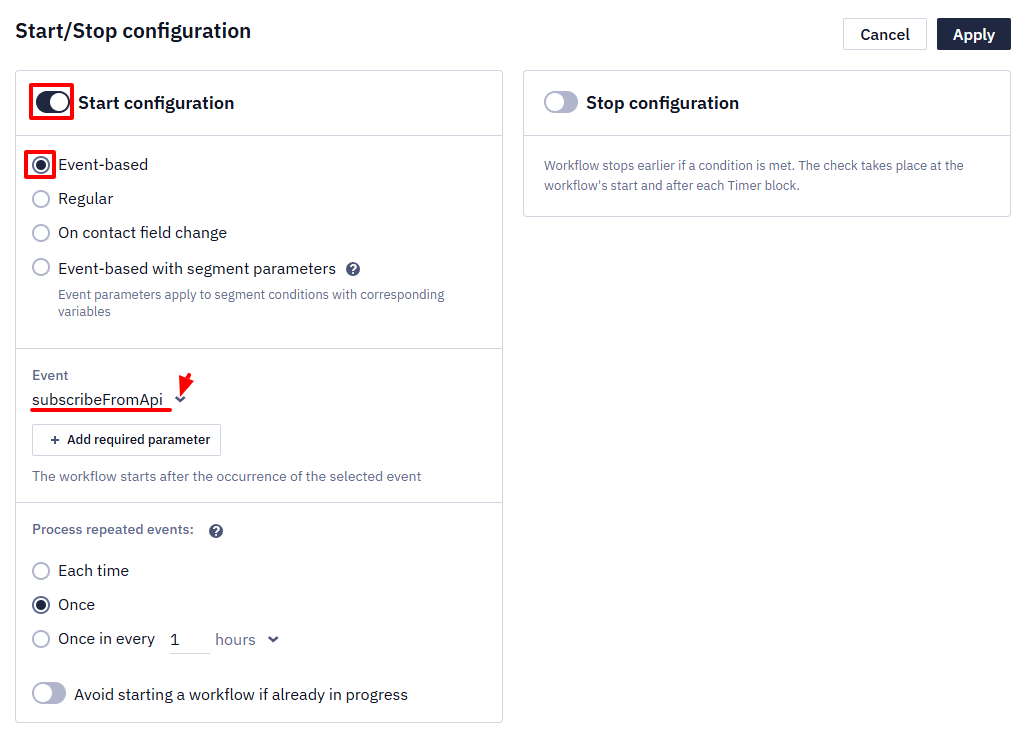
Learn more about creating events >
- Click Apply.
- Activate workflows.
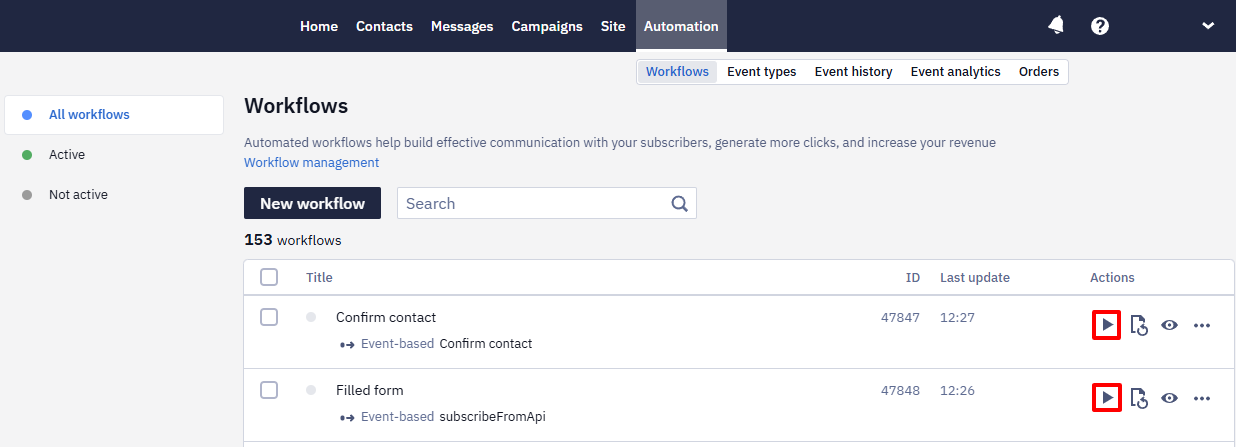
If needed, set up processing unique events(1 hour by default). You can opt that the contacts who fill in the subscription form several times a day still receive only one confirmation email. In case of re-subscribe, another event - subscribeUpdateFromApi - will be sent. The confirmation email won't be sent, and contact data will be updated.
ImportantThe segment for contacts who have confirmed subscription is created in the system by default, but if you transfer data via the API, you can specify the name of the segment in the request.
If the subscribe request specifies a list of segments to which the contact should be added after subscribing, and then the workflow checks for membership in one of these segments, use a timer of at least 4 minutes between these actions. This will ensure the correct workflow operation and consistent execution of all requests in the system.
Follow-Up Welcome Series
You can add a welcome email or a series of welcome emails to your contact confirmation workflow. They will be sent after the contact confirms the subscription and gets active in the system. You can vary the number of welcome emails depending on your needs.
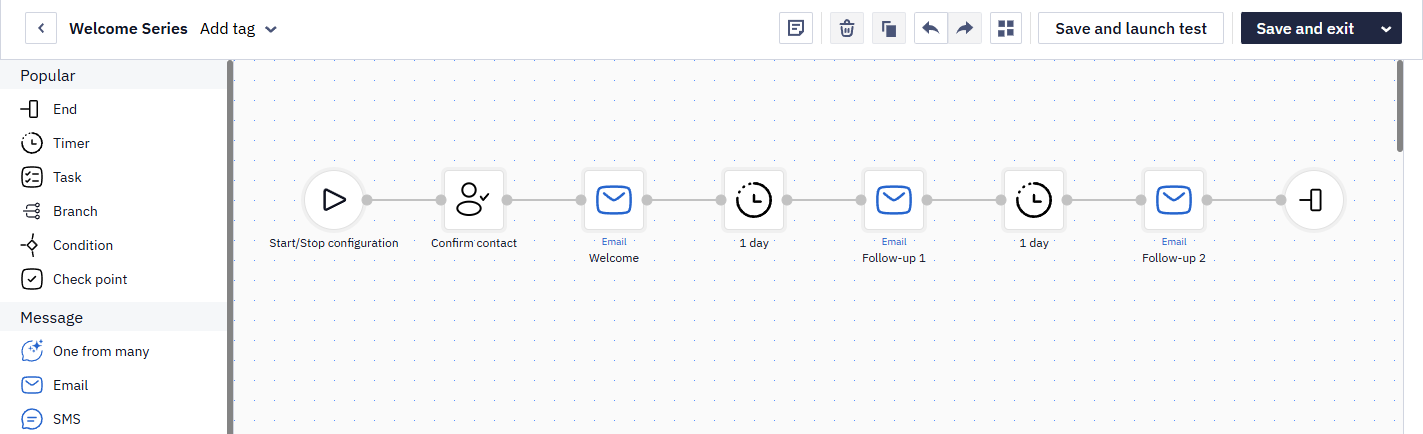
NoteA contact becomes available (active) for your campaigns only after they confirm their subscription in the confirmation email. You cannot send bulk campaigns to unconfirmed contacts.
After all the settings, run a test: fill in the form on the website and check if your email address gets to the segment Subscribers in the system. This segment is the default, but you can specify the segment name in the request if you send contact data via API.
If the subscribe request specifies a list of segments to which the contact should be added after subscribing, and then the workflow checks for membership in one of these segments, use a timer of at least 4 minutes between these actions. This will ensure the correct workflow operation and consistent execution of all requests in the system.
Notes
- If you have several forms assigned to different confirmation emails, you need to create separate workflows and events for each form.
ImportantFor the event category Click, Key is a required field. The text is optional, but we recommend using Latin without numbers. For example: click, subscription, confirmation, etc.
- When creating a subscription form, add a checkbox with your terms of use. According to the GDPR rules, the user must check the box to confirm they agree to your terms of use and privacy policies and want to receive bulk campaigns from you.
NoteFor an EU audience, auto-subscribing a contact to promotional messaging through the same click that confirms the double opt-in email isn't GDPR-compliant. Promotional consent needs its own explicit action, such as a separate button — a checkbox alone isn't sufficient.
Updated about 2 months ago