
Building and Editing Workflows
Workflows allow you to automate sending your notifications through different channels. You can configure delivery to a single contact or to a segment.
You can use workflows to segment your audience and send different types of campaigns (welcome emails, birthday emails, order confirmations, abandoned cart notifications, reactivation emails, etc.) to defined segments.
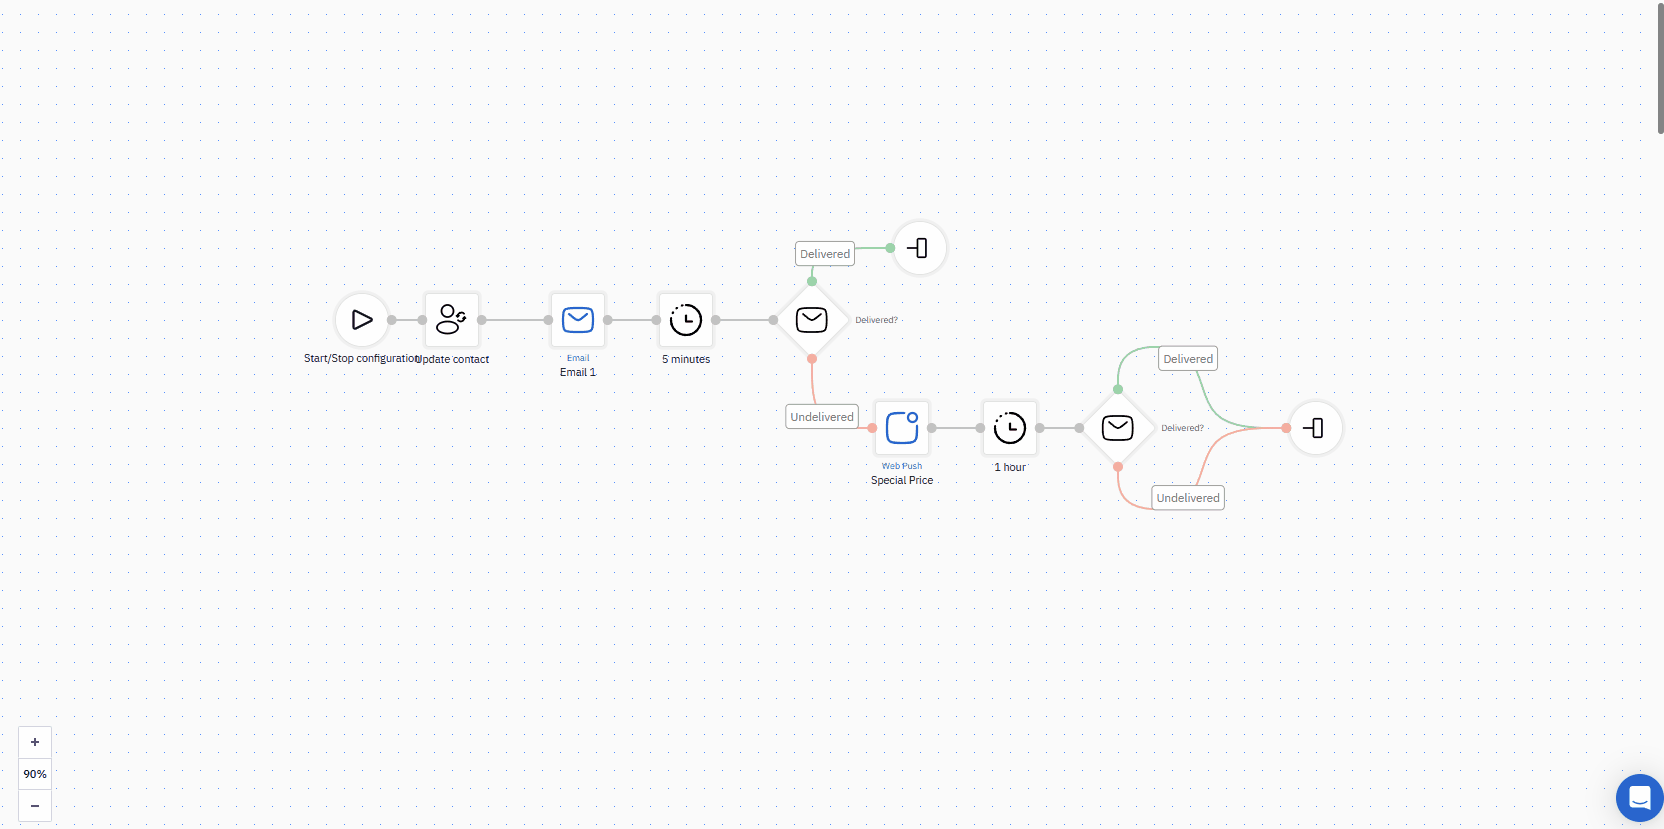
Yespo offers a drag-and-drop builder for building workflows. The builder uses pre-programmed configurable blocks which you can place and connect into a workflow, and assign tasks and conditions to them.
NoteRead about workflow blocks before you start building and editing workflow.
Creating a New Workflow
To create a new workflow:
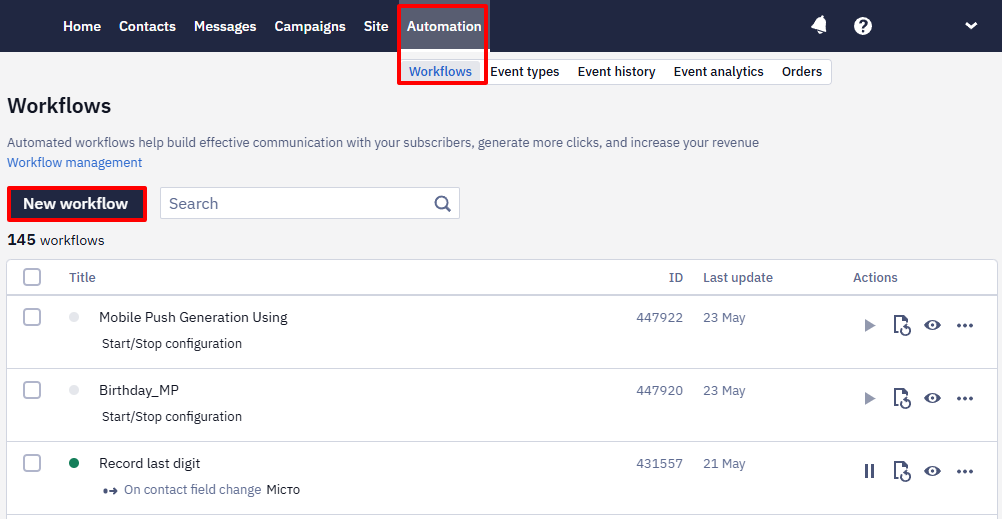
- Go to Automation → Workflows and click New workflow.
- Enter the workflow name (required) and add tags (optional).
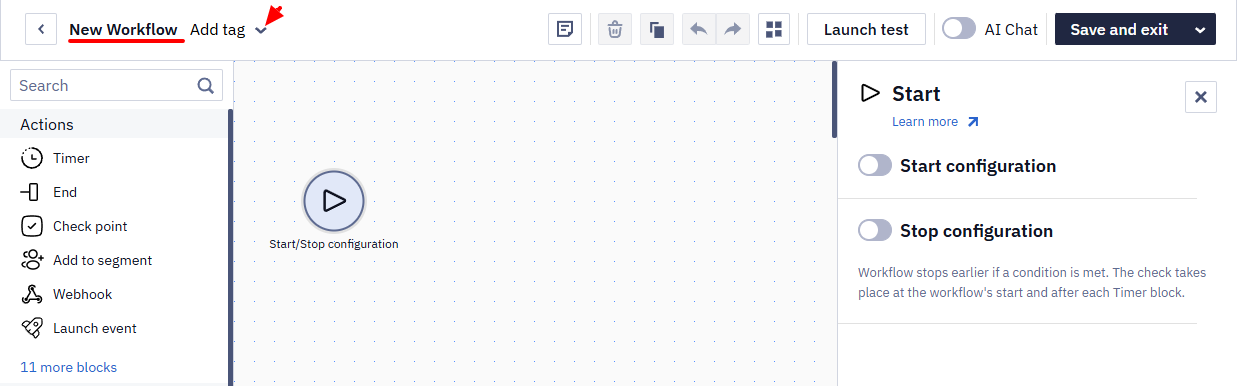
- Add and set up the necessary blocks.
Each workflow contains the required blocks:
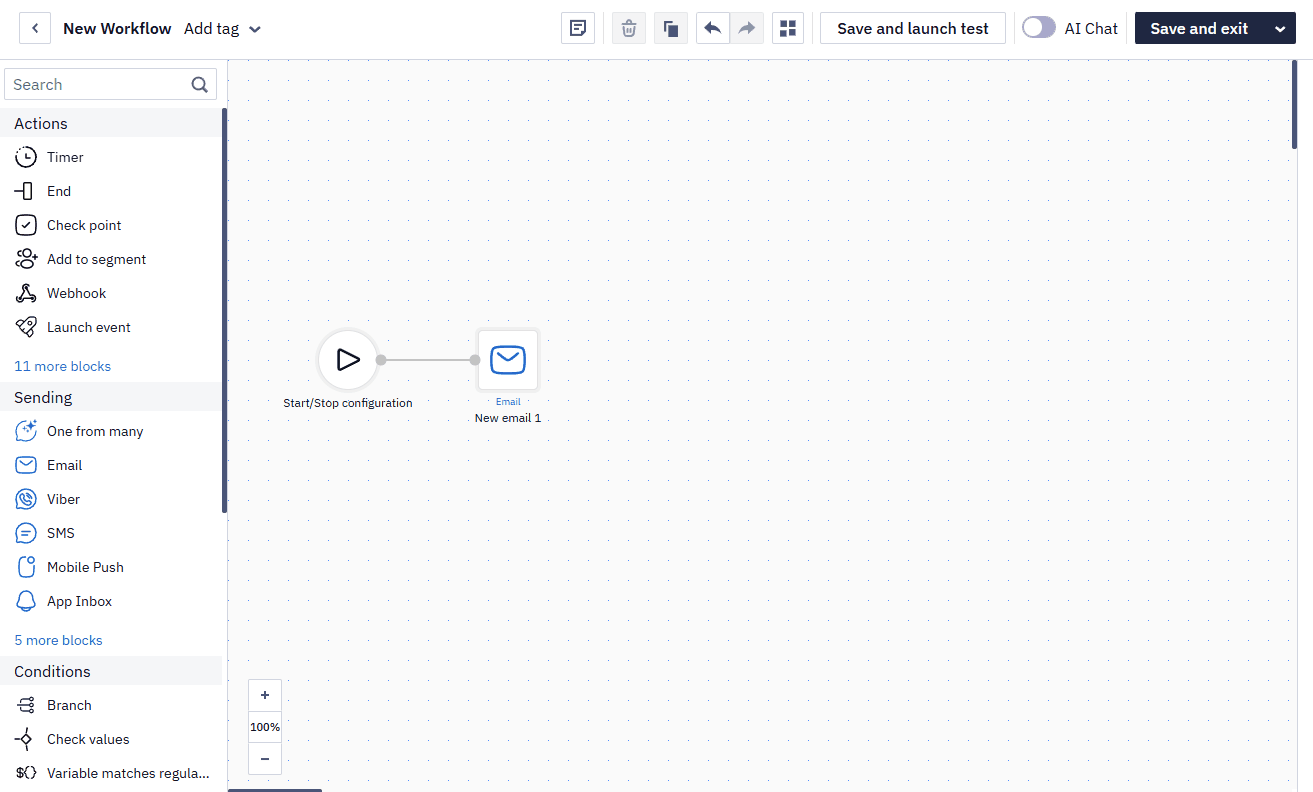
- Start. This block is automatically added at the beginning of a workflow.
- End. Place this block at the end of a workflow branch.
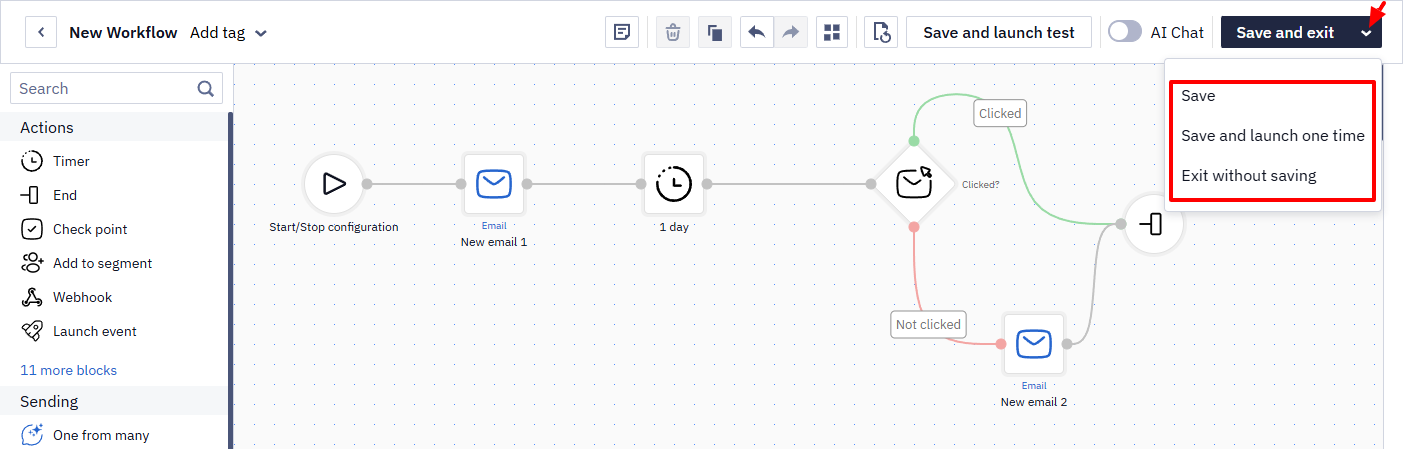
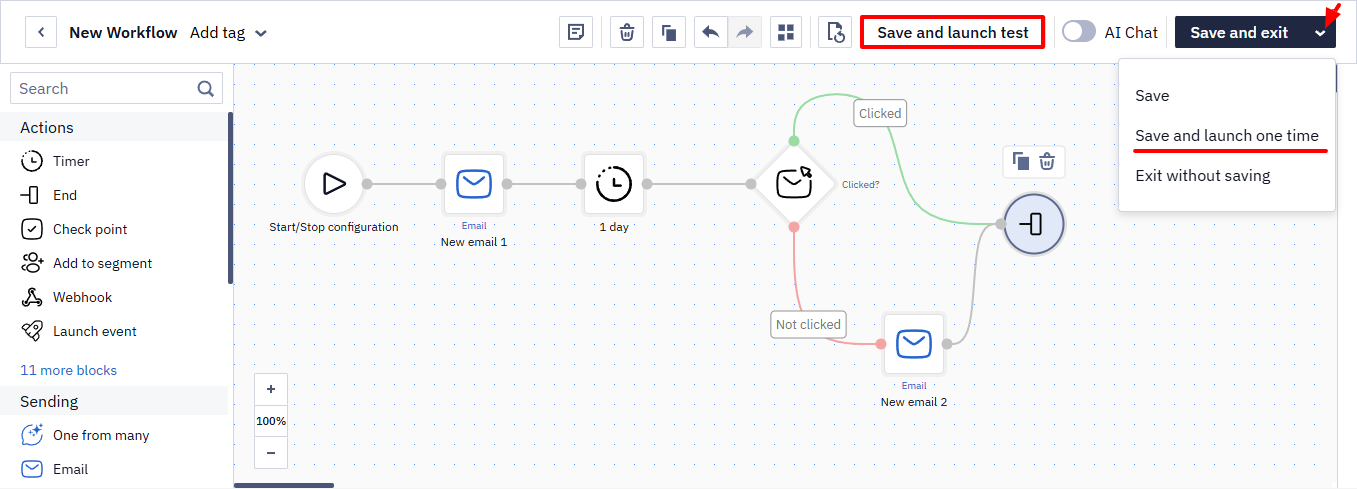
- After adding all the necessary blocks, save the workflow by selecting one of the following options:
From the dropdown menu:
- Save — without exiting the editor.
- Save and exit — returns you to the list of workflows.
- Save and launch one time — runs the workflow one time.
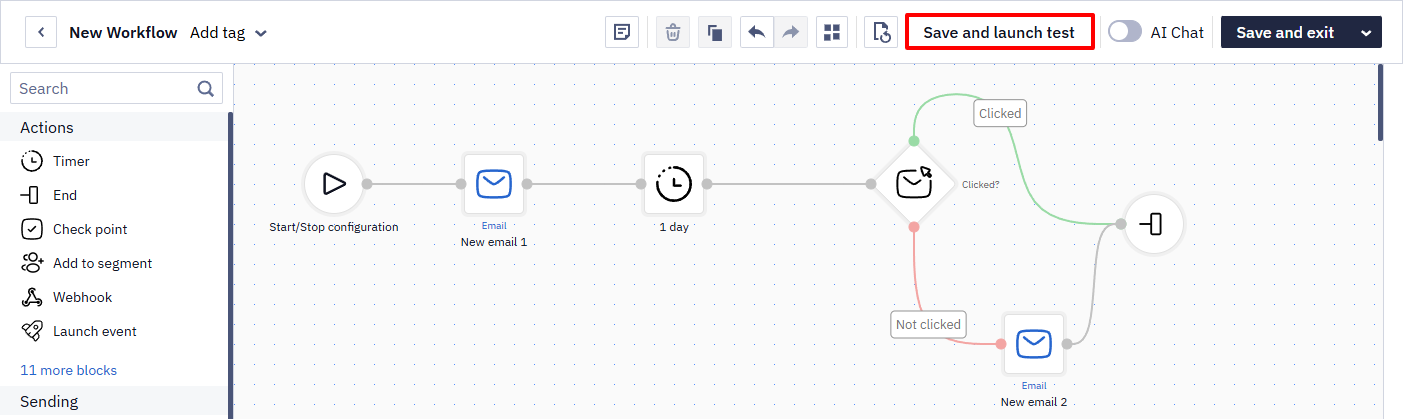
On the top toolbar:
Save and launch test/Launch test — performs a test run of the workflow.
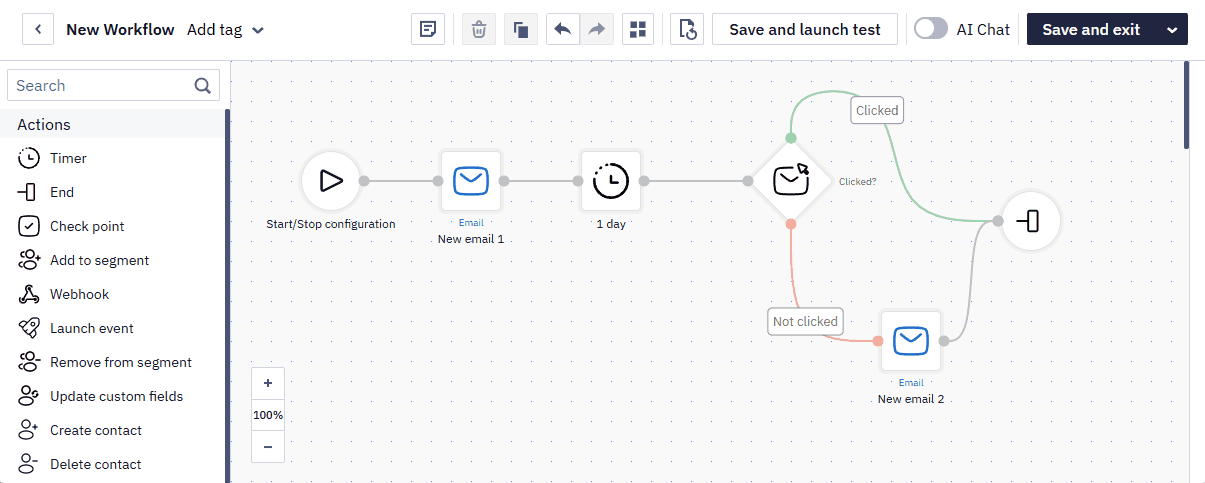
Managing Blocks
Let's consider the actions that you can do with the blocks.
Searching for Blocks
To quickly find a block instead of browsing through the Actions, Sending, and Conditions groups, use the Search field at the top of the block panel and start typing the block's name. The panel filters the list in real time to show only matching blocks across all groups.
Each group shows only the most common blocks by default. Click More blocks to expand the group and see its full list, or click Collapse to hide the extra blocks again.
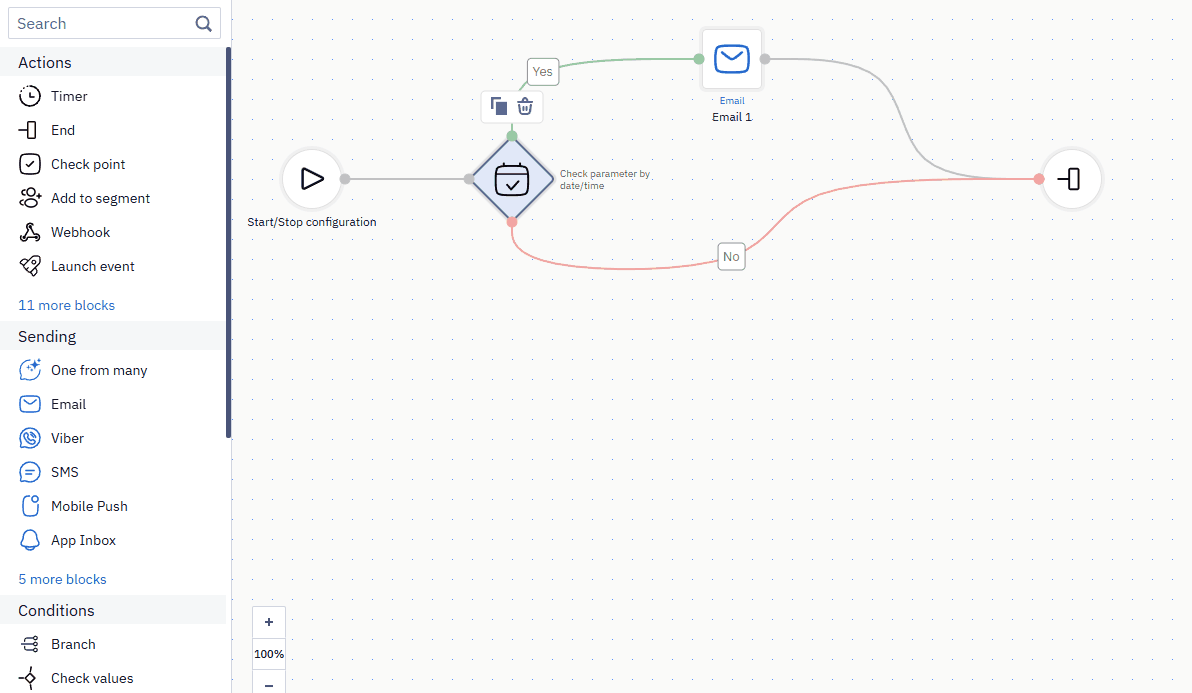
Adding Blocks
You can add blocks to a workflow in several ways:
- Drag a block into the workspace and connect it manually.
- Select a block in the workspace, then click the desired block in the panel. The editor automatically connects the new block to the selected block.
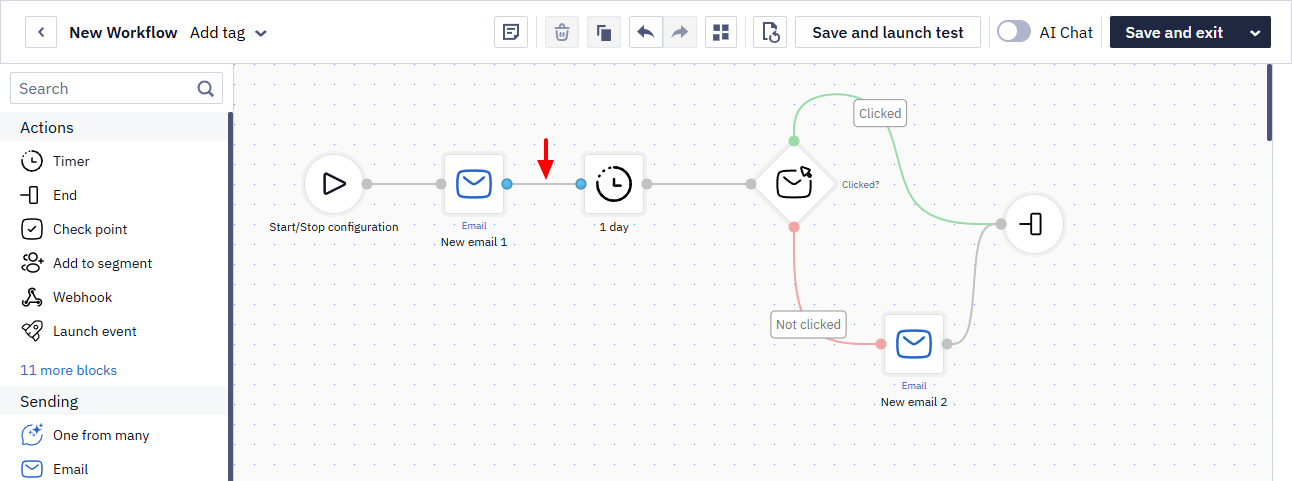
To Insert a block between two connected blocks:
- Drag the block onto the connection line.
- When the line becomes dashed, drop the block.
The editor automatically inserts the block into the chain and reconnects the links. Other blocks are automatically moved to make room for the new block.
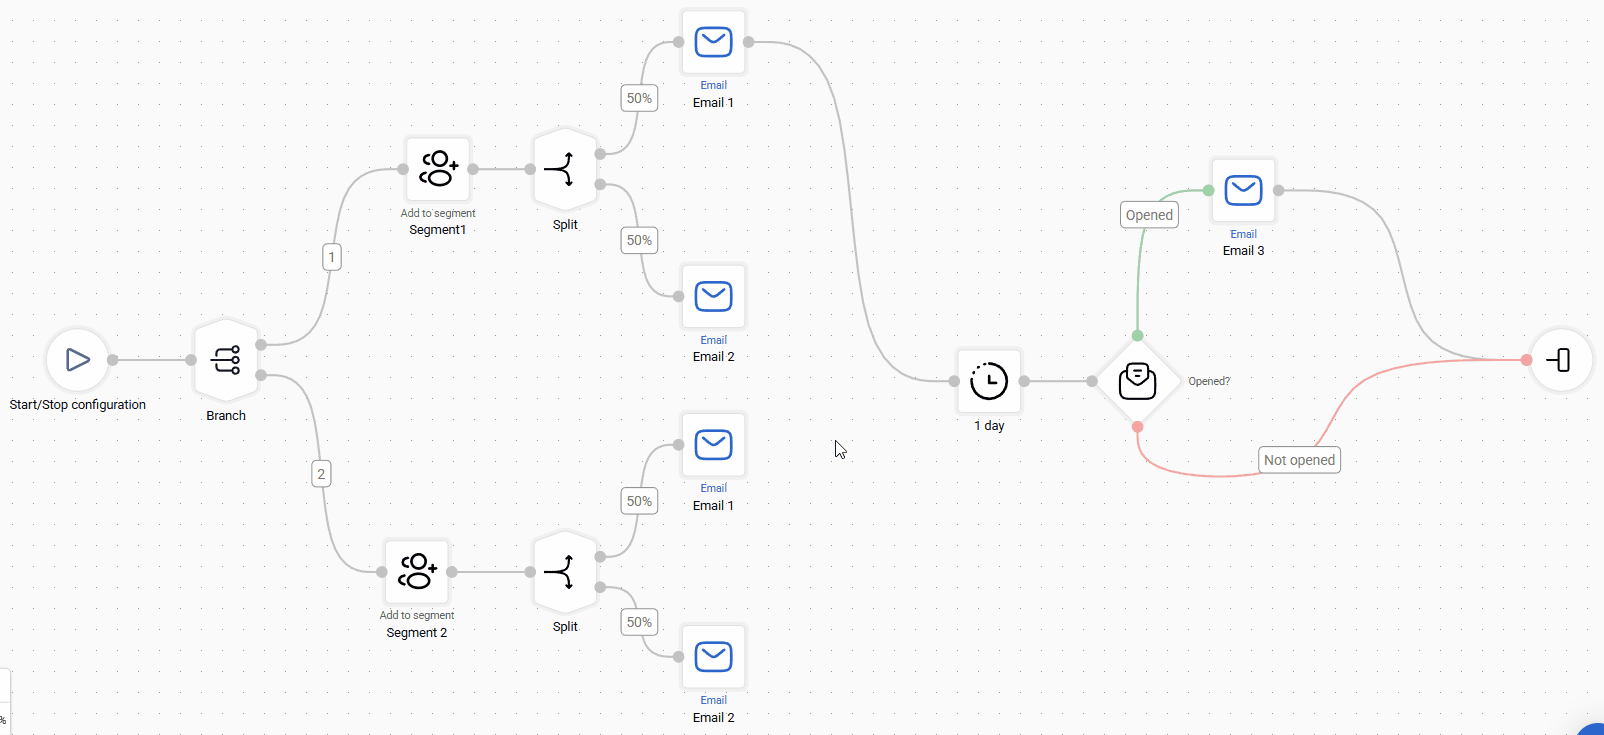
Workflow blocks support multiple incoming connections, allowing you to merge different paths into a single logical point without duplicating blocks and simplifying the overall workflow structure.
Use this connection when the workflow needs to continue with the same action — for example, checking whether the contact opened an email, regardless of which message they received.
To merge branches:
- Select the block where you want the branches to converge.
- Drag a connection from the output of each branch to this block.
As a result, the block will have multiple incoming connections.
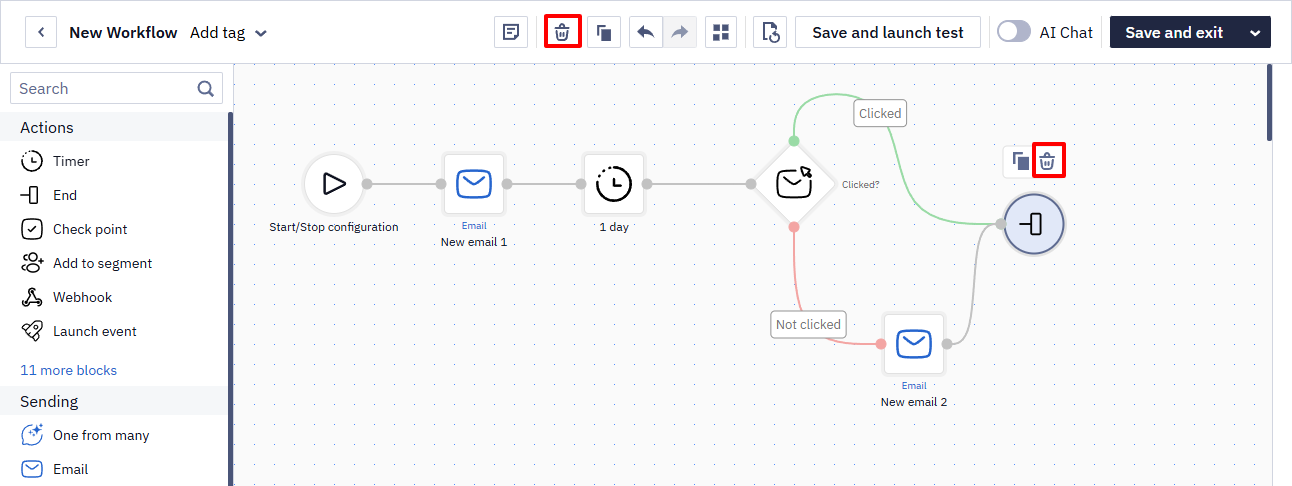
Deleting Blocks
To delete a block, select it and click the trash icon above it or in the top panel. You can also press Delete on your keyboard.
To delete a connection between blocks, select it (the color of the connection points changes to blue) and press Delete on the keyboard.
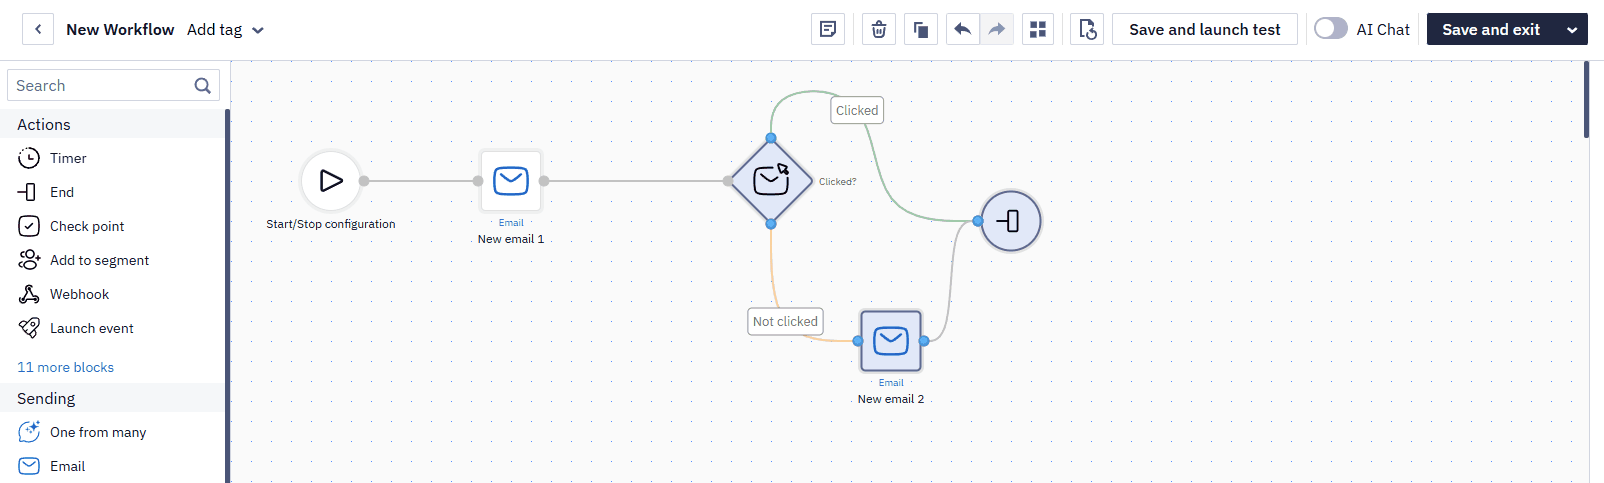
To select a few blocks and connections, press the Shift key on the keyboard and select the necessary workflow fragment.
To select all blocks and connections, press Ctrl+A on the keyboard.
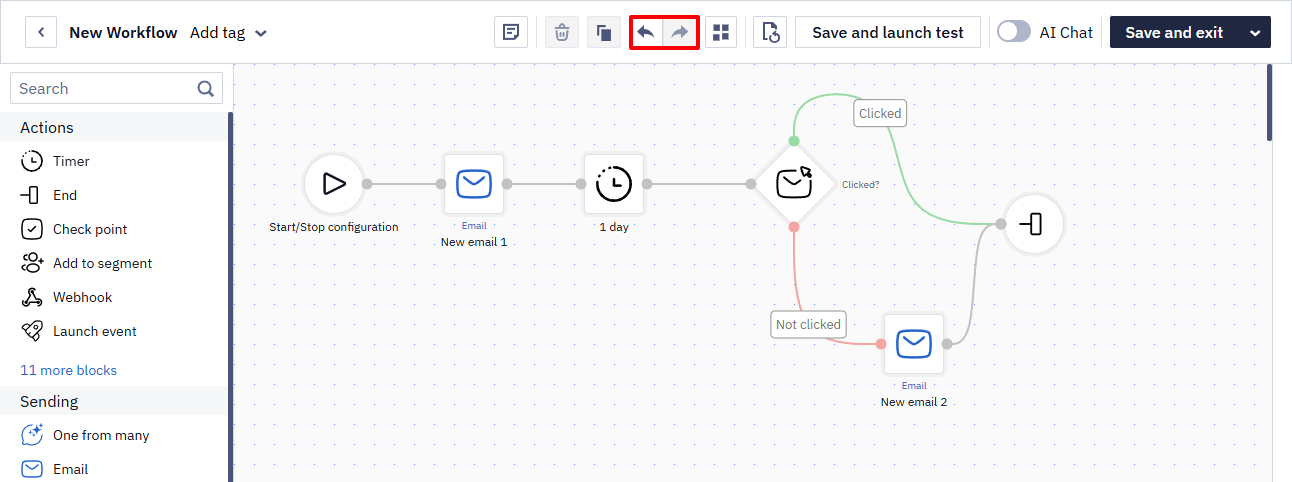
Undo Actions
To undo the previous action or redo the undone action, click the arrow icons on the top panel or press on the keyboard:
- Ctrl + Z — undo the previous action.
- Ctrl + Y — redo the undone action.
Drop-down Menu Navigation
Use the ↑ and ↓ keys to move between items in a drop-down menu, and press Enter to select the desired item. The currently selected item is highlighted.
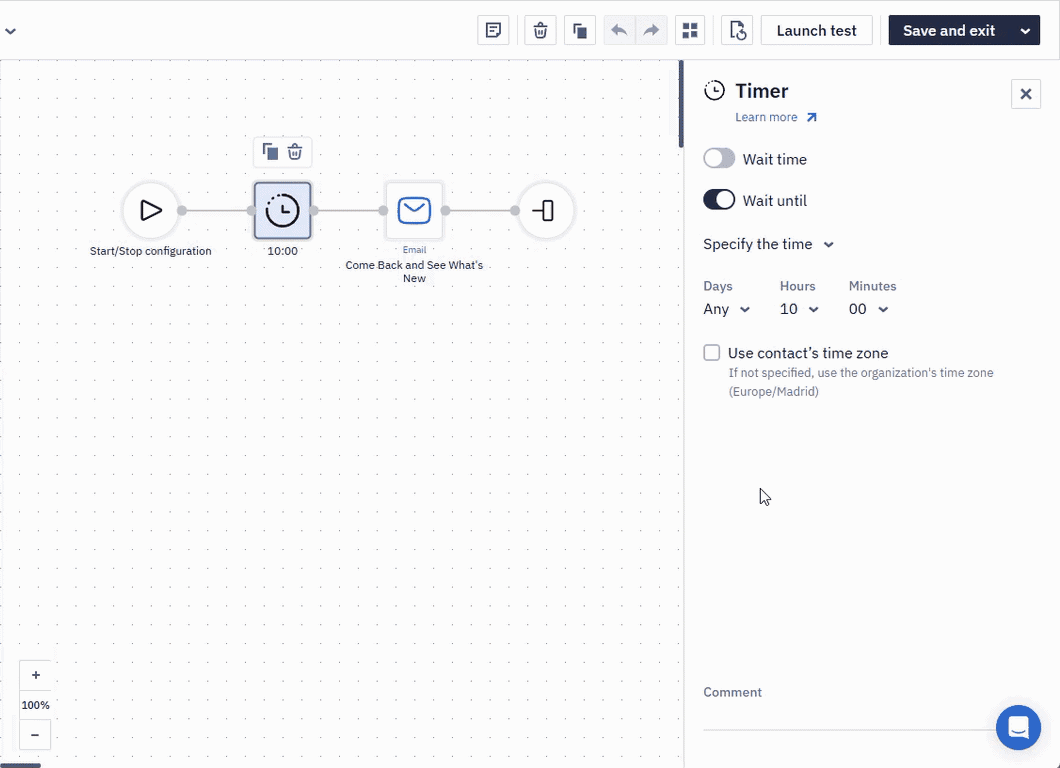
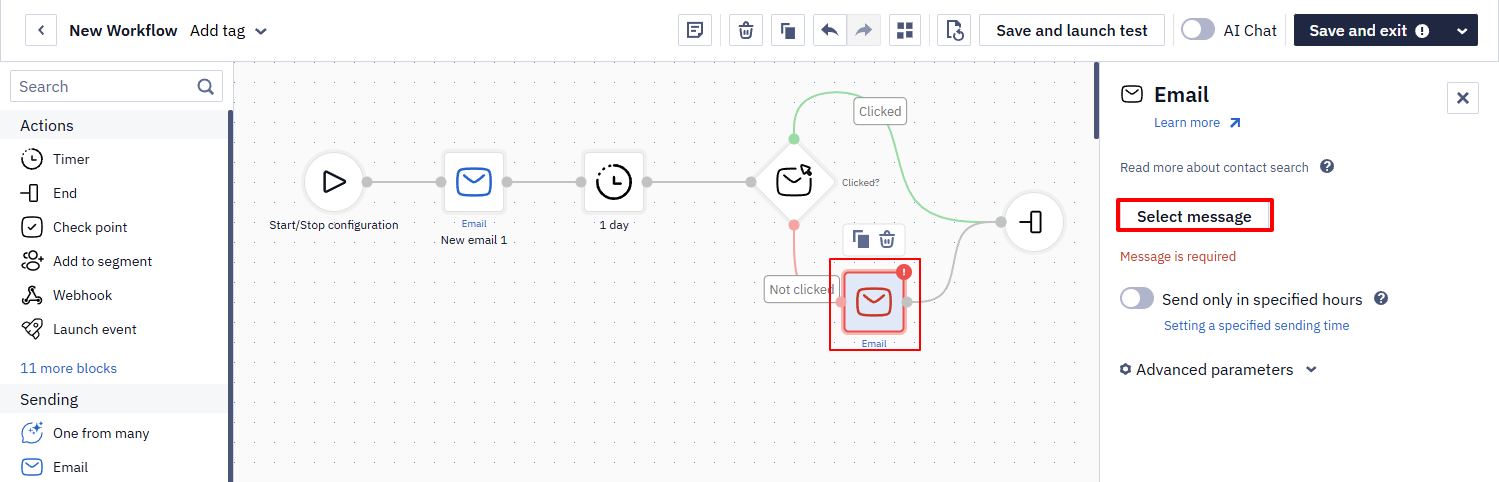
Additional Block Settings
The blocks requiring additional settings have an orange alert label mark. Select a block and configure its settings in the right-hand side panel. Learn more about the block settings in the instructions for each block group.
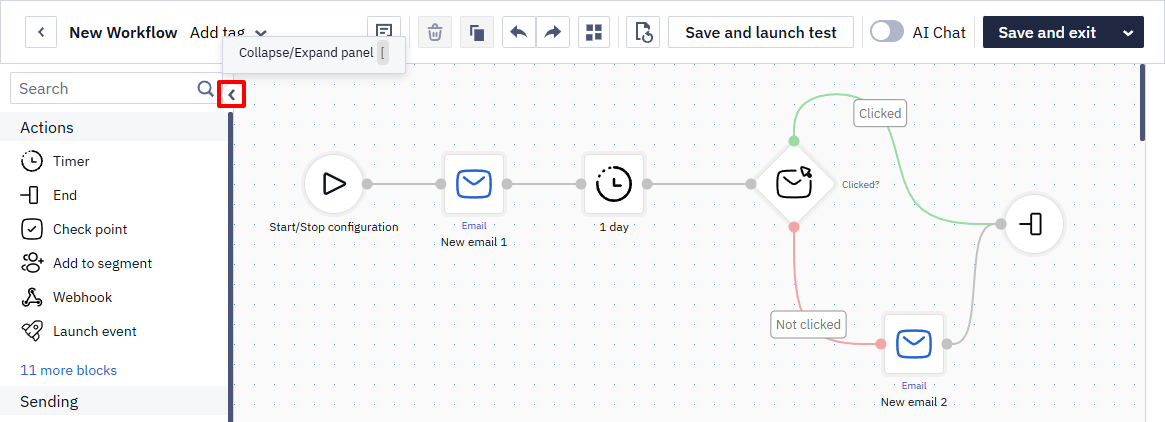
To expand or collapse the block panel, click [ on the keyboard or angle brackets icon in the drag-and-drop builder.
Workflow Description and Preview
The description of a workflow in the system helps mark workflows with brief information about their purpose and key actions.
Click the Workflow description icon and add the necessary information.
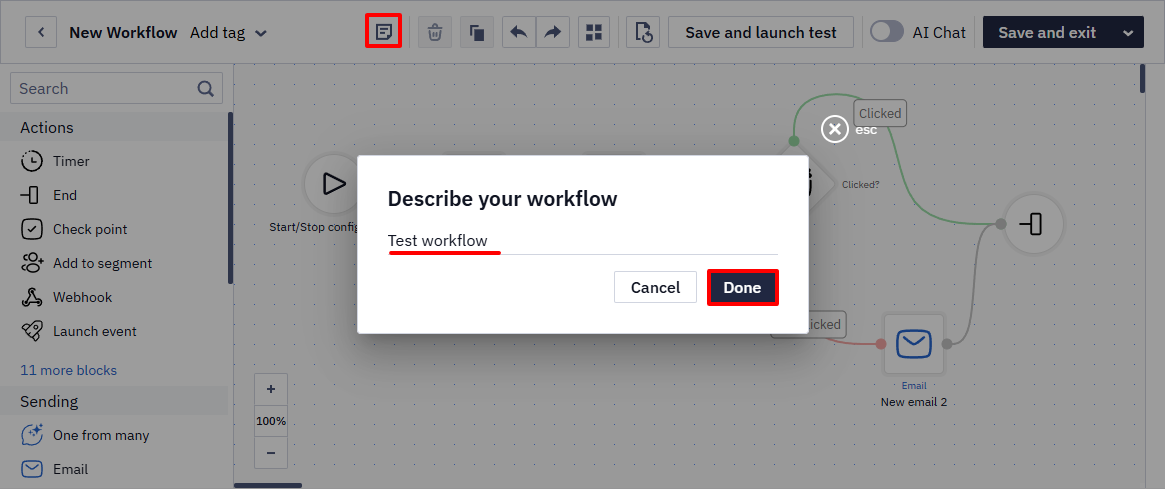
In the menu, the description appears in a tooltip when you hover over the icon.
Workflow preview lets you check the workflow structure, logic, and block settings without opening the editor. Select a block to view its parameters in the right-hand panel. In this mode, the settings are read-only.
To make changes, click Edit workflow.
Workflow Zooming
The zoom function makes it easier to work with workflows that contain many blocks and branches by allowing you to adjust their size for more comfortable viewing.
Use the buttons in the bottom-left corner of the editor or in the workflow preview window:
- + : to zoom in;
- – : to zoom out;
- 100% : to reset to the default scale;
Or use shortcuts:
- Scroll + Ctrl or Ctrl +/- for Windows
- Scroll + CMD or CMD +/- for macOS
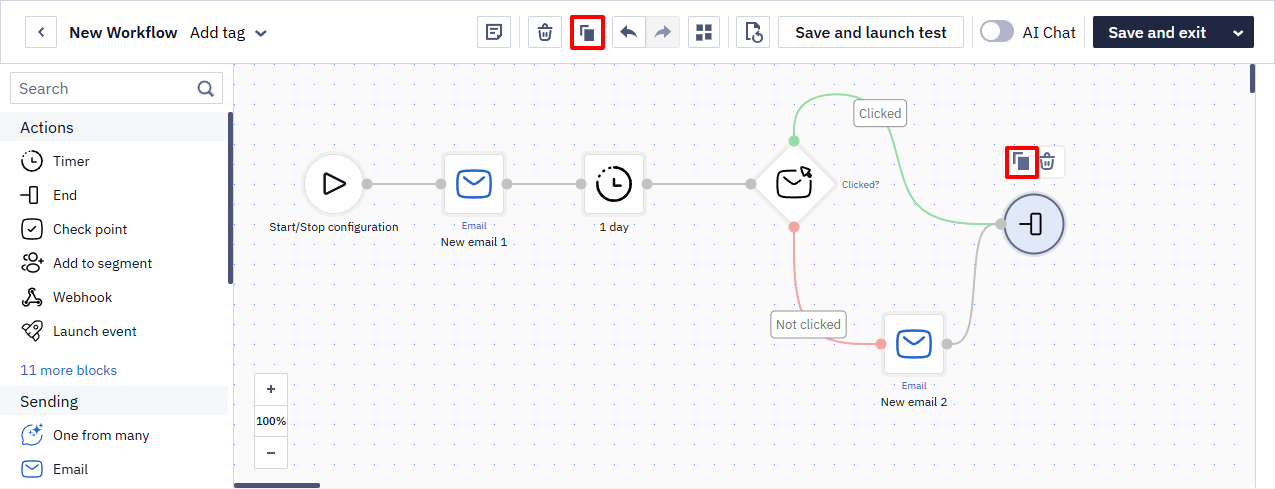
Copying Blocks & Workflows
You can duplicate blocks in a workflow so that a duplicated block has the same configuration as the original one.
You can also copy selected blocks from one workflow to another and create a new workflow containing the blocks from an existing workflow.
To duplicate a block, select the block and click the Copy icon above it or in the top panel. You can use Ctrl + C / Ctrl + V combinations on your keyboard.
To copy the selected blocks from one workflow to another:
- Open two workflows in different tabs.
- Using your mouse, select the blocks in the workflow you want to copy or press Ctrl + C on your keyboard.
- Go to another workflow and paste the copied blocks by pressing Ctrl + V on your keyboard.
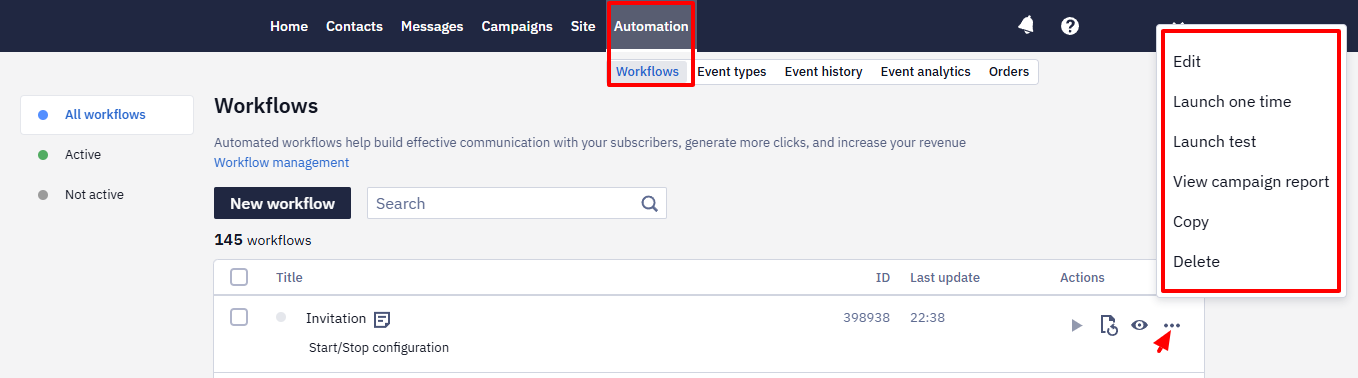
To copy workflow:
- Go to Automation → Workflows.
- Select the ellipses (three dots) icon beside the workflow you want to copy.
- Select Copy from the dropdown list.
A new workflow window appears containing the blocks from the copied workflow. You can edit and save it.
NoteCopy to another account is available for message templates, but not for workflow scenarios. To move a workflow to a different account, contact Yespo support.
Setting up Workflow Start/Stop Configuration
In addition to settings you can apply to workflow blocks, you can set up start/stop configuration for your workflow.
Read Configuring Workflow Start/Stop Conditions to learn more.
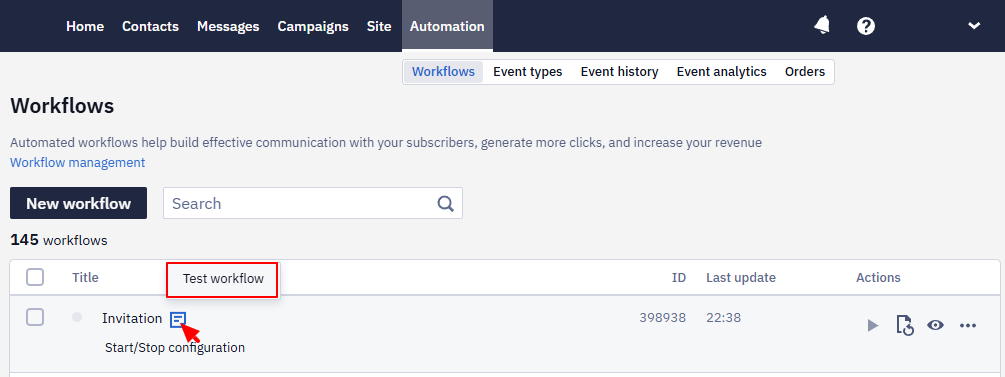
Testing Workflow
There are two ways to check the correctness of the workflow:
A. In the editor while creating or editing a workflow (the Save and launch test/Launch test button or the Save and exit button menu → Save and launch one time):
B. In the general workflow list (the Launch test or Launch one time options):
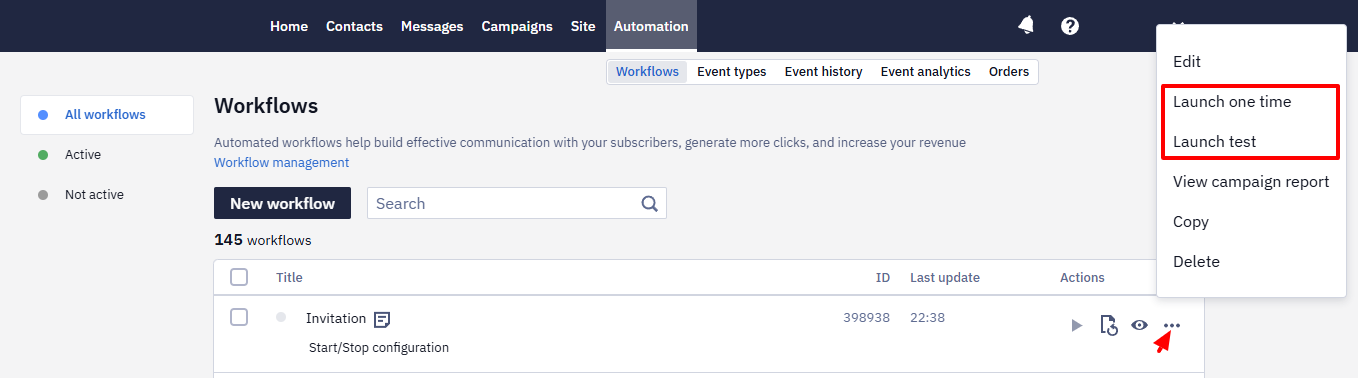
After selecting the way, select one of the testing options:
- Start for a contact
- Start with event
- Start for the segment (this option is only available in the Launch one time option)
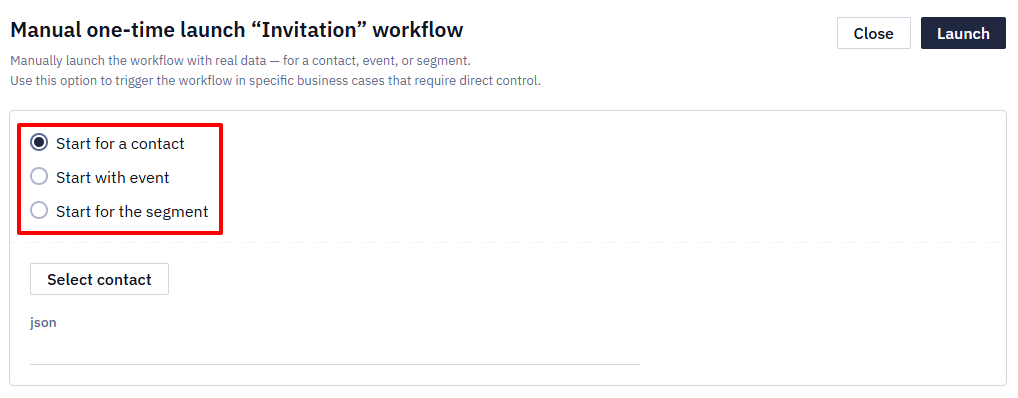
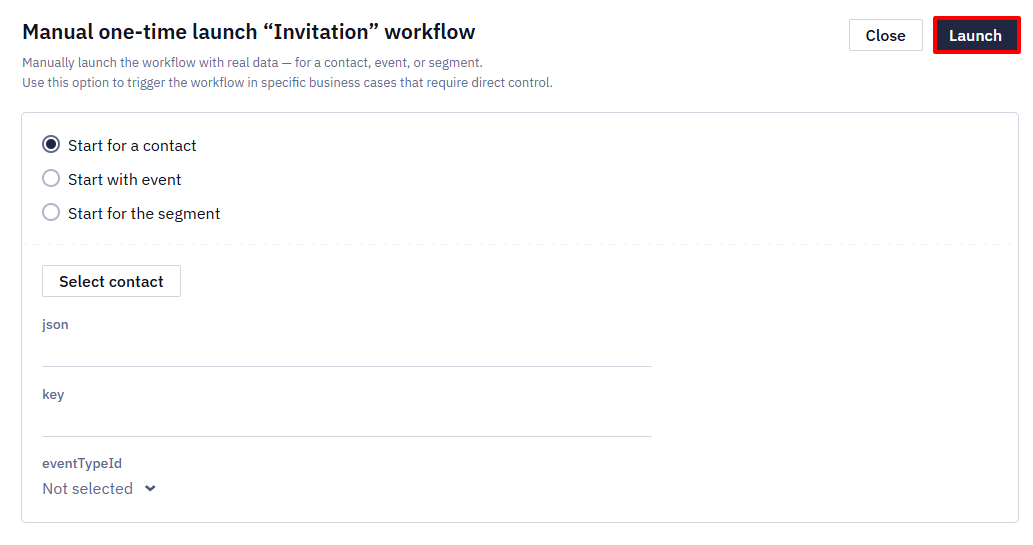
Start for a Contact
Click Select contact and select the contact from the list.
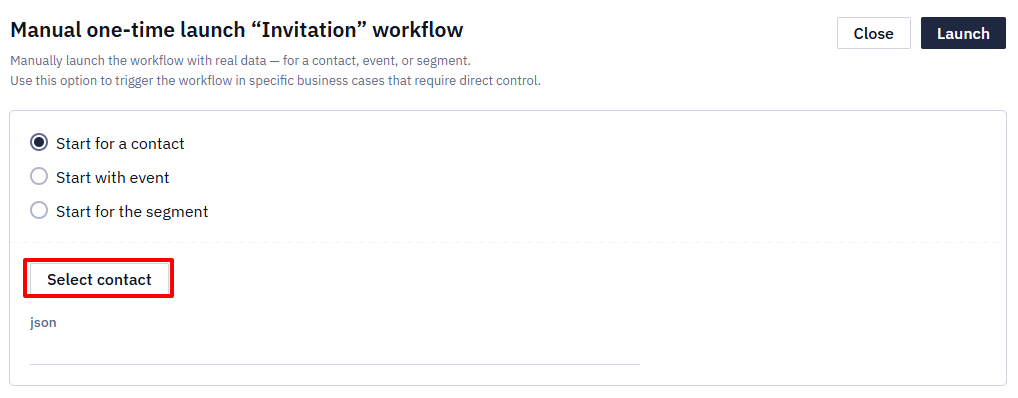
If the workflow uses event parameters, select the event from the list.
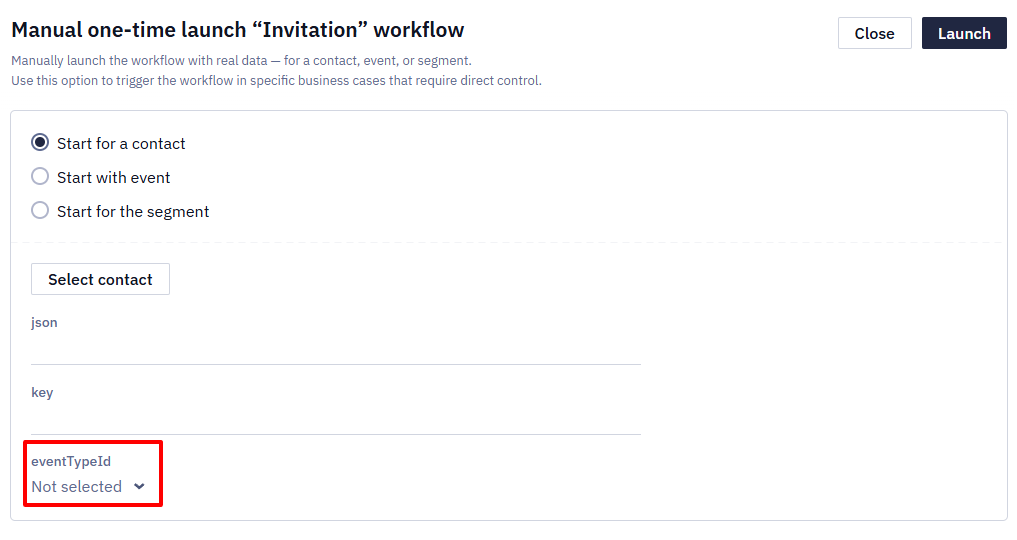
If variables are specified in the workflow blocks, specify their values in the corresponding fields.
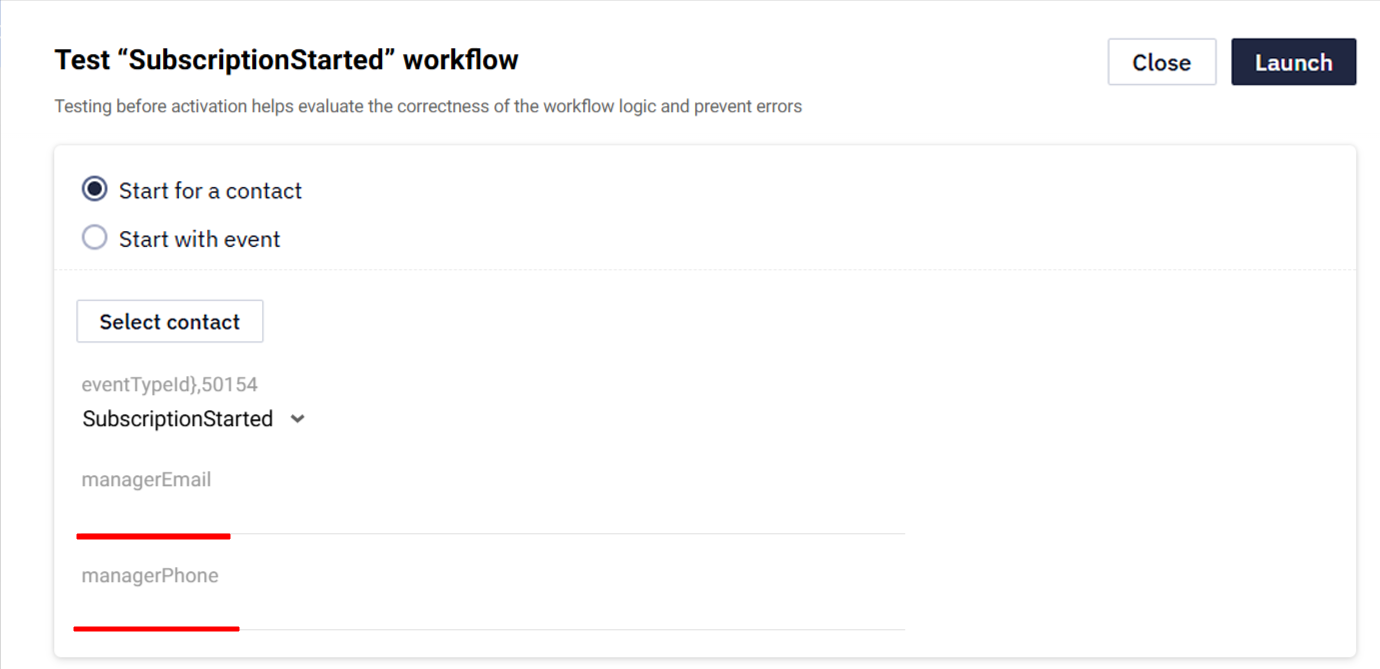
Click Launch.
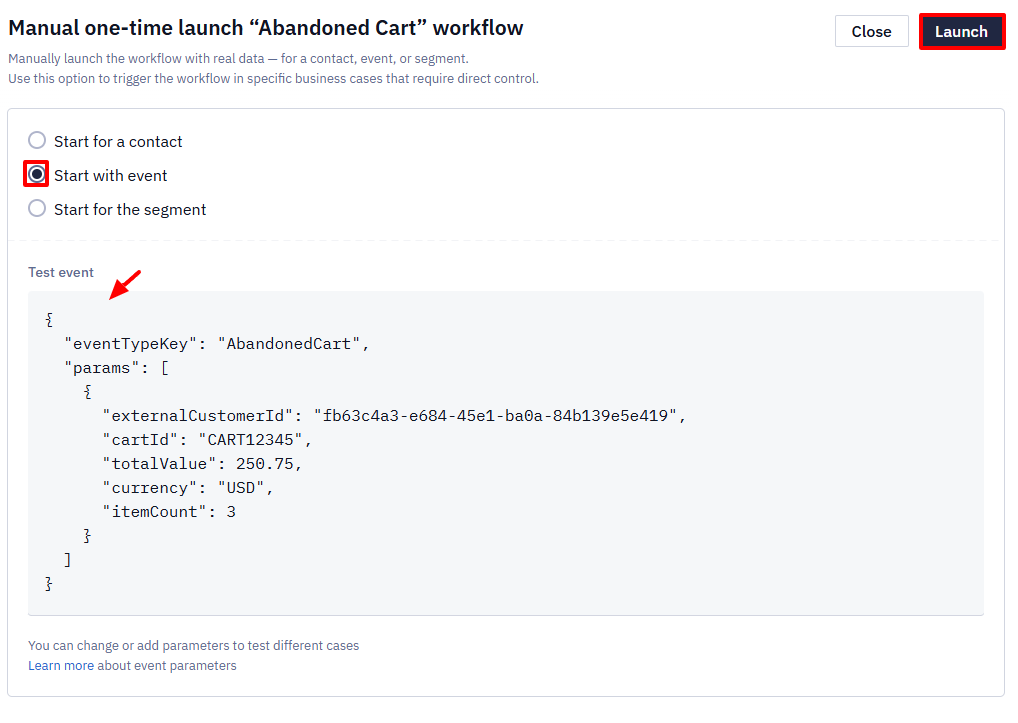
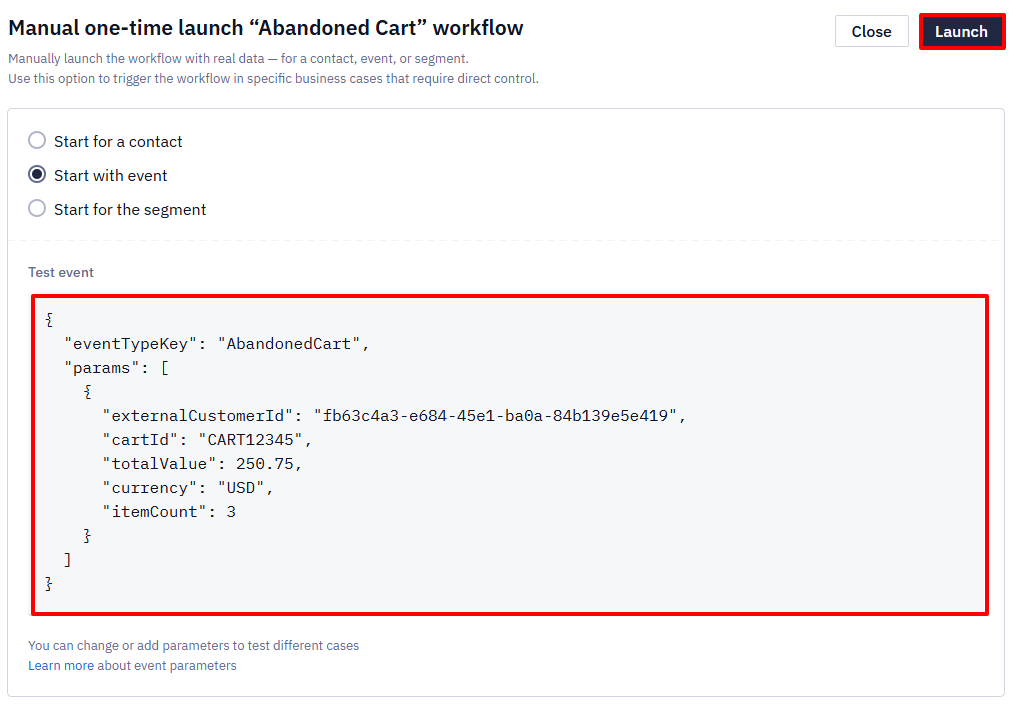
Start with Event
Paste the event parameters in JSON format into the appropriate field and click Launch.
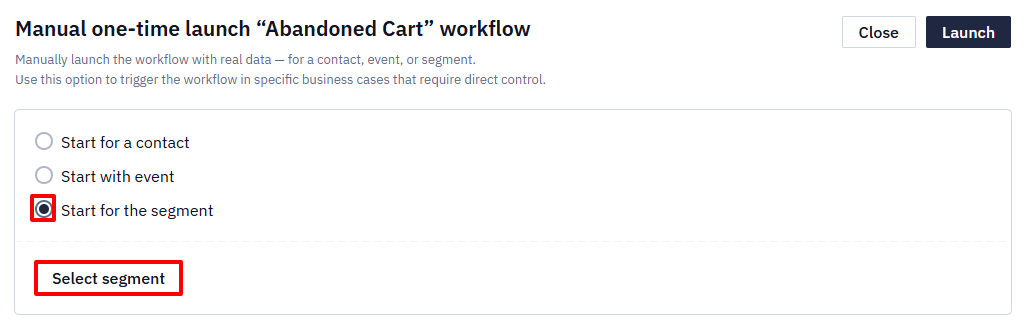
Start for the Segment
Click Select segment, choose a static or dynamic segment, and click Launch. The manualRunEventType event will be generated for each contact from the selected segment.
If the workflow includes a Timer block, you can skip it to speed up testing by clicking the Skip waiting button.
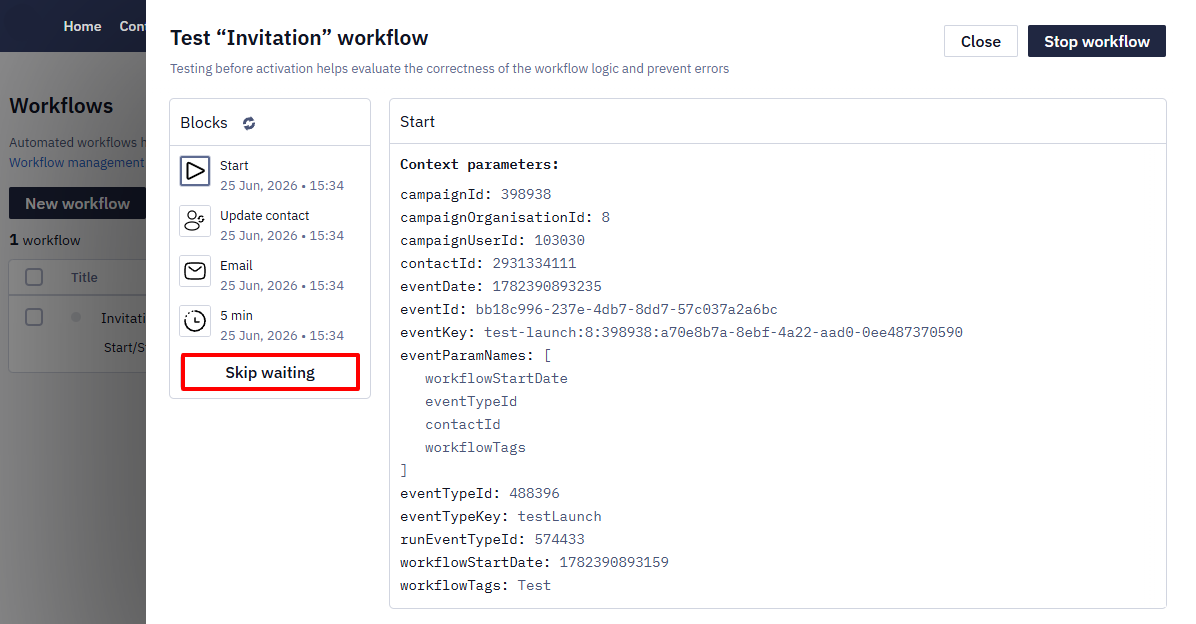
To exit the testing menu, click the Close button or select Stop workflow to stop it.
NoteAfter the test is completed, the system remembers:
- which testing option you selected (for a contact, start with event parameters, or start for the segment);
- the exact values you entered or selected.
This feature allows you to quickly repeat workflow testing without re-entering the same parameters.
If you tested the workflow using different options, the system stores the most recent settings separately for each option.
After a workflow test run, check the history of its launches and/or the messages received through the workflow.

Activating and Deactivating Workflows
You need to activate your workflow, so it can start automatically in accordance with the launch conditions.
To activate a workflow:
- Go to Automation → Workflows, and select Not active in the menu on the left-hand side.
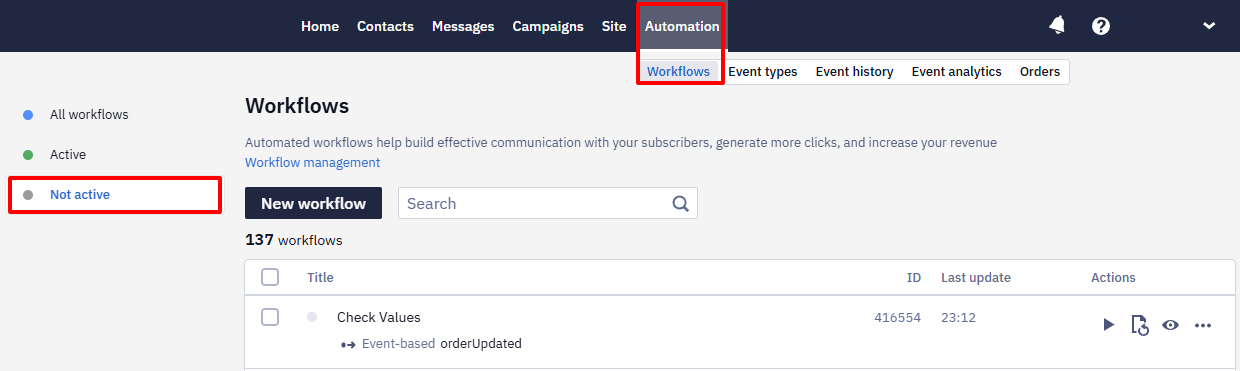
- Click the Activate icon beside the workflow you want to activate.

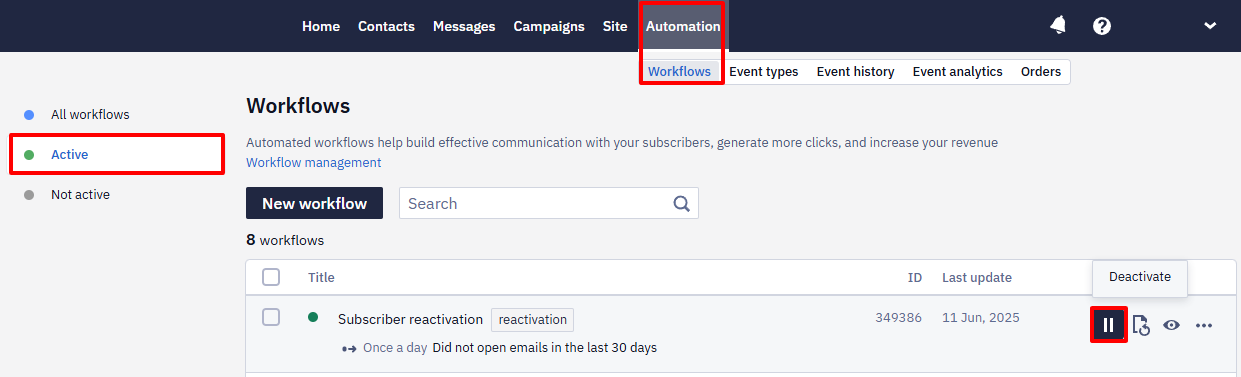
To deactivate a workflow:
Go to Automation → Workflows → Active and click the Deactivate icon beside the workflow you want to deactivate.
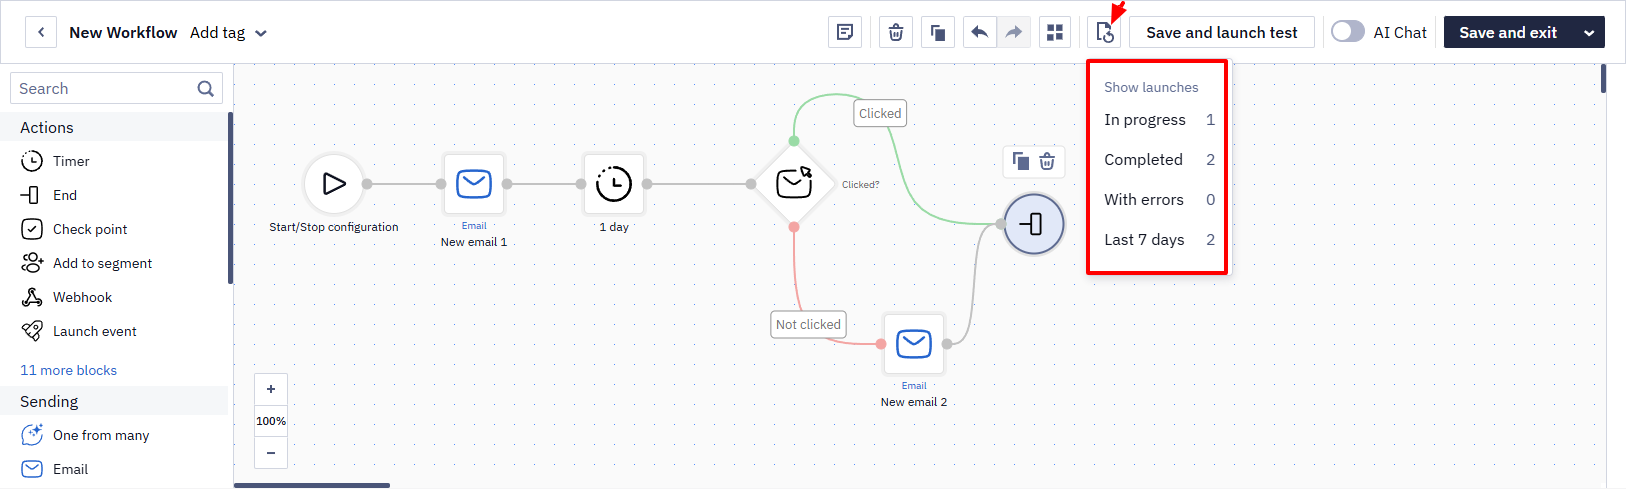
Workflow Launch History
You can view the workflow launch history in either of the following locations:
- In the editor:
-
From the workflows list:
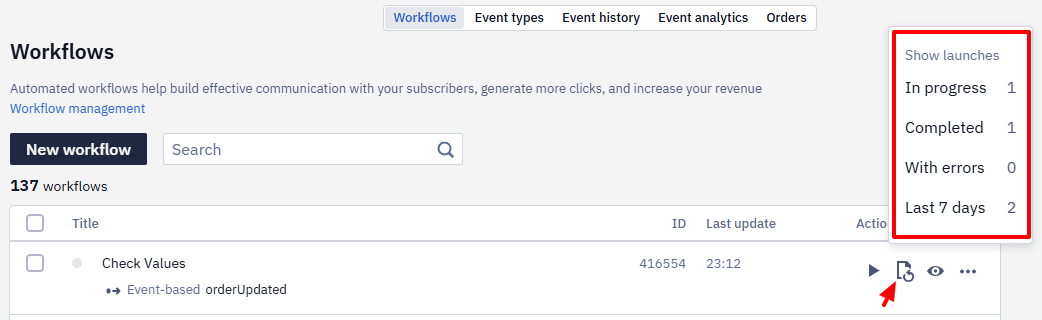
In either location, click Launches and select an option from the Show launches dropdown:
- In progress — launches that are still running;
- Completed — launches completed without errors;
- With errors — launches during which an error occurred;
- Last 7 days — launches whose start date falls within the last seven days;
- Launch statuses per segment — details of launches for contact segments. This option is available only for regular workflows for a segment.
Both entry points use the same filters, seven-day period, and counting rules. Launch history is available only for the last seven days; custom ranges and longer periods are not available.
The counters in the Show launches dropdown use different date references:
- In progress and Last 7 days are counted by launch start date;
- Completed and With errors are counted by launch completion date.
Because different dates are used, the Last 7 days total may not equal the sum of the status counters. Click the ? icon next to Show launches to view this explanation in the interface.
Read Using Workflow Launch History to learn how to inspect launches, preview execution paths, and check blocks for errors.
NoteWhen a contact enters a workflow, its current version is recorded for them. The contact then goes through this recorded logic, even if the workflow has been edited, such as adding new branches, changing conditions, timing, etc.
You can learn about stopping workflow instances by following this link.
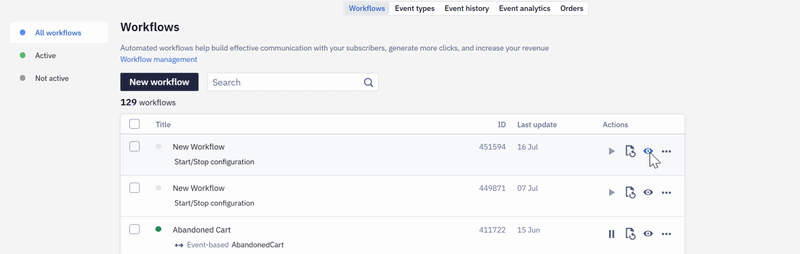
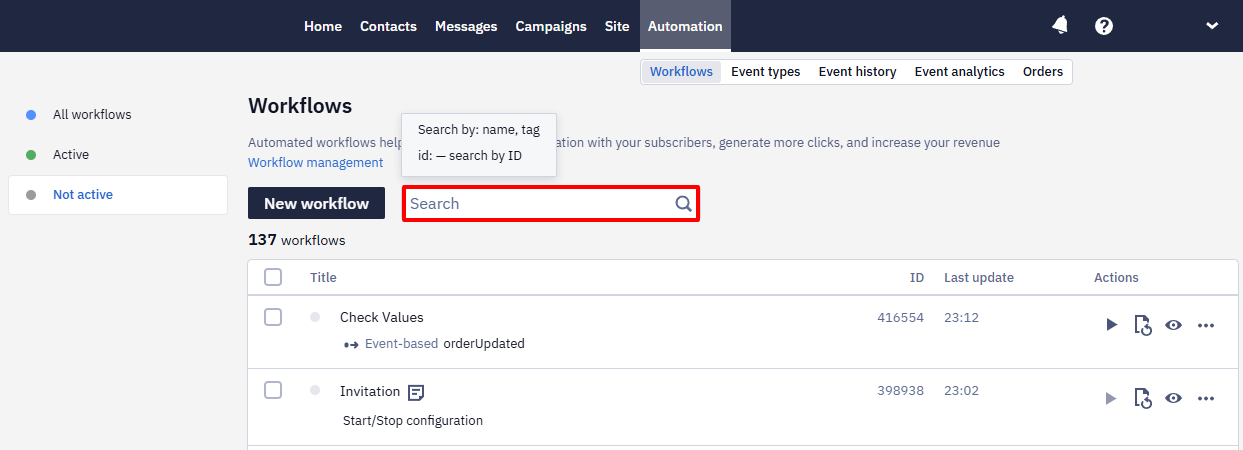
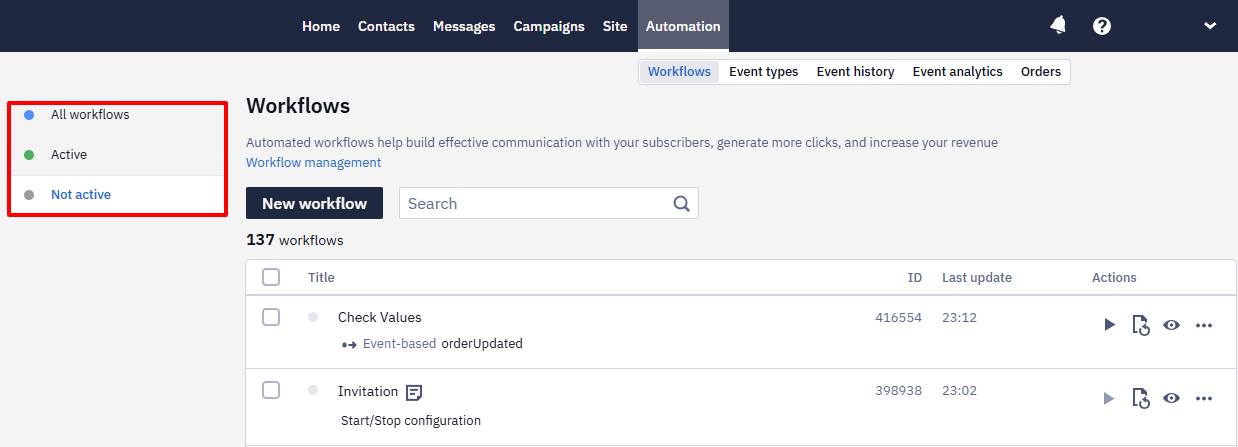
Searching and Filtering Workflows
To find a workflow, use the search bar by name, tag, or workflow ID
To filter workflows by activity, click the corresponding tab in the menu on the left:
- All workflows (shows workflows with all statuses)
- Active
- Not active
Updated 6 days ago