
Scheduled Mobile Push Message
After creating a message in the editor, you have three options.
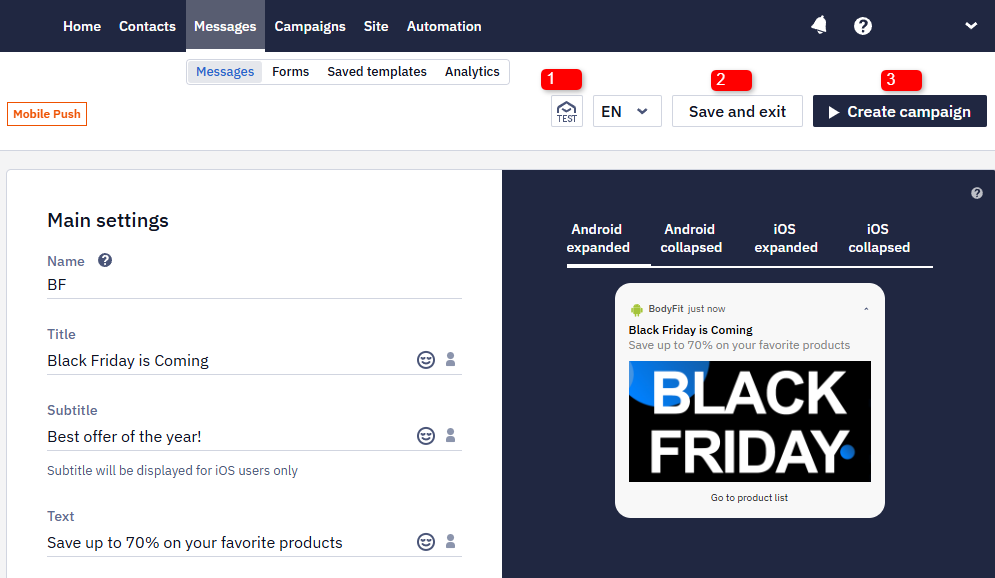
You can:
- Test – specify a phone number and send a test message to it without leaving the editor.
- Save and exit – the message will be saved in your account, and you can return to editing it.
- Create a campaign – go to sending the current message. The system will not allow you to do this if the required fields are not filled in, for example, the name of the message is not indicated.
Clicking on the Test or Create campaign icons you may see the following popup window:
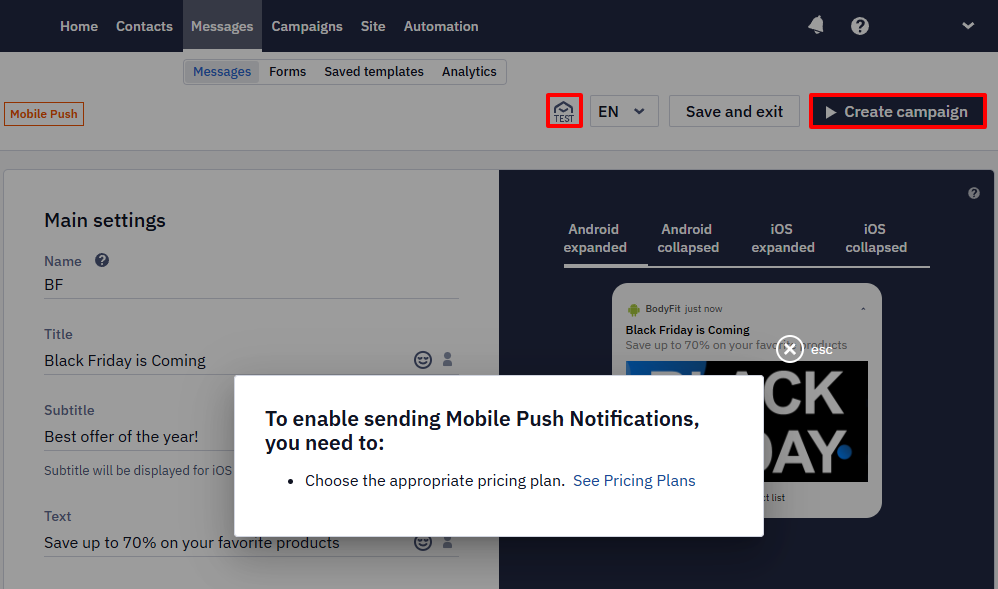
This is a system reminder that the mobile app is not yet connected or that you haven't selected the appropriate pricing plan for sending your mobile push notifications. If everything is set up all right, you will be able to launch your campaign immediately.
Campaign Launch
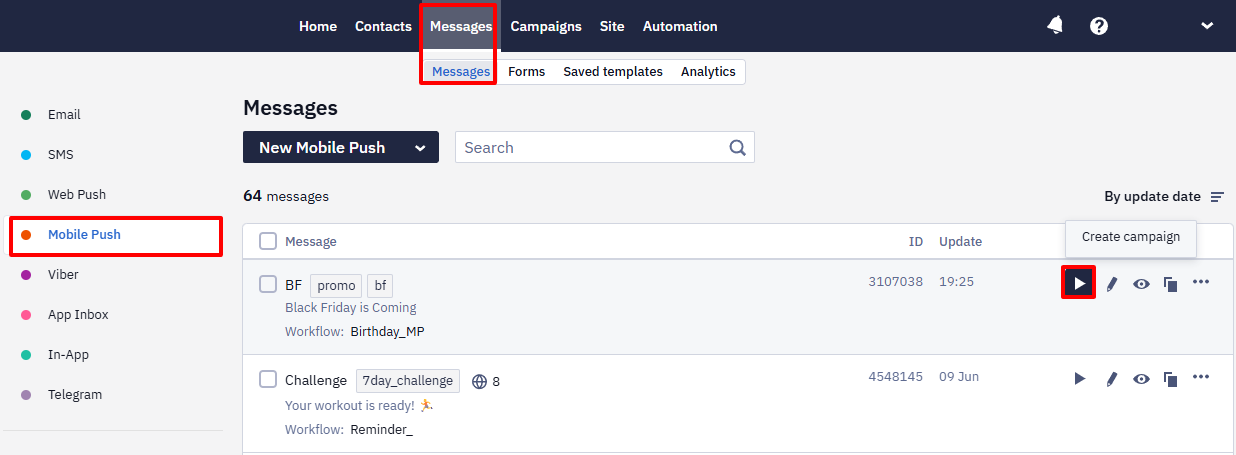
If you want to send a previously saved notification, click on the Create campaign button in the message list on the Messages → Messages → Mobile push tab.
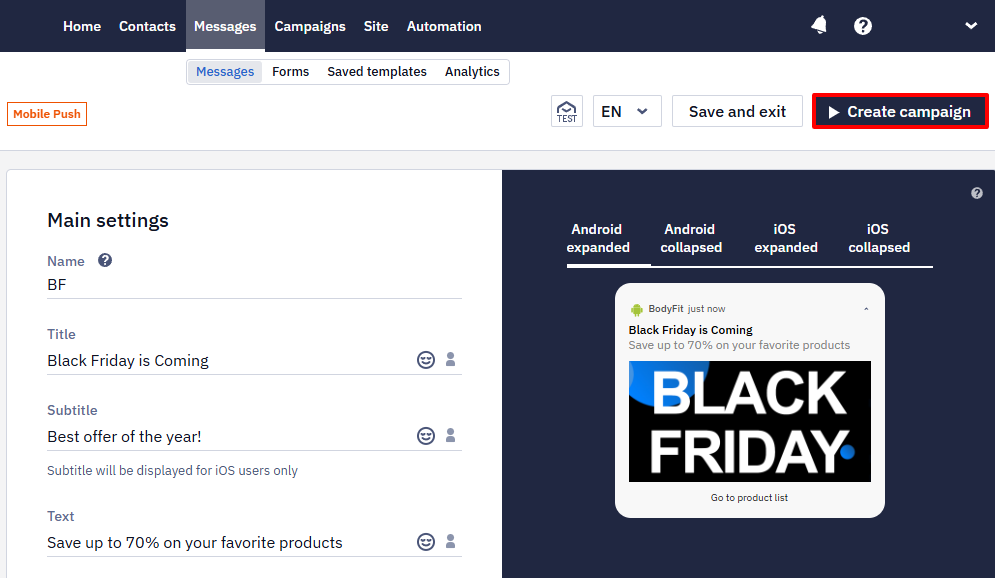
To launch a campaign from the editor click on Create campaign:
Select in the popup window the segments you want to send the push notification to.
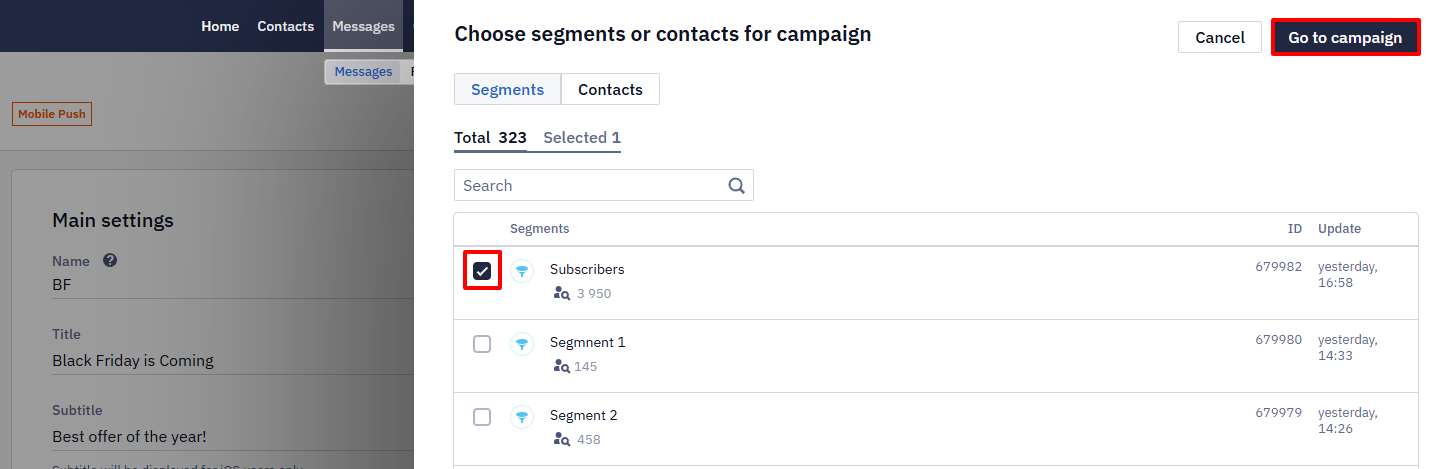
You just have to check the box next to one or more segments. If the contact is in both selected segments, no duplicate is created and only one push notification will be sent to the user.
In the preview window, check all the data to start the push notification campaign.
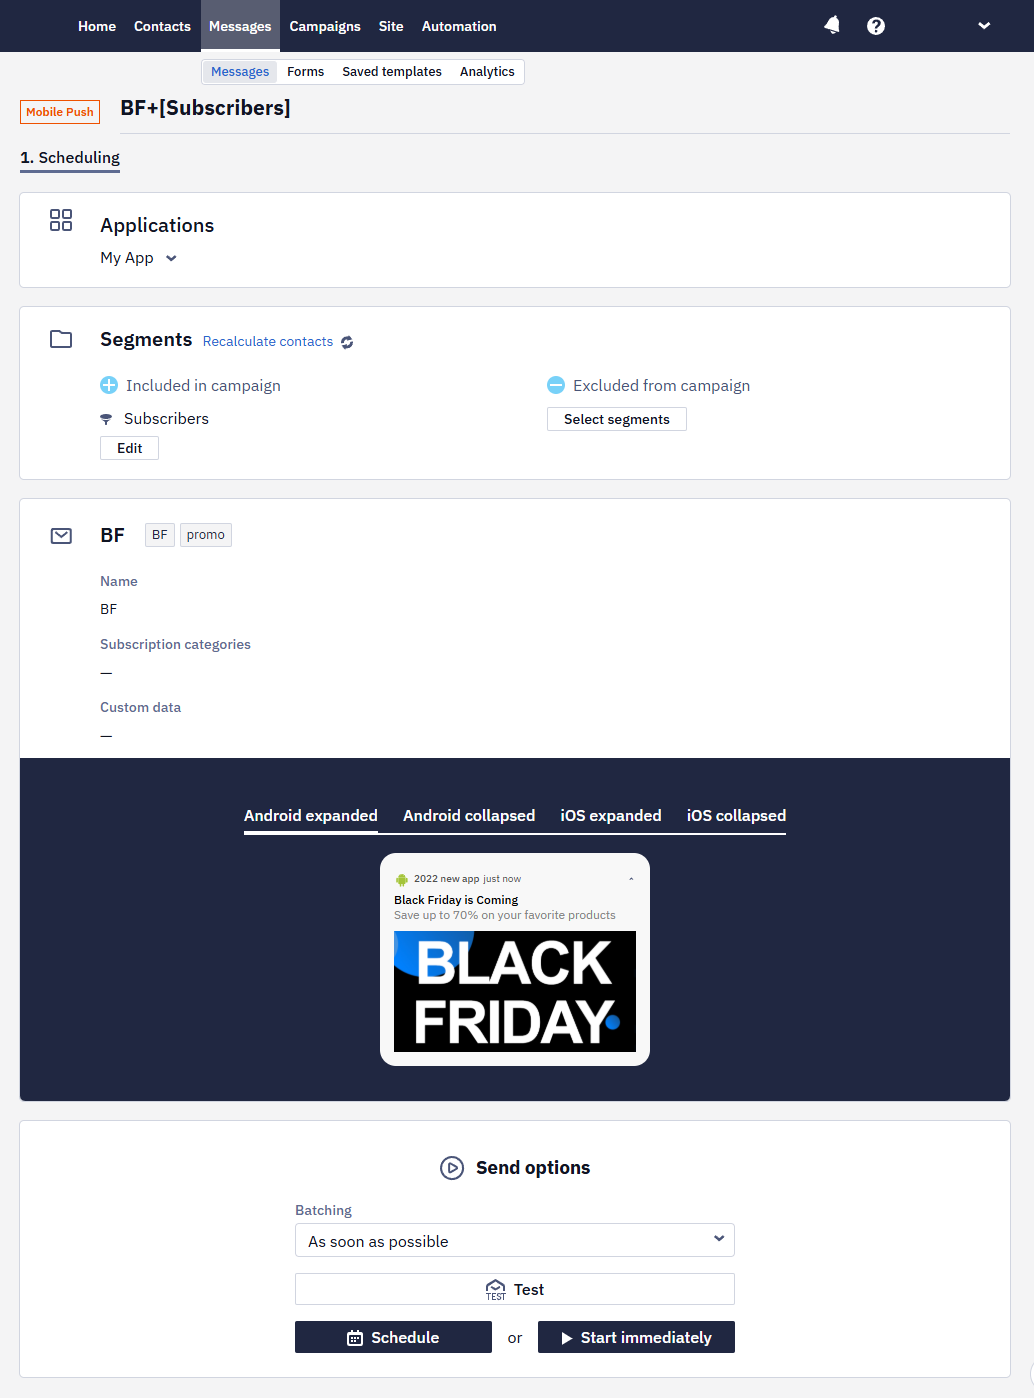
Send Options
Here, you can configure the following options:
1. Batching
You can choose the As soon as possible option or limit the speed by specifying the number of messages sent in a particular time (minute, hour, day, week).
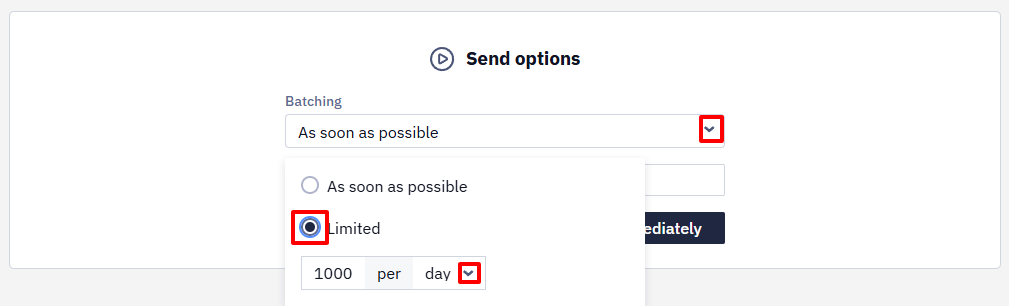
NoteYou can set a limited sending speed for a campaign that involves at least ten contacts and does not use the option of sending by contact time zone.
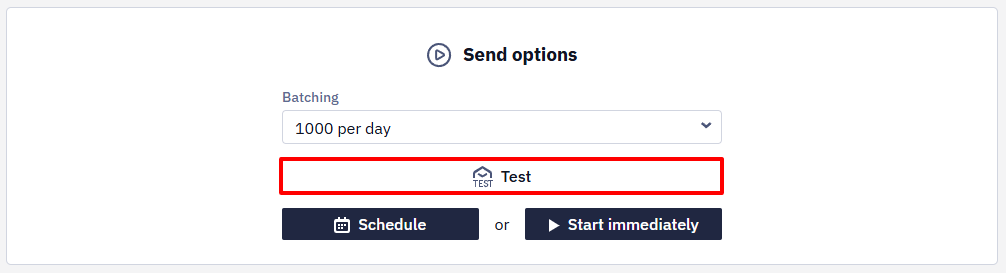
2. Test
Send yourself a message to check it's correct.
3. Schedule
Click Schedule to set the date, time, and frequency of sending the campaign.
A recurring campaign stays active until you cancel it in Campaigns → Scheduled: deleting the message does not stop it.
4. Use Contact’s Time Zone
If your database contains many contacts from different time zones, activate this option so that they receive the campaign at a time convenient for them and you.
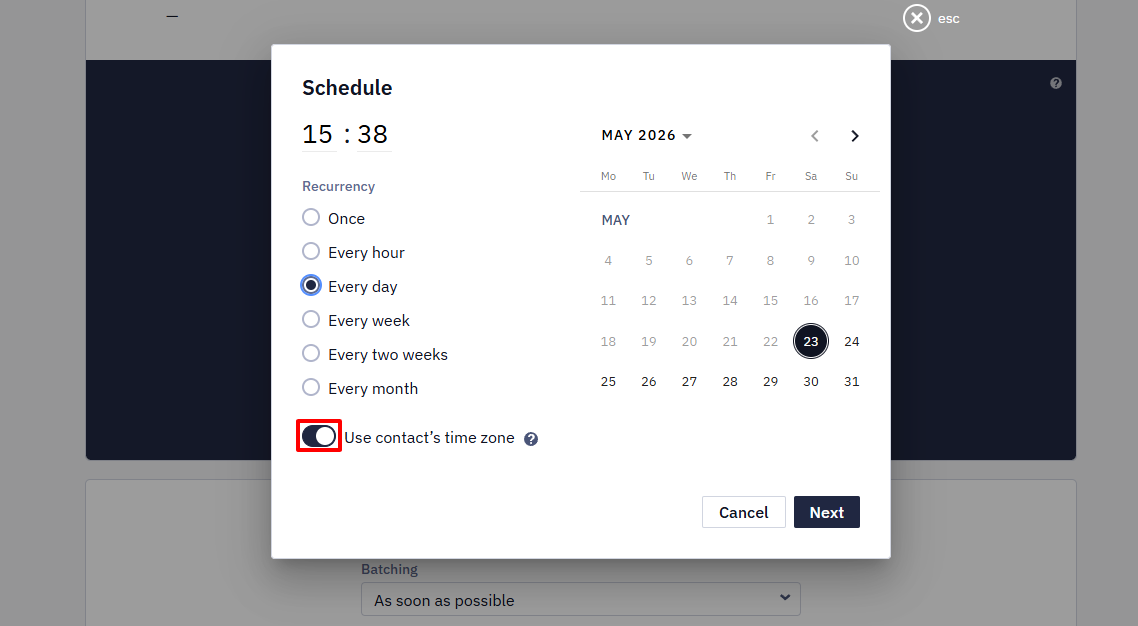
For example, if you schedule a campaign for 4:00 p.m., the contact will receive it as soon as 4:00 p.m. occurs in their time zone.
Contacts whose cards do not have a time zone will receive a message based on the time zone set in your account settings.
NoteYou cannot set batching if the contact's time zone is enabled.
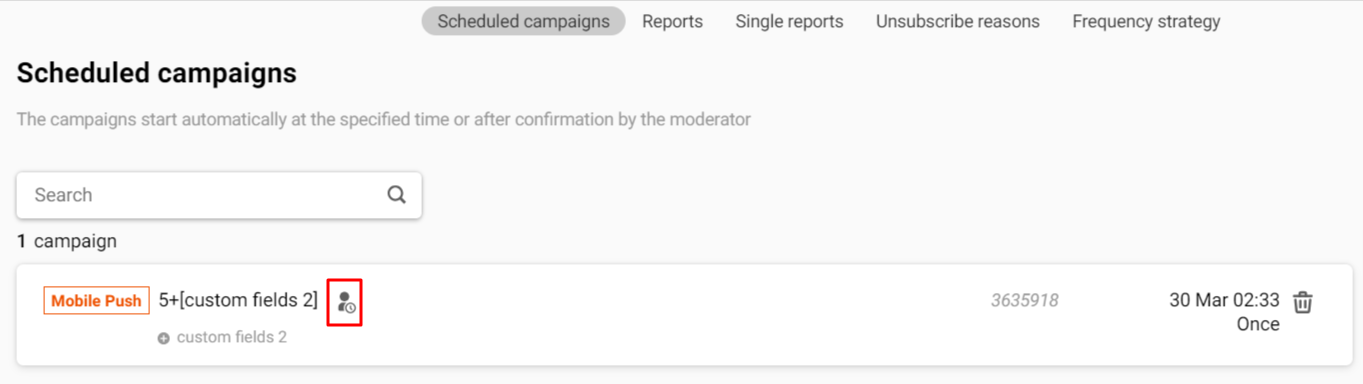
Campaigns scheduled by time zones are marked with a special icon on the report table and inside the report. The same icon is displayed in the campaign list scheduled by time zone.
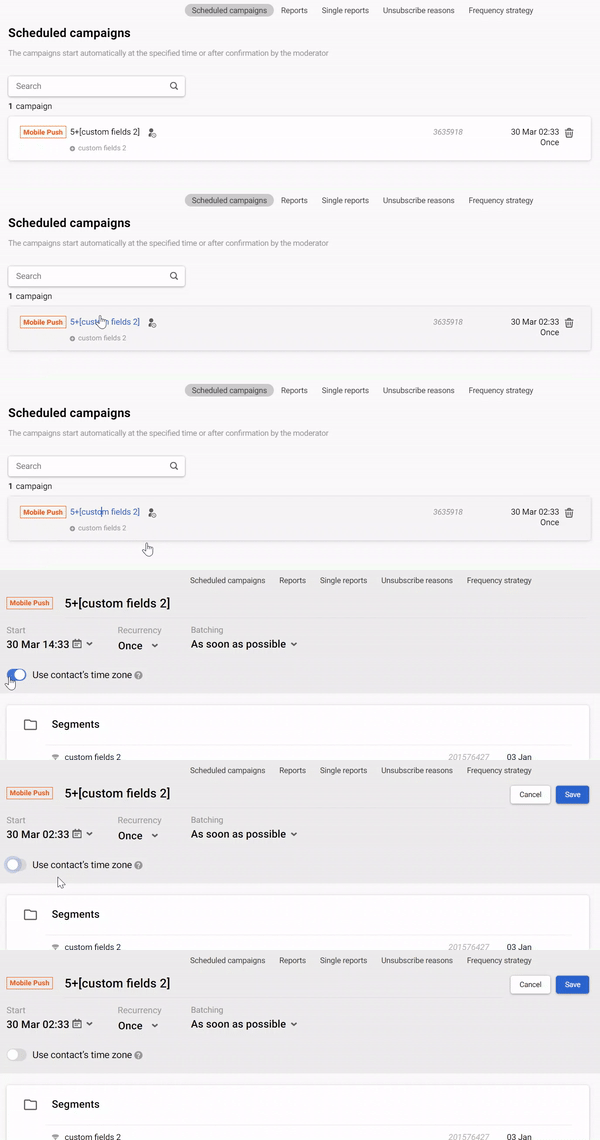
To cancel sending a scheduled campaign based on your contacts' time zone, go to the Campaigns → Scheduled campaigns section, click on the campaign name, and turn off the Use contact's time zone switch. The campaign will be sent to all contacts in the account's time zone when the scheduled time arrives.
If the campaign is scheduled for a time that has already arrived in one of the time zones, it will immediately go to the Reports section as active and will begin to be sent as soon as contacts appear from the time zone in which the scheduled time occurs. It will not appear in the Scheduled campaigns section.
If the scheduled time has not yet arrived anywhere, after scheduling, such a campaign will be displayed in the scheduled ones until the specified time arrives in the first time zone (UTC+14), after which it will move to the Reports section as active.
Contacts in a time zone where the campaign start time has already passed will receive the message the next day at the same time.
NoteUsing the contact's time zone is available for all Yespo channels
5. Start Immediately
Click Start immediately to send the campaign immediately after passing the moderation.
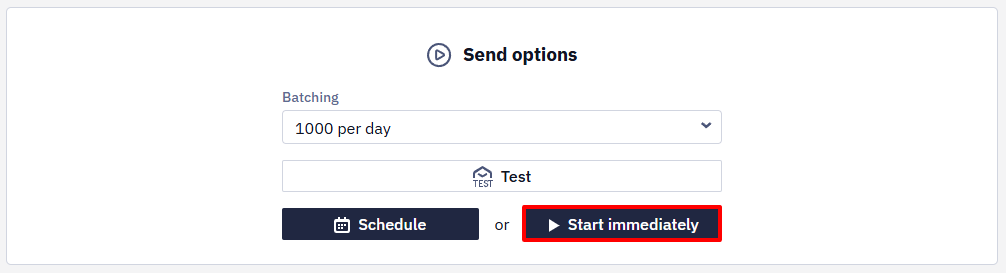
After launching or planning, the campaign will be sent for moderation. Moderation is carried out at +03 GMT and takes at most 10 minutes during working hours (Mon-Fri - 8 am - 7 pm; Sat-Sun - 9 am - 6 pm) and 1-3 hours in the evening time and on holidays. Moderation is not carried out at night.
NoteModeration is triggered automatically and dynamically — for example, by the performance of your previous campaigns, a newly uploaded contact base, suspicious message content, or no campaigns of this type for more than 30 days — rather than on a fixed schedule. Moderation can't be switched off for an account: in a trusted account most campaigns go out without it, but a campaign there can still be sent for review.
Moderation Statuses
- Preparing for sending.
- Moderation.
- Blocked: the campaign has been rejected by a moderator. The email with the reasons for blocking will be sent to your email address.
- Confirmed: the campaign has been approved by a moderator and is waiting for the sending.
Immediately before sending the campaign automatically transferred to Campaigns → Reports. Here, you can see the information on the sending and the statistics.
Sending Messages Automation
You can also use campaign scheduling to send regular and automatic messages, such as birthday greetings.
Option 1. Schedule a Message for a Segment
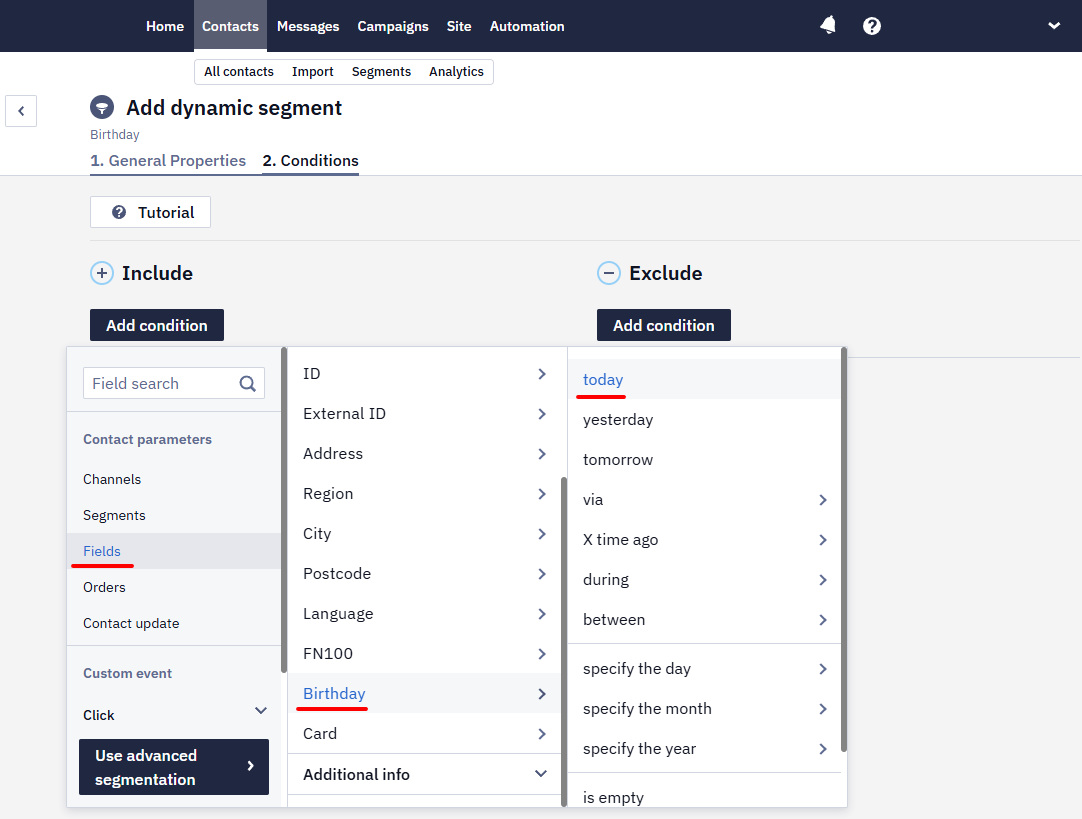
- Create the segment with the condition Birthday = today.
- Go to the saved push notification and click on the Create campaign button.
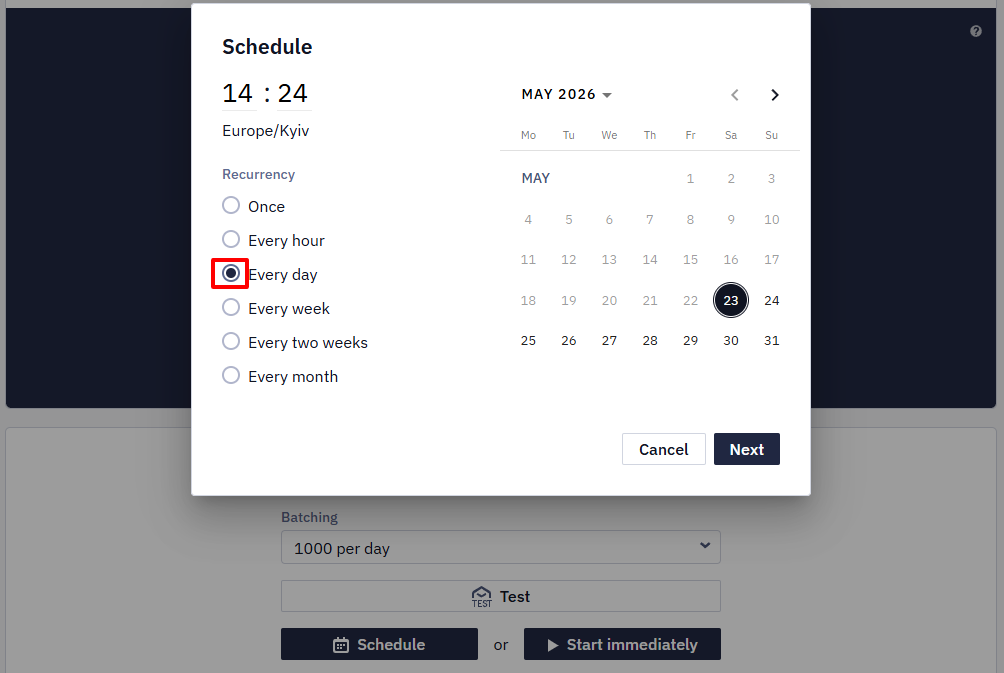
- In the Send options window, select the Schedule button. In the window that appears, specify the time for sending, and in the Recurrency field, select the frequency Every day and confirm the settings.
Option 2. Send Message from Workflow
-
Create the segment with the condition Birthday = today.
-
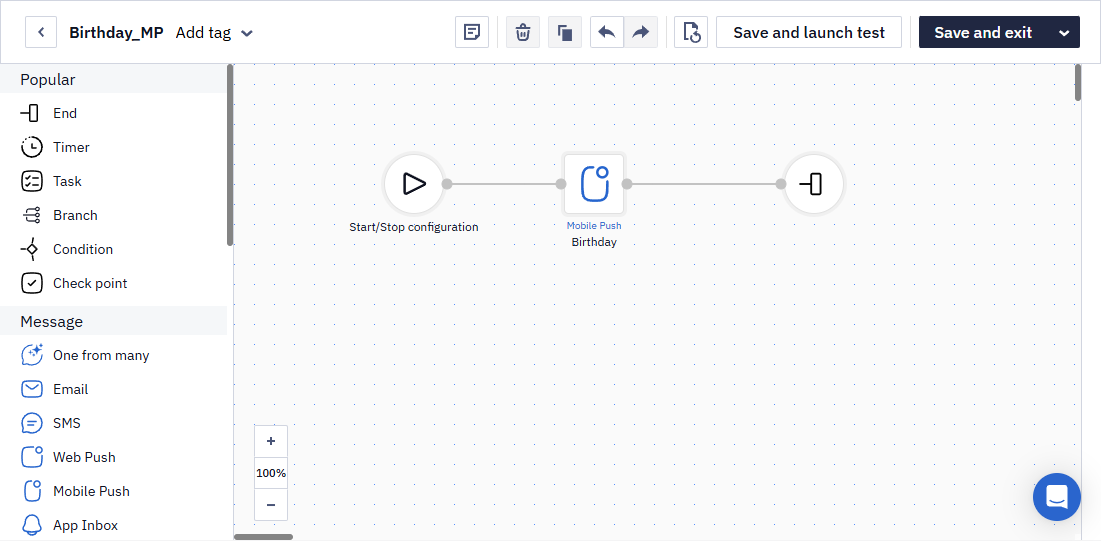
Build the workflow using three simple blocks:
- Start;
- Mobile Push;
- End.
-
You don't need to set conditions for the first and third blocks. In the parameters of the Mob Push block, select the message that you have prepared for the notification:
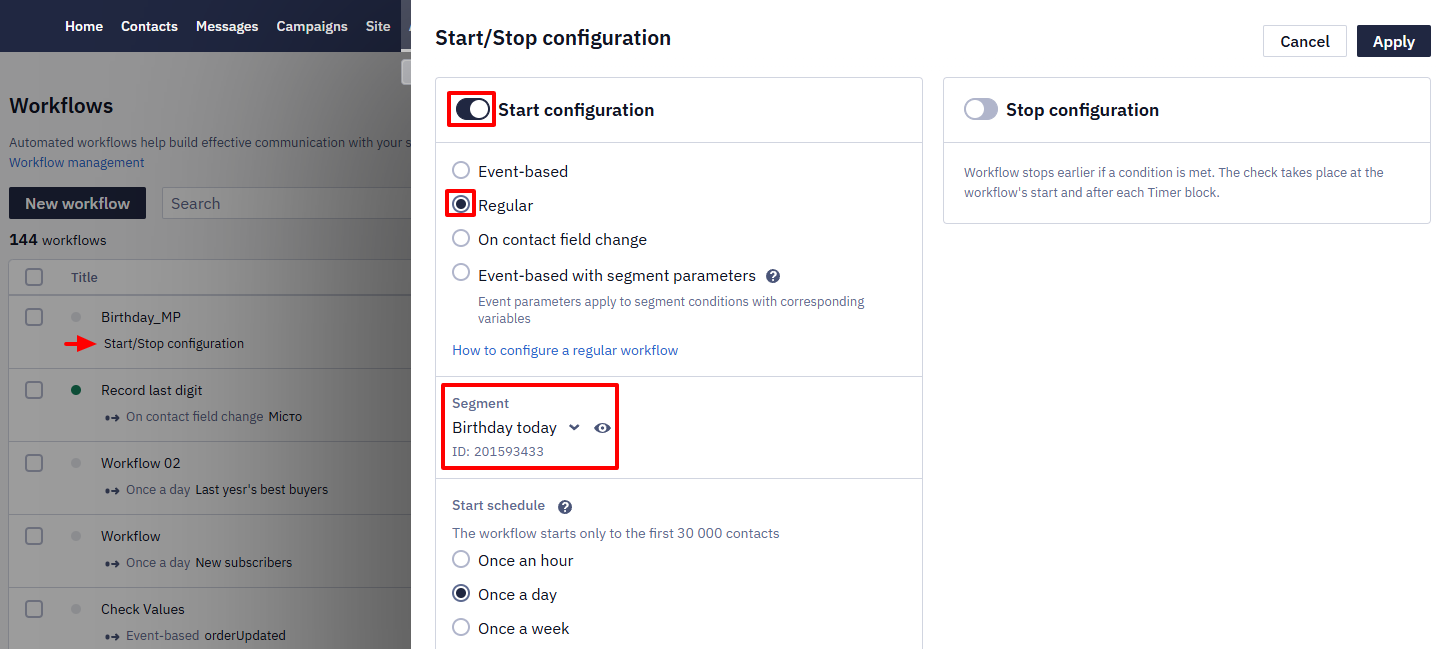
In the launch conditions, select the regular type of workflow, specify the created recipient segment, and set other necessary settings.
You can see the results of all launched campaigns in the reports tab.
Updated 24 days ago