
Opening a CSV File After Export
Yespo provides the following options for exporting contacts to a CSV file:
- From the general contact list
- From the segment list
- From reports
Export from General Contact List
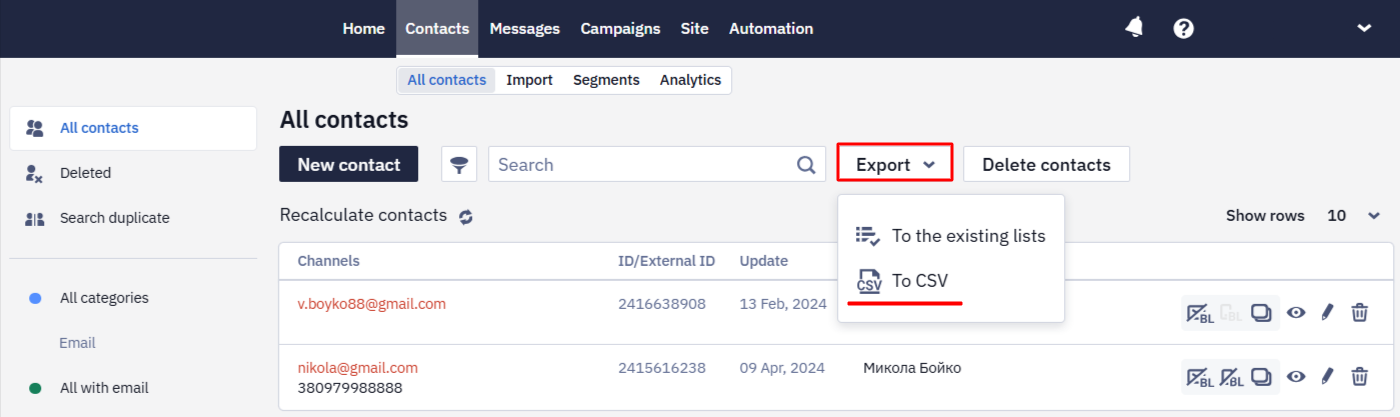
- Go to the Contacts → All Contacts tab and select a contact category from the left menu. By default, all categories are selected.
Any categories are available for export except duplicates.
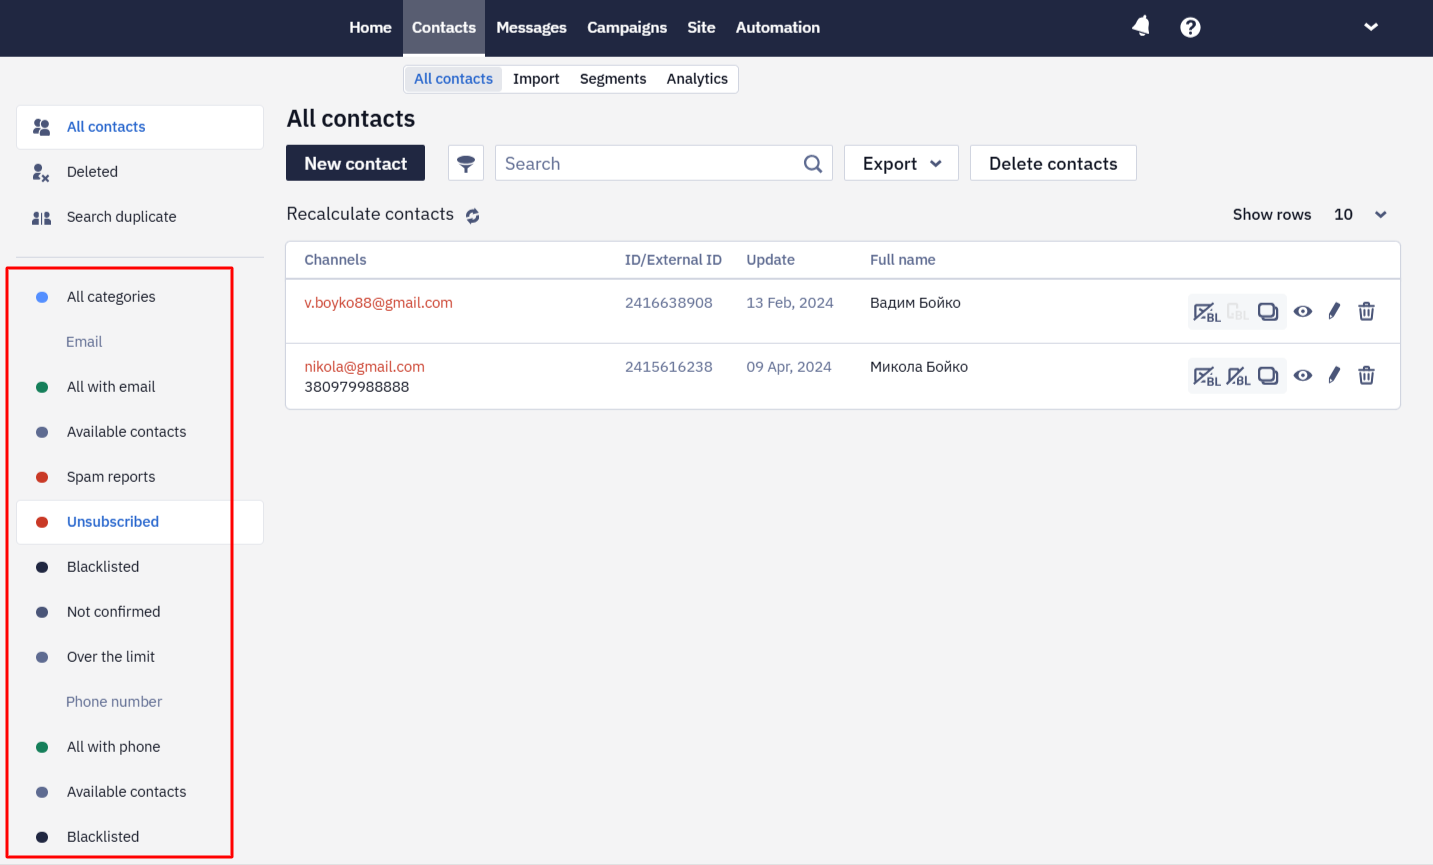
- Click the Export button and select To CSV from the drop-down menu.
Export from Segment List
-
Go to the Contacts → Segments tab.
-
Select a segment, click the three dots next to it, and select the To CSV export option.
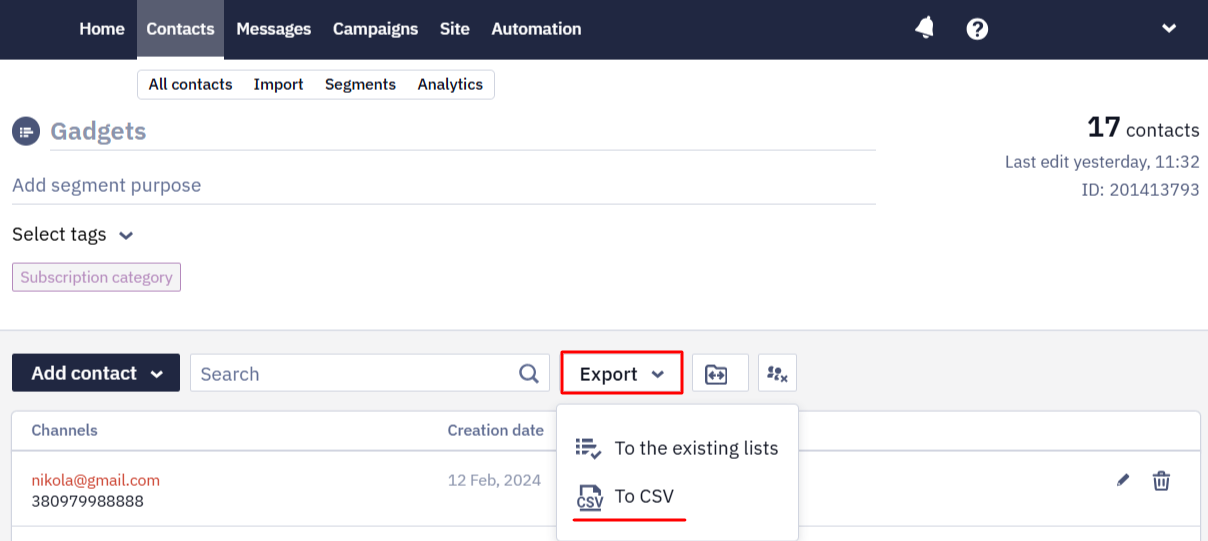
ImportantOnly users with export rights can upload contacts. After clicking the To CSV button, you will receive an email with a link to download the file at the email address you used to log in to your account. The file will be available for download within 3 days.
Export from Reports
Exporting contacts from reports is described in the manual.
After you have exported contacts using one of the options listed above, you can proceed to work with the file.
Working with a CSV File
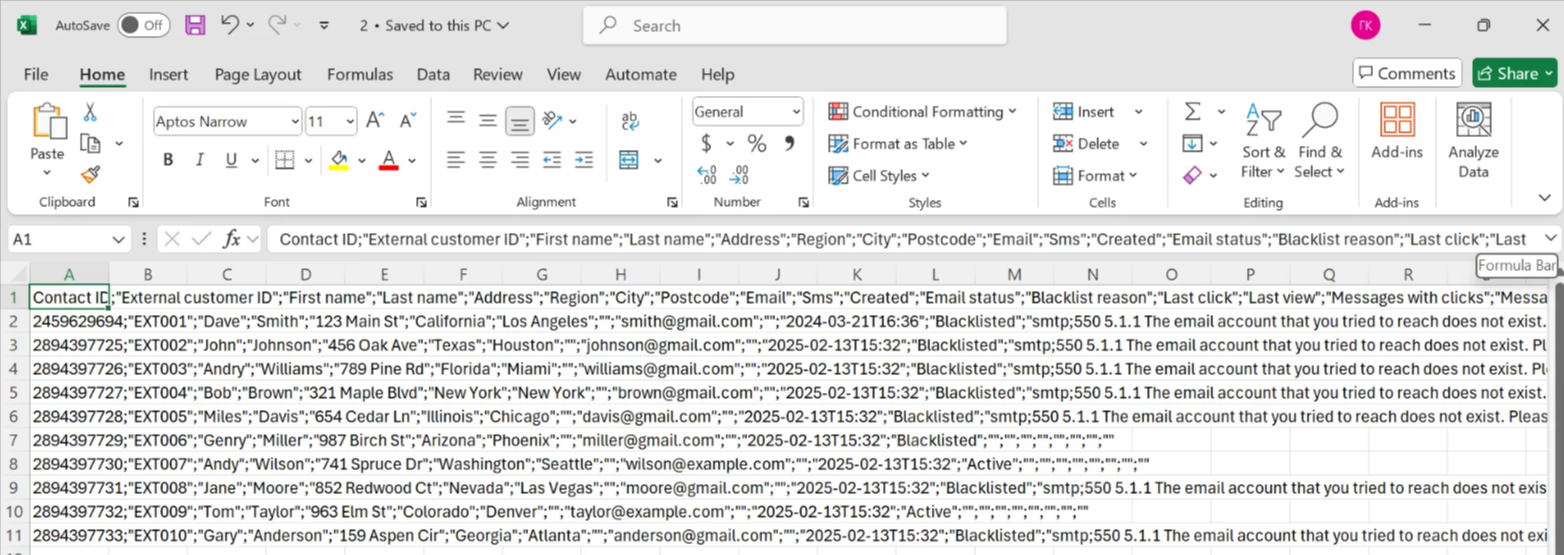
A file with comma-separated values contains text information, and the delimiter can be either a comma or a semicolon (depending on the language version of the system that generated the CSV file).
For the data in the file to be displayed correctly, you may need to
- Specify the appropriate encoding and delimiter character;
- Split the text into columns.
Specifying Encoding
When opening a CSV file in Excel, the encoding and delimiters may not match, and you may see a set of unreadable characters or text that is not divided into columns.
In this case, take the following steps:
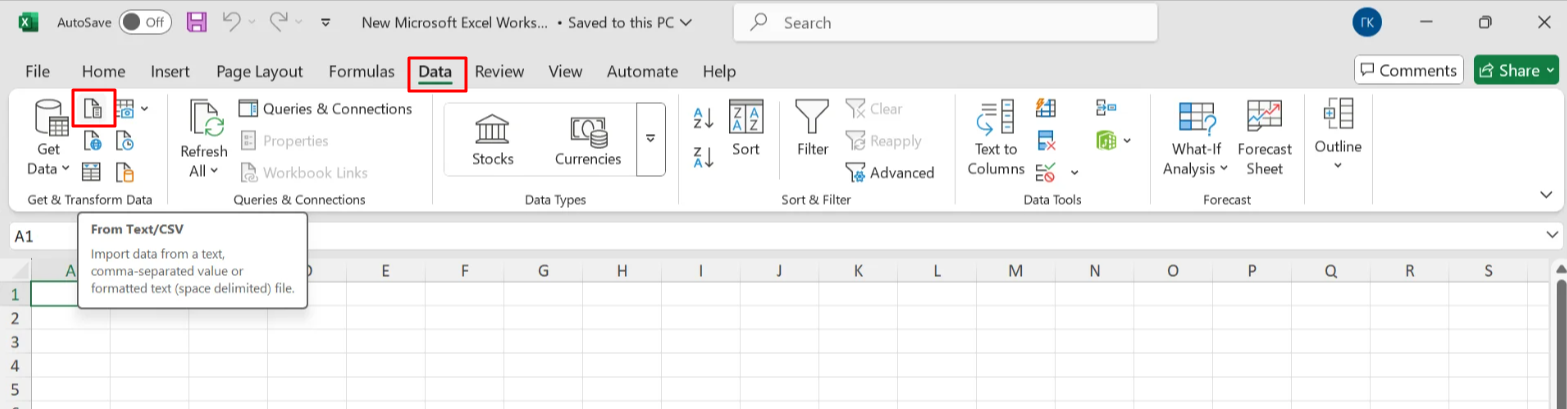
-
Open Excel and create a blank sheet.
-
Go to the Data → Get & Transform Data tab, and select From Text/CSV.
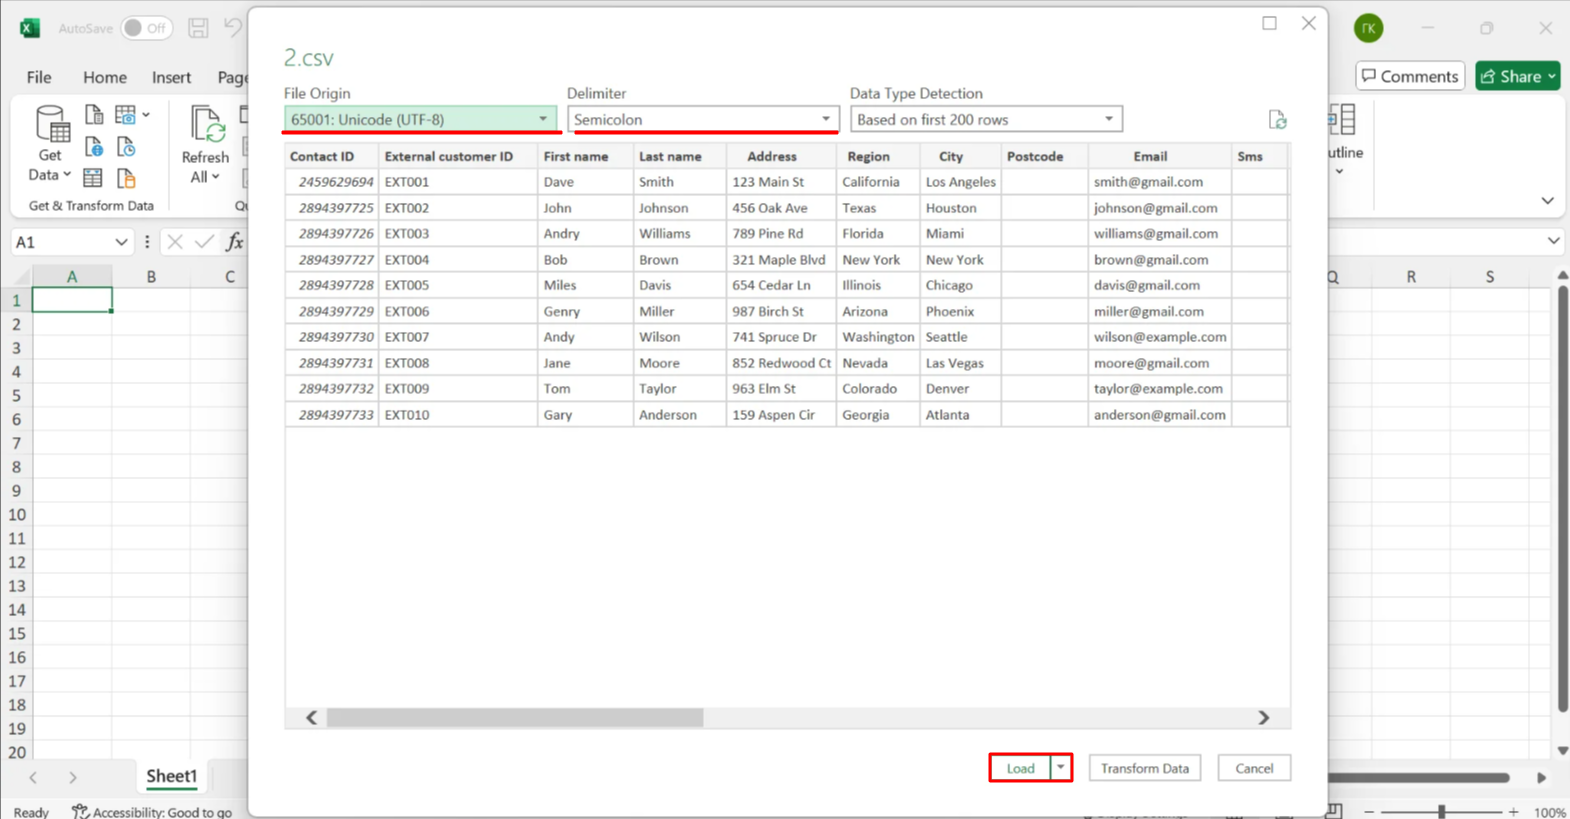
- In the Import Data window, navigate to the exported file's location, select it, and click the Import button.

- Next, specify:
- File Origin: Unicode (UTF-8) or Cyrillic (DOS) are the most popular options and are most often suitable for working with files. Refer to the preview to check which encoding is suitable.
- Delimiter: Semicolon or another delimiter, depending on the result in the preview area (you can also specify a custom character).
Other parameters usually do not need to be adjusted.
When finished, click Load.
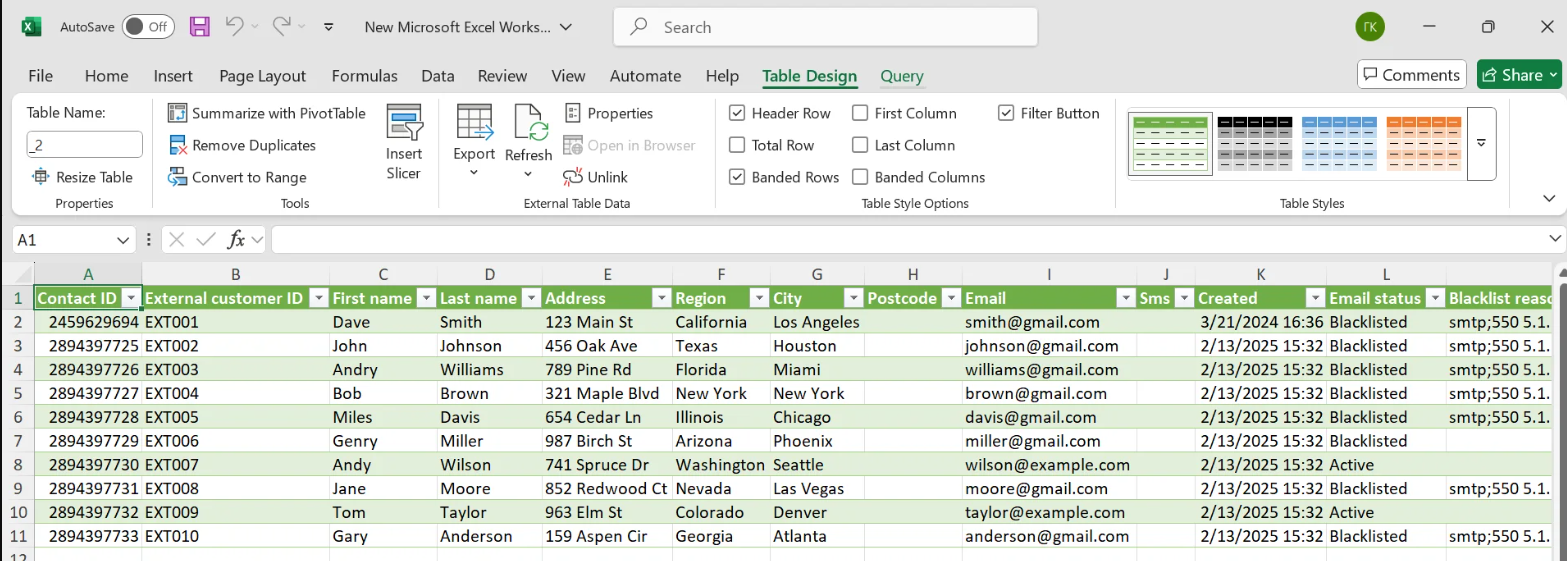
The result of choosing the appropriate encoding and delimiter is a correctly displayed CSV file in Excel:
NoteBy default, when you open a
CSVfile through Libre Office, it prompts you to select the encoding and delimiter: follow the instructions above.
Splitting Text into Columns
You may need to split text into columns, for example, to divide first and last names.
- Add the empty column to the right of the column with first and last names.
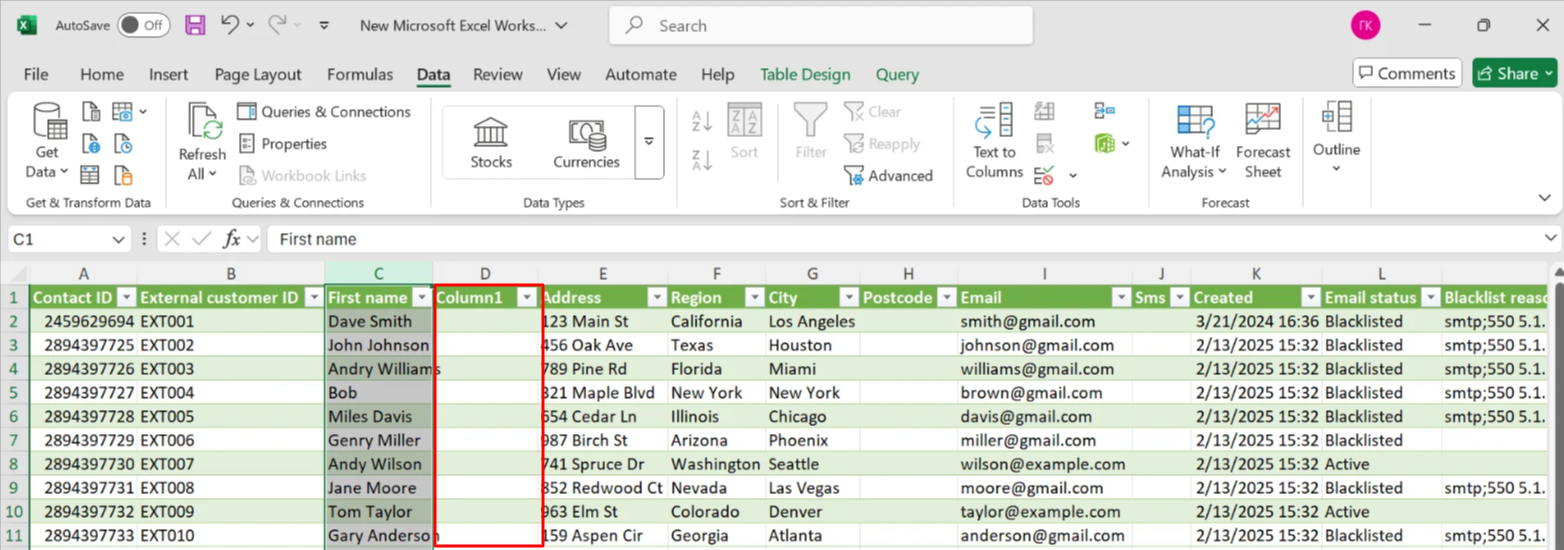
- Highlight the column with first and last names and click the Text to Columns button.
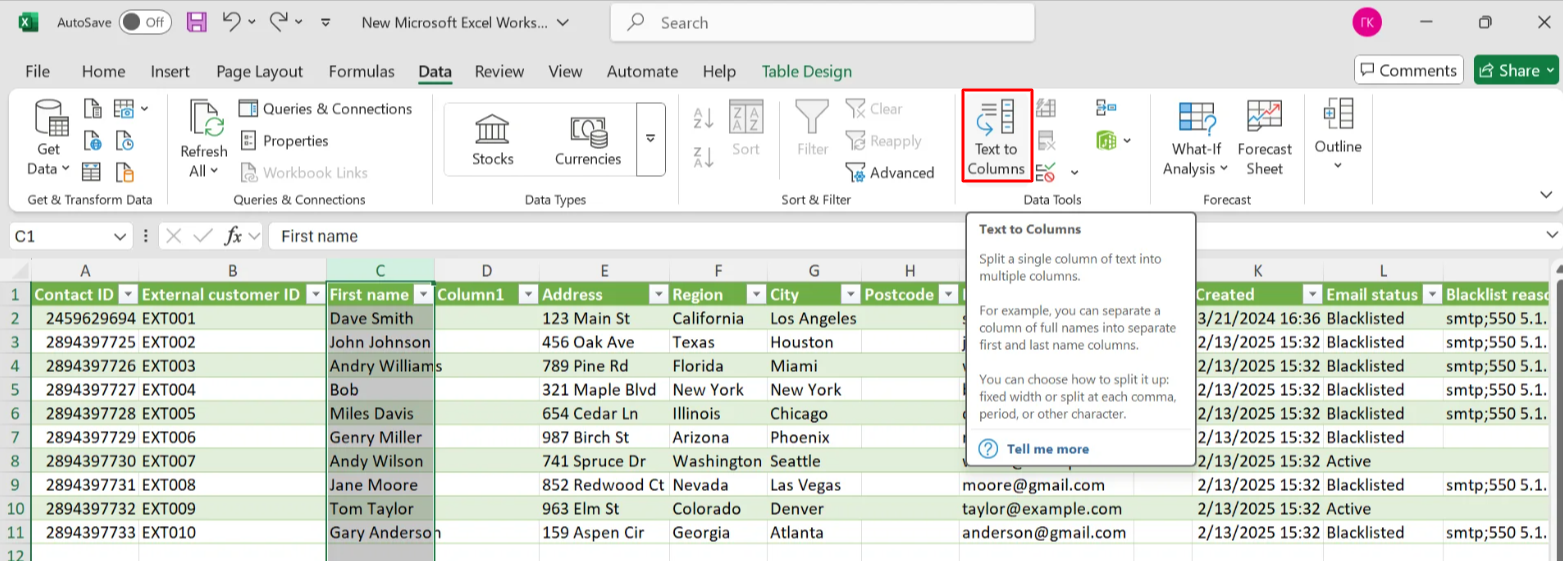
- Specify the Delimited format and click the Next button.

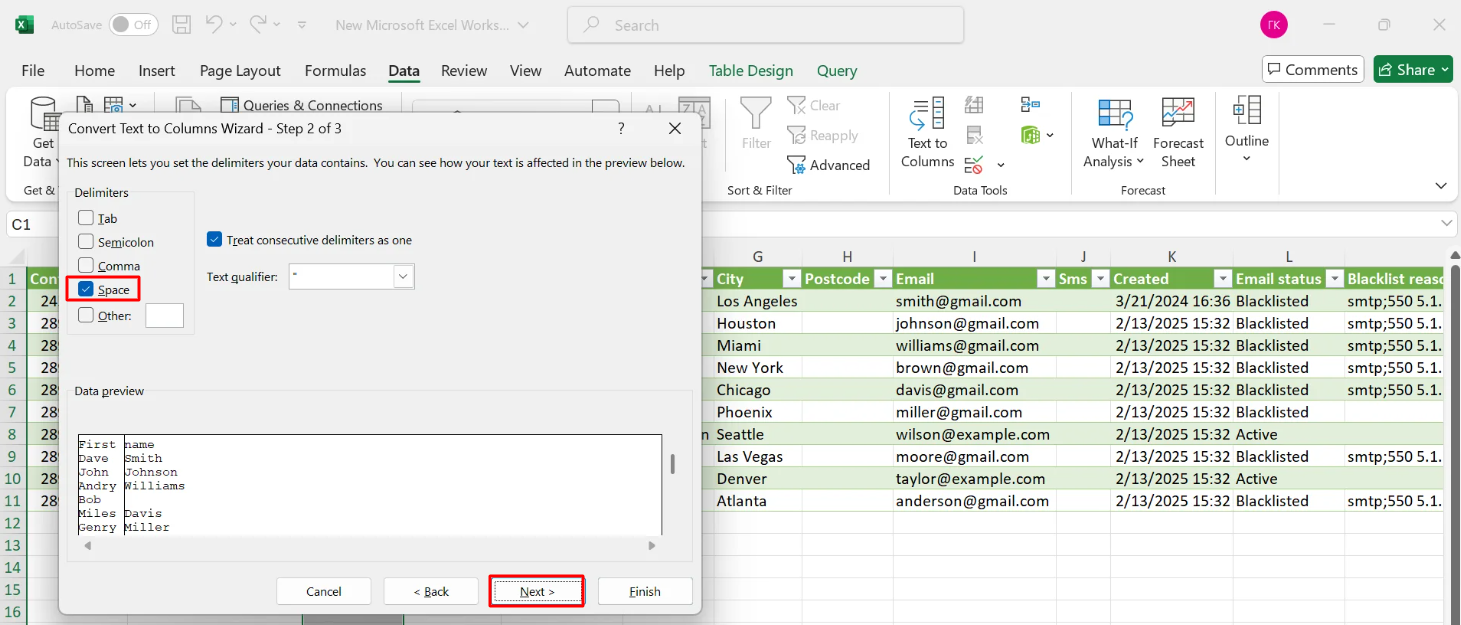
- Select the Space delimiter. Check how the data is split in the preview area. If necessary, you can specify another delimiter.
If everything is correct in the preview, click Next.
- In the last step, you can change the column format by selecting the one you want in the preview.
Click Finish.

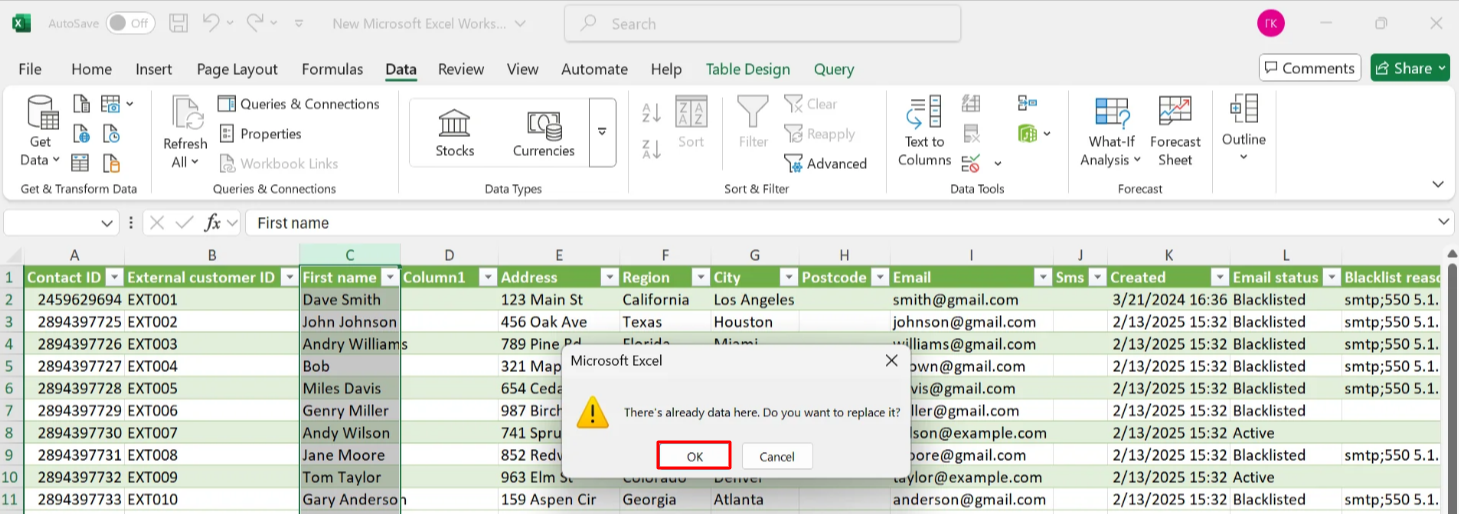
Confirm replacing data.
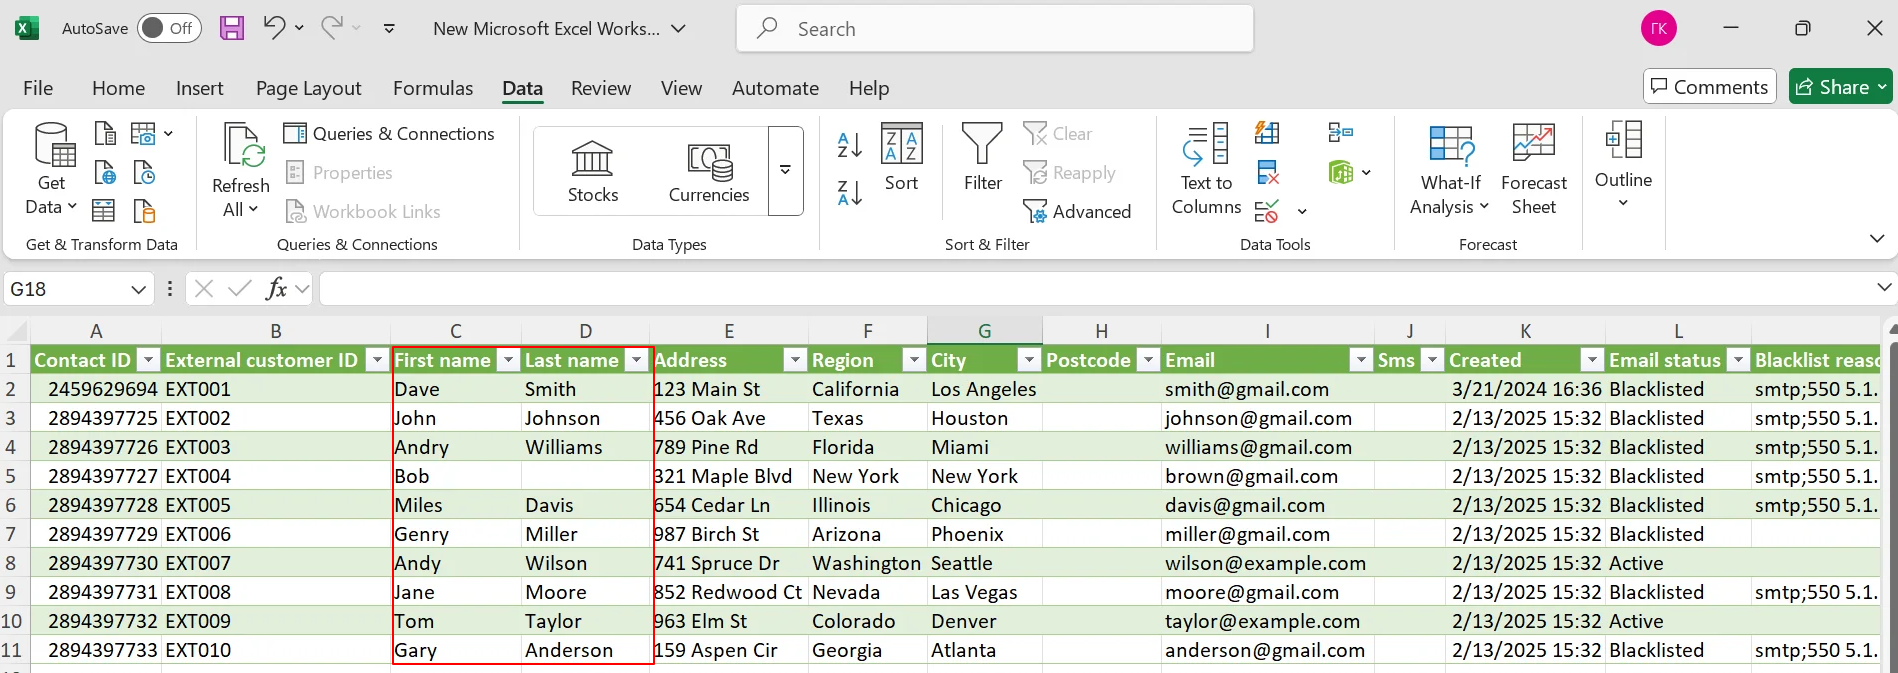
The result is a table with first and last names separated by columns.
Updated 2 days ago