
Creating Multilingual Messages
Use multilingual messages for the international audience and communicate in their language across multiple channels.
Let’s create a multilingual message using an email as an example.
Default Language Selection
- Open a message in the editor or create a new one.
- Click the globe icon on the top toolbar and select the default language from the list.
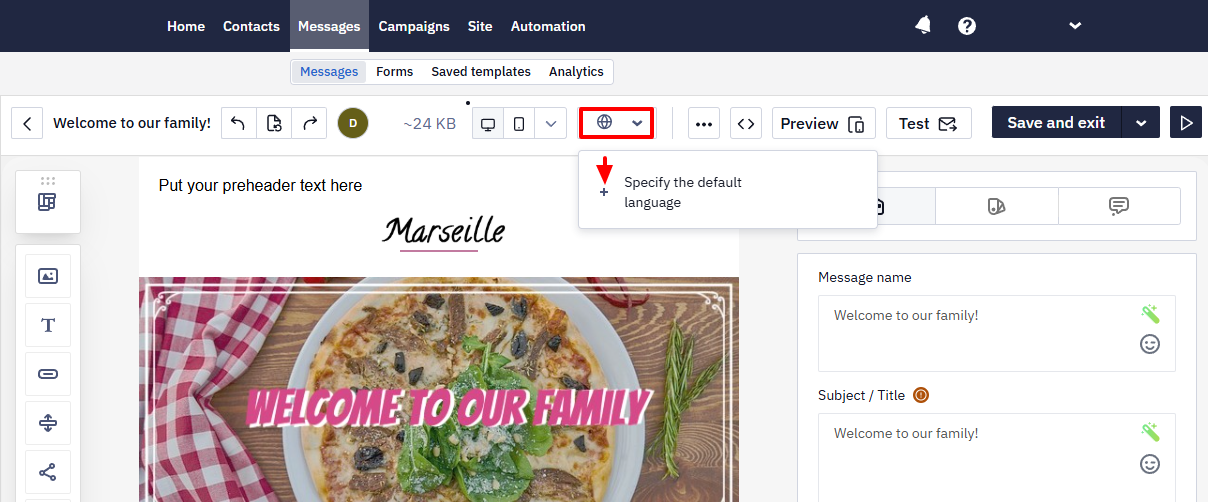
This language version goes to users whose profile contains the corresponding preferred language, as well as to users without language data.
Contacts whose language has no version in the message also receive the default language version — this can't be turned off. To keep such contacts from receiving the message, filter them out by language in the campaign segment, or check the contact's language in the workflow before the sending block.
The Audience language in the organization settings (My account) sets:
- the default language for new messages, including those created via the API;
- the language of the footer of a new email and of the ready-made templates in the email editor;
- the language of the unsubscribe page, regardless of the email's language;
- the language of the names the system generates for dynamic segments.
If you change this language, messages that already exist don't change. This setting doesn't set the contact's language.
Latin American Spanish has a shared language version with the code es-419. Contacts with the language es-MX, es-GT, es-SV, es-HN, es-NI, es-CR, es-PA, es-DO, es-CU, es-PR, es-VE, es-CO, es-EC, es-PE, es-BO, es-PY, es-CL, es-AR, or es-UY receive it, so you don't need a separate version for each country. If the message has a version with the contact's exact language code, for example es-MX, that version is sent. Contacts with the language es or es-ES aren't part of this group.
Adding Language Versions
After you select a language, its language code appears instead of the globe icon.
Click the language code and add new language versions.
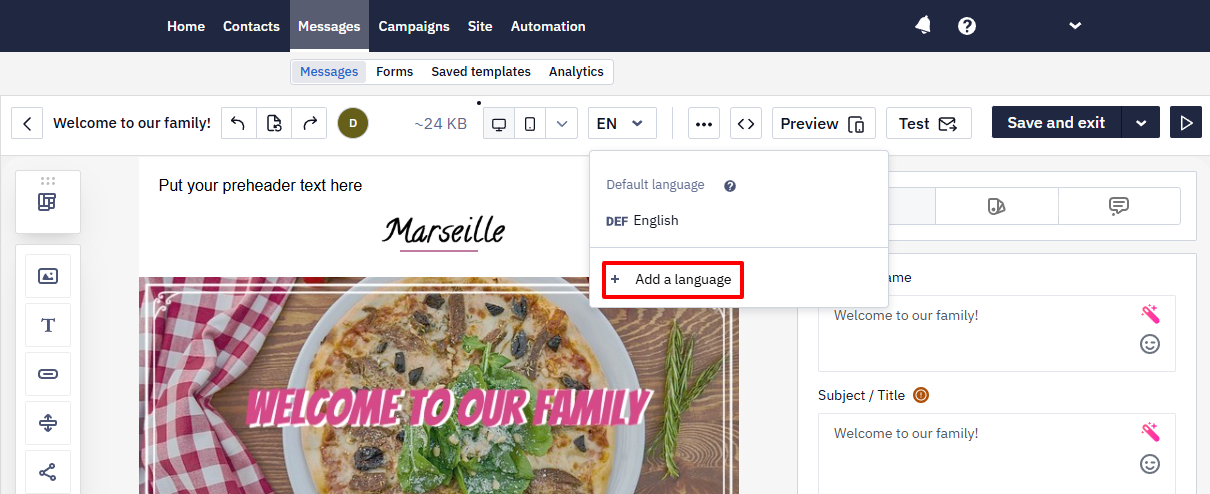
The number of language versions you can create depends only on your account plan.
Create versions with different content or identical ones. Changes in one version do not affect the others.
Important
When you add a new language, the editor copies the currently active version, not the default version.
This approach works well for similar languages. For example:
- Danish → Norwegian
- English (UK) → English (US)
To switch to another language version, click the language code in the top toolbar and select the required language from the list.
NoteTags are set on the main version of the message and automatically apply to all of its language versions. In a language version, the tag list isn't editable — to change tags, open the main version.
If You Already Have Separate Templates per Language
Existing single-language messages can't be merged into one multilingual message. Several messages with different IDs remain separate messages — there is no operation that combines them, and a multilingual message always creates each language version as a copy of the currently open template.
To bring existing translations into one multilingual message:
- Choose one of the existing messages as the main template and set its default language.
- Add a language version for each remaining language. The editor creates it as a copy of the version that is open.
- Open the corresponding single-language message, copy its HTML from the code editor, and paste it into the new language version.
- Repeat for every language, then check the subject, sender, and links in each version.
After that, use the multilingual message everywhere and retire the old single-language ones — workflows and campaigns must reference the multilingual message for language selection to work.
Replacing and Deleting the Language
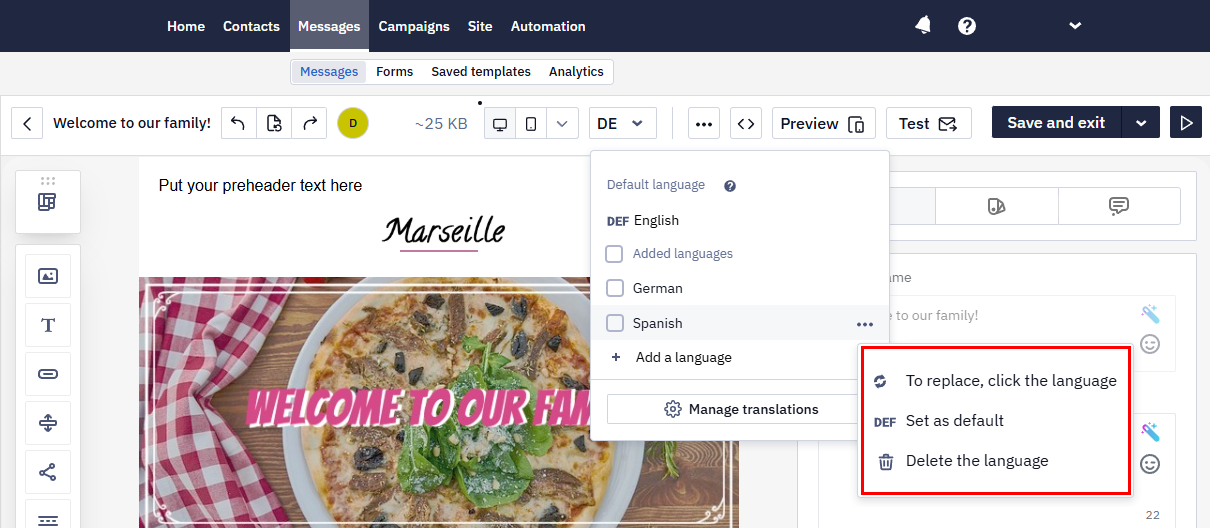
- Click the three dots next to the language.
- Select one of the following options:
- Replace language
- Set as default
- Delete language version
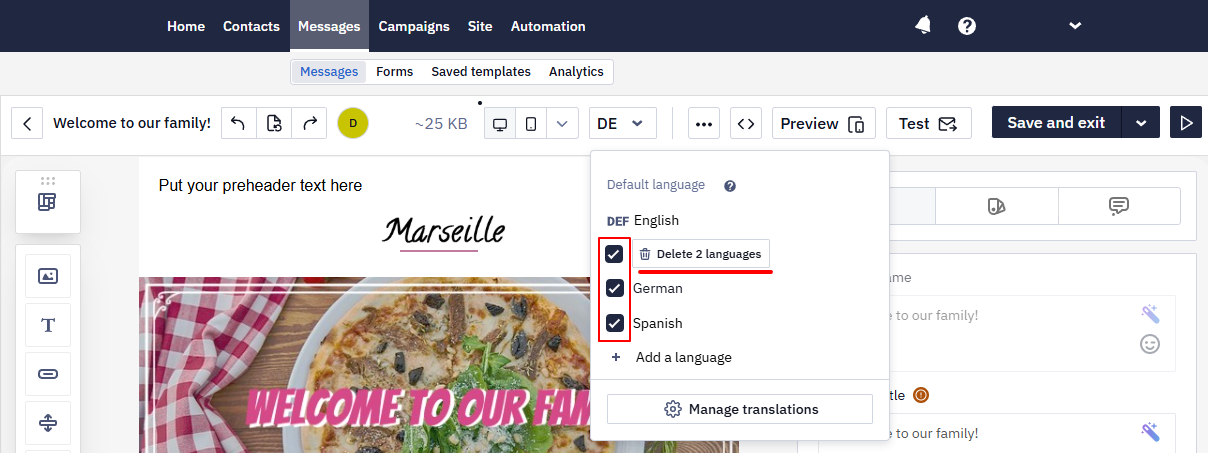
You can delete several language versions at once.
Multilingual Campaign
The sending process remains standard. The system automatically sends each contact the message in their preferred language.
You do not need to create separate groups for each language.
Learn more about configuring multilingual campaigns >
Displaying Multilingual Messages in an Account
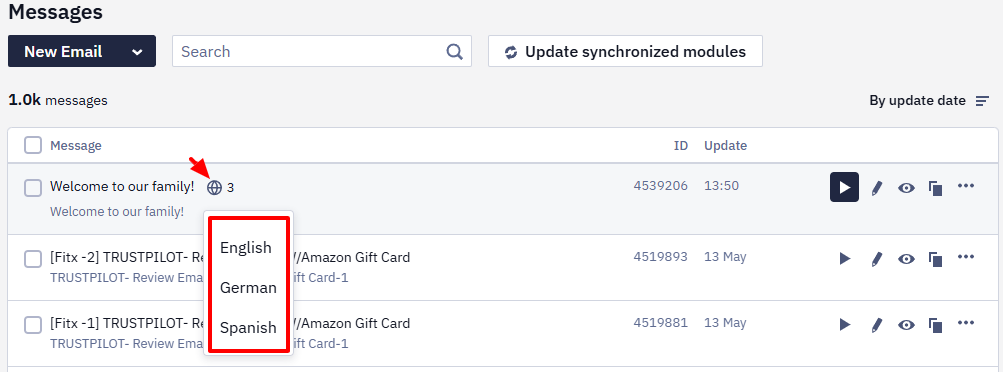
In the message list, multilingual messages show a globe icon. The number next to it indicates how many language versions the message contains.
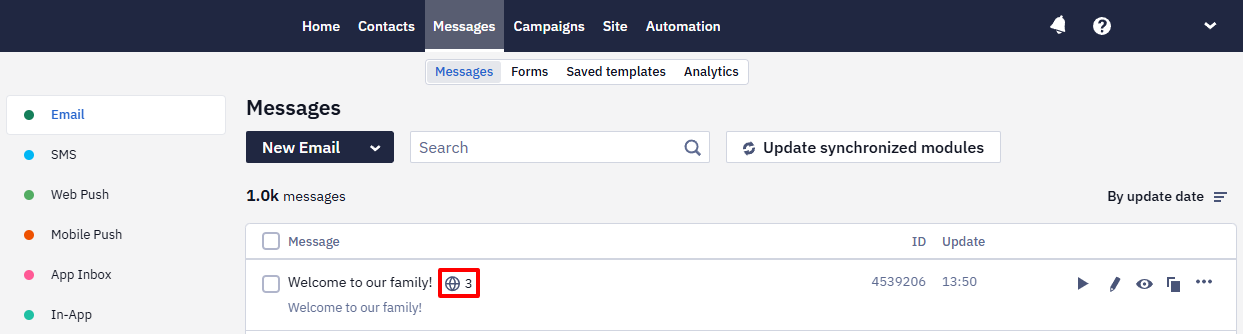
Hover over the icon to view all available versions. Select a version from the dropdown list to open it directly for editing.
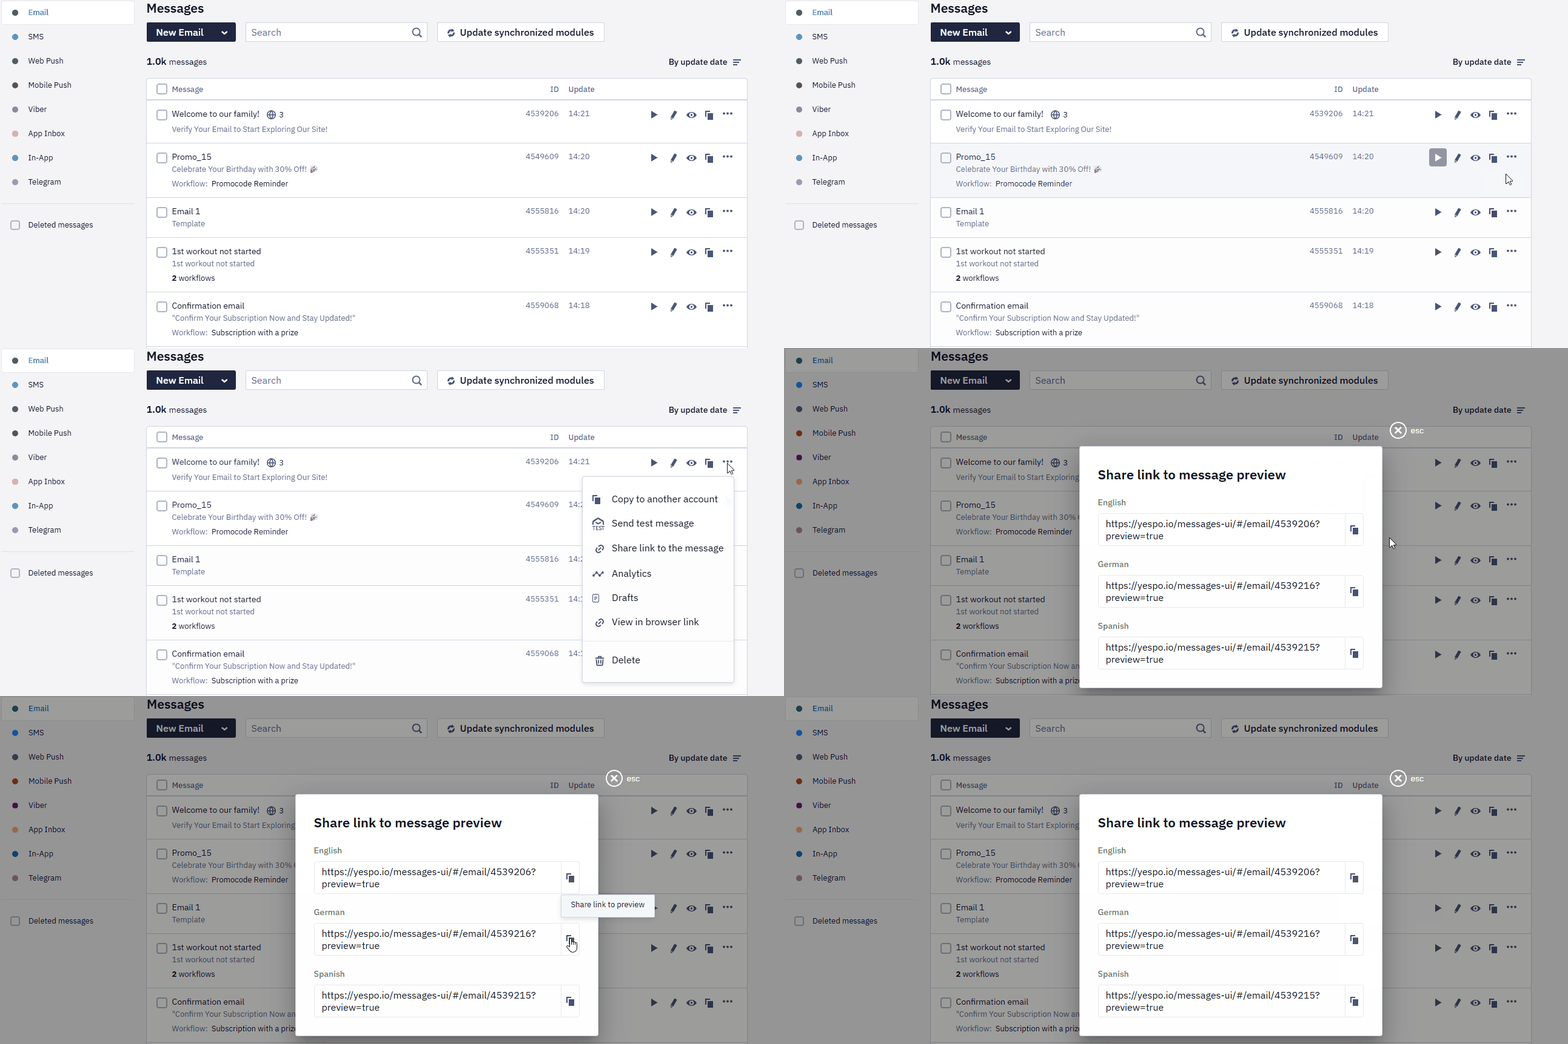
Link to a Language Version
You can copy a link to a specific language version of a message:
- from the message list;
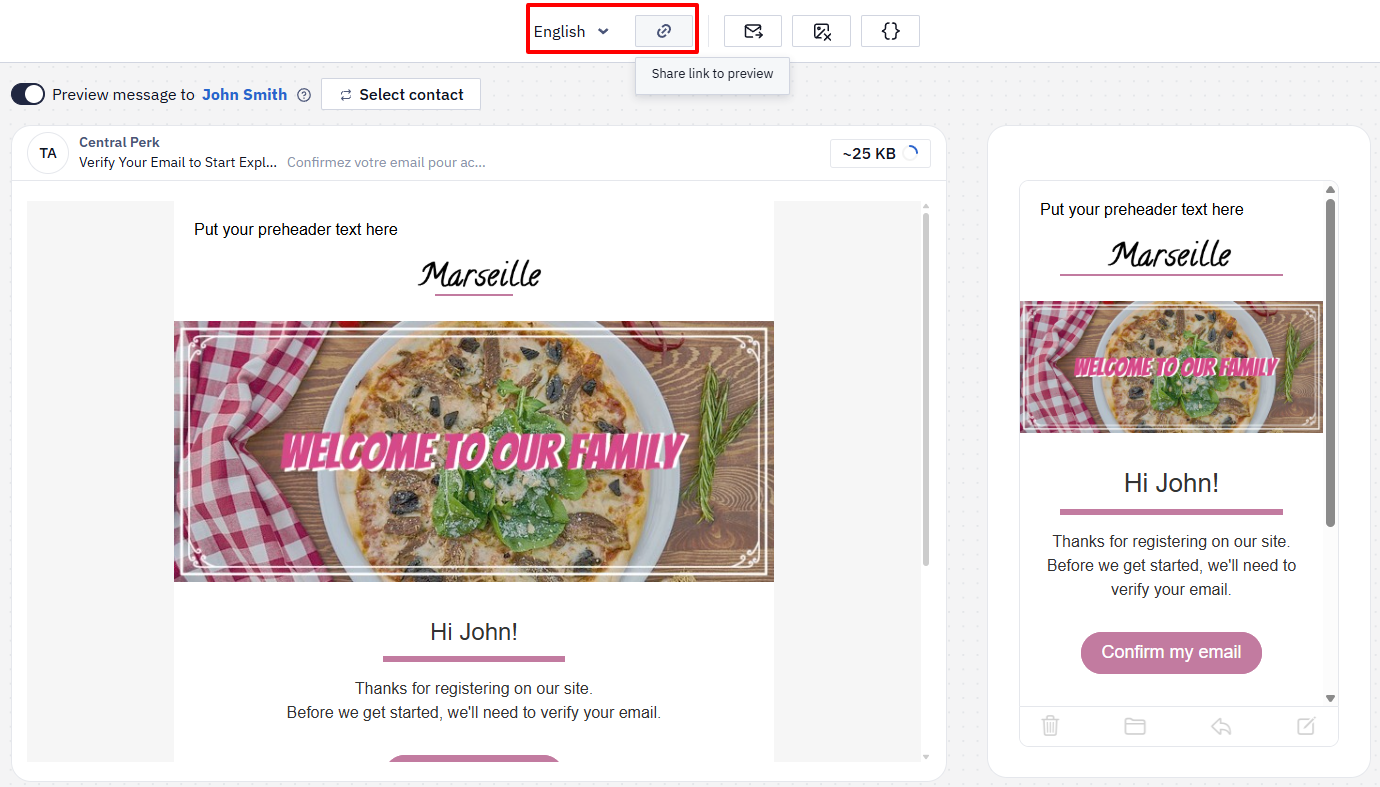
- from the preview window.
After you create a multilingual message, proceed to configure the multilingual campaign.
Updated 25 days ago