
Adding Data on User’s Web Activity to Push
Create and send personalized Web Push campaigns based on user actions on your website, such as checkout or abandoned cart.
To do this, you need to pass the appropriate events to Yespo and connect a workflow to them. Let's consider setting up personalized Web Pushes using the Abandoned Cart workflow example.
Setting Up Abandoned Cart Notification
For the correct functioning of the workflow, it is necessary to send:
- The event of adding a product to the cart,
- The event of ordering a product is necessary to avoid sending notifications to those who have already made a purchase.
1. Sending the AbandonedCart Event
Add the code on the cart page (the event you send to Yespo must be sent from the corresponding page) before the closing tag of the Yespo script that you installed on your site.
Code example:
function sendEventForToken(pushToken) {
     es('sendEvent', 'EventName', pushToken, {"paramName":"paramValue"});
}
es('getPushToken', sendEventForToken);
where EventName, paramName, and paramValue must be replaced with your values (e.g., 'AbandonedCart', "cartId":"CART12345").
2. Sending the Purchase Event
o determine whether the customer has completed their order, the workflow uses the OrderCompleted event. It will stop the workflow if the purchase is completed successfully. To do this, add the code like this example before the closing tag of the Yespo script on the Thank you for your order page:
function sendEventForToken(pushToken) {
es('sendEvent', 'OrderCompleted', pushToken);
}
es('getPushToken', sendEventForToken);
3. Creating a Workflow
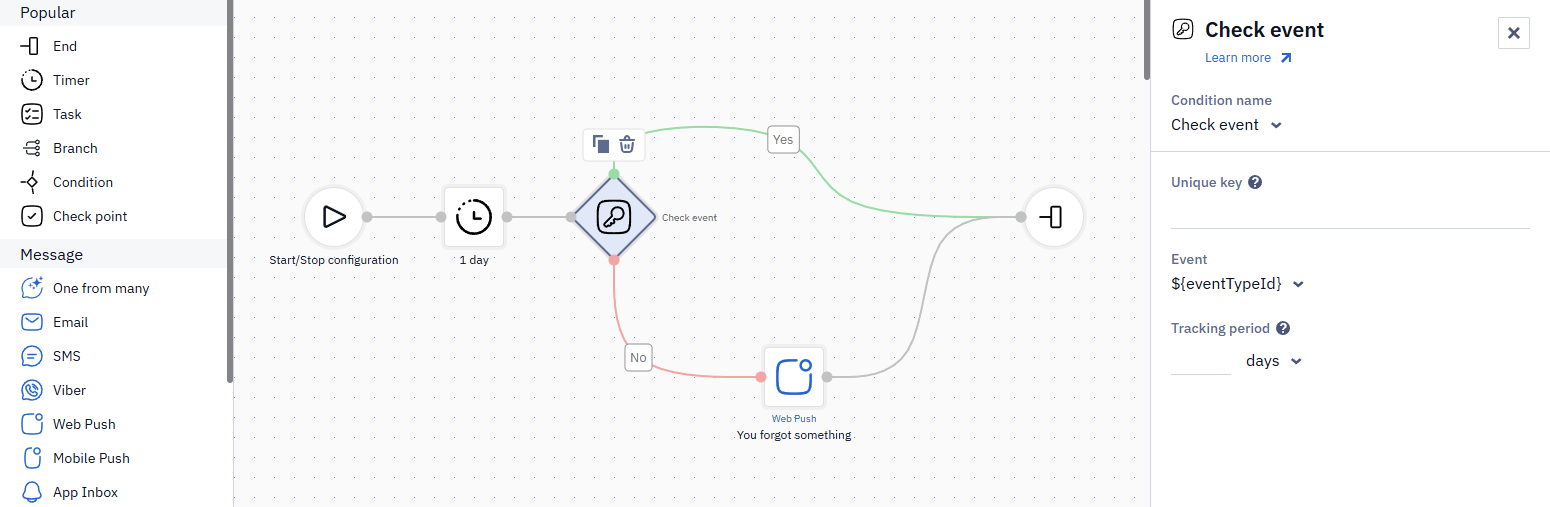
Now build a workflow that will trigger with the AbandonedCart event and will include the following blocks:
- Start
- Timer (set the purchase event wait time)
- Check event (has the user made a purchase?)
- Web Push (pre-prepared reminder about an abandoned cart)
- End (for both paths)
Test your workflow and launch it.
Updated 7 days ago