
Contact Management Options
Contact Management Options
The Admin role in your account has the following advanced contact management permissions:
- Adding emails to the local blacklist.
- Removing emails from the local blacklist.
- Adding phone numbers to the local blacklist.
- Removing phone numbers from the local blacklist.
- Unsubscribing emails and editing contact subscription categories (also available for the Marketer role)
NoteContact our Support Service if you need to manage other functions, not available for the Admin role.
Adding Emails to the Local Blacklist
To add emails to the local blacklist:
- Go to Contacts → All contacts.
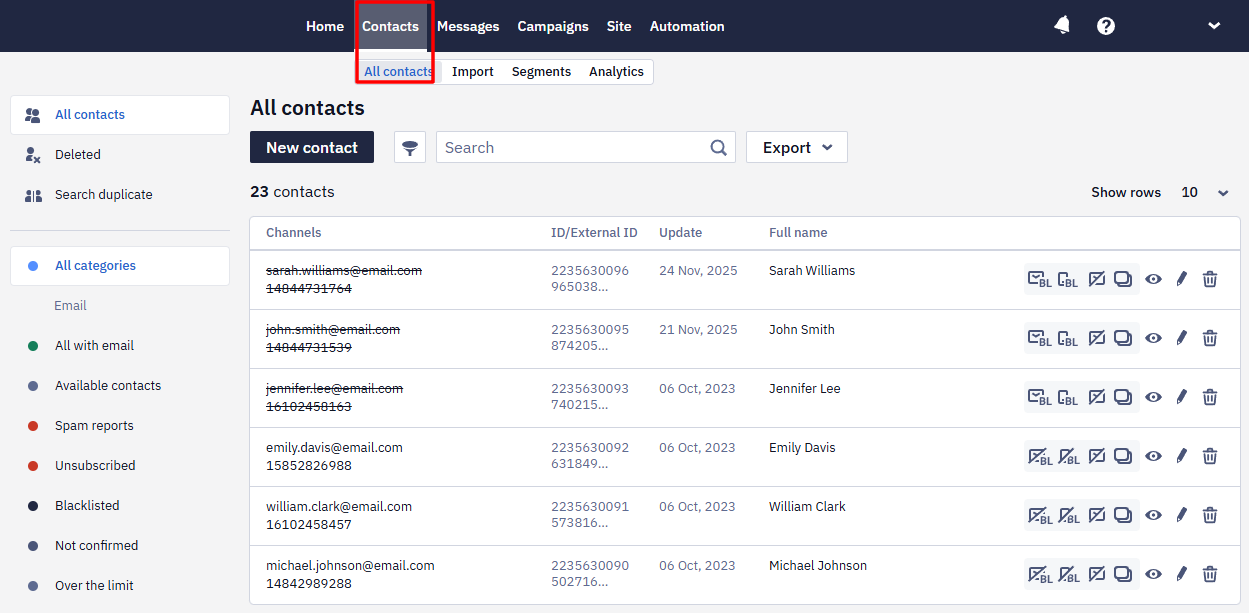
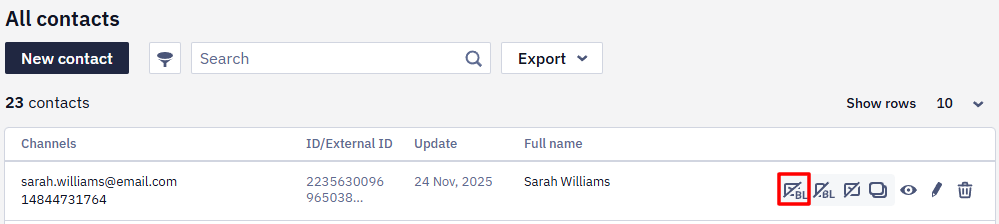
- Select the Add email to blacklist icon beside a contact.
- In the popup window, click Done.
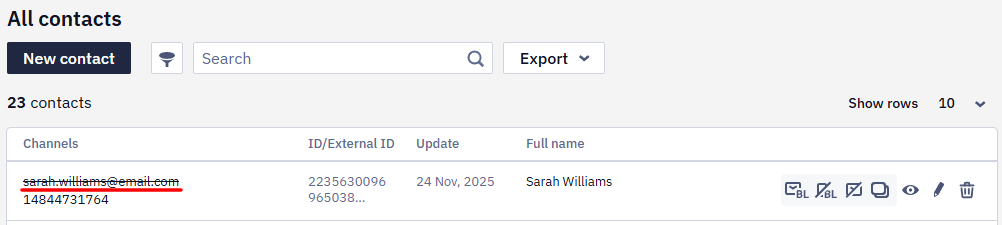
The email address of a contact added to the local blacklist shows crossed in the list, and the Add email to blacklist icon for that contact is replaced with the Exclude email from blacklist icon.
Removing Emails from the Local Blacklist
To remove emails from the local blacklist:
- Go to Contacts → All contacts and select Blacklisted in the Email section of the left-hand side menu.
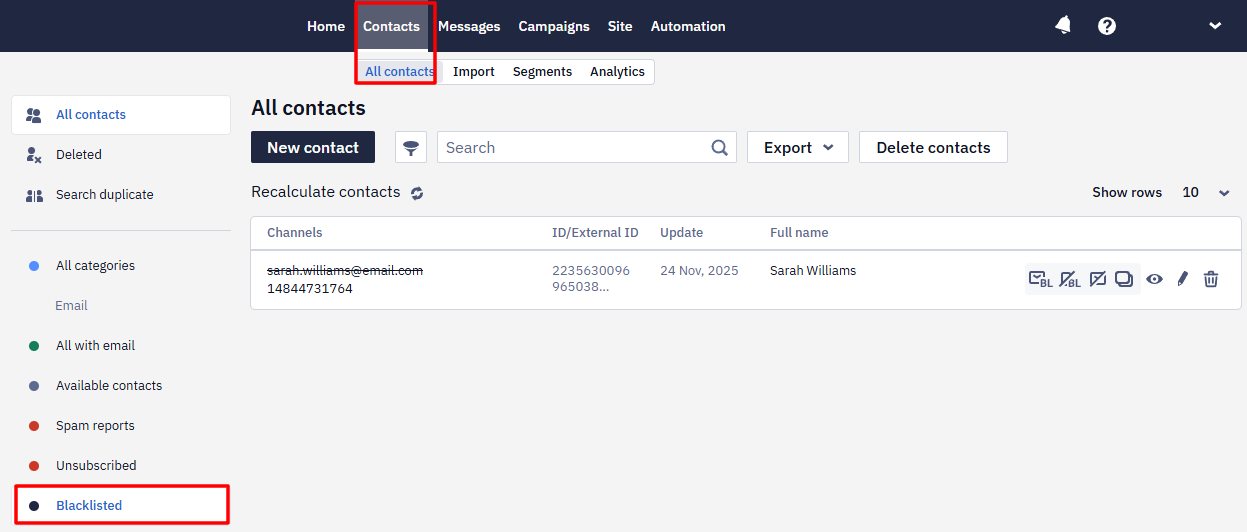
- Select the Exclude email from blacklist icon beside a contact.
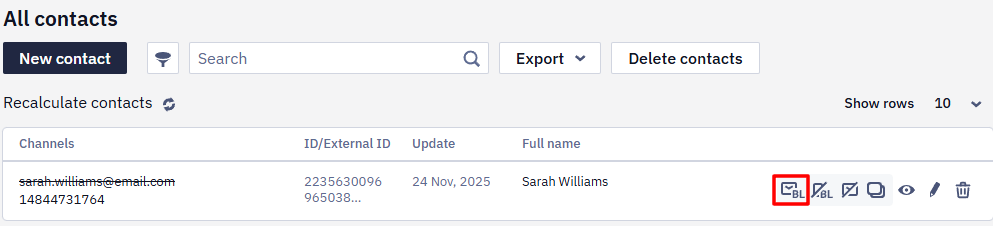
- In the popup window, click Done.
The email address of a contact removed from the local blacklist disappears from the list of the blacklisted emails, and the Exclude email from blacklist icon for that contact is replaced with the Add email to blacklist icon.
To remove many addresses at once, collect the contacts into a segment, open it, and choose Remove Email from account's Black list in the … menu. The same menu has Remove Email from global Black list and Remove SMS from account's Black list. The action runs in the background, so the list is not updated instantly.
Adding Phone Numbers to the Local Blacklist
To add phone numbers to the local blacklist:
- Go to Contacts → All contacts.
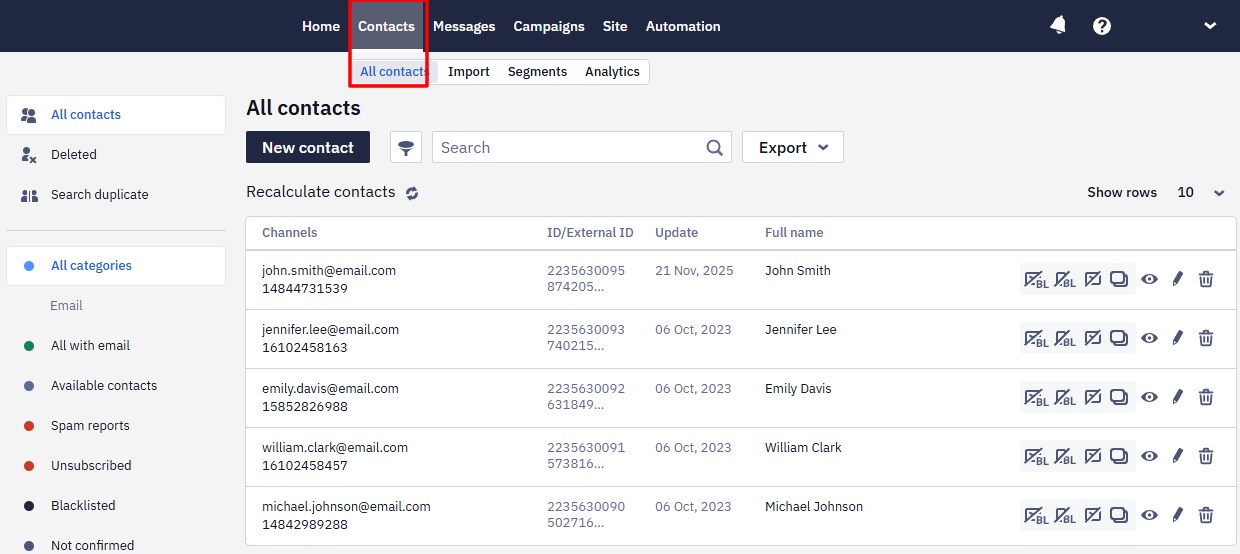
- Select the Add phone number to blacklist icon beside a contact.
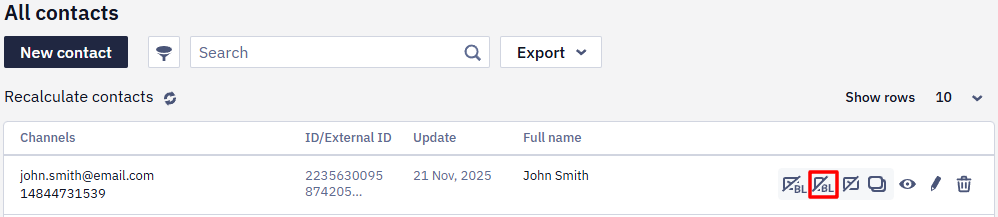
- In the popup window, click Add.
The phone number of a contact added to the local blacklist shows crossed in the list, and the Add phone to blacklist icon for that contact is replaced with the Exclude phone from blacklist icon.
Removing Phone Numbers from the Local Blacklist
To remove phone numbers from the local blacklist:
- Go toContacts → All contacts and select Blacklisted in the Phone number section in the left-hand side menu.
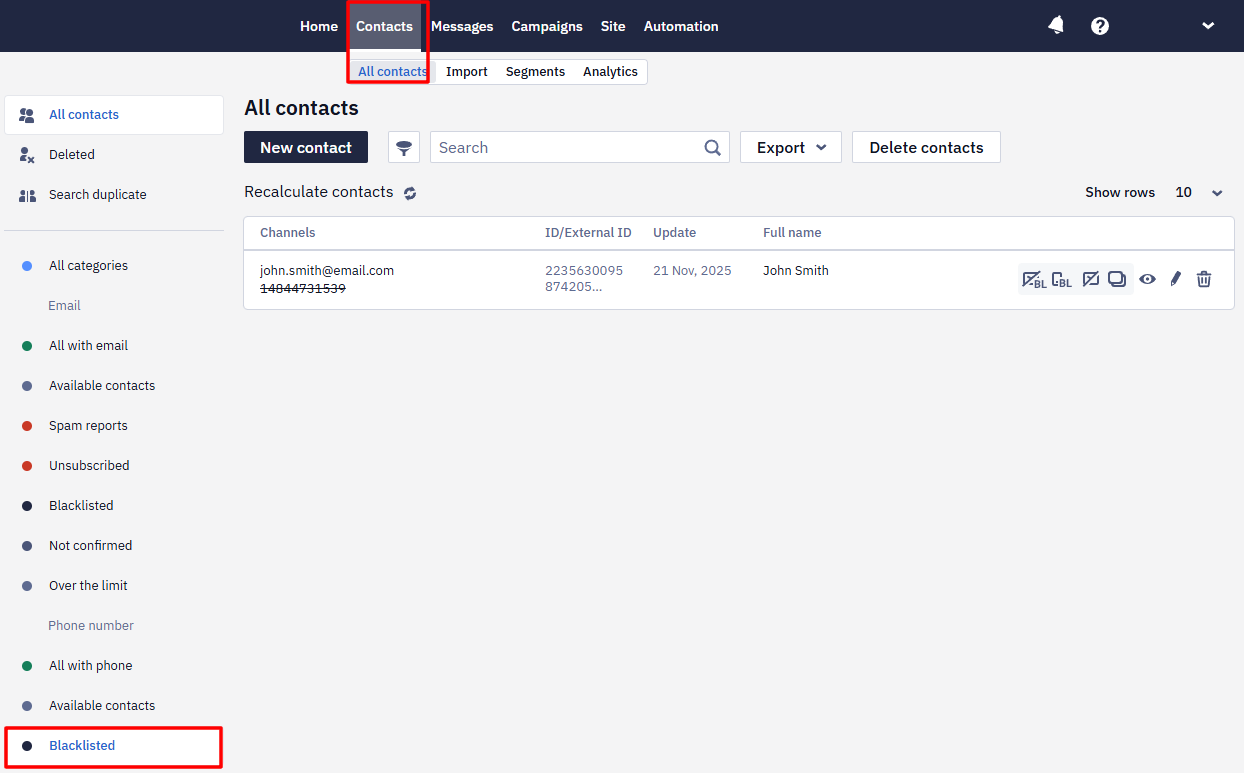
- Select the Exclude phone from blacklist icon beside a contact.
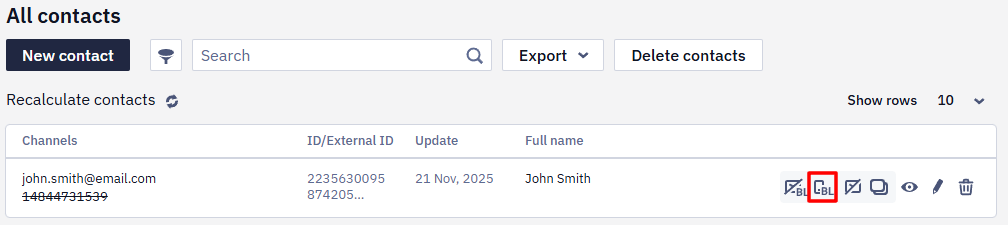
The phone number of a contact removed from the local blacklist disappears from the list of the blacklisted phones, and the Exclude phone from blacklist icon for that contact is replaced with the Add phone to blacklist icon.
Unsubscribing Emails
ImportantThe Admin role permissions allow you only to unsubscribe email addresses. It is not possible to add them again manually to a subscription category. To subscribe again, the contact has to fill in your subscription form themselves and confirm the subscription through double opt-in. An unsubscribed address doesn't receive emails, except those sent by transactional blocks in a workflow. If an address was unsubscribed by mistake, you can return it with the Remove emails from unsubscribed list API resource.
To unsubscribe emails:
- Go to Contacts → All contacts.
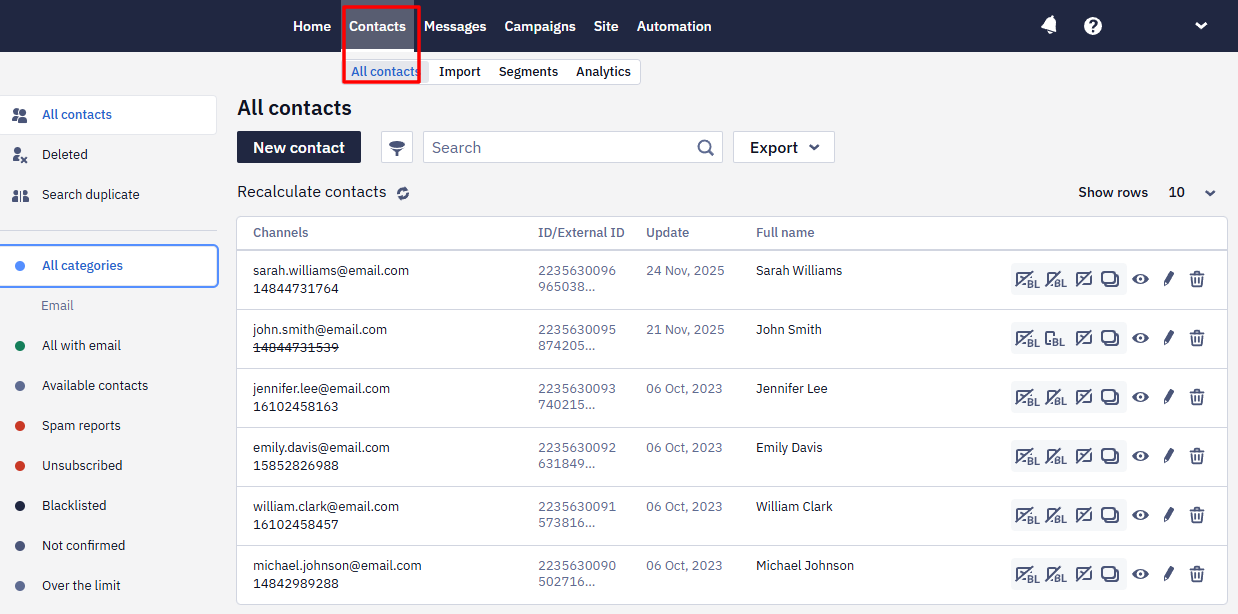
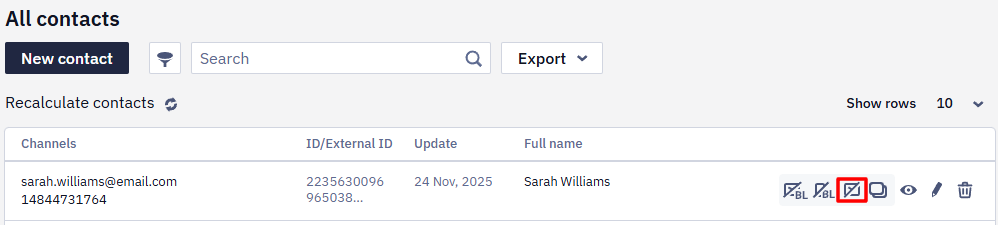
- Select the Unsubscribe contact’s email icon beside a contact.
- In the popup window, click Unsubscribe.
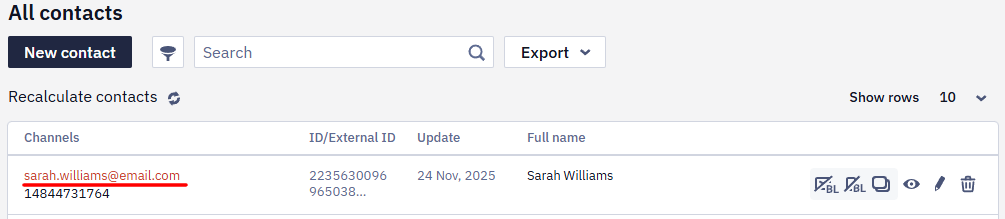
The email address of a contact removed from the subscription category shows in red in the list, and the Unsubscribe contact’s email icon for that contact disappears.
Information about which user unsubscribed will be displayed on the Contact information tab.
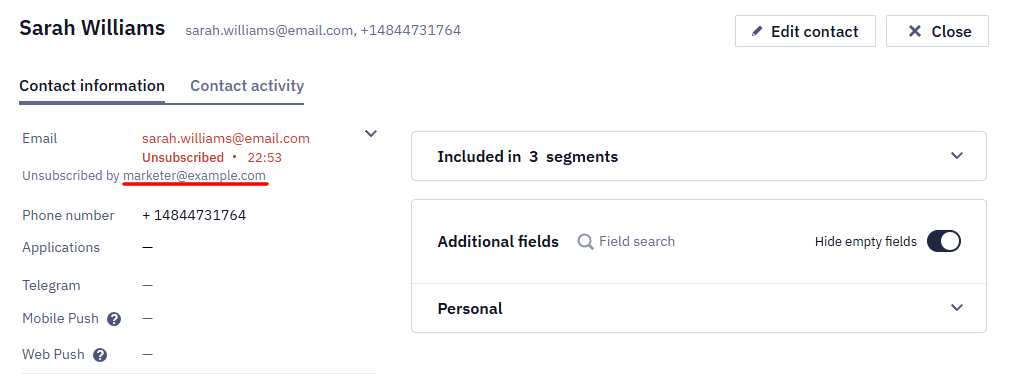
Unsubscribe and blacklist actions apply to the email address, not to a specific contact. If several contacts in your account share the same address — for example, when one account serves several products — unsubscribing or blacklisting one of them affects all of them.
To unsubscribe many addresses at once, pass them with the Add emails to unsubscribed list API resource, or upload the contacts to a separate segment and ask support to unsubscribe that segment.
Editing Contact Subscription Categories
Editing contacts’ subscription category allows only deleting a contact from a category. Read the Subscription Categories article to learn about adding a contact to a subscription category.
To edit subscription categories for a contact:
- Go to Contacts → All contacts.
- Select the Edit contact subscription icon beside a contact.
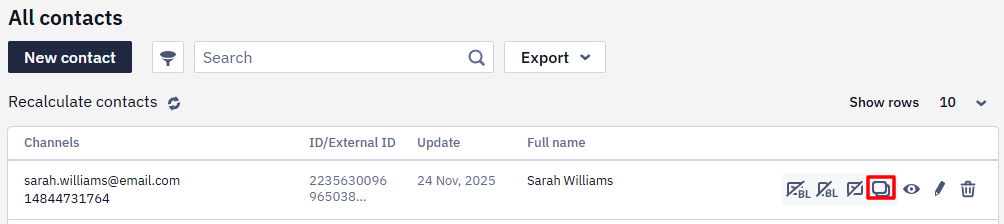
- In the popup window, clear the box beside the category name that you wish to remove for the contact, then click Done.
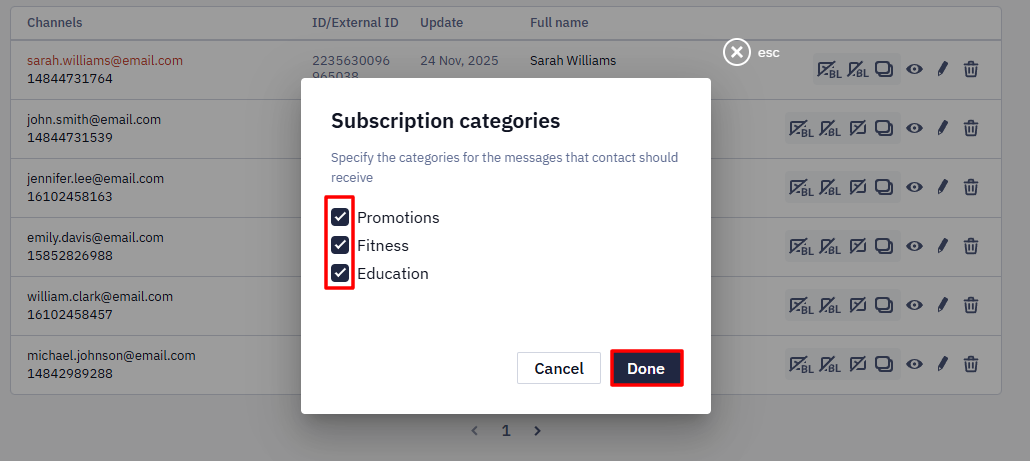
The contact is removed from the subscription category that you unselected.
Deleting Contacts
Contacts are not deleted from the account automatically. This also applies to unsubscribed contacts: they remain in your base and count toward its size until you delete them manually, with the Delete contact workflow block, or via the Delete contact API method.
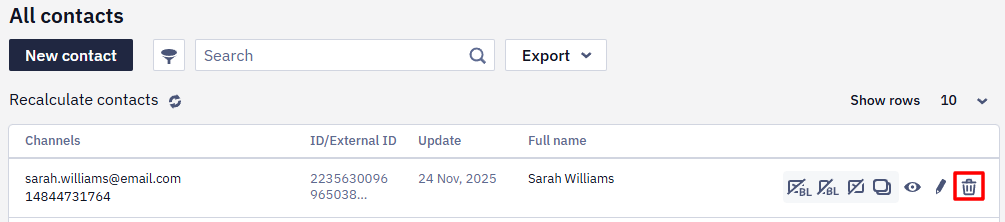
To delete contact:
- Go to Contacts → All Contacts.
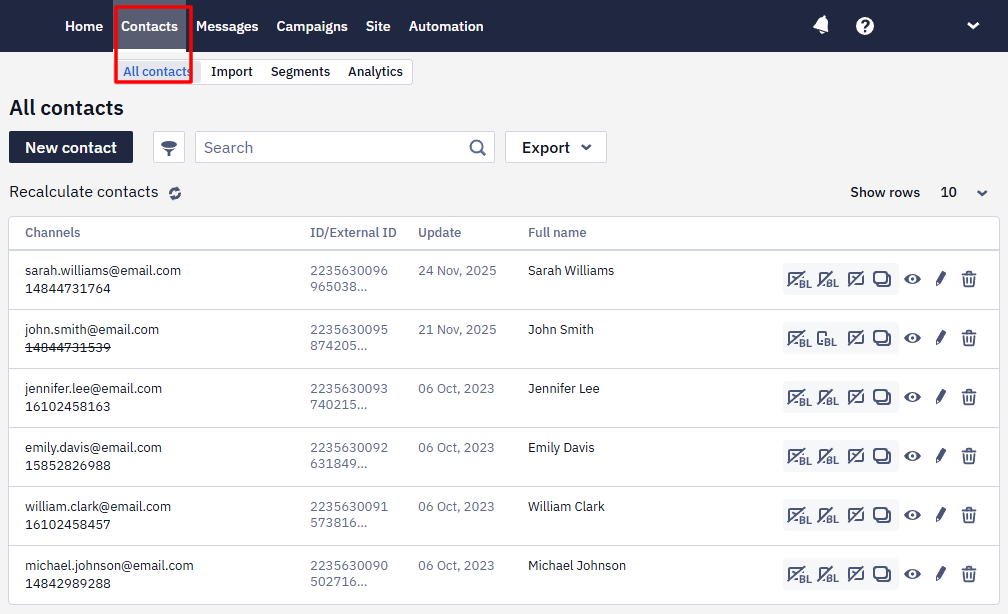
- Click the Delete contact icon beside a contact.
- Specify the delete reason (optional) and click Delete.
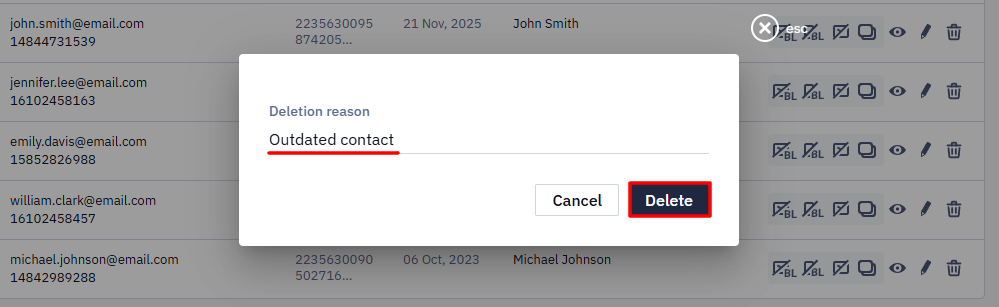
When a contact is deleted, the active workflow runs linked to it stop.
Contacts with a Device ID
The Device ID identifies the contact's mobile profile, and the push token belongs to that profile: once the user is identified, the two are merged into the contact. Don't remove the Device ID from a contact that already has a mobile push token — mobile identification and token handling break. Contacts that have a Device ID but no push token can be deleted; if such a contact allows notifications later, it is restored from the deleted contacts with both the Device ID and the push token. The app can't stop sending the Device ID.
When a Deleted Contact Comes Back
Deleting a contact doesn't erase their data for good. A deleted contact's message history is kept: you can see it in the contact card — deleted contacts open from the Deleted list on the All contacts tab — and a restored contact comes back with this history. If a message is later sent to that contact's email address or phone number — an OTP code over the API, for example — the contact is restored. When several deleted contacts share that address or number, the oldest of them is restored, the one with the lowest ID, so a duplicate you have just cleaned up can reappear in the base. If an active contact with the same address or number exists, the message goes to them and no deleted contact is restored.
The mobile SDK doesn't send user data that hasn't changed since the last transfer, so sending the same attributes from the app again doesn't restore a deleted contact. Restore it via the API: call Add/update contacts with "restoreDeleted": true.
Deleting Contacts in Bulk
Several routes remove a group of contacts at once, depending on how the group is defined.
- A segment you already have. Delete the segment with the option that removes its contacts too — see Segment Management Options.
- A cell of the RFM table. Use Delete contacts for the selected cell — see RFM Analysis.
- A rule that keeps applying. Run a workflow with the Delete contact block over a dynamic segment, started regularly for that segment, so contacts that match the conditions later are deleted too.
Segment conditions include the contact creation date, so this is also how you remove contacts registered before or after a given date.
If you prefer to delete contacts with Delete contact from the API, you need their IDs. The Search contacts resource has no parameter for the creation date, so take the IDs from the BigQuery export instead: the contacts table holds both the contact ID and the creation date.
Updated 22 days ago