
Setting Up Recommendations for Trigger Campaigns
The recommendation blocks in the email are placed in stripes. Stripe’s code contains the rules for substituting dynamic data.
You will find the Abandoned browse template in your account, where this stripe is already set up.
You only need to create data sources and insert their names into the stripes’ code.
We will show how to create a trigger template with two dynamic stripes: one with products viewed by the user and one with recommendations based on products viewed. Each stripe requires its data source.
Recommendation Setup Steps
- Create data sources based on the Abandoned view (up to 6 products) and Recommendations for 6 abandoned views (up to 6 rec.) algorithms.
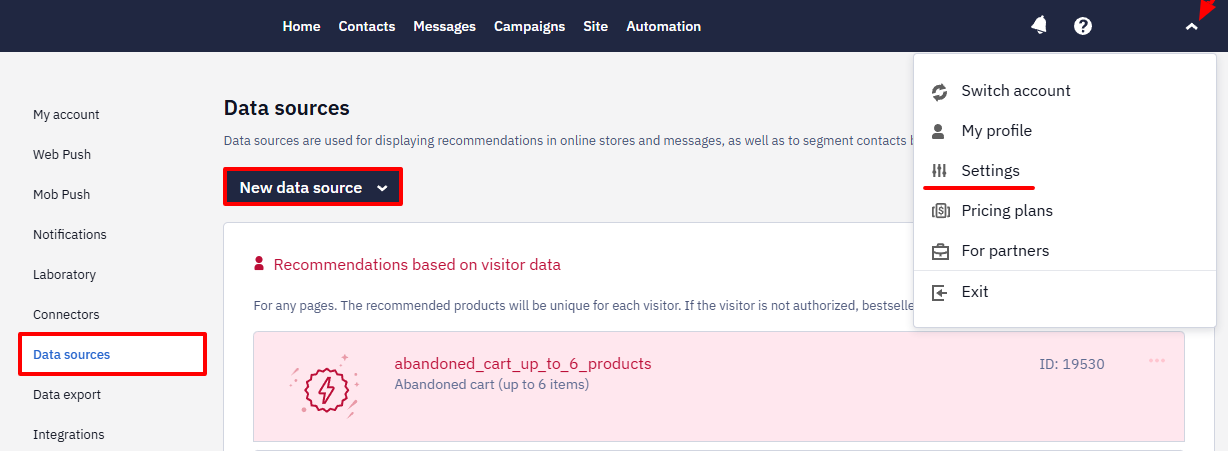
NoteMost algorithms are designed for specific advanced segmentation triggers and work only in them. Setting up a universal algorithm is described in the article Setting Up Product Recommendations for Promo Campaigns.
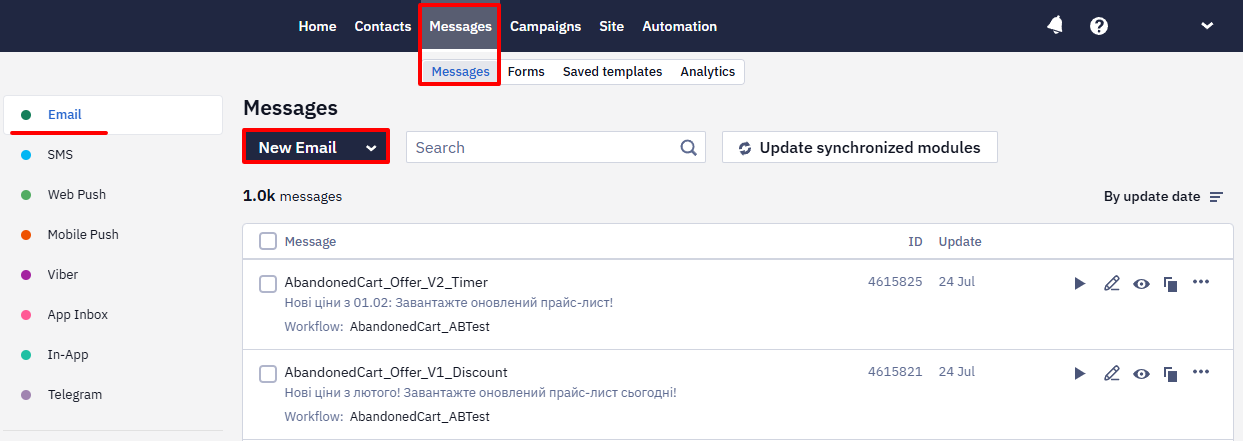
- Go to the Messages section on the Messages tab and click New Email.
- Select the Abandoned browse basic template.
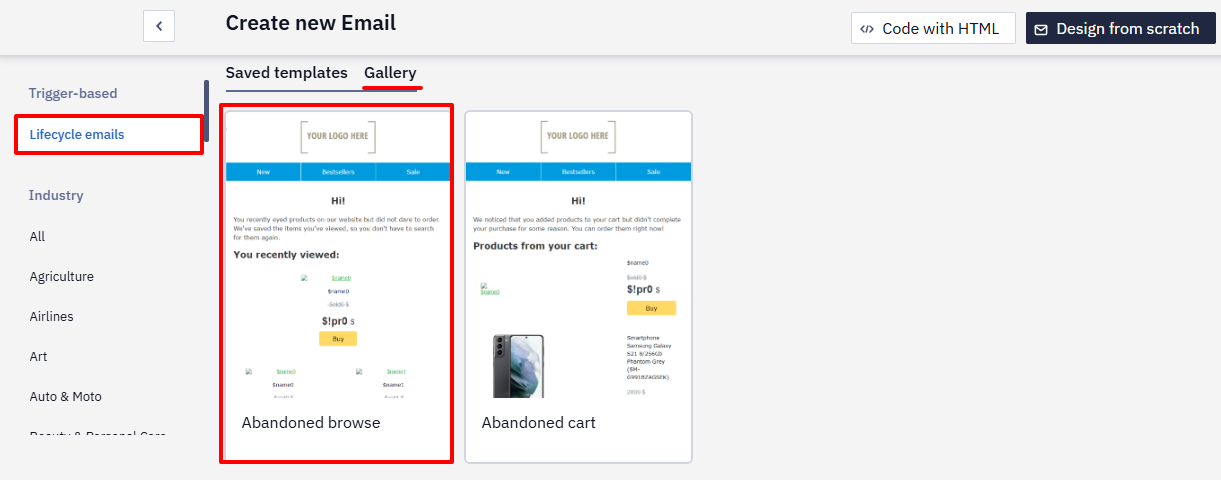
The template contains 2 stripes with product cards:
- the first (You recently viewed) — with dynamic settings;
- the second You may also like) is illustrative, without dynamic settings.
- Select the first stripe with products and open its code.
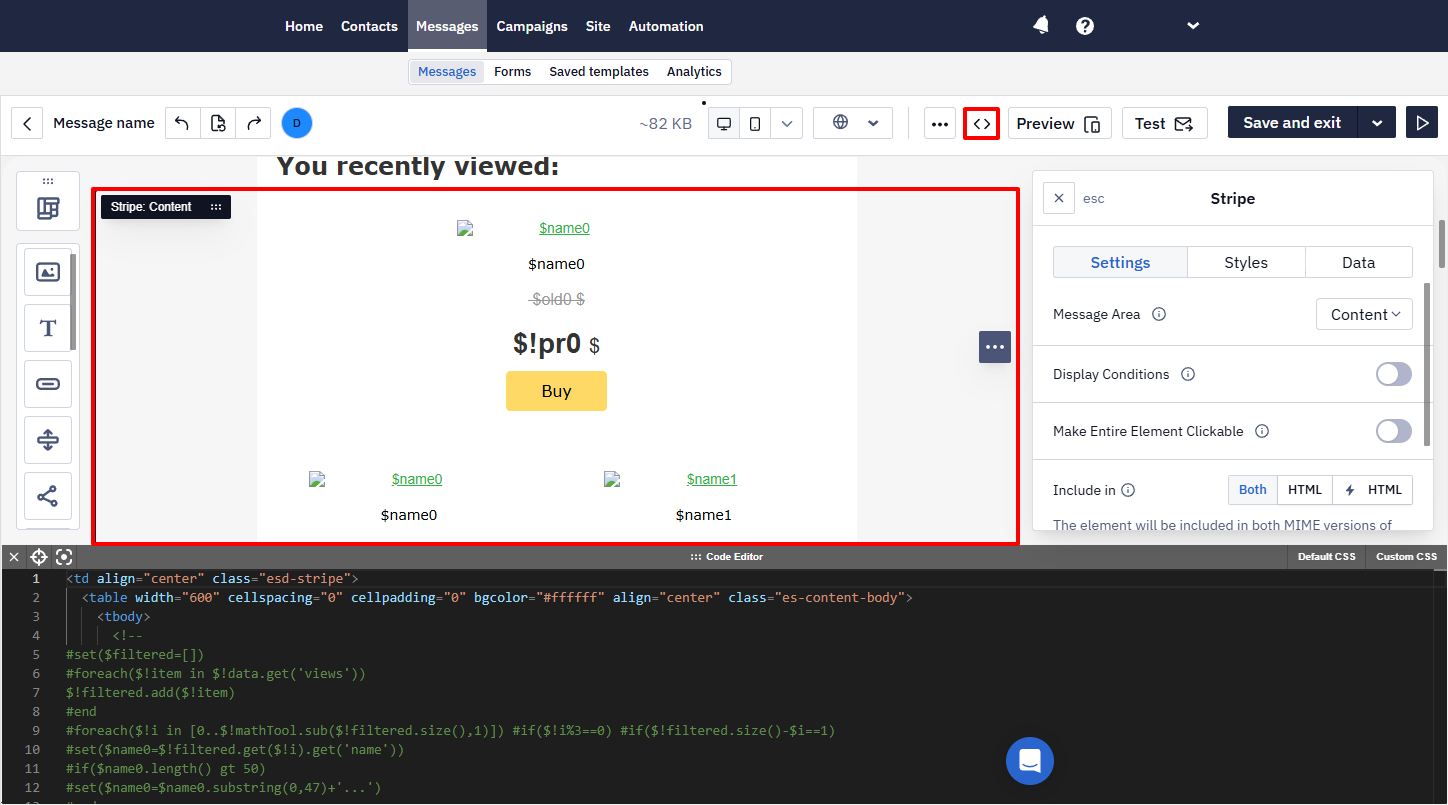
- In the
#foreach($item in $data.get('views'))line, replaceviewswith the name of the data source you created based on the Abandoned view (up to 6 products) algorithm.

- Customize the stripe’s appearance.
The stripe’s structure is universal: depending on the number of viewed items, the recipient will see one, two, or three cards in a row.
You can change the design of the stripe’s elements: colors, text, and background.
We do not recommend changing the stripe’s structure, i.e., the arrangement of its elements to each other: this will break the layout, and the recipient will see an incorrect display of the email’s content. Also, you cannot change the variables specified in the structure blocks since they are responsible for displaying product data from your feed.
If you want to create a fundamentally different structure with dynamic content, please send a request to [email protected]
Learn more about designing recommendations in email.
- Save the stripe as a module.
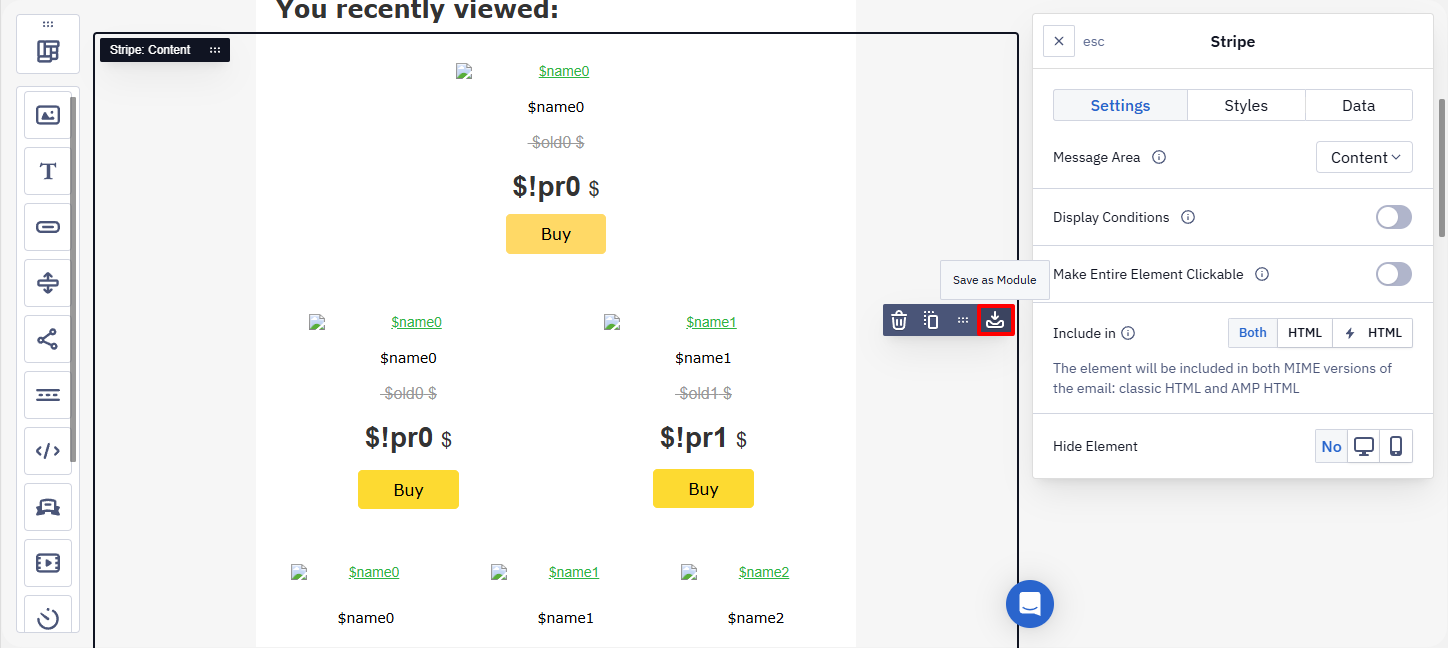
You can insert the saved module in any campaigns with product selections, for example, for the Abandoned cart trigger. You just need to replace the name of the data source.
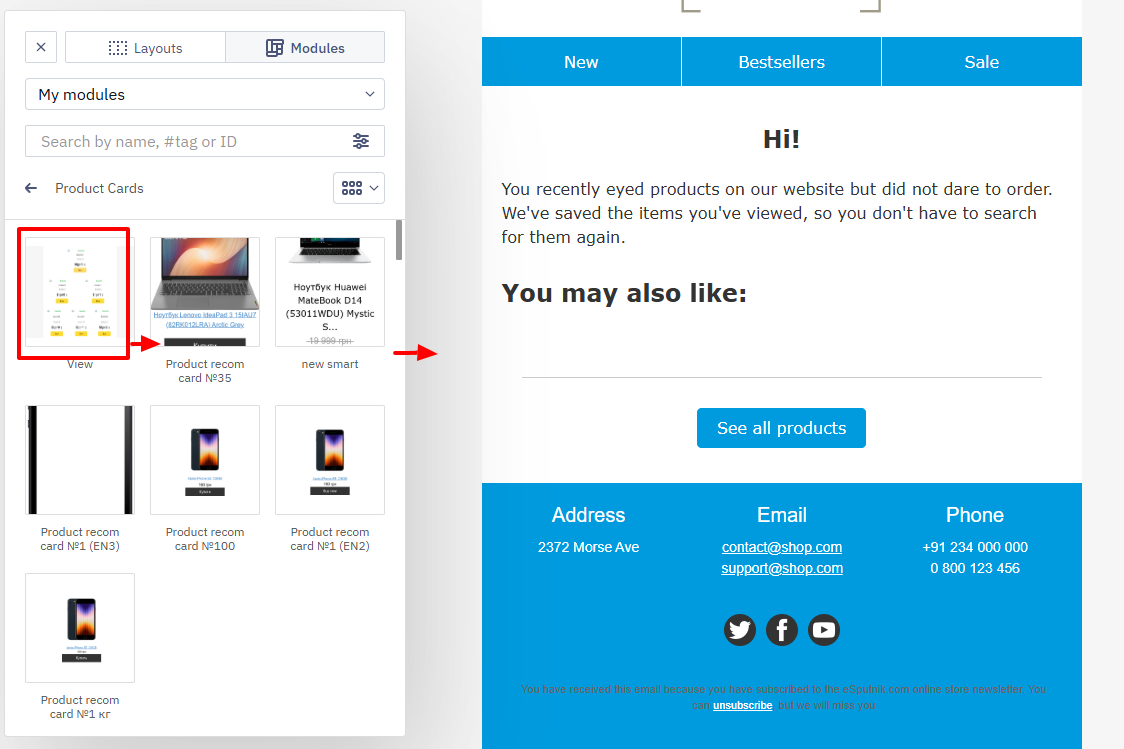
We will use the saved module in the same template as a stripe with recommendations for viewed products.
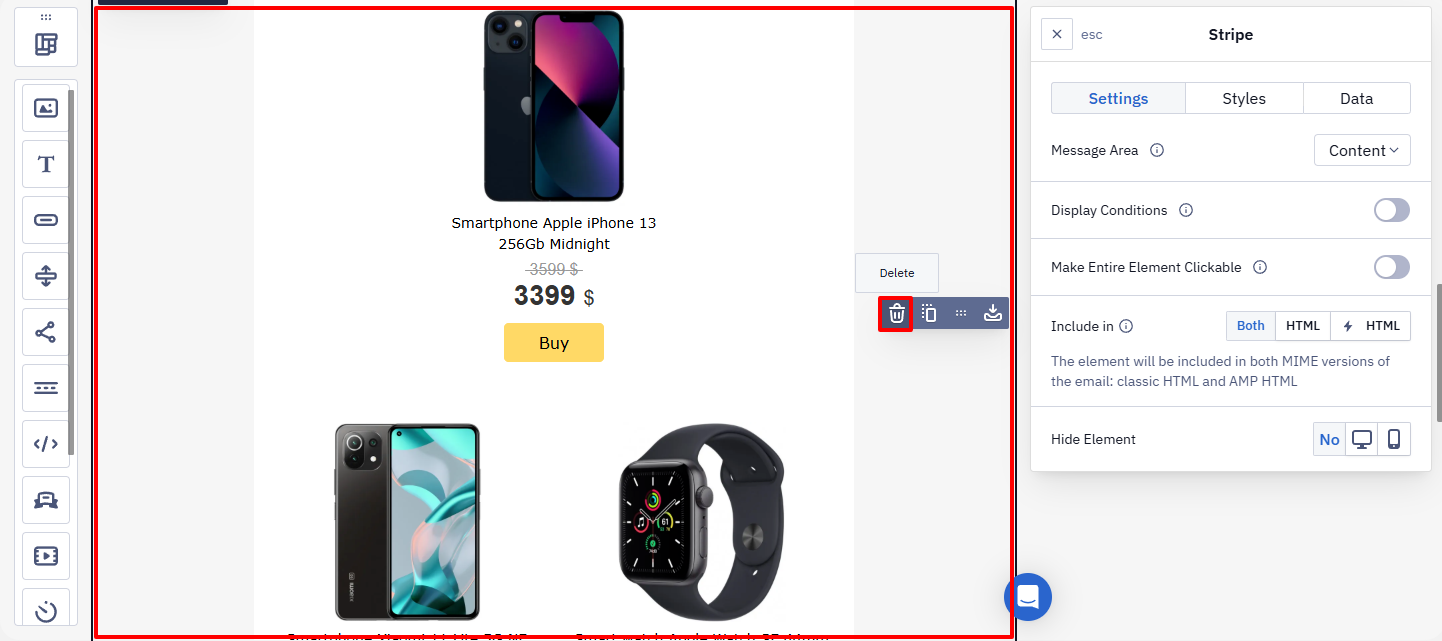
- Remove the illustrative stripe with product cards from the template (You may also like).
- Insert the module you saved before in place of the removed stripe.
- Replace the name of the data source in the stripe’s code with the one you created for the Recommendations for 6 abandoned views (up to 6 rec.) algorithm.
This completes the recommendation settings. You can insert saved modules into your trigger template or redesign the template you are currently working on to match the style of your site.
NoteYou can define what to do with messages when there is no data for recommendations - to send or not. To do this, add one of the variants of the Velocity command to the recommendations’ code:
$!datasource('source_name').required('false')— send,$!datasource('source_name').required('true')— do not send.
Updated 15 days ago