
Quickstart Guide
Pleased to meet you! Let us take you on a small tour of how to create, launch and measure the results of the first campaign!
Read the guide to the main sections of Yespo to launch marketing activities in favor of your business as quickly and easily as possible. We'll walk you through all the settings step by step.
Ready to Get Started?
Let's move on to specific tasks.
Set Up Your Account
Enable MFASet up multi-factor authentication to provide an additional security layer to your account.
Set different account access levelsDistribute access rights among users in your organization, such as admin, marketer, designer, or auditor.
Add Contact Data

Import existing contacts
Upload contact data using the API or manually.
Before importing an email database, check its validity and security — because of mailings to invalid addresses, your domain may end up on black lists.
Automate the transfer of new contact information
Send API requests to Yespo when contact data is created or updated on your end to keep them up to date at all times.

Set Up Email Channel
Verify your domain
Make DNS records and add the sender name to improve your emails' delivery and open rates.
Create a template
Take advantage of the powerful capabilities of our template editor to create high-quality and attractive email content.
You can also contact our support team to order a new template or adapt an existing one if you are switching to Yespo from another system.
Automate Processes
Build segmentsPrepare static and dynamic segments for behavioral targeting campaigns.
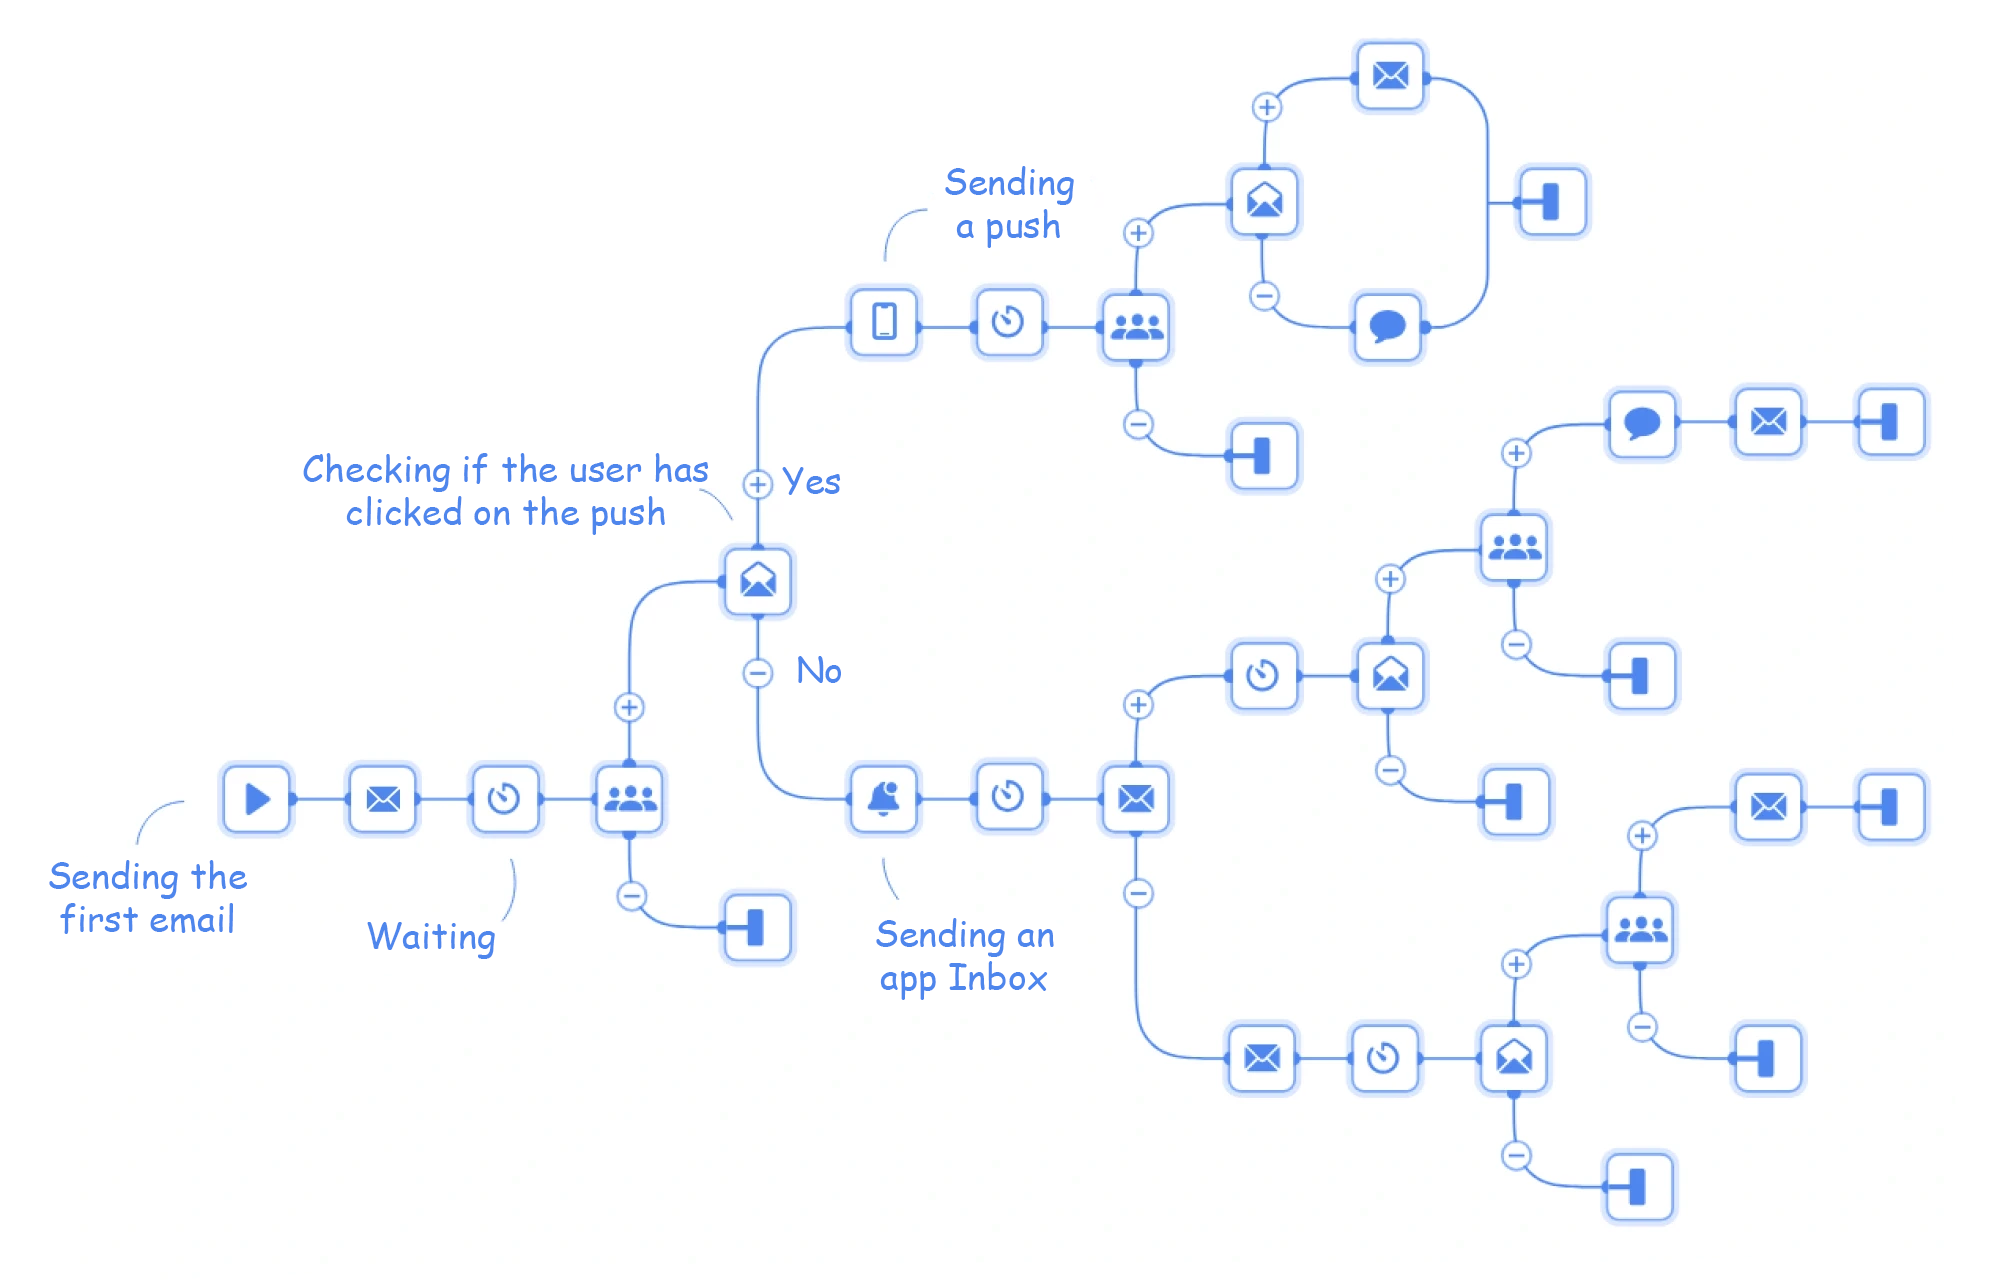
Create workflowsMap out your customer journey to attract subscribers and move them through your sales funnel efficiently.
Track eventsUse events to trigger automated messaging, segmentation, personalization, and business process analytics.
Set up the transfer of order dataOrder tracking allows you to create transactional message series and segment based on purchase data.
Organize Web Tracking
Install the script and download the product feed
Copy the tracking script in your Yespo account and add it to the code on each page of your site. After that, upload your product feed to your Yespo account. This way you will have access to data about any user actions on your site.
Send events with behavioral data
Use JavaScript requests to transmit event data to Yespo and incorporate them into marketing campaigns.
Set up AI-powered product recommendations
Recommendations provide a personalized experience for each user, which helps build loyalty and increase sales.
Use recommendations

Install Widgets
Create a widget
Attract new subscribers using different types of Yespo widgets.
Define actions after filling the widget
Set up DOI and onboarding workflows to get newcomers interested in engaging with your brand.
Set calling rules
Use flexible widget display options to extend site visit time.
Implement Omnichannel Campaigns
Organize communications to increase sales and expand your audience — create campaigns and combine all channels on one platform:
Your offer will be seen by the broadest possible audience: these messages appear directly in the browser, even if your website is closed at that moment.
Combine the advantages of mobile and web push messages. With their help, you can deliver a variety of personalized content to users directly to their accounts or apps.
Is very convenient and familiar to most of your audience. Telegram tokens are associated to other contact information, allowing you to integrate a Telegram bot into your omnichannel strategy.
Manage all these channels within one platform and choose the most appropriate tool for each specific situation. The more relevant channels you use in your omnichannel strategy, the more effective each one will be.
Test the System for Free
During the trial period, you can:

✔️ Send 2500 emails and 10 SMS
✔️ Install most types of widgets on the site
✔️ Use any of the seven basic automated campaign workflows and create your own
✔️ Apply all analytical tools
Support
We are always here to answer any questions you may have and help with setup.
Updated 12 months ago