
Integrating with Google BigQuery
To integrate BigQuery with your Yespo account:
- Register your account at Google Cloud Platform.
- Get a project key.
- Create tables in Google BigQuery for importing data to Yespo; tables with data from Yespo will be created automatically after the first export.
ImportantWhen creating tables in Google BigQuery, use
snake_caseorcamelCasefor field names. Don't use spaces in the names: segments based on such fields aren't built.Examples of correct names:
first_nameloyalty_card_numberorderDate
- Create the Yespo connector.
If you already have a project key and BigQuery tables with data for Yespo, you can go directly to the connector settings.
Creating a Project Key
- Create a Google Cloud Platform account.
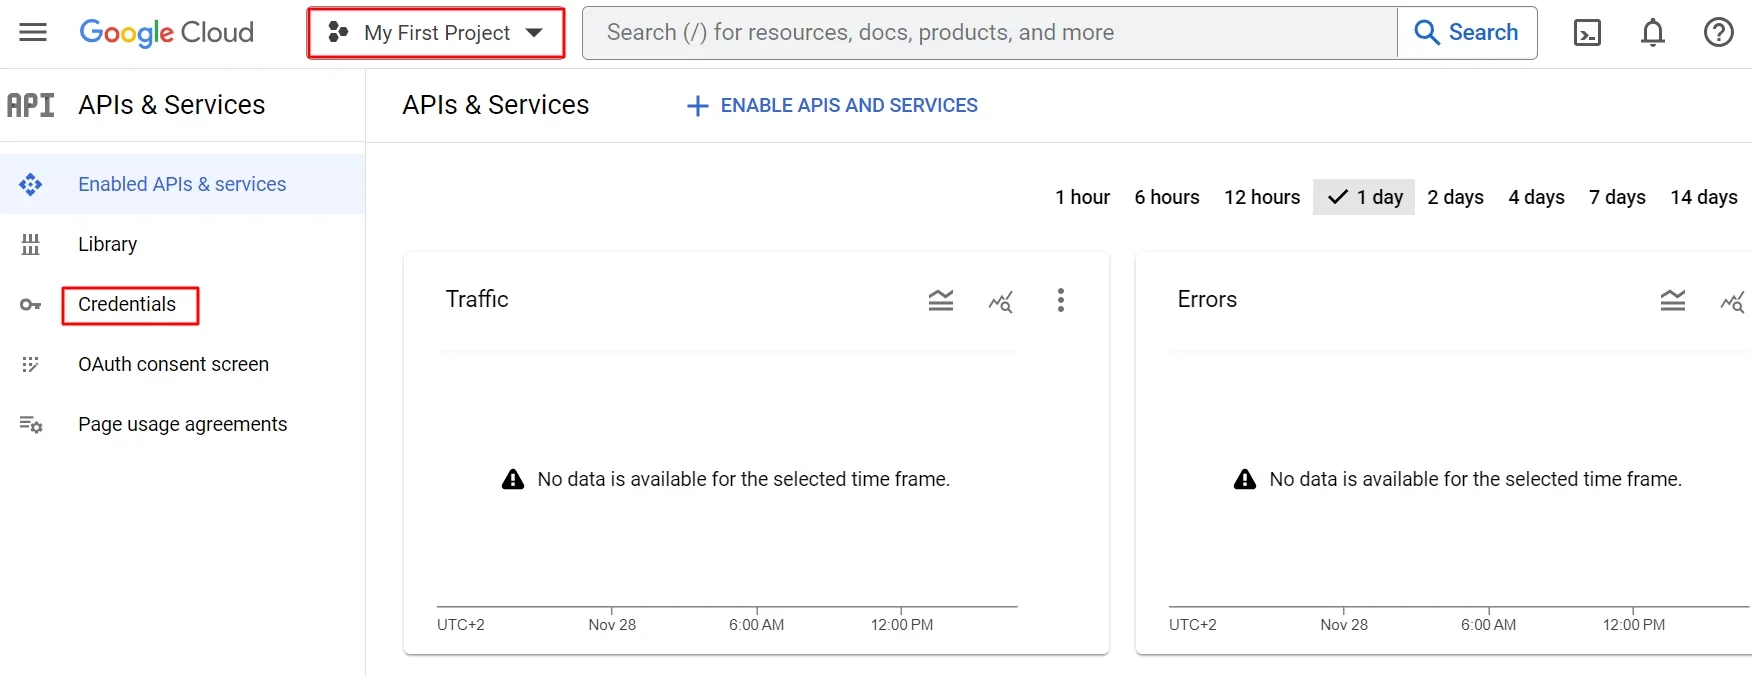
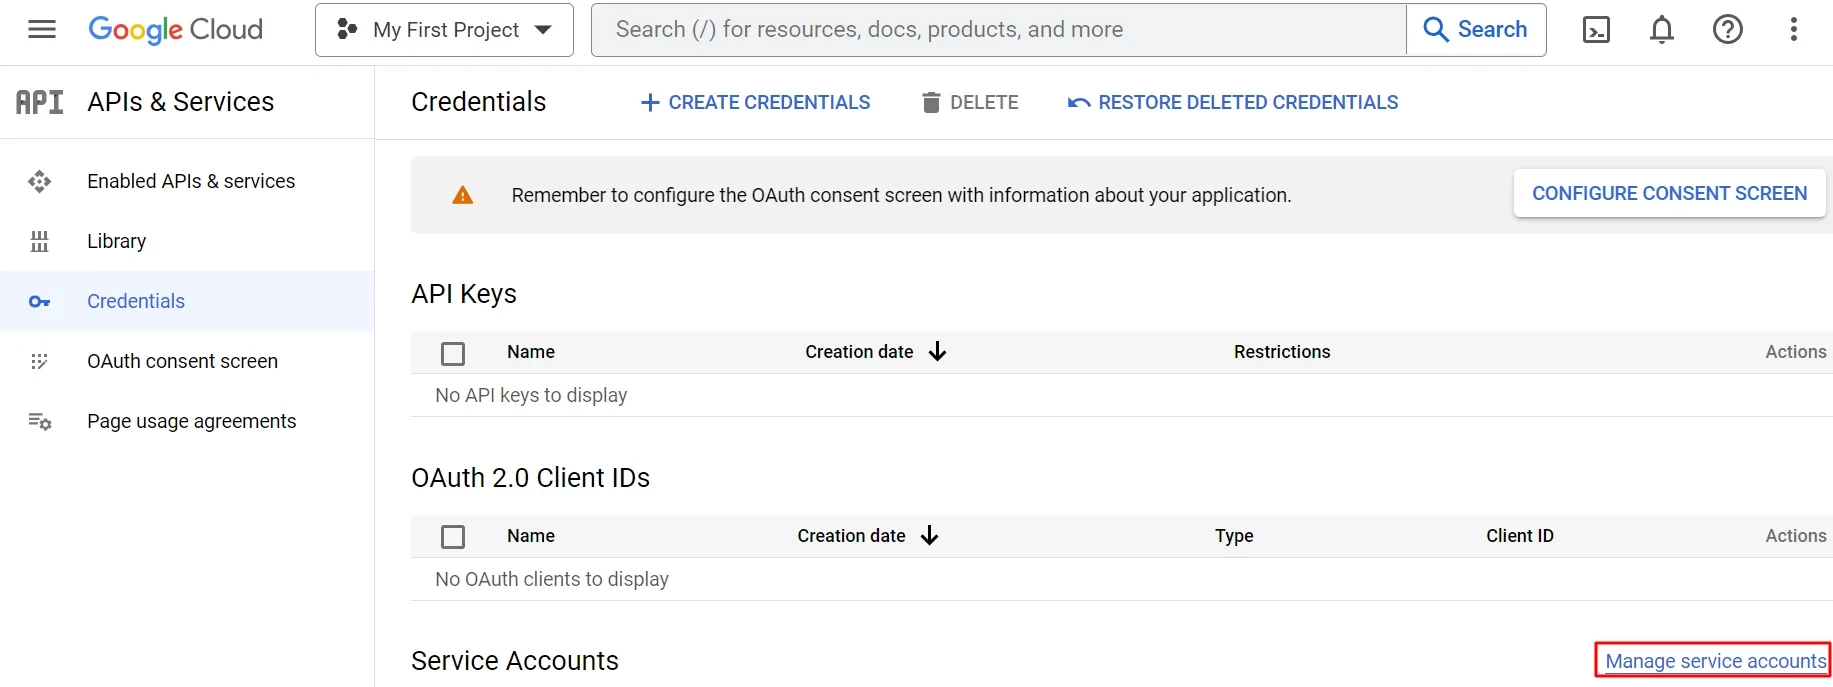
- Select a project → APIs & Services → Credentials.
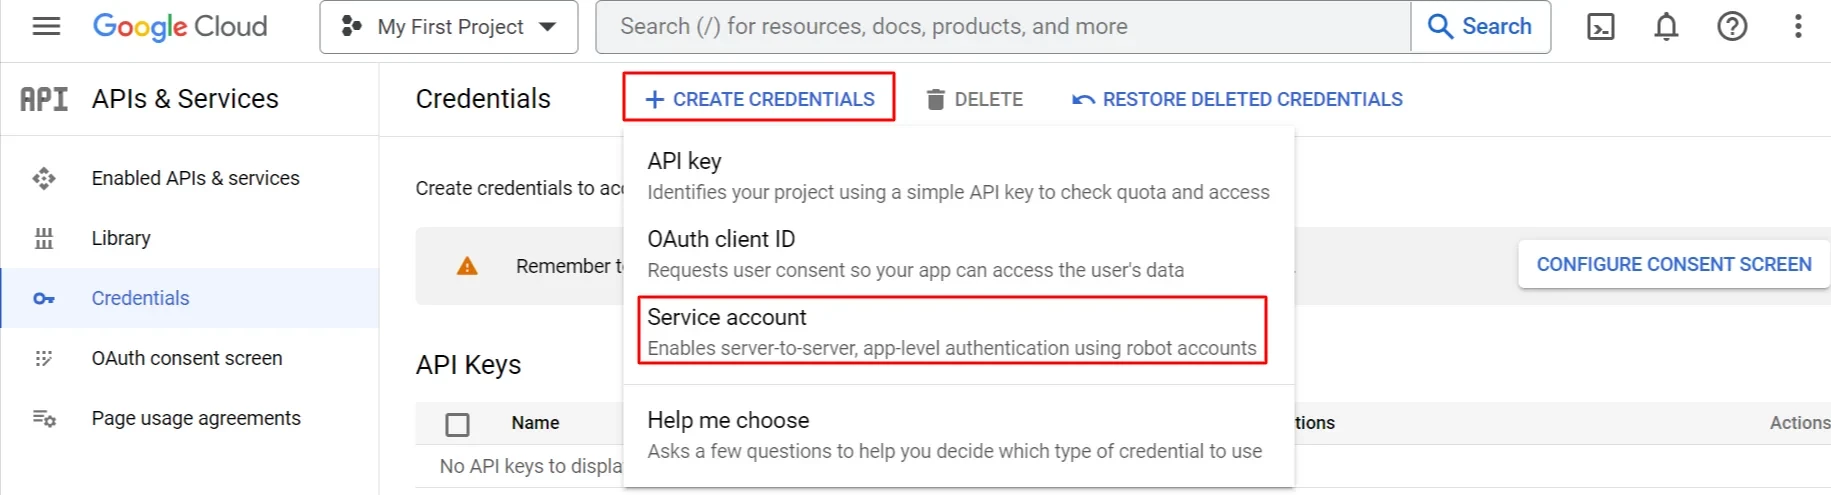
- Click Create credentials → Service account.
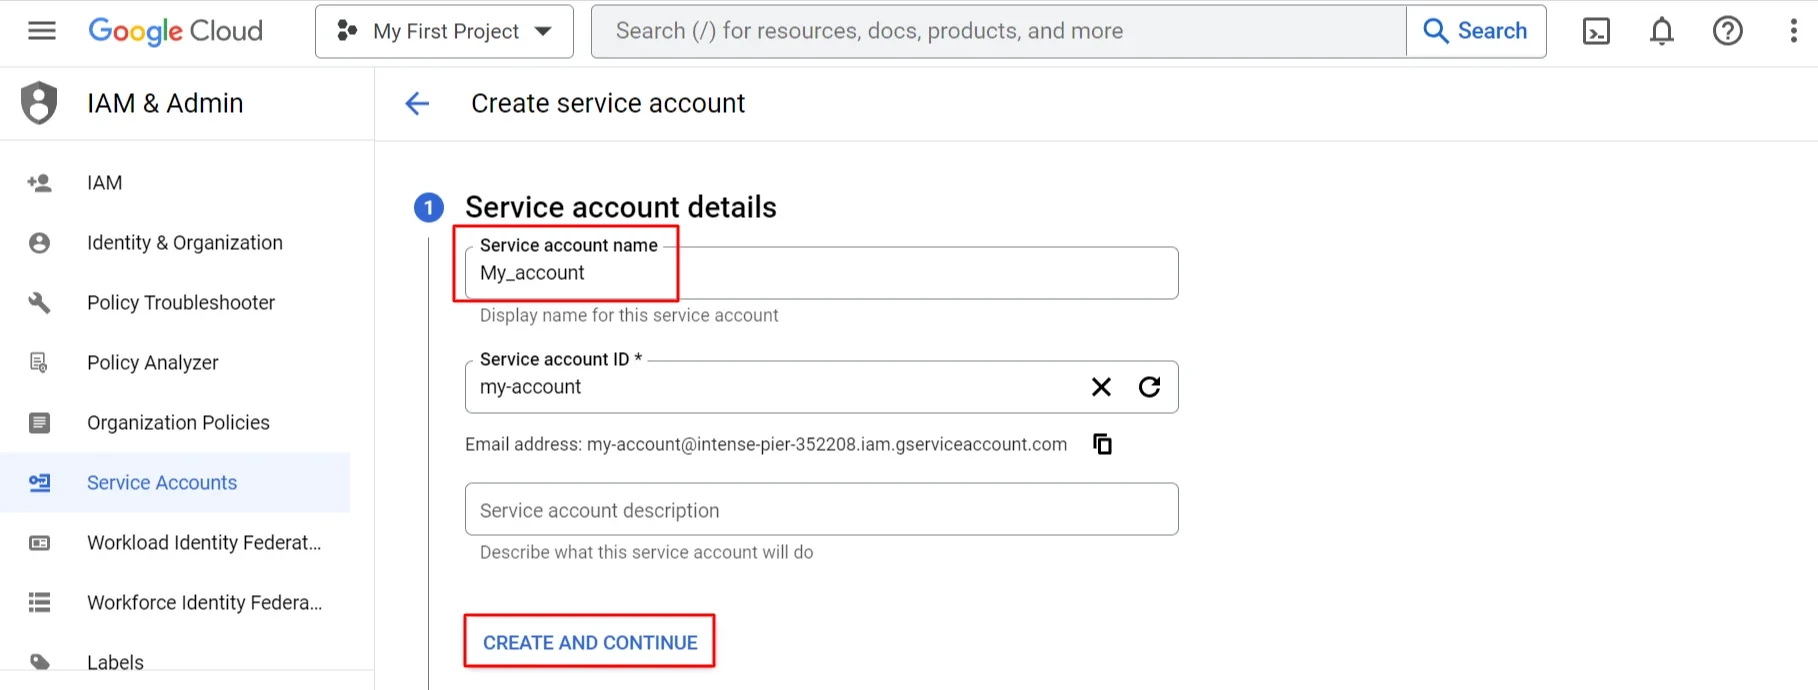
- Enter a service account name and click the Create and continue button.
- Select the BigQuery Job User role, click Continue → Done.
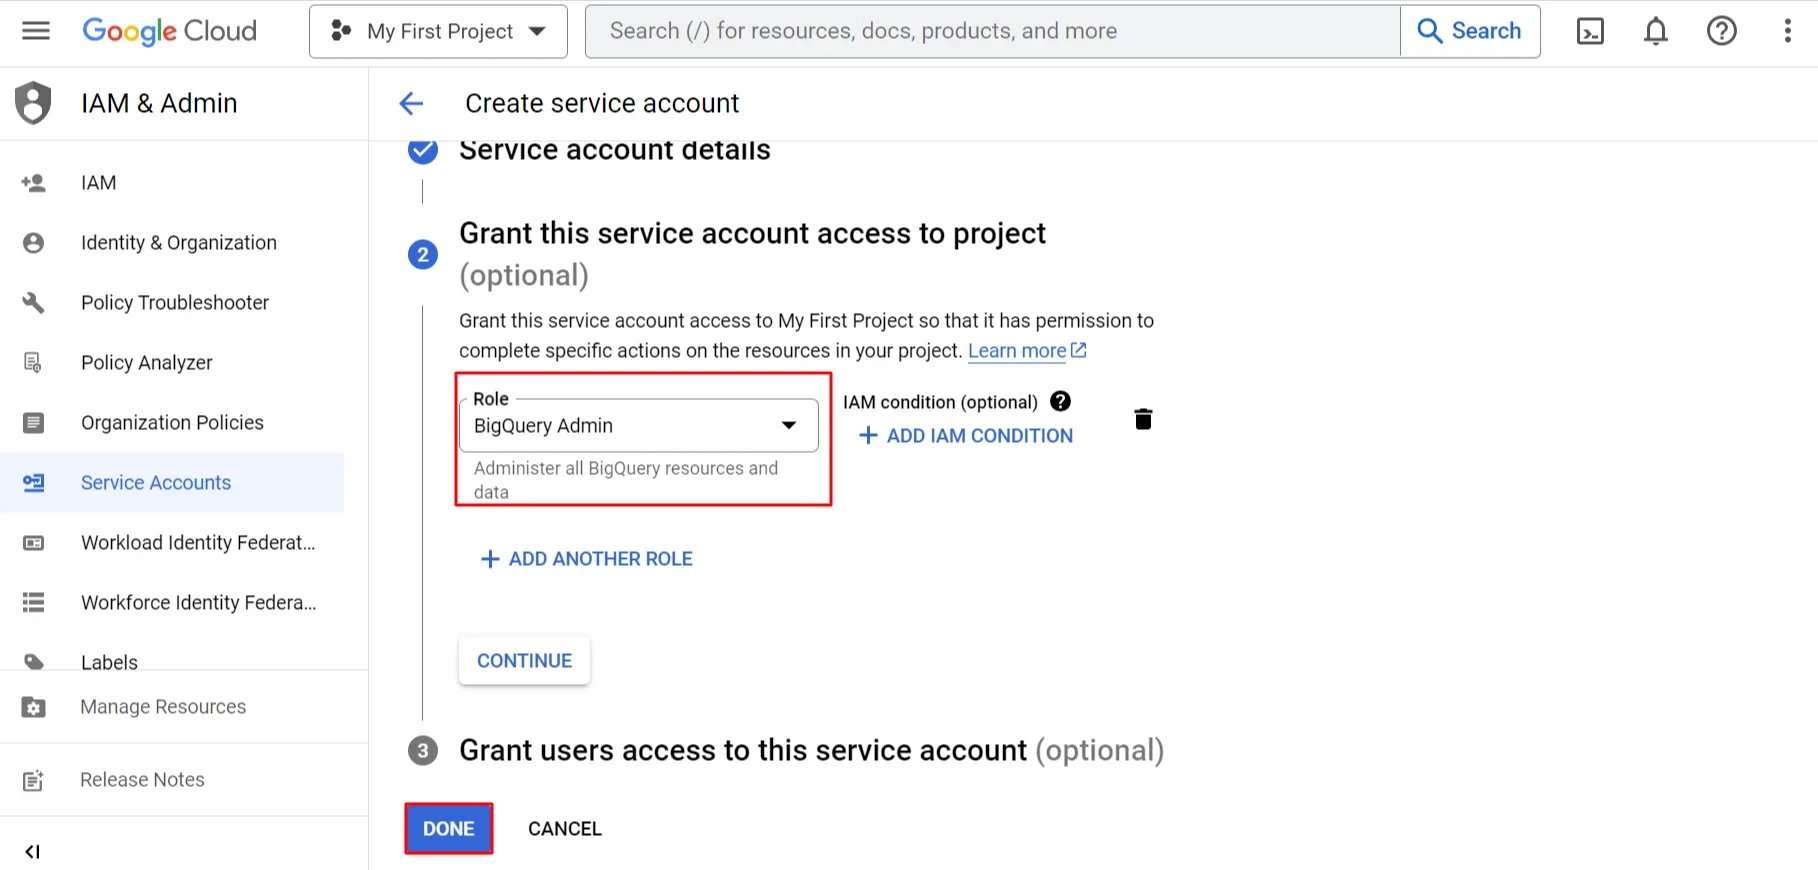
NoteLeast-privilege setup. The connector does not need the BigQuery Admin role. Grant permissions in two steps:
- Assign the service account the BigQuery Job User role at the project level — this lets it run the load and query jobs.
- Create the dataset that the connector will work with, then assign the same service account the BigQuery Data Owner role on that dataset only.
The service account then has full control over the integration dataset and no access to the rest of the project.
- Click the link Manage service accounts on the main page of the Credentials section.
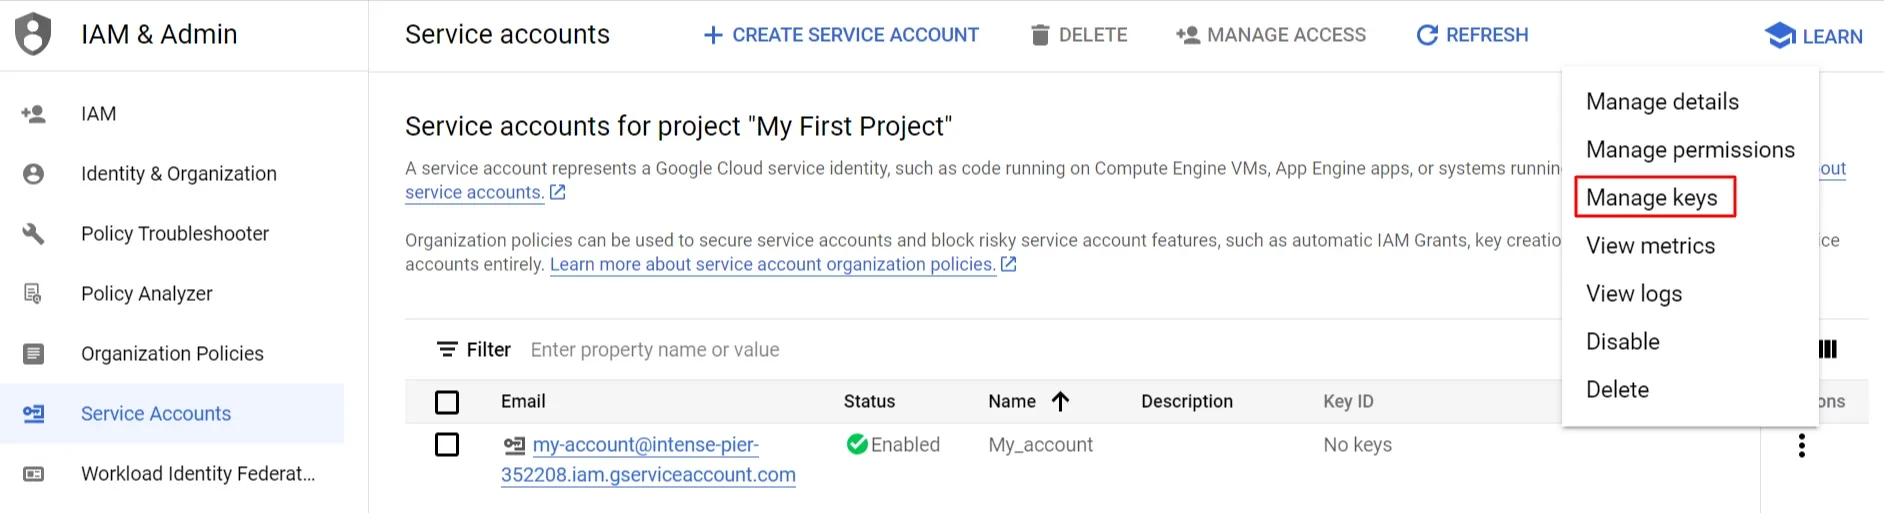
- Click on the three dots opposite created account and select the option Manage keys.
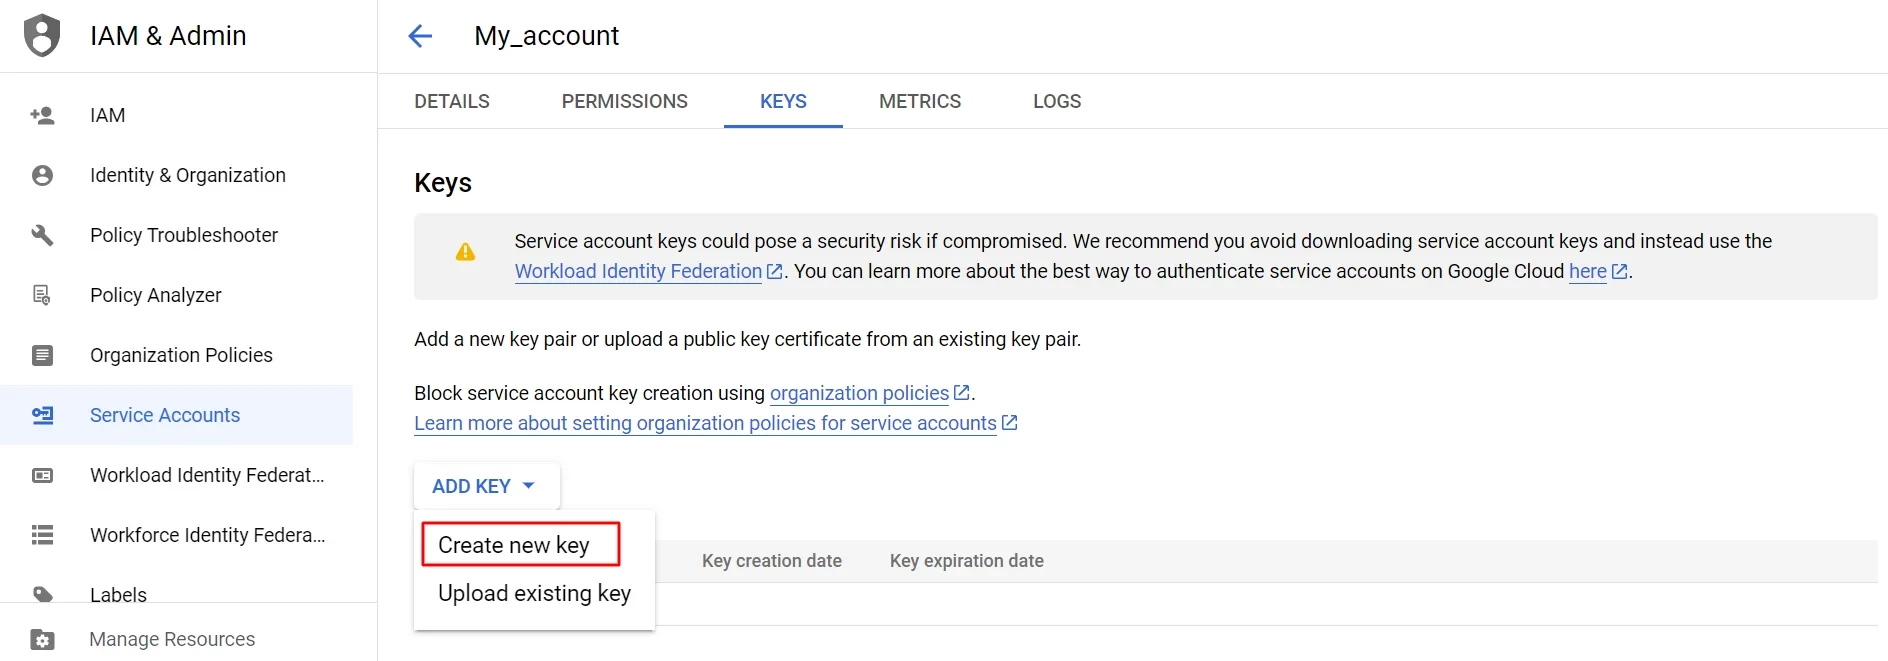
- Click on the Add key button and select Create new key option in Keys section.
- Select JSON key type and click Create.
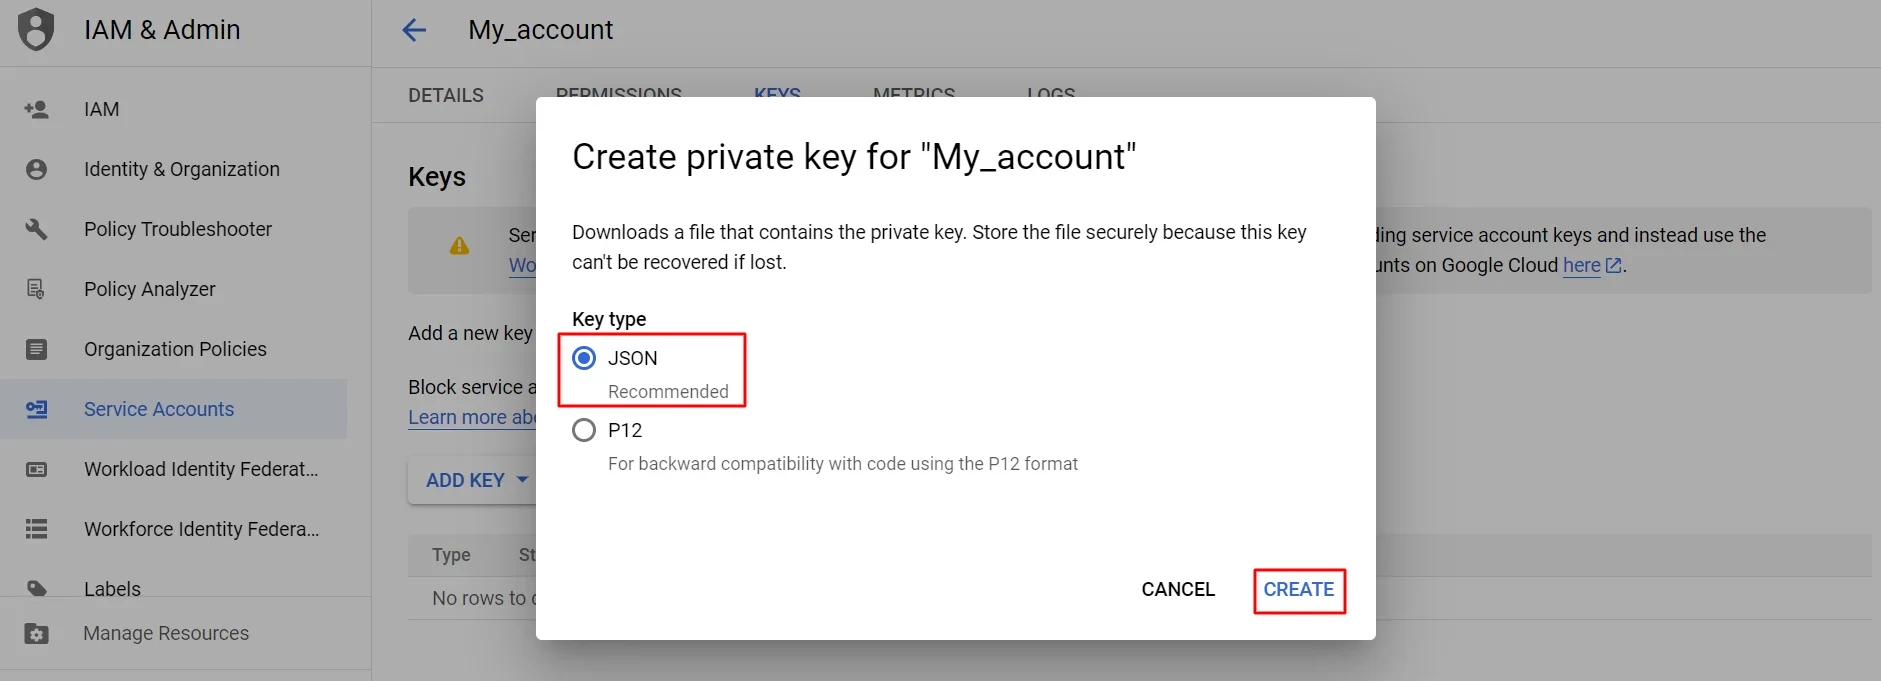
- The browser will automatically download the key to the download folder.
Setting up BigQuery Connector
Go to your profile → Settings → Connectors → and select Connect BigQuery.
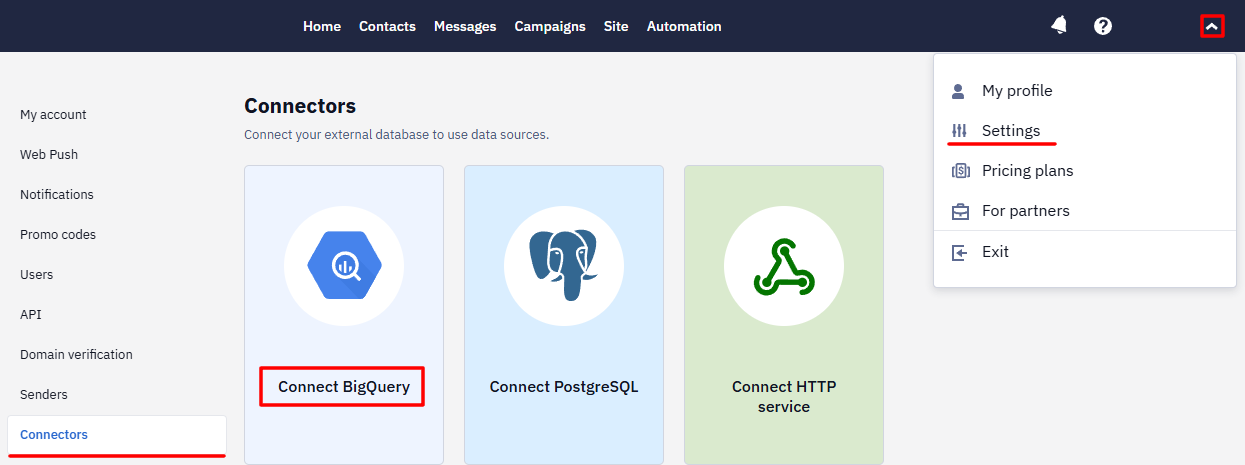
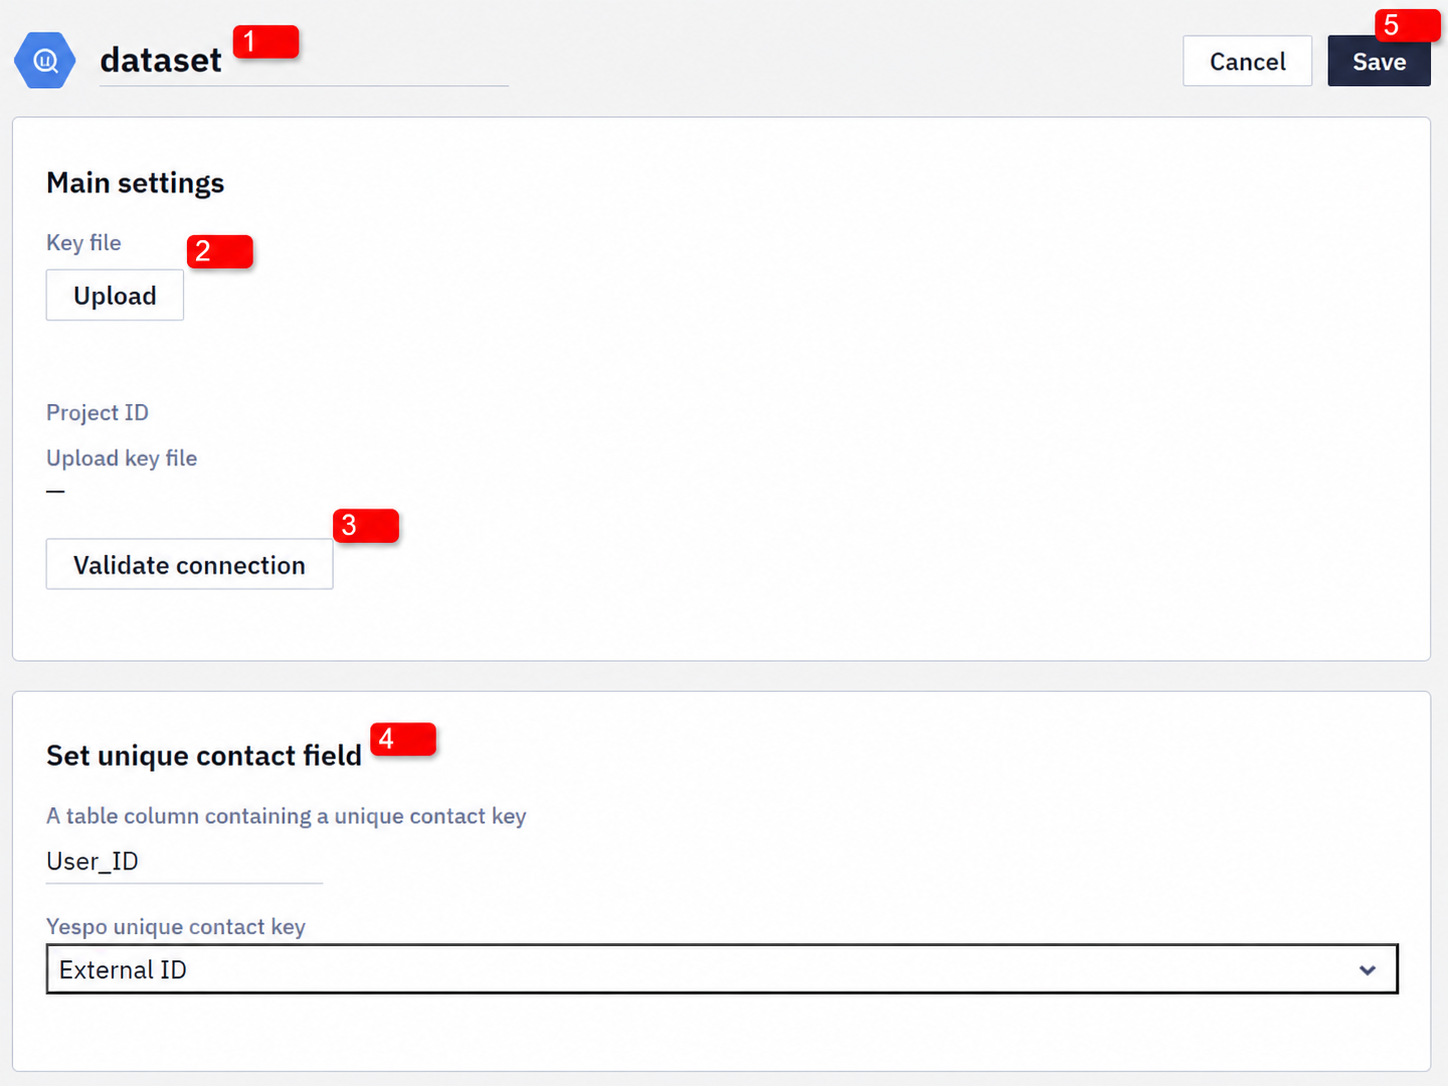
Create connector:
- Fill in the Name field.
- Upload the key file.
- Click Validate connection to test whether the authorization data is correct. You will see the notification if the connection is successful or not. If the connection fails, check the entered data and contact your system administrator if needed.
- Set unique contact field: select a table column that contains a unique contact key and Yespo's unique contact key. They should match.
5. Click Save.
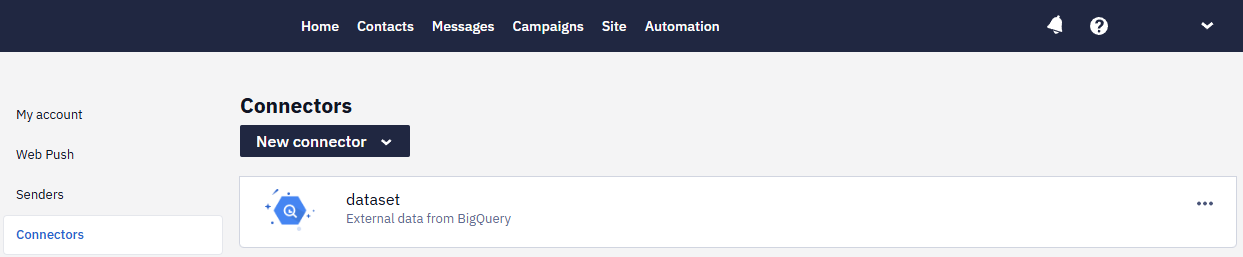
You will see created connector in Settings → Connectors. Click the tab with its name to edit the connector’s parameters.
Now, you can use it for exporting Yespo’s data and for importing data from BigQuery.
Note
- The target BigQuery dataset must already exist before you connect it — Yespo creates the individual tables inside that dataset automatically, but it does not create the dataset itself.
- The first export includes the history the account already holds, so you don't have to request a separate upload of earlier data. The limit is what the account collected: contact activity goes back up to 90 days and no earlier than the day activity collection was enabled, and
eventsandrevenuearen't backfilled for the whole account history.contactsand broadcast data cover the whole lifetime of the account. Activity from before collection was enabled can't be recovered by any means, including the Get contacts activity API resource.
Updated 12 days ago