
Integration with Shopify
The Yespo plugin for Shopify automatically handles the following technical setup:
- Contact transfer — real-time contact creation, update, and deletion, plus historical data import.
- Order transfer — real-time order creation and updates, plus historical data import.
- Web tracking — script installation and event tracking configuration (see the full list of events below).
- Web Push — script installation and Service Worker setup. You do not need to follow the steps from the standard Web Push setup guide — the only remaining step is to activate Web Push in your organization settings.
- Widgets — script installation.
- App Inbox — the plugin automatically reconfigures the script initialization and handles authentication token retrieval when the App Inbox toggle is enabled. No additional steps from the standard App Inbox guide are required.
Note
- Product Recommendations require additional setup on your site, while the technical configuration of the remaining tools is performed automatically by the plugin.
- Technical details about the application can be found in the public repository
How to Set Up the Yespo Shopify App
Follow these simple steps to integrate Yespo with your Shopify store:
NoteWe support integration only for one active Market
Step 1: Connect Your Yespo Account
Use the Full Access to API key from your Yespo account:
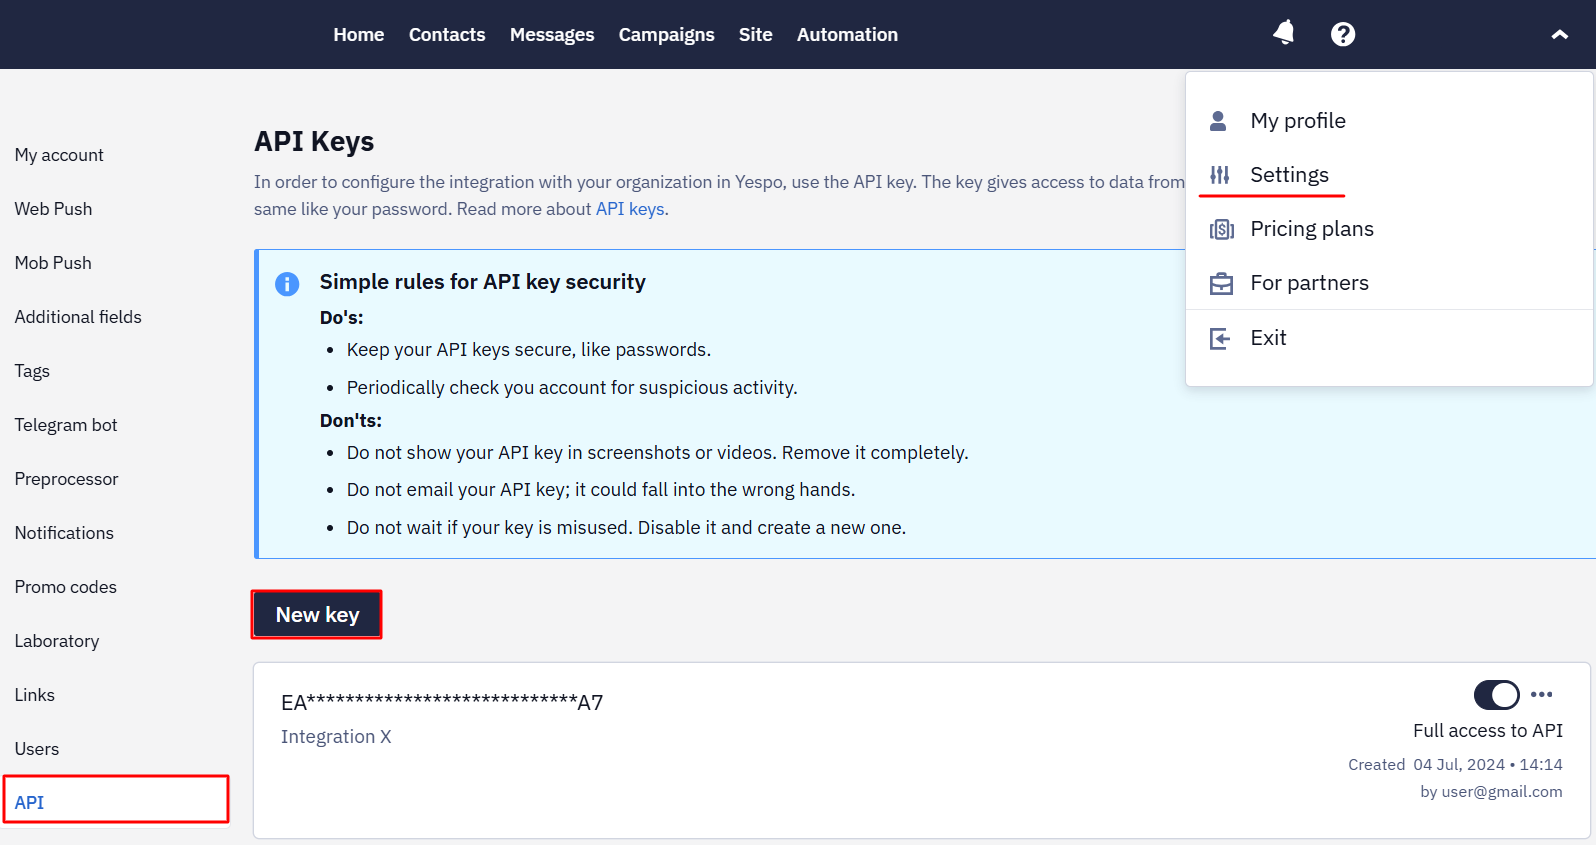
- Go to your Yespo account settings → API tab, create a full access to API key, and copy it.
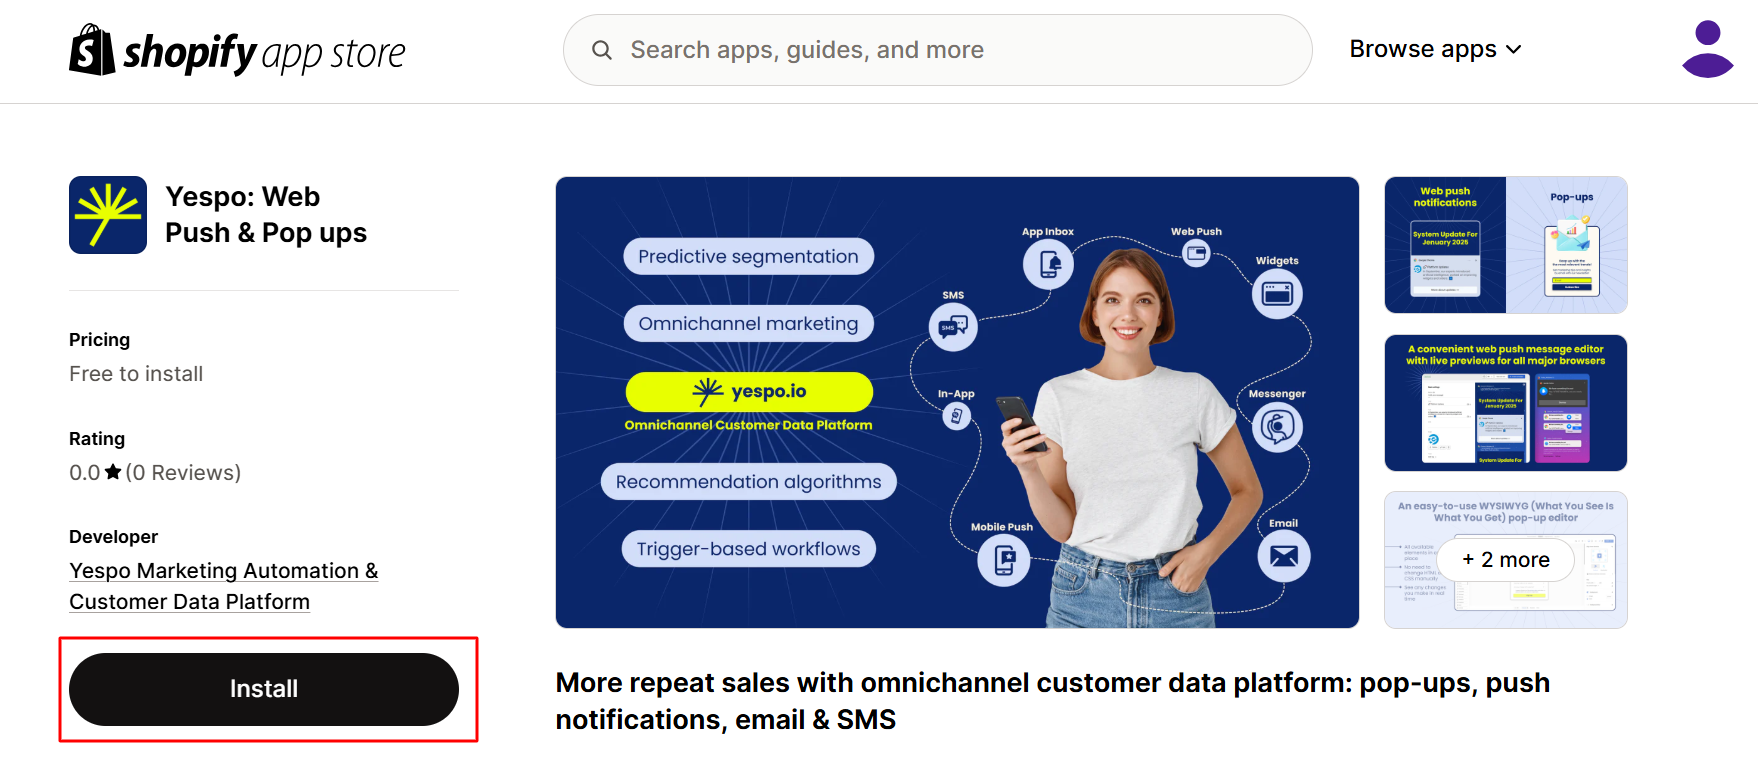
- Log in or sign up for your Shopify account, follow the link to access the Yespo app, and click Install.
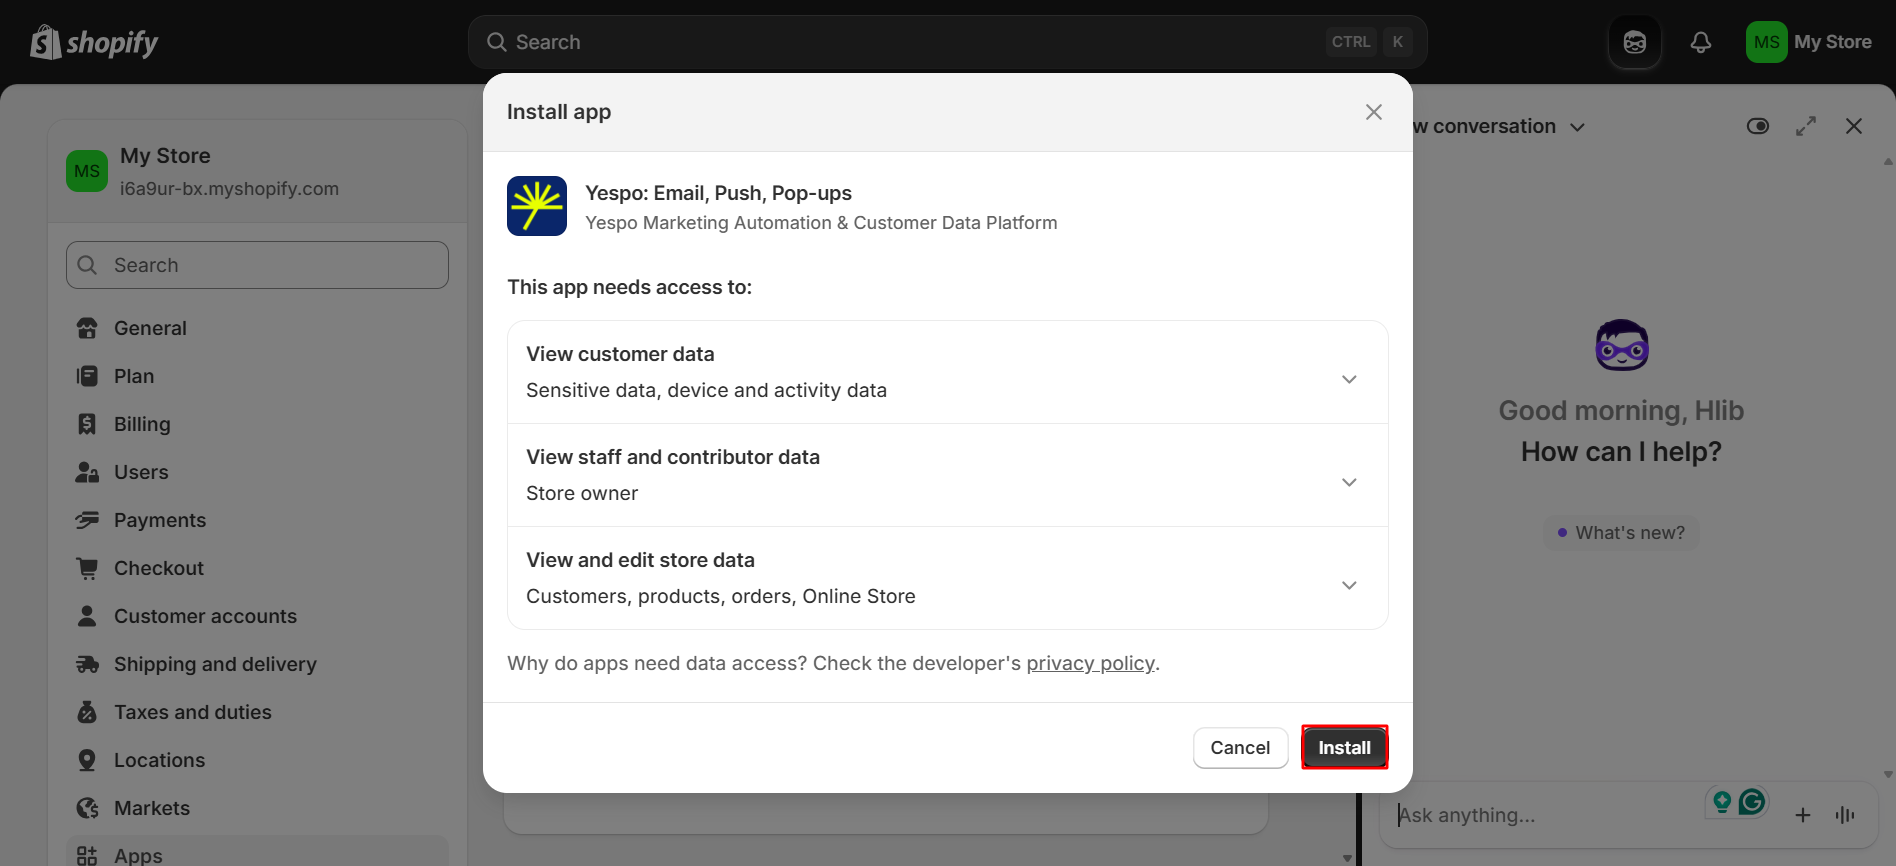
- Confirm installing the app.
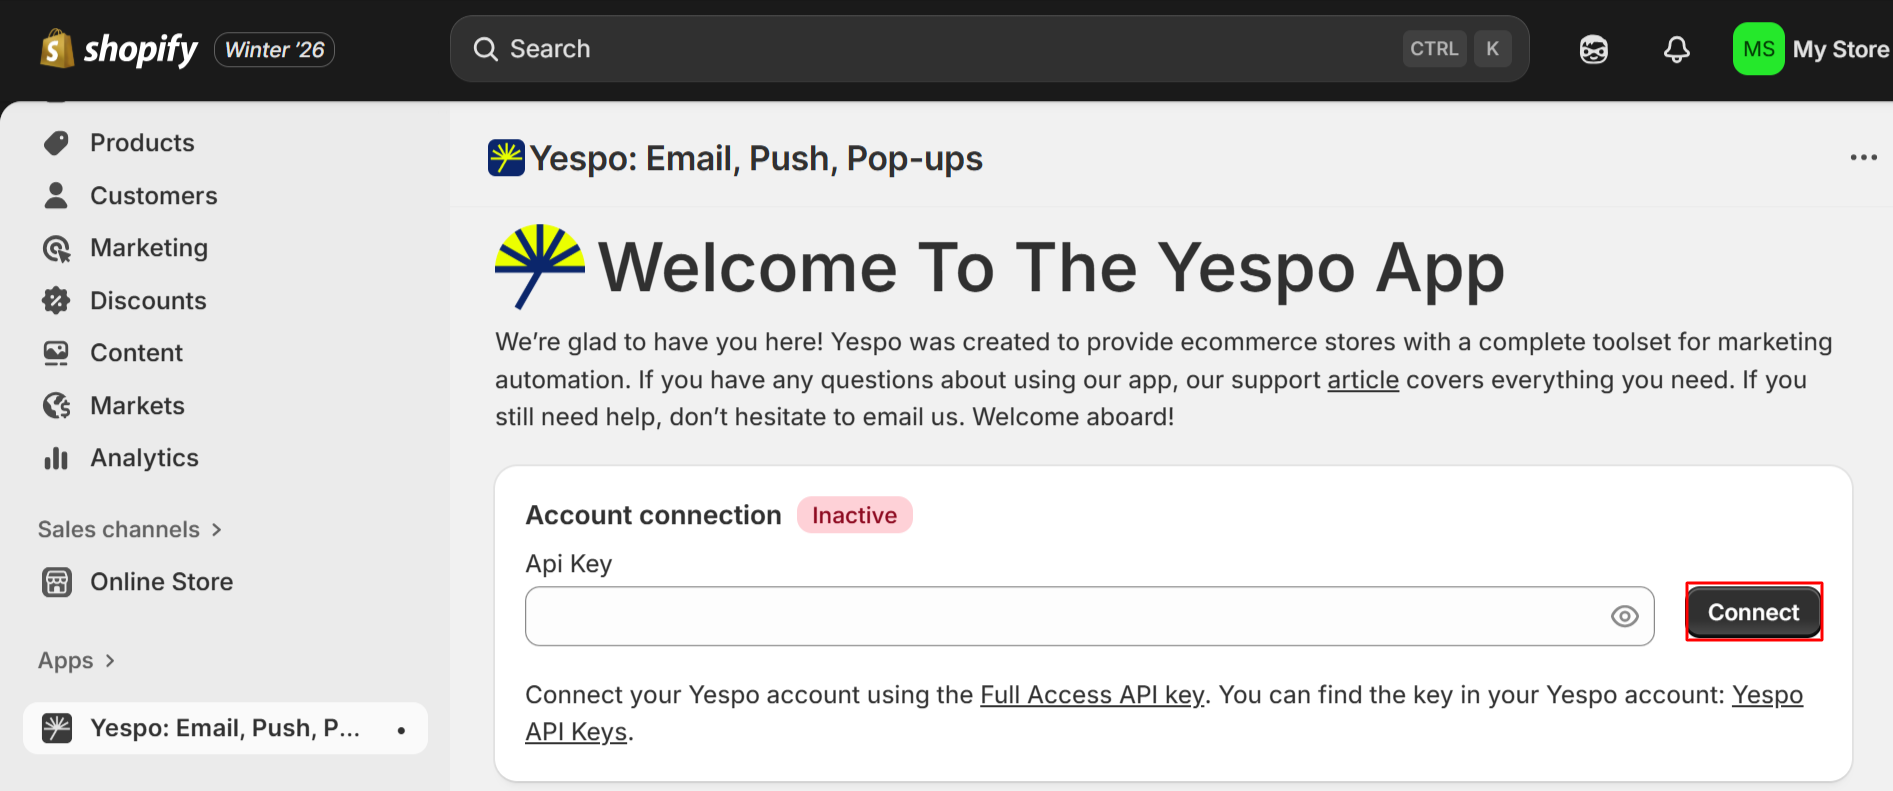
- Enter your Yespo API key and click Connect.
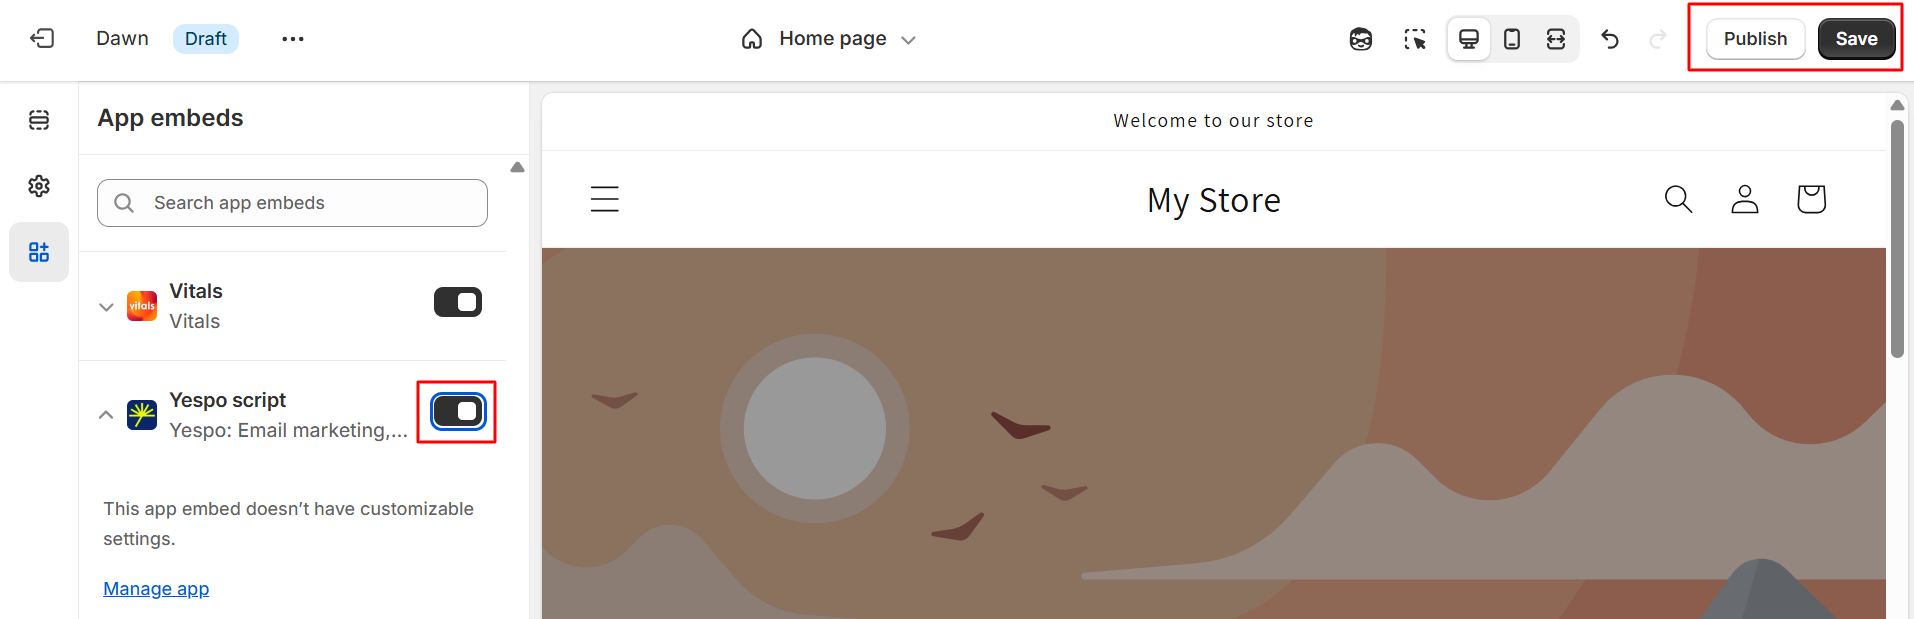
Step 2: Web Tracking and Site Scripts Integration
Once your Yespo account is connected, install scripts.
- Activate the Yespo theme extension.

- Click Save and Publish.
Step 3: Enable App Inbox (Optional)
To use the App Inbox channel in your Shopify store, enable this option in the App Inbox section.
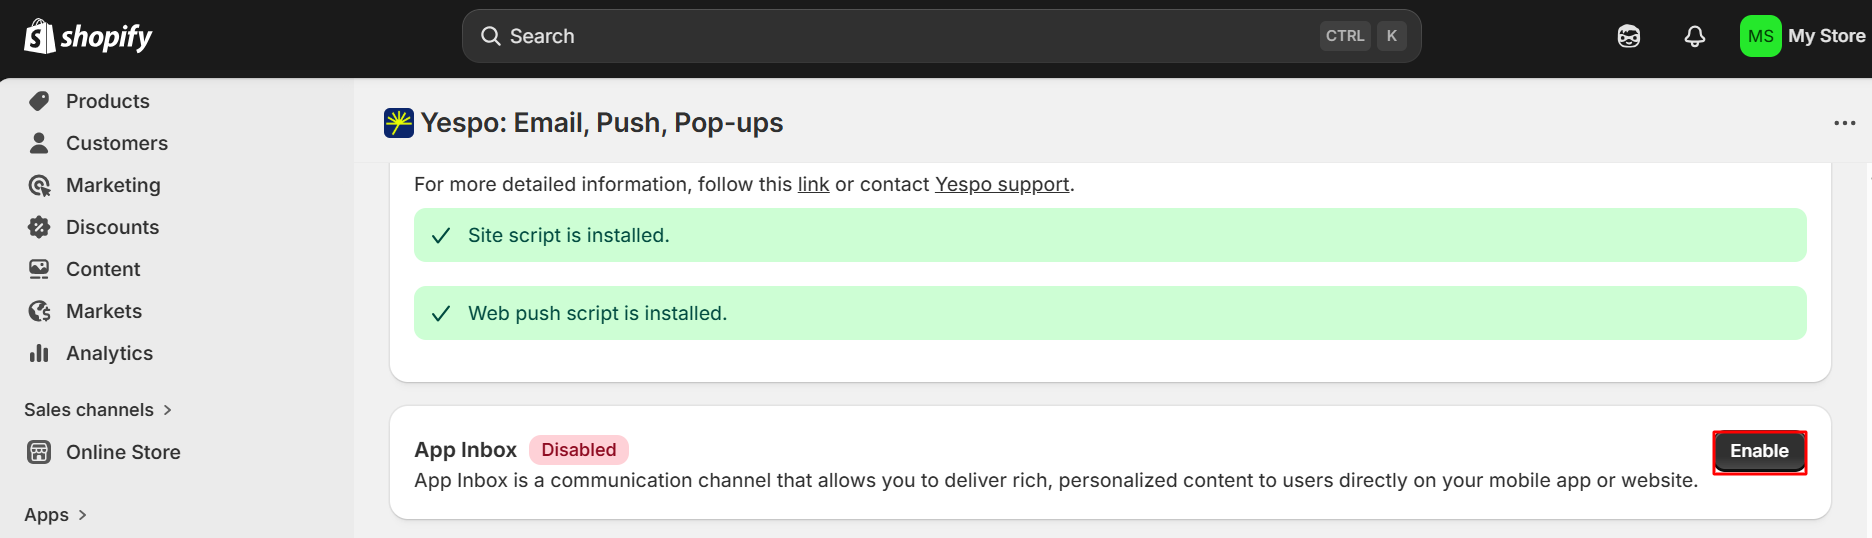
The plugin will automatically reconfigure the script initialization for App Inbox mode and handle authentication token retrieval — no manual setup is required.
All you need to provide to [email protected] is the CSS selector of the element on your site and the position of the bell icon relative to it: beforebegin, afterbegin, beforeend, or afterend.
<!-- beforebegin -->
<div class="your-selector">
<!-- afterbegin -->
element content
<!-- beforeend -->
</div>
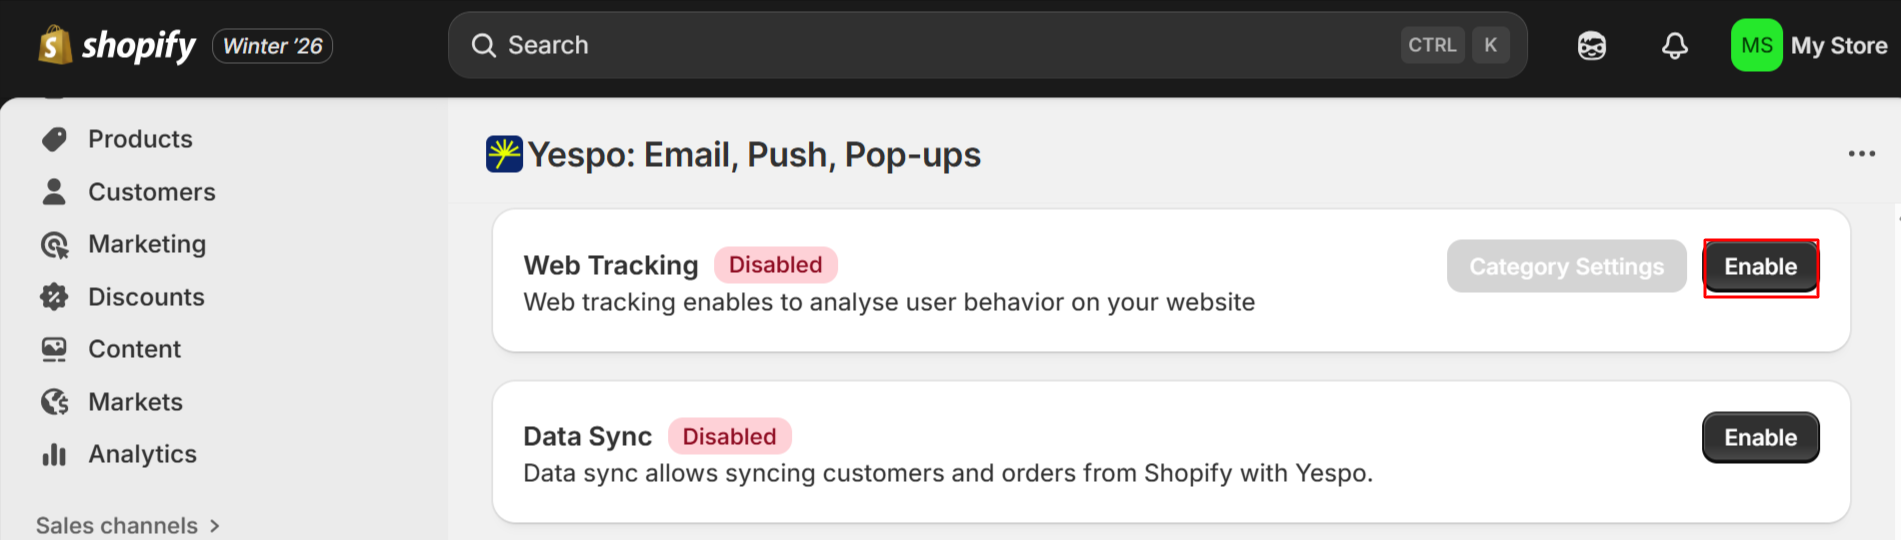
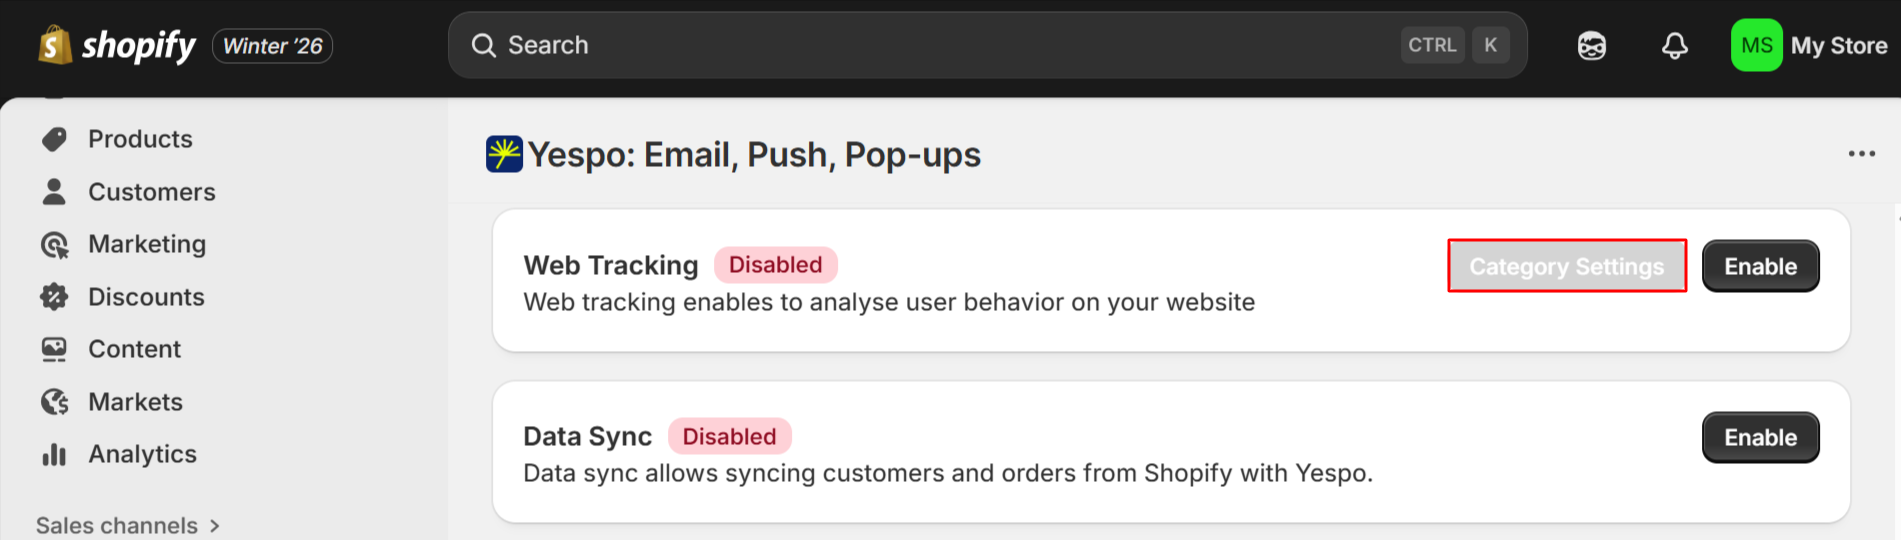
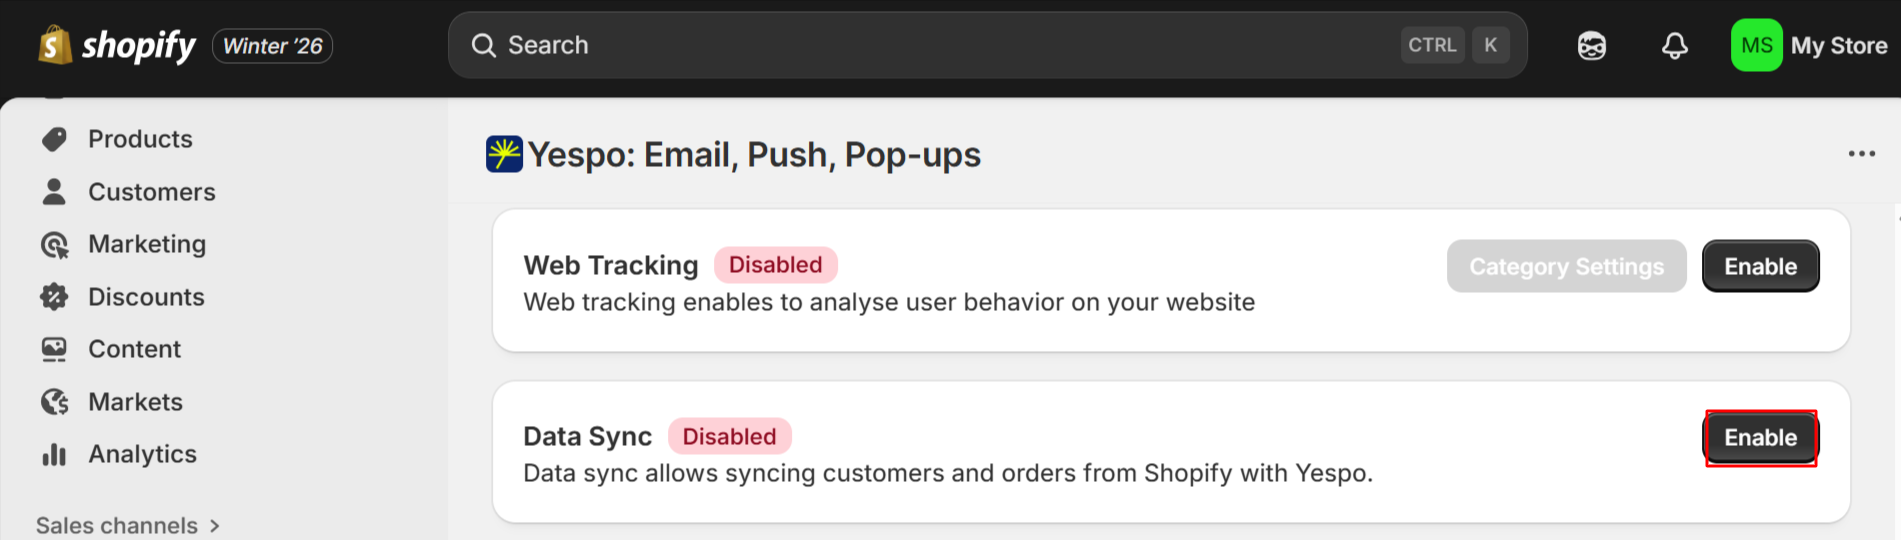
<!-- afterend -->Step 4: Enable Web Tracking (Optional)
To activate tracking web events in Yespo, click Enable.
The app allows sending the following events to Yespo:
| Event | Description |
|---|---|
ProductPage | The event is associated with actions on your product pages. It can be used for campaigns involving abandoned view, discount notifications for viewed items, or win-back campaigns. |
CategoryPage | It is triggered when a visitor views a product category page. After receiving this event in Yespo, you can send emails recommending the most popular products in the viewed category. Configuring category mapping in Category Settings is described below. |
CustomerData | This event relates to the site visitor's data received when they register, log in, or complete a purchase. The event links your website visitors to accounts in your system, enabling personalized campaigns. |
StatusCart | The event helps track the status of your customers' shopping carts. It can also be used to run ecommerce workflows, such as abandoned cart notifications, discount notifications for products in the abandoned cart, and notifications for discounts on products similar to those in the cart. Called from the backend by the carts/update webhook. |
PurchasedItems | It informs about the purchased items and can be used to compile lists of popular products for recommendations, upselling, and cross-selling. For example, if a customer purchased a phone, you can send them a message with recommendations featuring a phone case or a charger. Called from the backend by the orders/create webhook. |
MainPage | It is triggered when a visitor is currently on the main page. Necessary to display recommendations on the site. |
404 | This event tracks the 404 page. Necessary to display recommendations on the site. |
NoteAdditionally, you can manually set up sending the AddToWishlist and SearchRequest events.
CategoryPage Event Settings
CategoryPage Event SettingsAfter enabling web tracking, click Category Settings.
Configure sending the CategoryPage event for collection pages in Shopify.
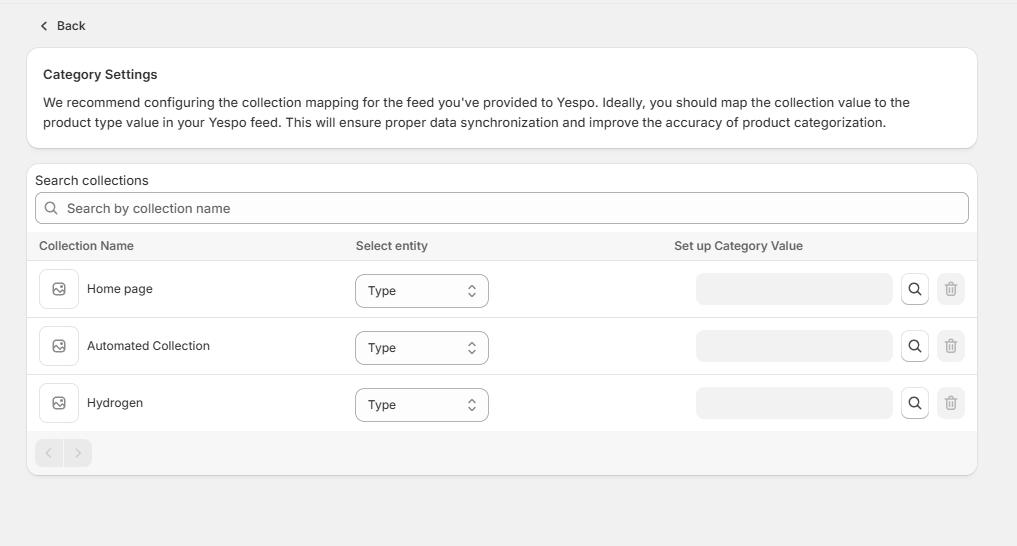
- In the Collection Name column, select the collections for which you want to send the
CategoryPageevent. - In the Select entity column, for each collection, select the entity type (Type / Category) that you use in the product feed as the
product type. - In the Set up Category Value column, specify the product types that are displayed on this collection page (Bags, Accessories, etc.)
After that, when a user opens the page of the customized collection, the application will send the CategoryPage event to Yespo with data about the corresponding category from your feed.
Step 5: Data Synchronization (Optional)
Activating this option allows you to:
- Transfer historical contact data to Yespo;
- Send data on new and historical orders.
Note
- You can always pause sending contact data to Yespo.
- If the application has been deactivated and reactivated, contacts deleted during its inactivity will not be transferred to Yespo.
Step 6: Configure Yespo Settings
After the script is installed, head over to your Yespo dashboard.
- Customize Web Push settings, recommendations, and other marketing features to align with your store's strategy.
Auto-Applying Promo Codes from a Widget at Checkout
If your store is connected via the Yespo app, the General tab of the promo code component will display an Apply promo code automatically toggle. It is enabled by default.

When the toggle is on, a visitor who receives a promo code in the widget will see it already applied at checkout — no manual entry required.
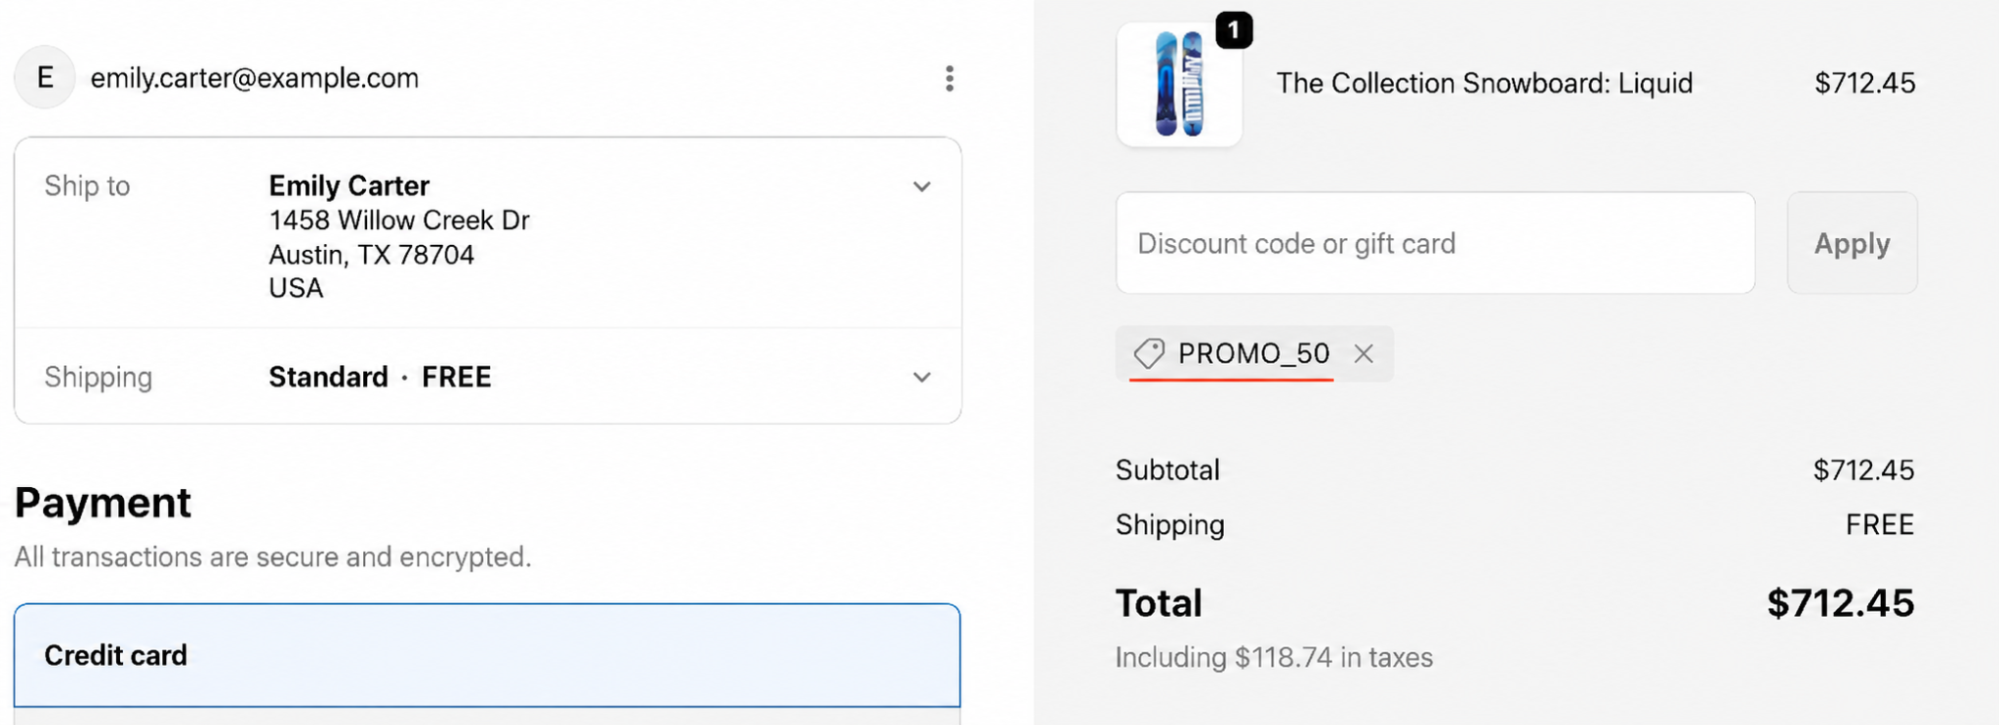
If the toggle is off, the promo code is shown in the widget but will not be automatically applied at checkout.
Updated about 1 month ago