
Using the Send Prepared Message API Method
The Send prepared message method allows you to send a pre-prepared message by specifying its ID in the request URL. This could be an email about password recovery, an order, an abandoned browsing or shopping cart, or a notification about a change in the price of a product the user was interested in.
Features of use:
- Up to a thousand recipients are transmitted in one request;
- Messages can be personalized for each recipient using data from the request;
- The method is used in the Email, SMS, Mobile Push, Web Push, Viber, Telegram, and App Inbox channels.
1. Request Description
A call to the method is made using the POST method at api/v1/message/{id}/smartsend, where id is the identifier of the message prepared in your account.
Request body example:
{
  "recipients": [
    {
      "contactId": "...",
      "locator": "...",
      "jsonParam": "...",
      "languageCode": "...",
      "email": "...",
      "fromName": "...",
      "externalRequestId": "..."
    }
  ]
}
In the request:
recipients – an array containing the contact data of the message recipients.
contactId – the identifier of a contact (may not be indicated when the locator parameter is indicated).
locator – a recipient identifier. For example, an email address for email messages, a phone number for SMS or Viber.
jsonParam – a parameter in JSON format. Used for messages with complex velocity patterns.
languageCode – the language of the message for the contact. Used for multilanguage messages.
email – message type: true for email, false for the rest of the media channels.
fromName – sender name. You must specify only the sender's name, not the email address. The sender's email selected in the message will be used. For SMS, the alpha name is specified. If the parameter is not specified, the name selected in the message will be used.
externalRequestId – an optional parameter, which allows you to assign your own identifier to the sent message and subsequently use the Get contacts activity method to get the status of this message.
2. Server Response
When the request is successful, the server returns the result of a single message delivery.
-
id– always returns 0; -
locator– email, phone number, Device ID, or contact token to which the message was sent -
status is the result:
OK– if the message is successfully added to the sending queue, you can see the message status using a requestId in the request to the Get single message status method;ERROR– If the message cannot be added to the sending queue, the request is returned with theERRORstatus, where the message is an error description (for example:"message": "[email protected] is not valid email").
{
  "id": 0,
  "results": [
    {
      "id": 0,
      "locator": "[email protected]",
      "status": "OK",
      "requestId": "8b2e65d9-060b-4c61-bbd7-73c6796fa504"
    },
    {
      "id": 0,
      "locator": "[email protected]",
      "status": "OK",
      "requestId": "458f3533-51d9-439e-a5d0-5fb7c2490c41"
    }
  ]
}
3. Use Case for Emails
You can use the method to send single messages with or without personalization. For personalization, the jsonParam field is used, which can contain JSON objects, nested objects, and arrays that need to be serialized before sending the request, i.e., you must sequentially convert objects into a JSON string.
3.1 Sending Message without Parameterization
The body of a request for sending one message looks as follows:
{
  "recipients": [
    {
      "locator": "[email protected]"
    }
  ],
  "email": true,
  "fromName": null
}
And for two recipients correspondingly:
{
  "recipients": [
    {
      "locator": "[email protected]"
    }, {
      "jsonParam": null,
      "locator": "[email protected]"
    }
  ],
  "email": true,
  "fromName": null
}
When the fromName field is transmitted with a null value, the email will use the name specified when adding the sender address:

Transmitting the jsonParam field with the null value indicates that the email does not support dynamic personalization.
3.2 Transmission of JSON Objects
Formatting of a JSON object is set using curly braces { } containing the data with the key values. The pairs of key values are separated by a colon: {"key" : "value"}. A comma separates every pair of the values, so the middle section of the JSON object looks like this: {"key" : "value", "key" : "value", "key": "value"}.
As an example, the object containing two pairs of key values looks as follows:
{
  "discount": "5%",
  "link": "https://example.site.com/items_for_sale"
}
For correct transmission, convert an object in the request body to a string to look like this:
{
  "recipients": [
    {
      "jsonParam": "{\"discount\":\"5%\",\"link\":\"https://site.com/items_for_sale\"}",
      "locator": "[email protected]"
    }
  ],
  "email": true,
  "fromName": null
}
To display the transmitted values in a message, use the velocity structure:
$!discount— instead of the discount size,$!link– in the button settings (link type – Other).
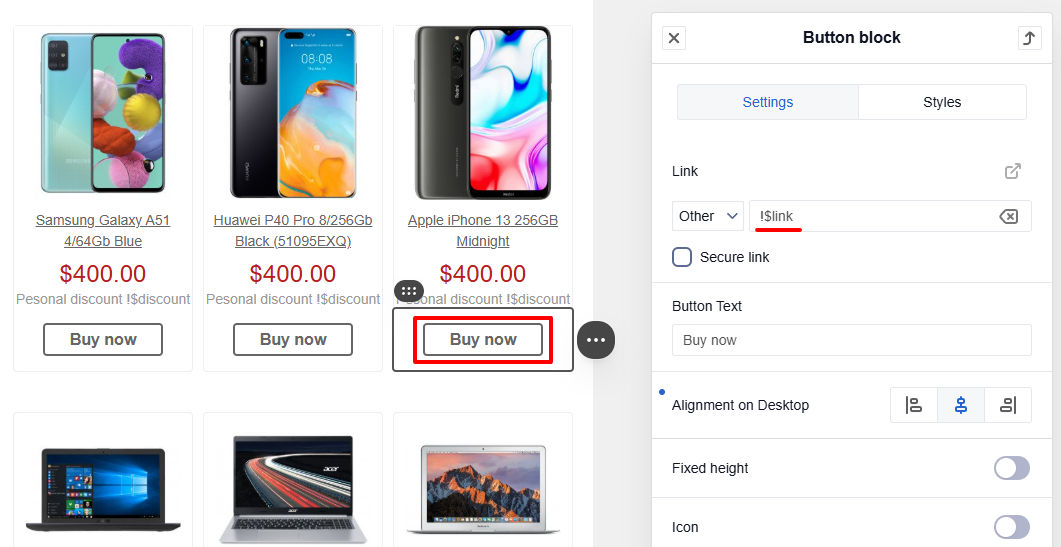
Instead of the discount variable, the value "5%" will be substituted, and for the button, instead of the link variable, the value "https://site.com/items_for_sale" will be substituted as a link.
3.3 Transmission of Nested JSON Objects
The format of a nested JSON object is "objectName": {"key" : "value", "key": "value"}.
The example of the customerData and orderData nested objects looks like this:
{
  "customerData": {
    "firstName": "John",
    "lastName": "Smith"
  },
  "orderData": {
    "name": "Apple iPhone X 64GB Black",
    "cost": 25999,
    "url": "https://example.site.com/smartfon-apple-iphone-x-64gb.html",
    "imageUrl": "https://example.site.com/smartfon-apple/apple_iphone_x_64gb.jpg"
  }
}
Convert the data to the string (serialize), and the request gets the following look:
{
"recipients": [
{
"jsonParam": "{\"customerData\":{\"firstName\":\"John\",\"lastName\":\"Smith\"},\"orderData\":{\"name\":\"Apple iPhone X 64GB Black\",\"cost\":25999,\"url\":\"https://example.site.com/smartfon-apple-iphone-x-64gb.html\",\"imageUrl\":\"https://example.site.com/smartfon-apple/apple_iphone_x_64gb.jpg\"}}",
"locator": "[email protected]"
}
],
"email": true,
"fromName": null
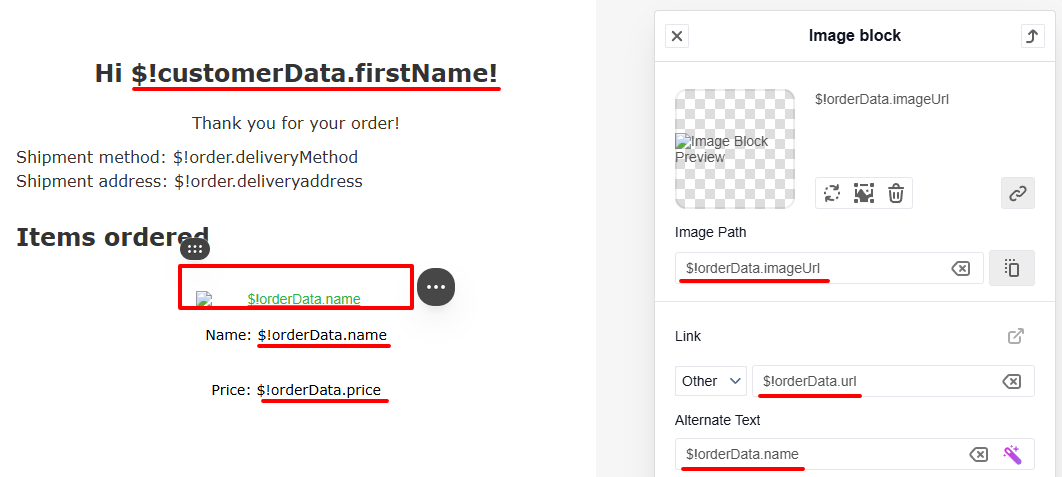
}To display the data in a message, use the following velocity structure:
- For personal data —
$!customerData.firstName- For order data —
$!orderData.nameIn both cases, the last brackets contain the parameter's name to be displayed.
3.4 Transmission of Nested JSON Array
Arrays are the ordered collections of values. Use square brackets [ ] to define an array. Separate the values inside the brackets with commas.
The format of a nested JSON array is "arrayName":[{"key":"value", "key":"value"},{...}]. You can transmit several arrays within one request.
{
  "orderData": [
    {
      "name": "Smartphone Apple iPhone Xs 512Gb",
      "price": "49999",
      "url": "http://example.com/smartfon-apple-iphone-27.html",
      "imageUrl": "http://example.com/apple_iphone_xs_silver.jpg"
    },
    {
      "name": "Apple Watch Series 4 GPS 44mm Space Gray",
      "price": "13699",
      "url": "http://example.com/smart-chasy-apple-watch-series-4-gps-45-2mm.html",
      "imageUrl": "http://example.com/apple_watch_series_4_gps_44mm.jpg"
    }
  ],
  "recommendationsData": [
    {
      "name": "Smartphone protection glass MakeFuture 3D Apple iPhone X/XS",
      "url": "http://example.com/glass.html",
      "imageUrl": "http://example.com/makefuture_3d_apple_iphone_xxs_black.jpg",
      "price": "399"
    },
    {
      "name": "Apple 44mm Black Sport Band",
      "url": "http://example.com/sport-band.html",
      "imageUrl": "http://example.com/apple_44mm_black_sport_band.jpg",
      "price": "1999"
    }
  ]
}
ImportantLike the nested JSON object, the JSON array must be converted to a string (serialized).
It is preferable to use arrays when operating with a large amount of data that can be grouped.
Use the foreach loop structure built into velocity in the message to access the data from the array.
The velocity code for orderData array looks like this:
// Inside the structure, the data are extracted in a sequence from every element of the array
#foreach($order in $!orderData)
  // To extract the value from the name field of the order
  $!order.name
  // For the url field
  $!order.url
  // For the imageUrl field
   $!order.imageUrl
  // For the price field
   $!order.price
#end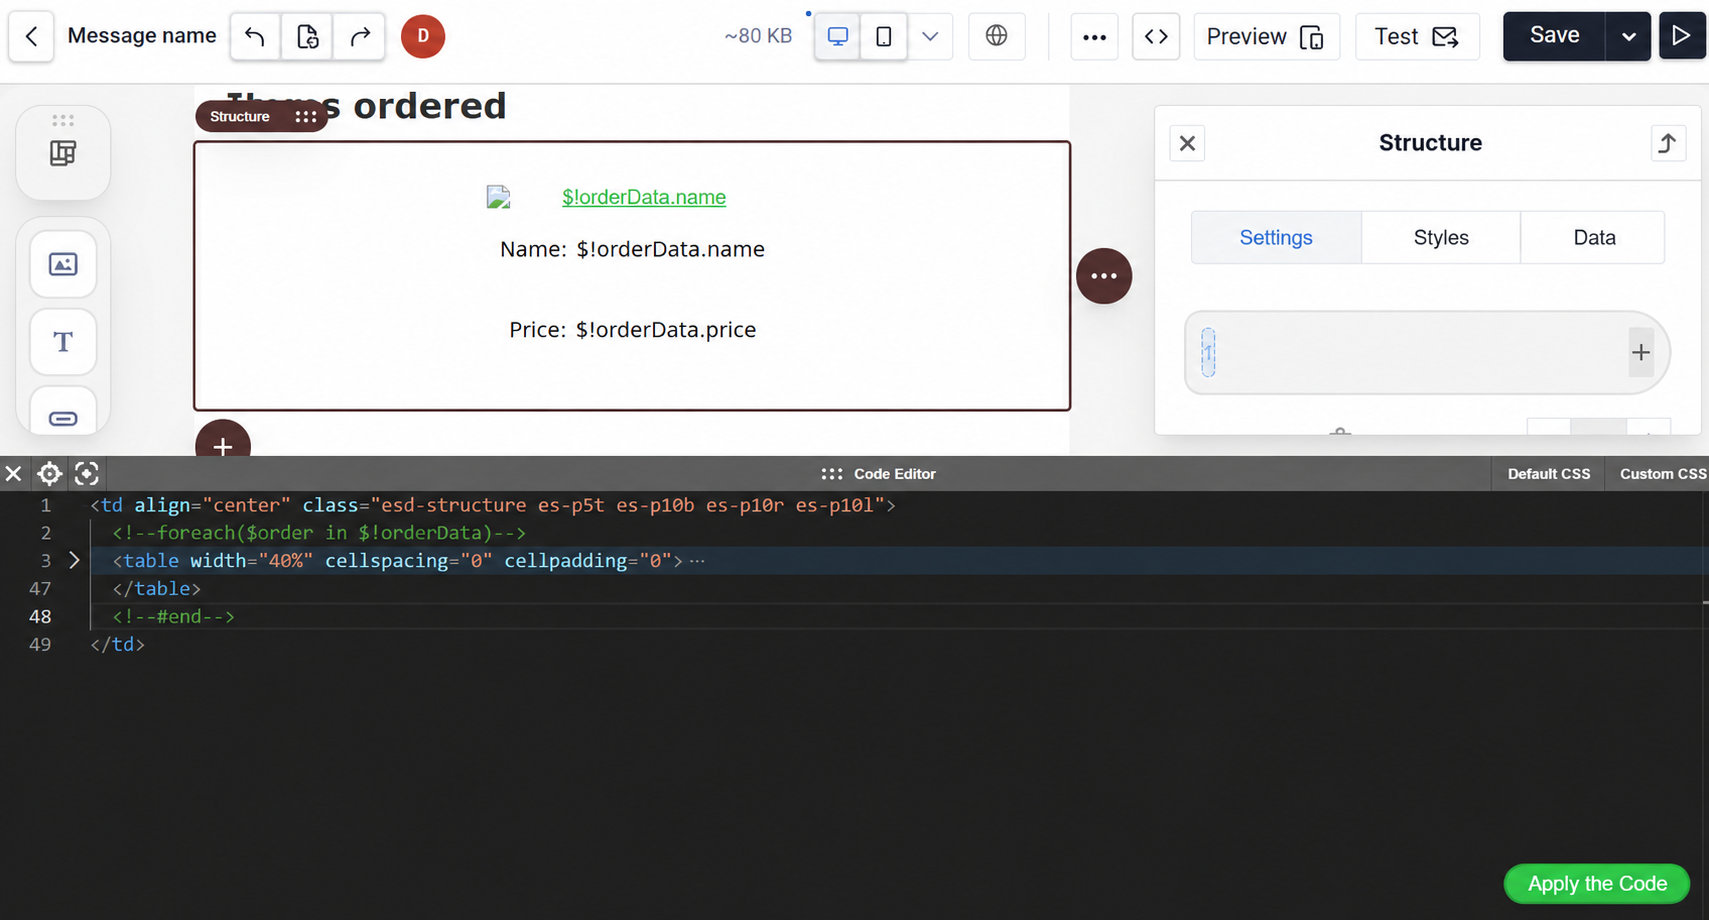
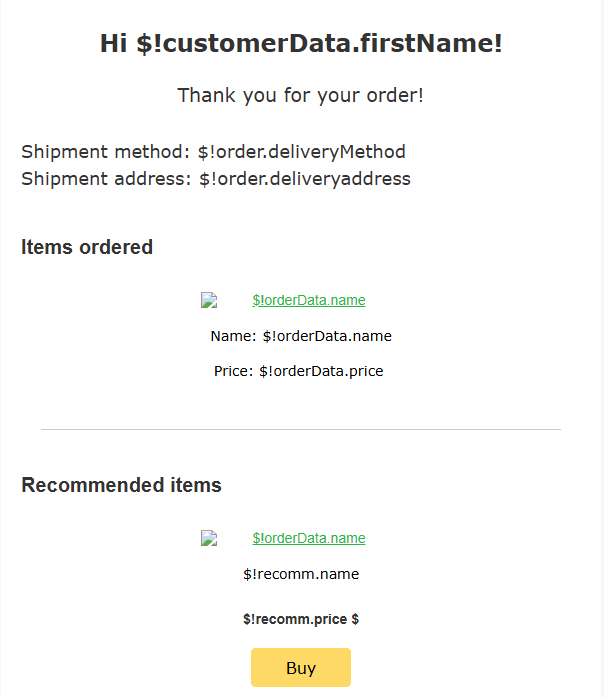
A similar construction is used for the array in which the recommendations are transmitted:
// Inside the structure, the data are extracted in a sequence from every element of the array
#foreach($recomm in $!recommendationsData)
$!recomm.name
$!recomm.url
$!recomm.imageUrl
$!recomm.price
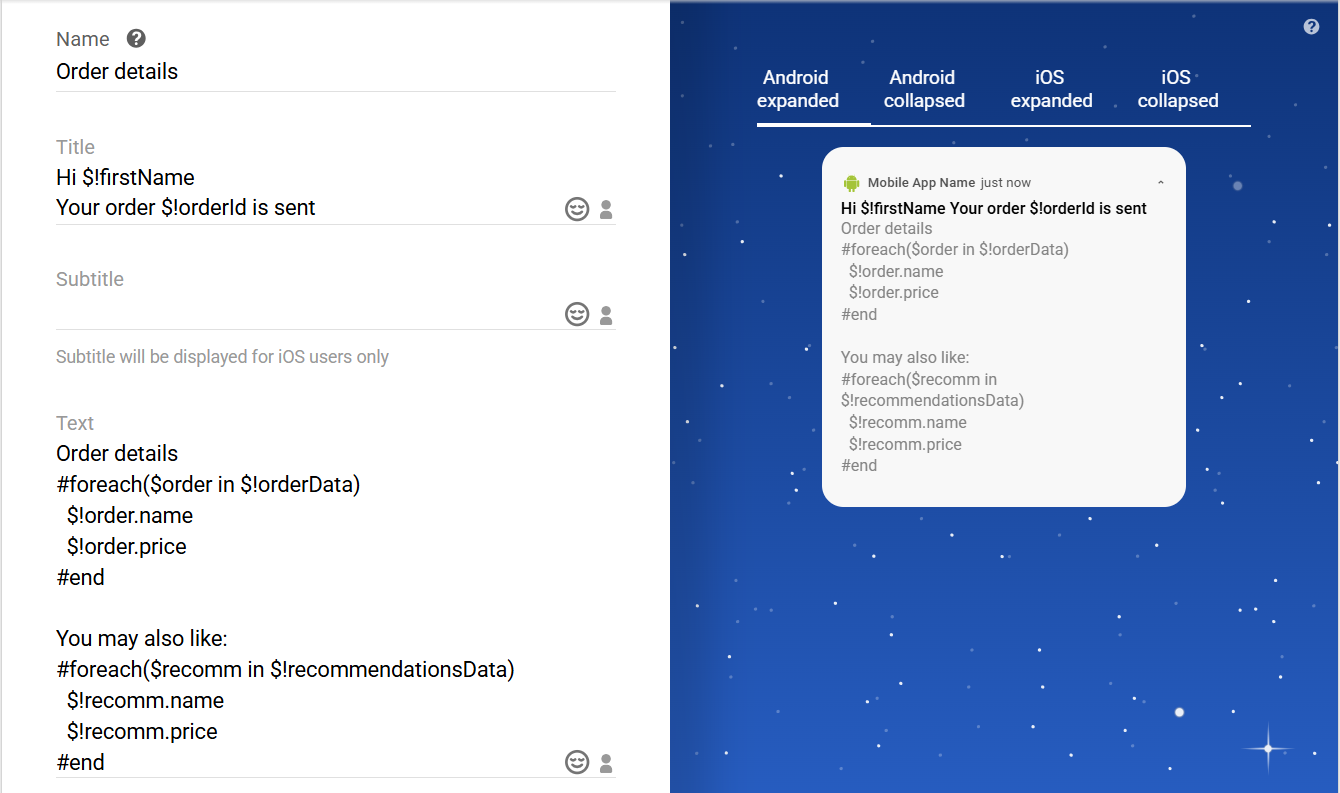
#endA prepared email containing velocity code has the following look:
4. Use Case for SMS
Let’s assume we have a task to inform a user via SMS that their order has been completed and shipped.
Then, we prepare the following request body:
{
  "recipients": [
    {
      "jsonParam": "{\"firstName\":\"John\",\"orderId\":\"JN134173389\",\"deliveryAddress\":\"London, Post office №32\"}",
      "locator": "380501234567"
    }
  ],
  "email": false,
  "fromName": "V-COMP"
}
where the recipient’s phone number is in the locator field, and alpha-name is in the fromName field.
Create an SMS:
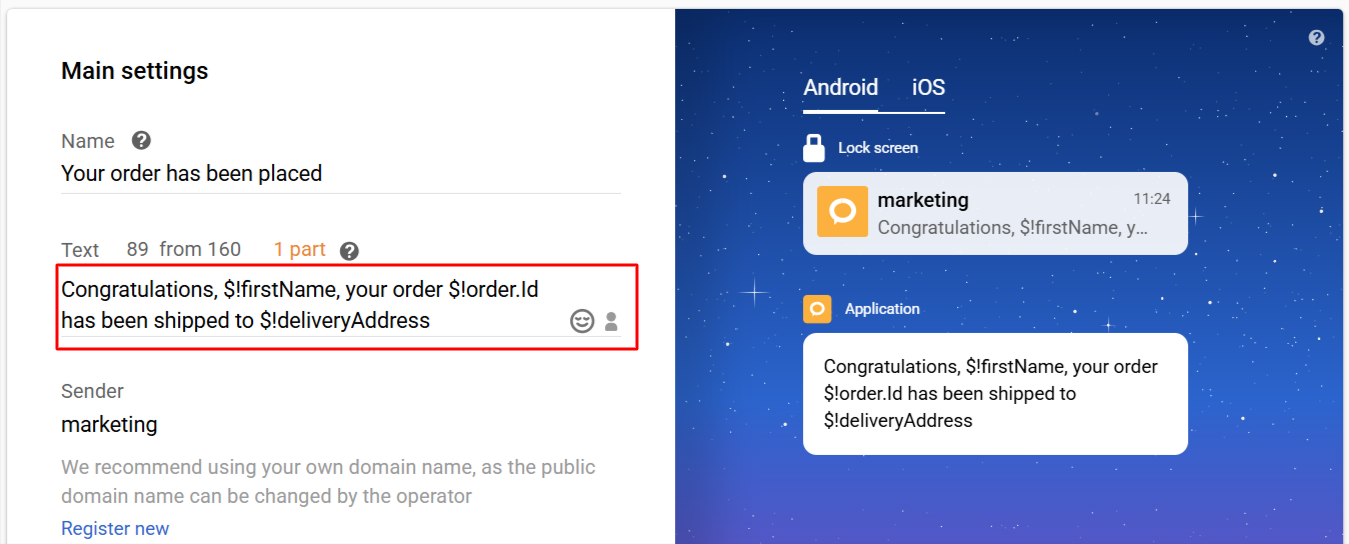
It is not always practical to show an array's content in an SMS using the foreach cycle; instead, it is possible to address a specific element of an array using orderData.
In this example, the velocity structure looks as follows:
In this example, the velocity structure looks as follows: $!orderData[0].name, where the addressed element is the first one in an array (enumeration begins with 0).
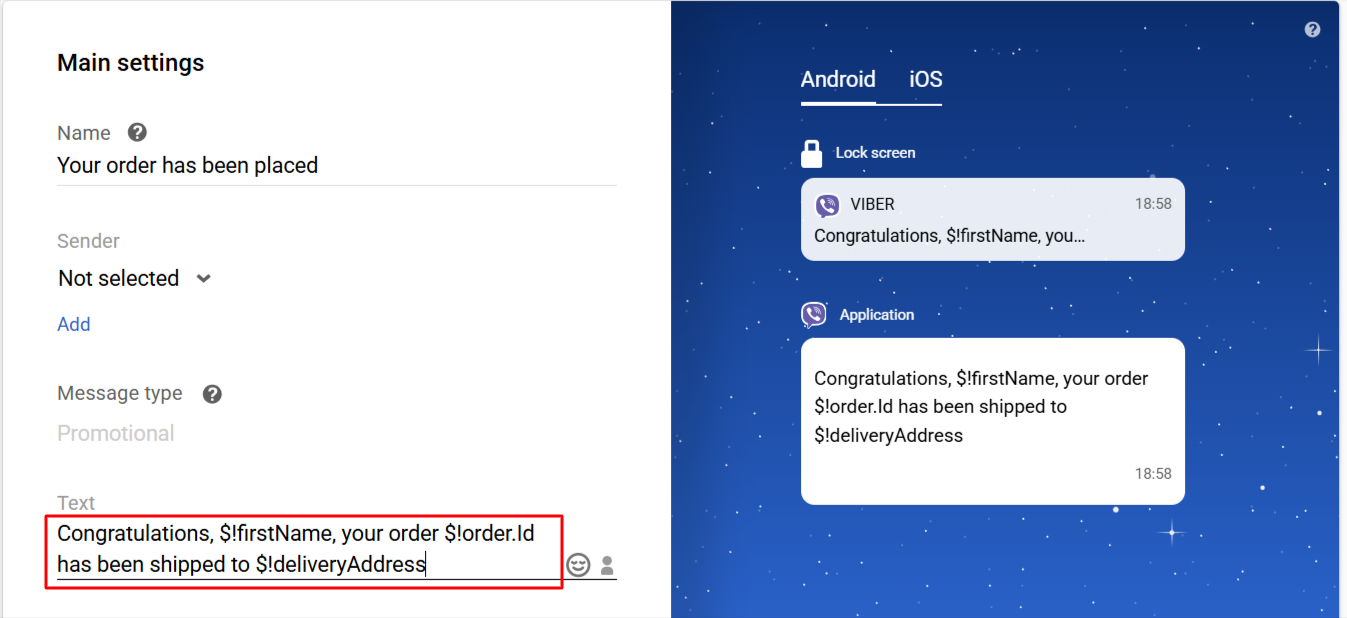
5. Use Case for Viber Messages
The configuration setting process is similar to the one for SMS. Define the data to be displayed in the Viber message. In contrast to SMS, a Viber message allows up to 1,000 symbols. It can display images and buttons with embedded links.
In such a case, the request body looks as follows:
{
  "recipients": [
    {
      "jsonParam": "{\"firstName\":\"John\",\"orderId\":\"JN134-173-389\",\"deliveryAddress\":\"London, Post office №32\",\"url\":\"https://example.com/offers.html\",\"imageUrl\":\"https://example.com/apple_iphone_xs.jpg\"}",
      "locator": "380501234567"
    }
  ],
  "email": false
}
In this request,
locatoris the recipient's phone number,imageUrlis a link to the image,urlis a link for the button.
Create a Viber message:
6. Use Case for Mobile Push Notifications
To send a prepared single mobile push notification, the body of a request has to look like this:
{
  "recipients": [
    {
      "jsonParam": null,
      "contactId": 449790707
    }
  ],
  "email": false
}
Instead of contactId, use the locator parameter to identify a contact and transmit a token inside it.
The option to parametrize the content by transmitting data in the jsonParam field is available for mobile push notifications, as well as for other channels:
The Custom data field can contain data in JSON format and be an additional source of information. The mobile application side must support the ability to use custom data — developers must provide these parameters when creating a mobile app.
7. Use Case for Web Push Notifications
Similar to the request for a Mobile Push message, in Web Push, instead of contactId, you can use the locator to identify a contact and transmit a token in it if contactId is missing.
{
"recipients": [
{
"jsonParam": null,
"contactId": 449790707
}
],
"email": false
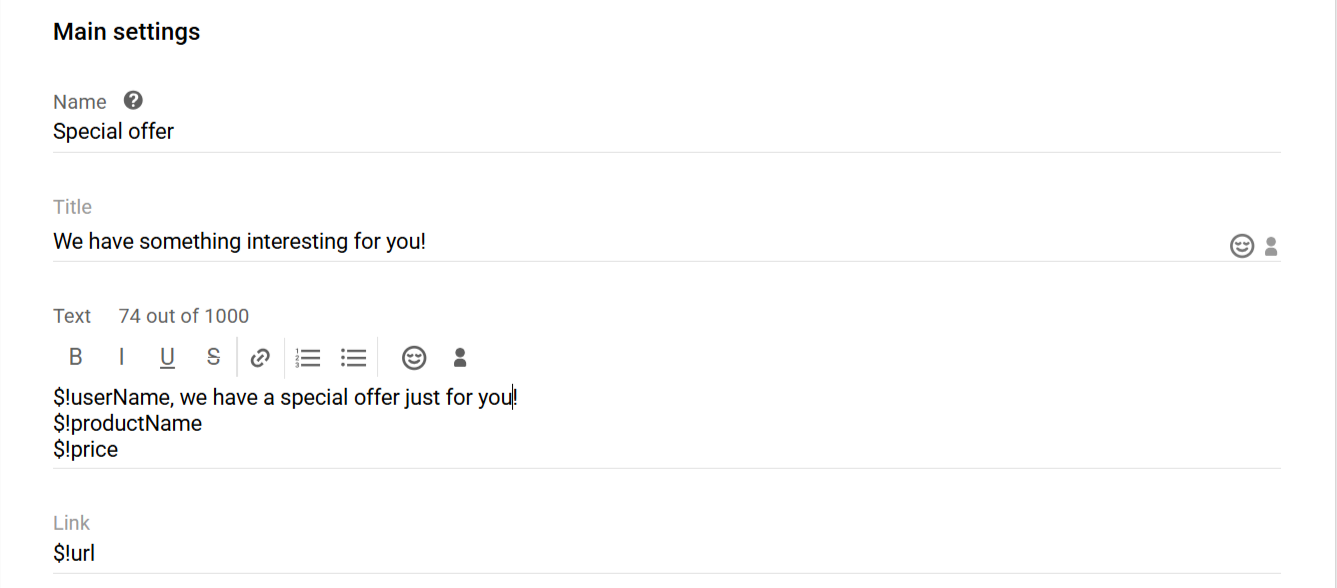
}You can insert dynamic content into a Web push notification. To do that, insert variables in the message editor in place of the logo, large image, and links:
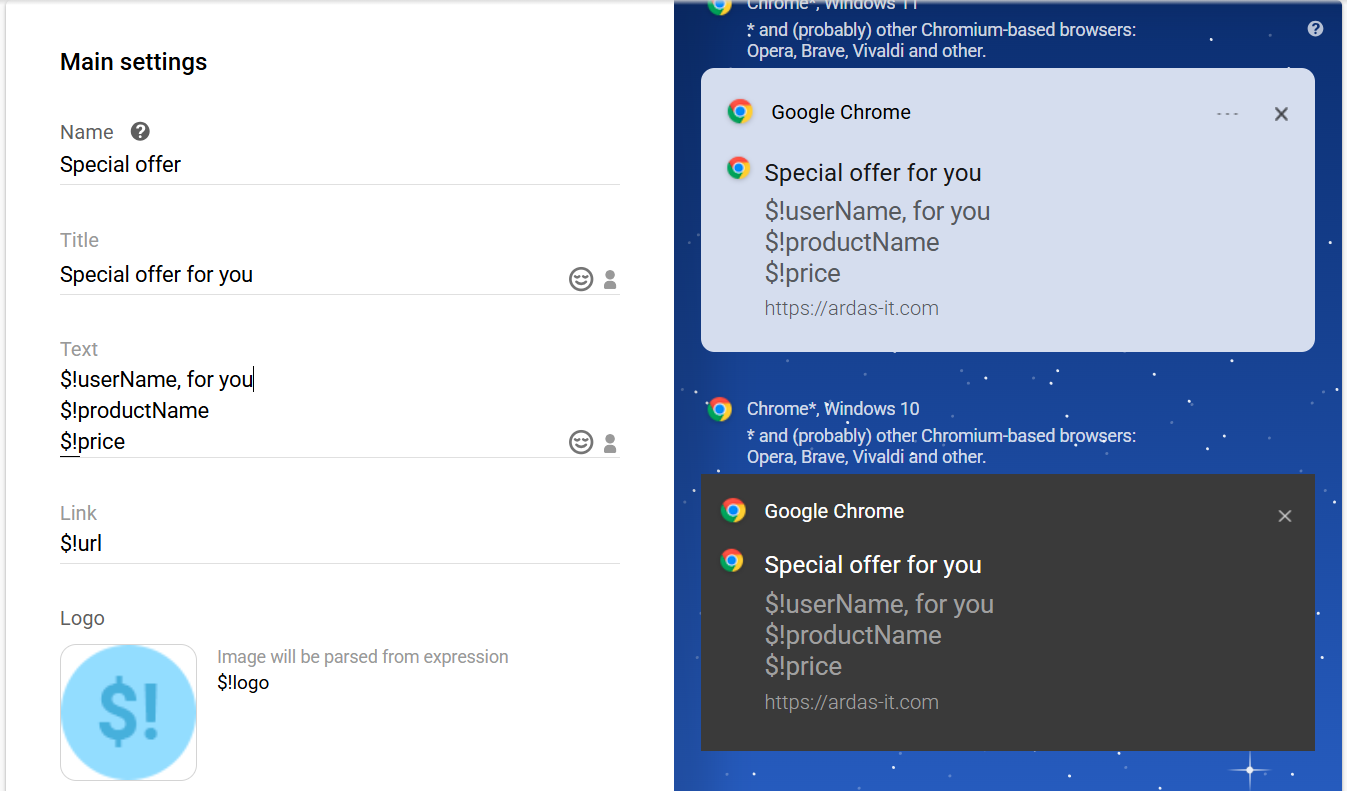
In this case, the body of the request looks like this:
{
  "recipients": [
    {
      "jsonParam": "{\"userName\":\"Aleksei\",\"productName\":\"Huawei Watch GT Black\",\"price\":\"6999 UAH\",\"productUrl\":\"https://example.com/huawei-watch-gt/431369.html\",\"imageUrl\":\"https://example.com/gallery/huawei-watch-gt.jpeg\",\"logo\":\"https://example.com/Your-Logo.jpeg\",\"moreOffer\":\"https://example.com/more-offer.html\"}",
      "contactId": 380470486
    }
  ],
  "email": false
}
8. Use Case for Telegram
Instead of contactId, you can use the locator to identify a contact and transmit a Telegram token to it:
{
  "recipients": [
    {
      "externalRequestId": "12344",
      "locator": "392083146",
      "jsonParam": "{\"startDate\": \"2025-06-05\", \"endDate\": \"2025-09-05\", \"period\": 3, \"customerName\": \"John\", \"products\": [{\"title\": \"Super Device\", \"count\": 10, \"price\": 160}, {\"title\": \"Super Device 2\", \"count\": 10, \"price\": 160}]}"
    }
  ],
  "email": false
}
Use variables to add dynamic content to the message:
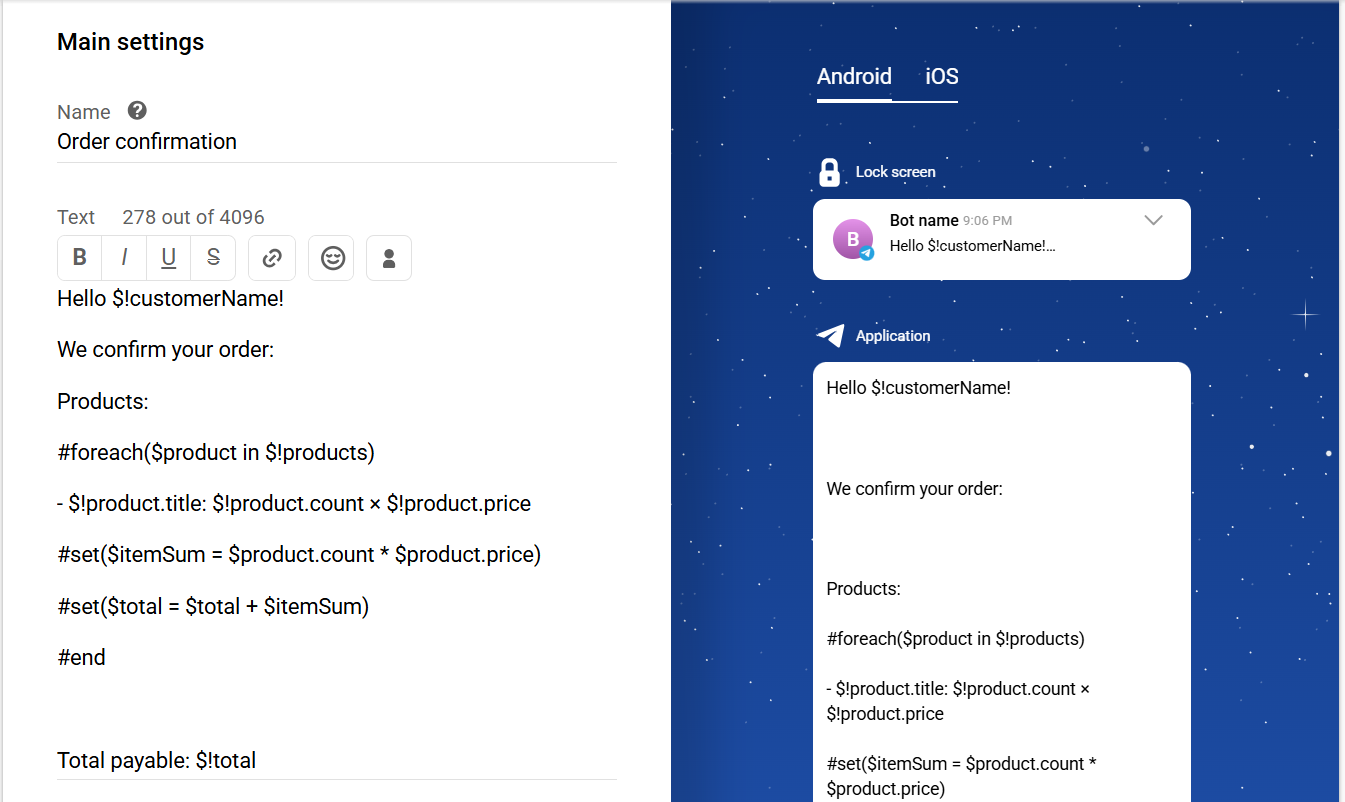
9. Use Case for App Inbox
The request body for sending App Inbox looks like this:
{
  "recipients": [
    {
      "jsonParam": null,
      "contactId": 449790707
    }
  ],
  "email": false
}
Instead of contactId, you can use the locator to identify a contact and transmit a Device ID in it.
Use variables to add dynamic content to the message:
The Custom data field can contain data in JSON format and be an additional source of information. The mobile app or site to which the message is sent must support the use of such data.
Updated 29 days ago