
Velocity in Workflows
In workflows, Velocity goes beyond message personalization — you can use it to transform data, write values to contact fields, and route contacts through different paths based on field values, event parameters, or external data.
This article covers practical use cases. Depending on the scenario, the expressions shown here are used in the Update contact fields, Branch, or Webhook block settings.
Use Case 1: Global Holdout Group from the Last Digit of Contact ID
- Goal: split contacts into stable test and control groups for all campaigns.
- Start: event-based workflow or regular workflow for a segment
- Where: Workflow → Update contact fields block
- Save: the last digit of
contactIdinto the additional fieldcontrolDigit - Expression:
$contactId.toString().substring($mathTool.sub($contactId.toString().length(),1))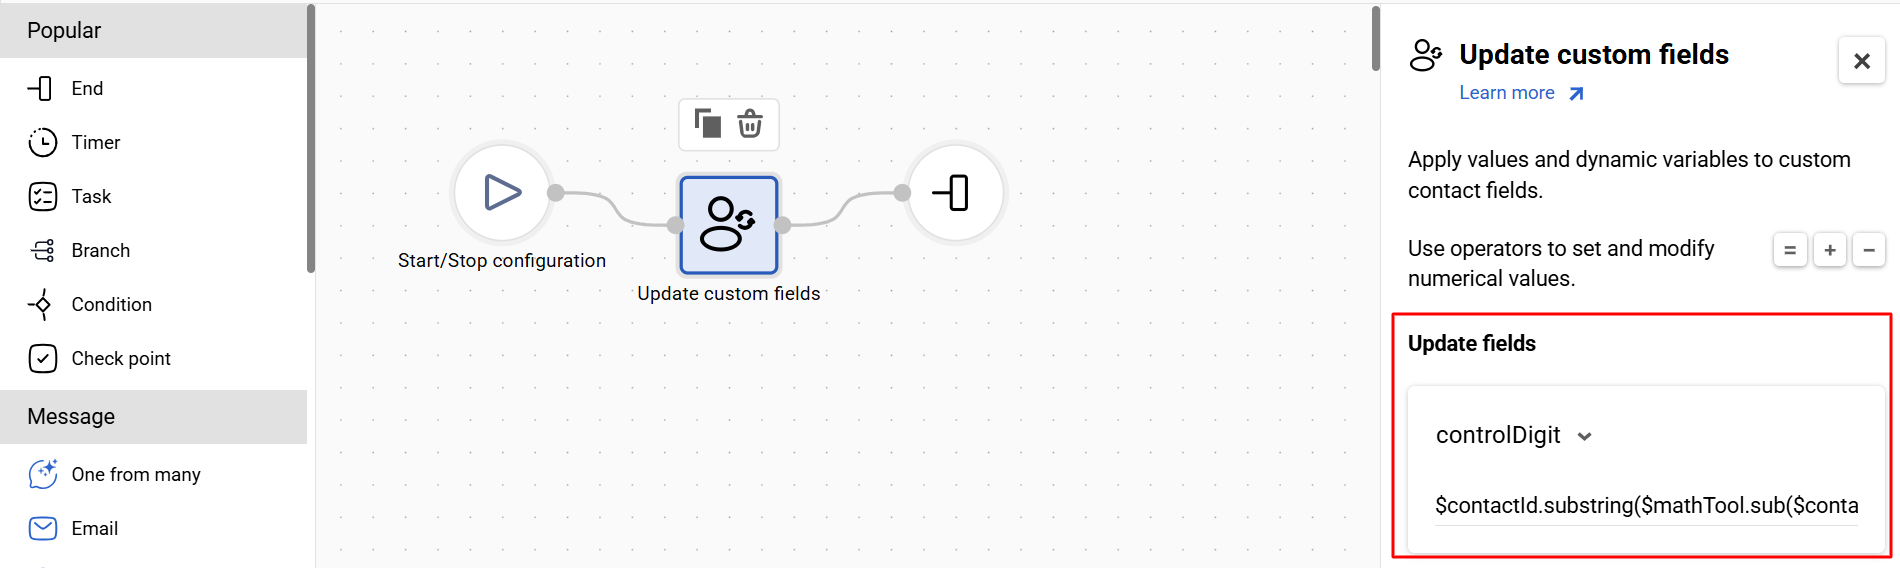
How to use later:
- Control group 10% — put only contacts with
controlDigitequal to0into the control group. Out of all possible digits (0–9), you take one → approximately 10% of the audience. - Test group 90% — send campaigns to everyone except the control group. Contacts with
controlDigitfrom1to9→ approximately 90% of the audience. - Control group 20% — put contacts with
controlDigitequal to0or1into the control group. Two digits out of ten → approximately 20% of the audience.
How this looks in practice:
In the Branch block or a segment condition, check the saved field controlDigit and route contacts into Control and Test paths based on the last digit.
Use Case 2: Save a Value from AddFavoritesItem into a Contact Field
- Goal: save the ID of the last favorited product from an event into a contact field (e.g.,
lastWishlistItemId) for reuse. - Start: event-based workflow (
AddFavoritesItem) - Where: Workflow → Update contact fields block
- Save: product ID into additional field
lastWishlistItemId
If the value comes from an object in the lastProductAdded parameter:
$lastProductAdded.externalItemId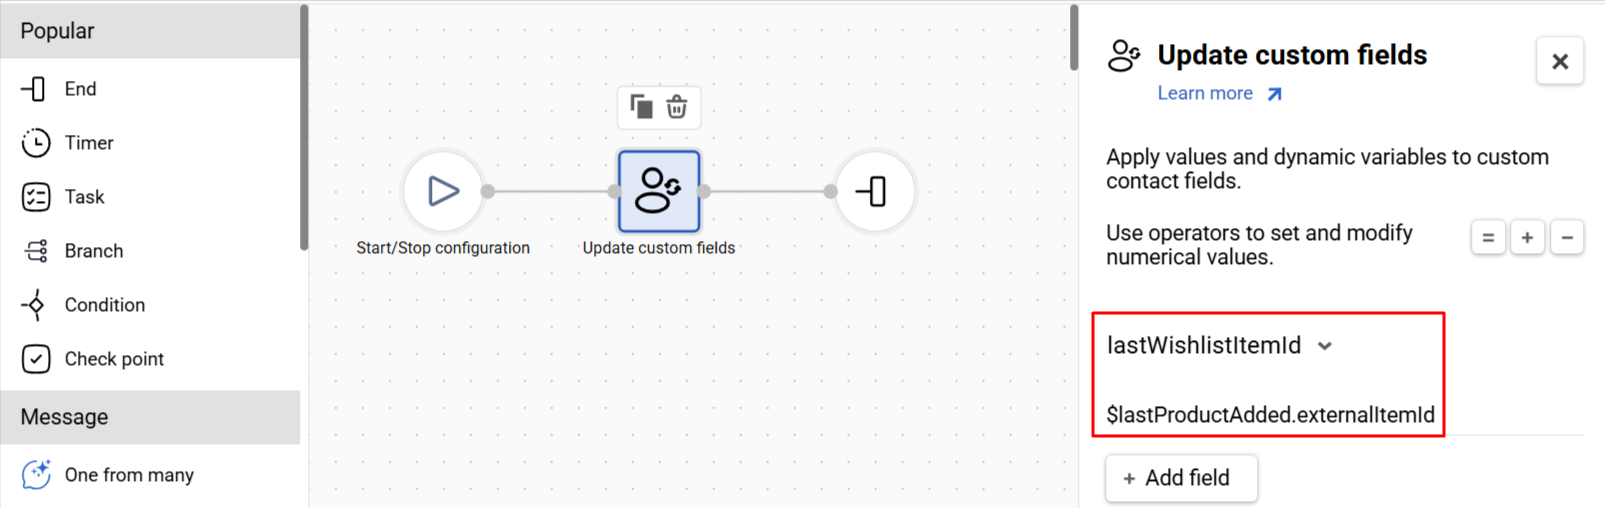
Event fragment:
"lastProductAdded": {
  "externalItemId": 87420539,
  "name": "Awesome item",
  "cost": "1000"
}
If the value comes from an array in the productsFullData parameter:
$productsFullData[0].externalItemIdEvent fragment:
"productsFullData": [
  {
    "externalItemId": 2697928574,
    "name": "Awesome item",
    "cost": "1000"
  }
]
NoteIf the event parameter is required, reference it directly, e.g.
$lastProductAdded.externalItemId. If it can be missing or null, use the null-safe form$!{lastProductAdded.externalItemId}instead — otherwise the block may write the literal unresolved expression instead of an empty value.
How to use later:
- Personalize messages — insert the saved ID into recommendation emails or push notifications (e.g., a reminder about a wishlisted item).
- Segmentation — build segments based on the last added product or category.
- Branching — route contacts through different paths depending on which product was added to the wishlist.
How this looks in practice:
- A contact adds a product to their wishlist → Yespo receives the
AddFavoritesItemevent. - The workflow starts and moves to the Update contact fields block.
- Yespo writes the event value into the field
lastWishlistItemId(using$lastProductAdded.externalItemIdor$productsFullData[0].externalItemId). - Any future workflow, segment, or message can read
lastWishlistItemIdfrom the contact profile and use it for branching or personalization.
Use Case 3: Webhook for Data Enrichment or Transfer
- Goal:
- GET: request data from an external system (e.g., stock availability, personal discount, recommended product) and optionally save the returned values in Yespo.
- POST: transfer selected event or contact data to an external system (for logging, CRM updates, analytics pipelines, triggering external processes).
- Start: event-based workflow (
AddFavoritesItem) or regular workflow for a segment - Where: Workflow → Webhook block (+ Update contact fields block if you want to save GET results)
- Save:
- GET: optional — save values returned by the endpoint into additional fields (e.g.,
couponCode,stockStatus,recommendedItemId). - POST: depends on your use case.
- GET: optional — save values returned by the endpoint into additional fields (e.g.,
GET — pass data in the URL, receive a response:
https://api.example.com/favorites?contactId=$contactId&itemId=$lastProductAdded.externalItemId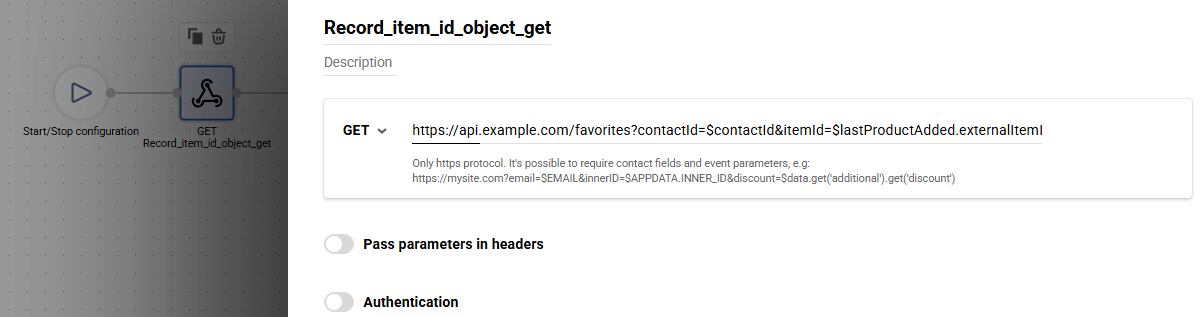
Or if the value comes from an array:
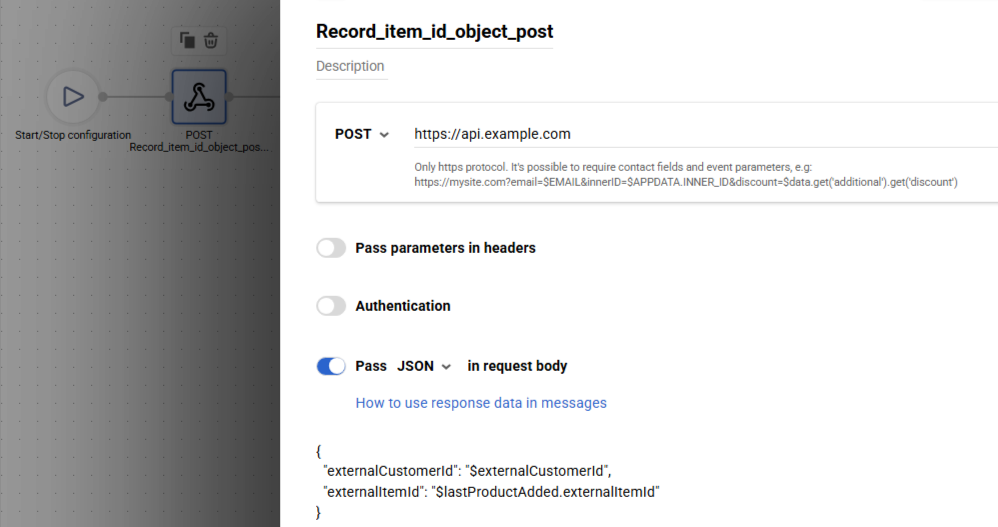
https://api.example.com/favorites?contactId=$contactId&itemId=$productsFullData[0].externalItemIdPOST — pass data in the request body:
{
  "externalCustomerId": "$externalCustomerId",
  "externalItemId": "$lastProductAdded.externalItemId"
}
Or if the value comes from an array:
{
  "contactId": "$contactId",
  "externalCustomerId": "$externalCustomerId",
  "event": "AddFavoritesItem",
  "externalItemId": "$productsFullData[0].externalItemId"
}
How to use later:
- After GET: personalize messages using saved values, branch workflows based on returned attributes, segment audiences using enriched fields.
- After POST: build external reporting and attribution, sync data with a CRM, trigger external actions (coupon generation, stock check, etc.).
How this looks in practice:
AddFavoritesItemtriggers the workflow.- The workflow reaches the Webhook block.
- One of two patterns occurs:
- GET: Yespo calls the URL → the external system returns data (e.g.,
{ "couponCode": "WISH10", "stockStatus": "available" }). - POST: Yespo sends a JSON payload → the external system stores or processes the data.
- GET: Yespo calls the URL → the external system returns data (e.g.,
- For GET, the workflow can then move to Update contact fields to save response values into the contact profile.
- Future workflows and messages use the saved fields (GET) or rely on external processing (POST).
Use Case 4: Branch by Subscription Period
- Goal: check the subscription period in a payment event and send the corresponding email.
- Start: event-based workflow (
InvoiceCommon) - Where: Workflow → Branch block → Email block
- Save: optional — save the subscription period to a contact field if you want to reuse it later in segments, workflows, or messages.
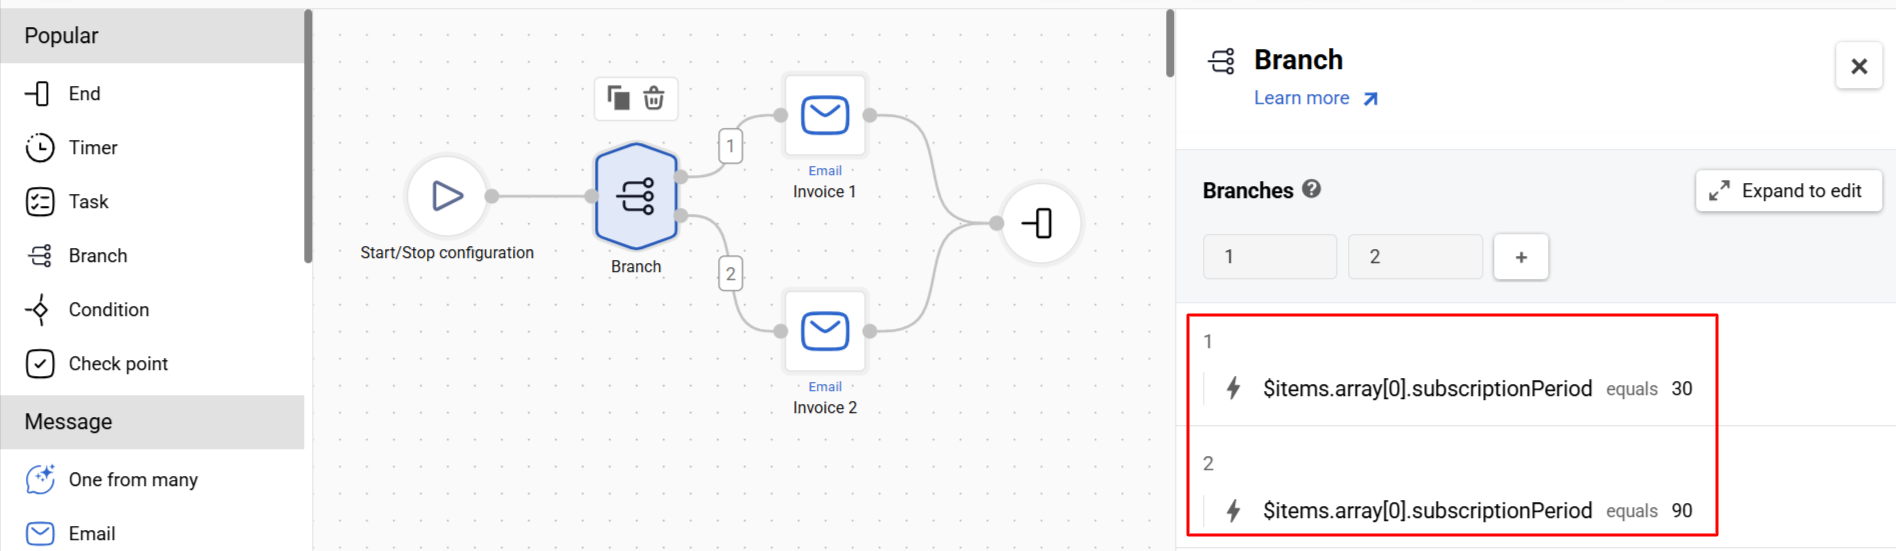
In this example, subscription details are passed in the items parameter where products are stored inside items.array. To access the subscription period of the first item, use:
$items.array[0].subscriptionPeriodEvent fragment:
{
  "eventTypeKey": "InvoiceCommon",
  "params": {
    "items": {
      "array": [
        {
          "subscriptionPeriod": "90"
        }
      ]
    }
  }
}
How to use in the Branch block
Based on the value of $items.array[0].subscriptionPeriod, route contacts to the correct email path:
30→ send the 30-day subscription email90→ send the 90-day subscription email- other or empty value → use a fallback branch
How to use later
- Send different payment confirmation or onboarding emails depending on the purchased subscription term.
- Keep communication aligned with the actual subscription period from the payment event.
- Optionally save the value to a contact field to reuse it outside this event-triggered workflow.
How this looks in practice
- A payment triggers the
InvoiceCommonevent. - The workflow starts.
- The Branch block checks the value of
$items.array[0].subscriptionPeriod. - The contact is routed to the corresponding email branch based on the value.
- Each branch sends the appropriate email for that subscription term.
Next Steps
- Velocity Reference — full syntax reference
- Testing & Troubleshooting Velocity — how to diagnose expressions and check variable context
Updated 7 days ago