
Setting Up the Yespo Plugin for Claude Code and Claude Cowork
The Yespo plugin works with both Claude Code and Claude Cowork. It combines the Yespo MCP connection with reusable skills for email template editing, email deliverability audits, and messaging analytics.
Once installed, you can describe a Yespo task in plain language, let Claude retrieve the required data, and review proposed changes without repeatedly switching between Claude and the Yespo interface.
About eSputnikYespo and eSputnik run on the same underlying platform, so this same plugin also bundles a connector for eSputnik accounts. If your organization uses eSputnik instead of (or alongside) Yespo, you'll see both listed in Connectors — connect whichever one (or both) match the accounts you use.
For the available skills, example tasks, and integration limitations, see Integrating Yespo with AI Agents.
Yespo also provides a plugin for OpenAI Codex.
NoteIn this article, Claude refers to both Claude Code and Claude Cowork. The same Yespo plugin repository supports both environments, although some interface labels may differ.
The steps below show the installation flow in Claude Desktop. Cowork requires additional network settings, while the Code tab is used to install the plugin for Claude Code.
Requirements
Before you start, make sure you have:
- An active Yespo account.
- A Claude plan that supports Claude Code or Claude Cowork.
- Claude Desktop for macOS or Windows if you use Claude Cowork.
- Permission to install personal or organization plugins.
Configure Network Access for Claude Cowork
Before installing the plugin, allow Claude to connect to the required Yespo services.
- Open Claude Desktop.
- Click your profile icon in the bottom-left corner, then go to Settings → Capabilities. Find Cloud code execution and file creation and allow network egress.
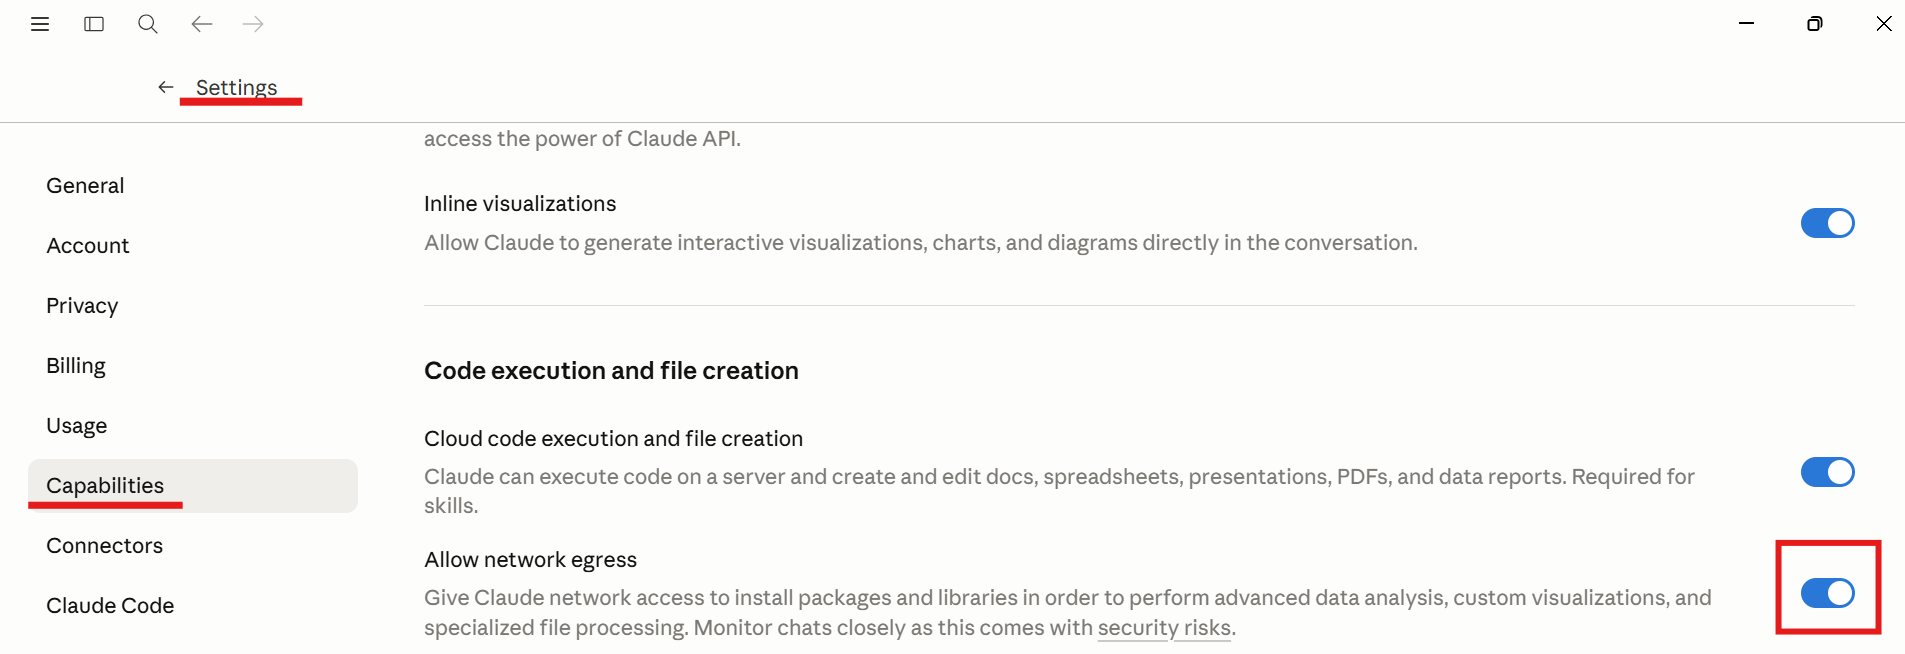
- In Additional allowed domains, enter
*.yespo.io, then click Add.
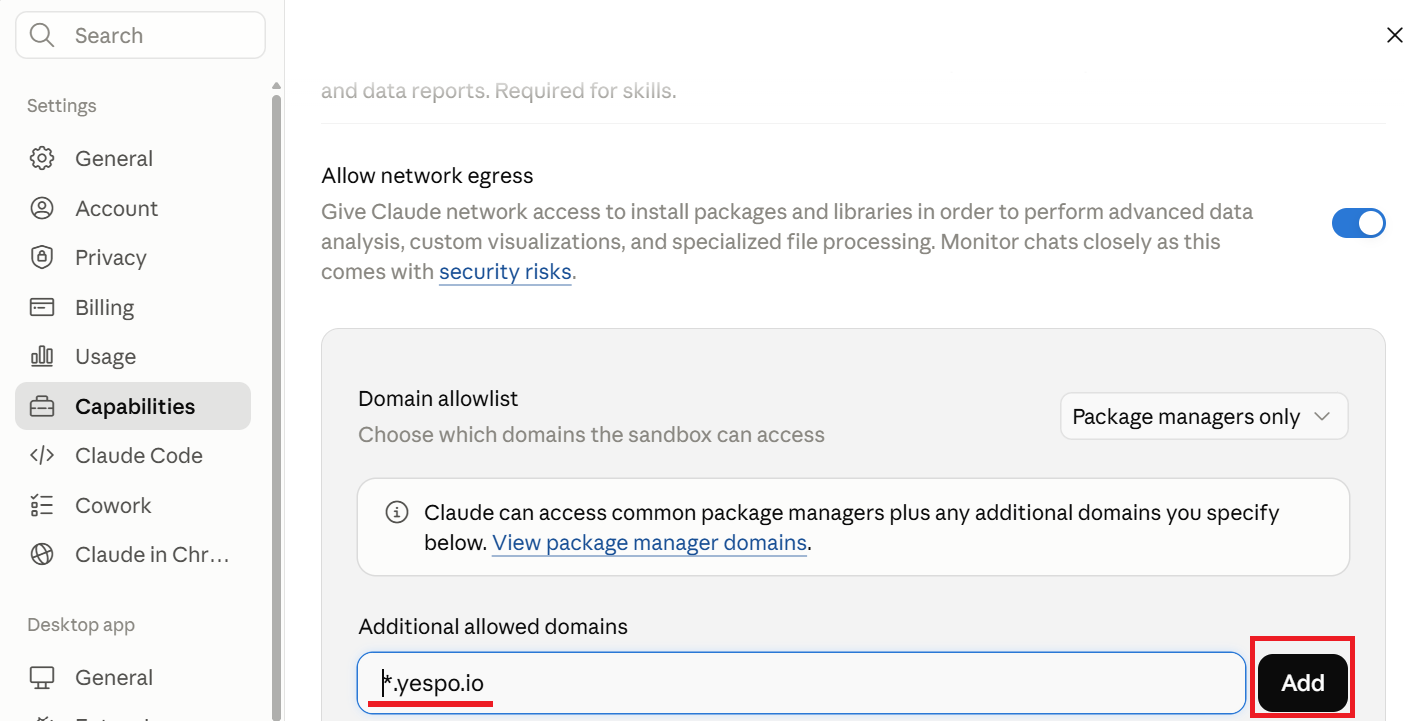
Connecting Both AccountsIf you also plan to connect an eSputnik account with the same plugin, add
*.esputnik.comas well.
Installation
Step 1. Add the Yespo Plugin Marketplace
- In Cowork, go to Customize → Plugins → Add → Add marketplace.
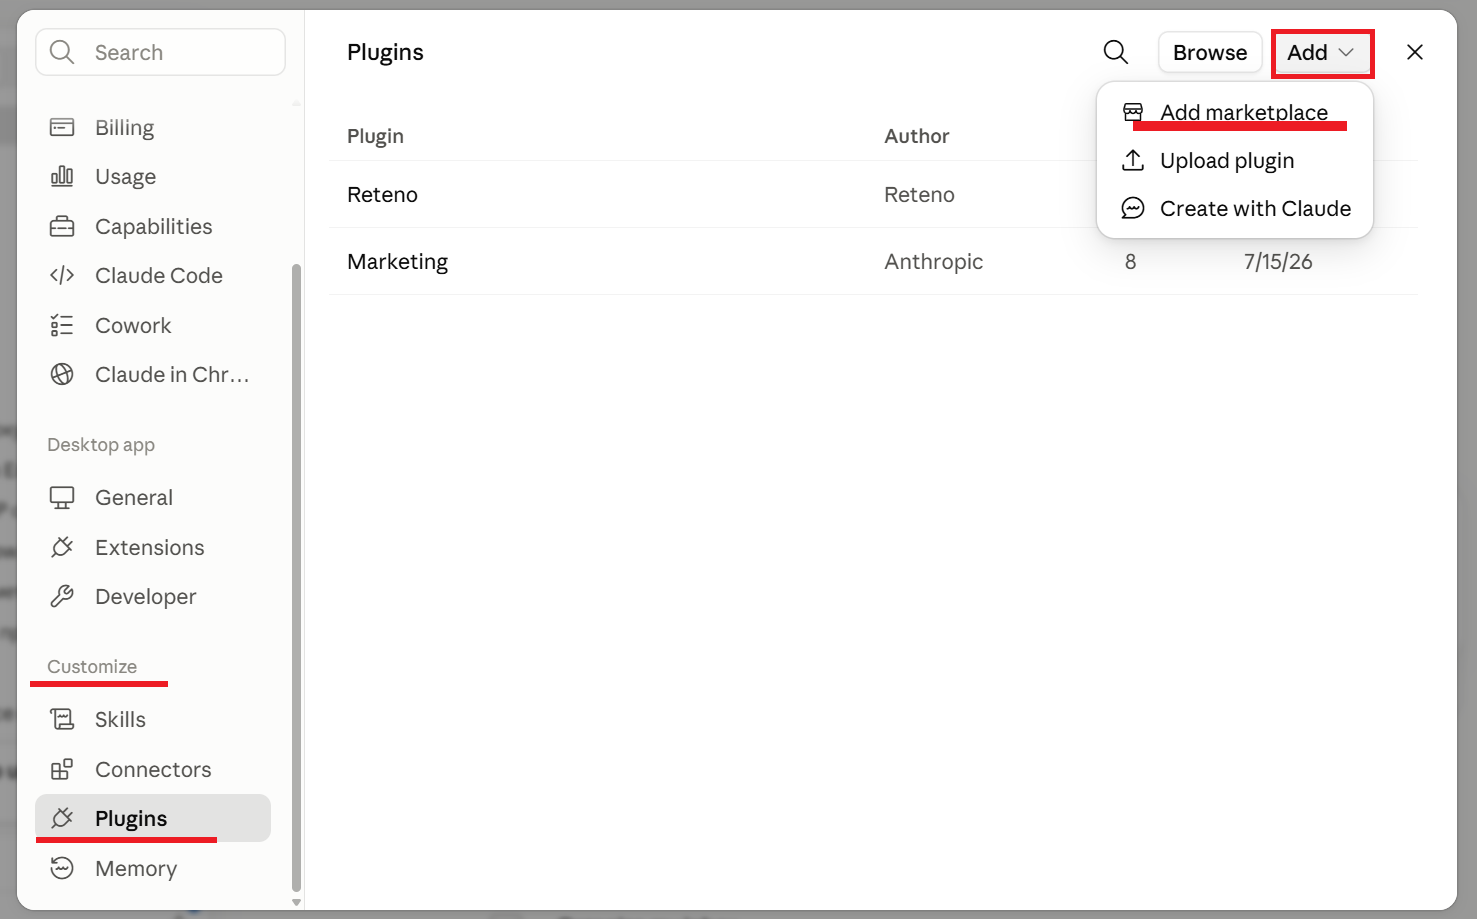
- Select Add from a repository and enter the Yespo plugin repository URL:
https://github.com/Yespo-CDP/ai-plugin- Click Sync.
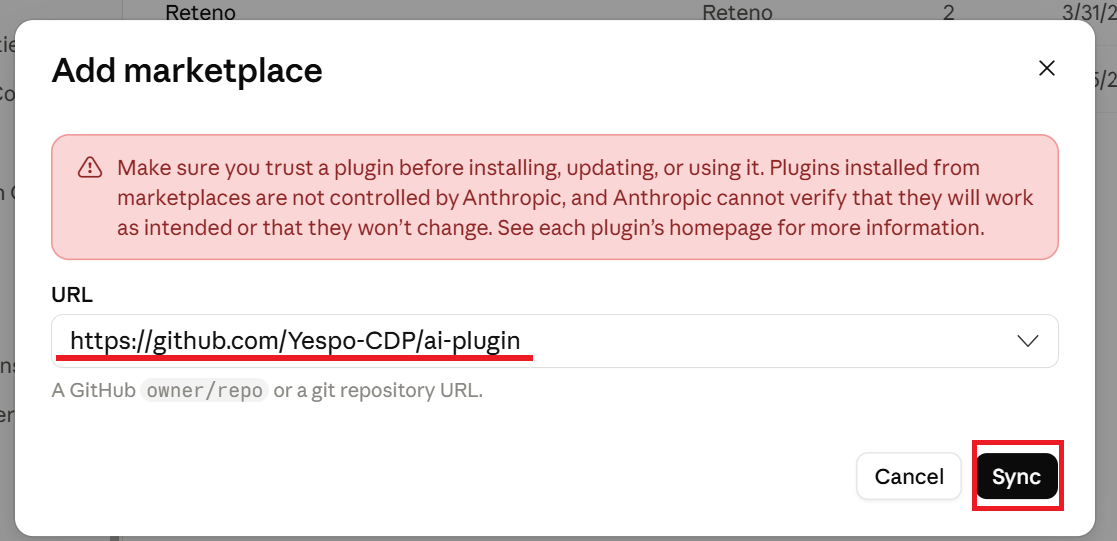
Claude adds the marketplace and displays the Yespo plugin.
Step 2. Install the Plugin and Connect Your Accounts
Installing the plugin adds the Yespo skills, but Claude cannot access your data until you connect a connector. The plugin bundles connectors for both Yespo and eSputnik — Yespo and eSputnik run on the same underlying platform, so you'll see both listed even if you only use one.
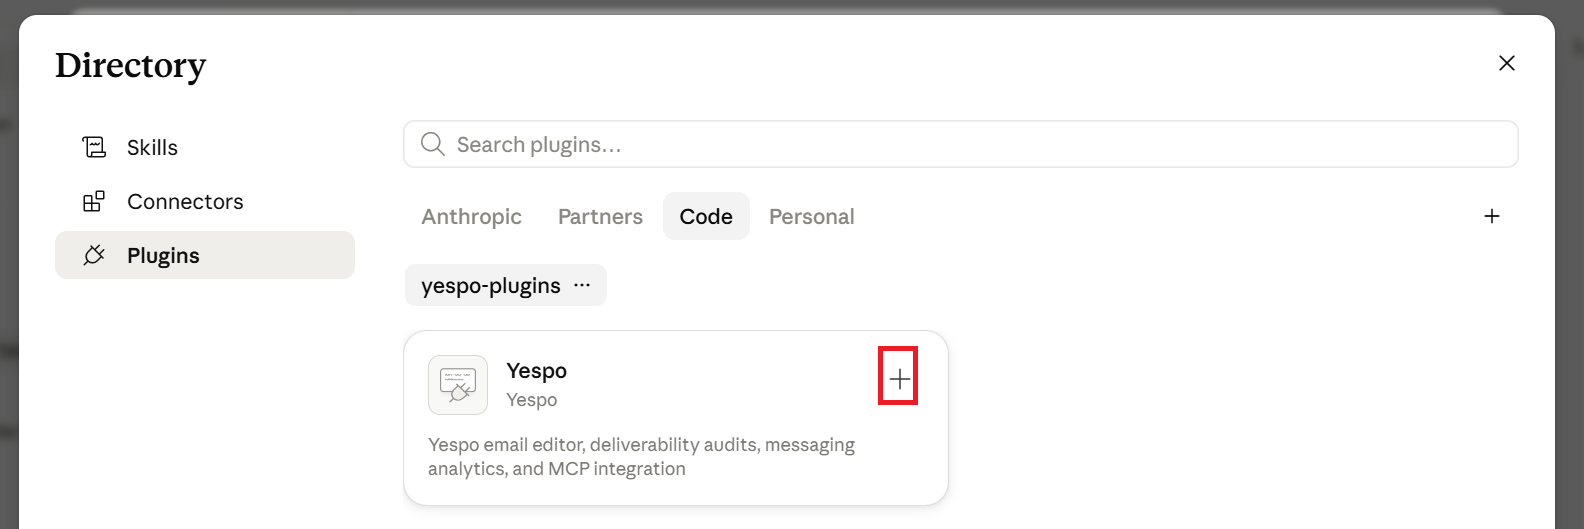
- In the Code tab, find the Yespo plugin and click +.
-
Click the Yespo plugin card to open its Skills and Connectors settings.
-
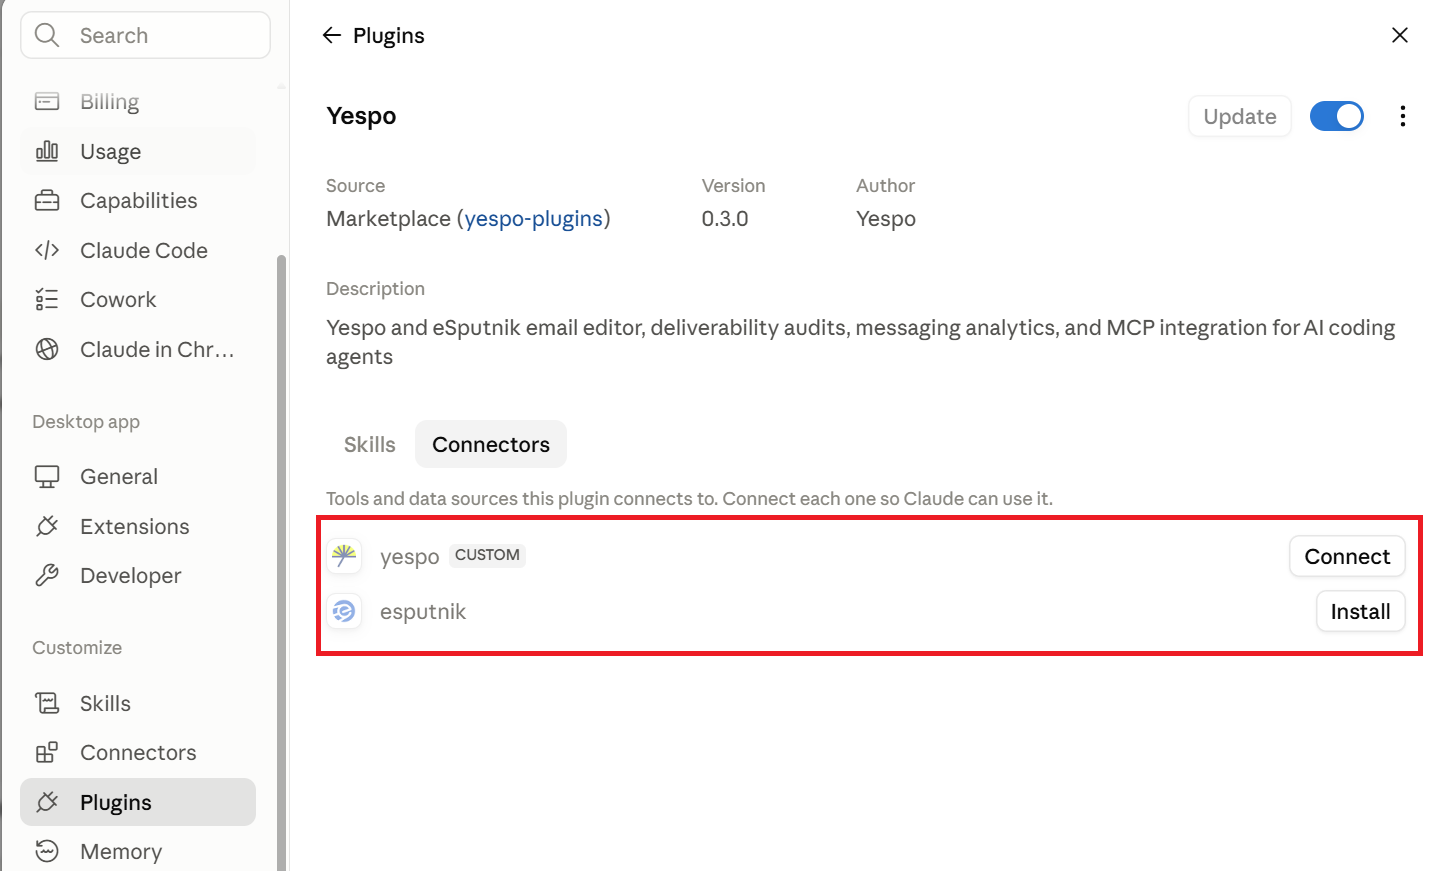
Open the Connectors tab. It lists separate rows for Yespo and eSputnik.
-
Next to the platform you want to use, click Install (if shown), then click Connect:
- Yespo — to connect a Yespo account.
- eSputnik — to connect an eSputnik account.
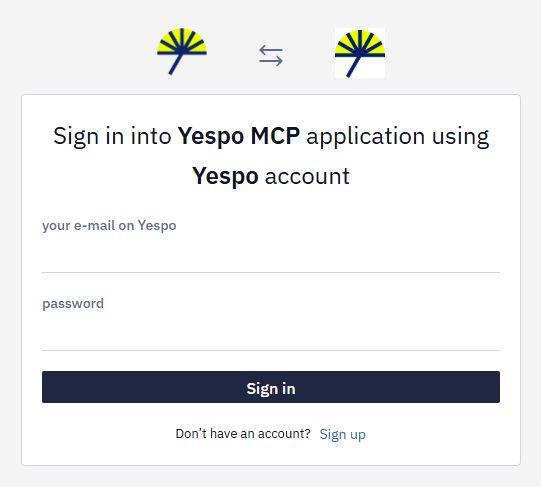
- Sign in to the corresponding account and confirm access.
After authorization, click Open desktop app to return to Claude Desktop. You can also close the browser tab and return manually.
NoteYespo and eSputnik are authorized separately, each through its own Install → Connect step. Repeat the process for the other platform if you use both accounts. If both are connected and the required account for a task is unclear, Claude may ask which platform to use.
The connector uses account authorization directly. You do not need to enter a REST API key in Claude.
Tool Permissions
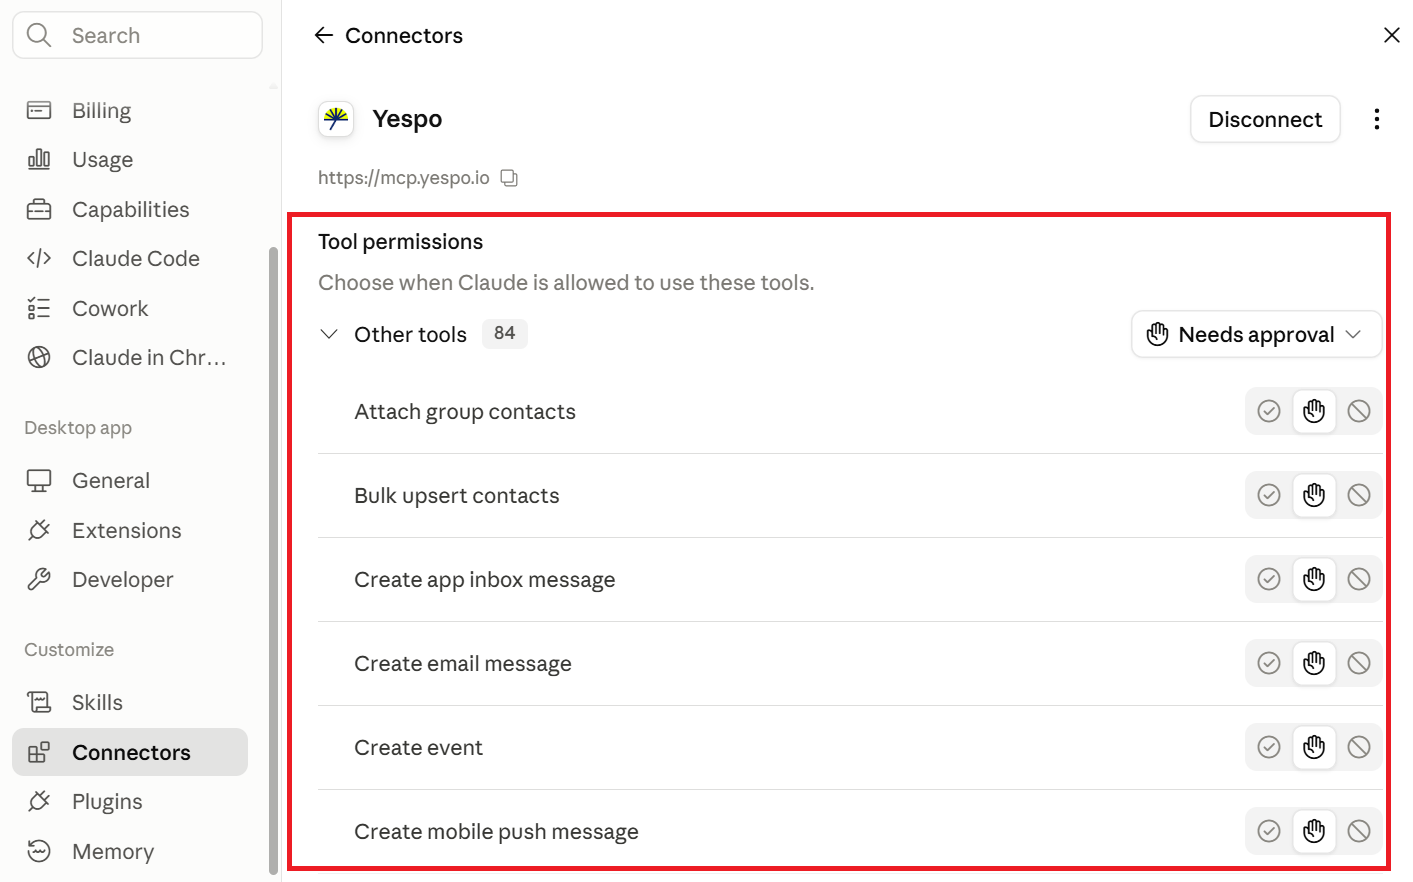
After connecting, you’ll see the available Yespo MCP tools. By default, Claude may ask for confirmation before using a tool.
You can set frequently used read-only tools to Always allow. Keep confirmation enabled for tools that create or update messages, contacts, workflows, or other account data unless broader access is approved by your organization.
Verify the Connection
Start a new Claude chat and ask:
Are any MCP servers connected?Claude should list the Yespo MCP server.
Next, test access to your Yespo account:
Use the Yespo MCP tools to show me my last 5 email templates.If Claude returns templates from your account, the connector is ready.
To check that the plugin skills are available, ask:
Which Yespo skills are installed?Claude should list:
yespo-email-editoremail-deliverabilityyespo-analytics
What to Do Next
Once the plugin is connected, describe the result you need rather than listing individual API calls.
Templates and content:
- Translate email template ID 3935987 into German.
- Clone template ID 3935987 and update the subject line for a spring sale campaign.
- Duplicate template IDs 3935987, 3935988, and 3935989. Add the suffix "— Copy Q2" to each template name.
- Replace all instances of the old unsubscribe link with the new one across all emails in workflow ID 434661.
- Extract the subject, preheader, body copy, CTA, and footer from template ID 3935987.
Template QA:
- Audit all emails in workflow ID 434661 for unsubscribe links. Flag any that are missing or broken.
- Check the subject line, preheader, and hero image for templates in the "Spring Sale" series. Flag anything incomplete or inconsistent.
- Template ID 3935987 has mobile rendering issues on iOS. Diagnose and fix the HTML/CSS.
Analytics and performance:
- Show me the Open and Click metrics for all workflows last month.
- Which workflows had the highest conversion rate in March?
- Compare broadcast and triggered workflow performance for Q1.
- How many PurchaseCompleted events were recorded last week, broken down by day?
- What is the share of email conversions from total PurchaseCompleted events in March?
- My open rate is high but CTR is low — what could explain this?
- Run a deliverability and spam metric audit for campaign IDs 1234, 1235, and 1236.
Contacts and segments:
- Add contact IDs 10023, 10045, 10089 to the static segment "Abandoned Cart — April".
- Show me the recent message history for contact ID 58821.
- What communications did contact ID 58821 receive in the last 30 days and why?
- Contact ID 58821 should be in segment ID 1234 but isn't. Why, and how do I fix it?
Workflows:
- What is workflow ID 434661 about? Describe its structure and steps.
- Review all emails in workflow ID 434661 and suggest improvements.
- Are there any contacts entering two workflows at the same time?
- Help me set up an A/B experiment in workflow ID 434661.
For more examples and skill descriptions, see Integrating Yespo with AI Agents.
Troubleshooting
The Marketplace Cannot Be Added
Confirm that you entered the repository URL exactly as shown:
https://github.com/Yespo-CDP/ai-pluginIf Claude still displays an error:
- Update Claude Desktop to the latest available version.
- Close and reopen the Add marketplace dialog.
- Restart Claude Desktop and try again.
- Confirm that your organization allows third-party plugin marketplaces.
- Check that your network can access GitHub.
The Yespo Plugin Does Not Appear
After adding the marketplace:
- Return to Customize → Plugins.
- Open the Code tab.
- Refresh the plugin list.
- Restart Claude Desktop if the marketplace was added during the current session.
- Check whether your organization restricts personal or third-party plugins.
A Connector Does Not Appear
Open the Yespo plugin card and check the Connectors tab for Yespo and eSputnik.
If the connector is still unavailable:
- Confirm that the Yespo plugin is installed.
- Restart Claude Desktop.
- Reopen the plugin settings.
- Check whether your organization restricts third-party connectors.
Authorization Is Complete, but Claude Cannot Use the Tools
Restart Claude Desktop and start a new chat. Tools added during installation may not be available in an already open session.
Also confirm that:
- The connector for the account you're using (Yespo, eSputnik, or both) shows as connected.
*.yespo.io(and*.esputnik.com, if applicable) is included in the allowed domains.- Network egress is enabled.
- You authorized the correct account.
Claude Can Read Data but Cannot Make a Change
Check the permission requested by Claude and the access rights of the connected Yespo user. The plugin cannot perform actions that are unavailable to that user.
Updated 7 days ago